To aggregate the bandwidth of multiple physical NICs on hosts, you can create a link aggregation group (LAG) on the distributed switch and use it to handle the traffic of distributed port groups.
Newly created LAGs do not have physical NICs assigned to their ports and are unused in the teaming and failover order of distributed port groups. To handle the network traffic of distributed port groups by using a LAG, you must migrate the traffic from standalone uplinks to the LAG.
Prerequisites
- Verify that for every host where you want to use LACP, a separate LACP port channel exists on the physical switch. See LACP Support on a vSphere Distributed Switch.
- Verify that the vSphere Distributed Switch where you configure the LAG is version 6.5 or later.
- Verify that enhanced LACP is supported on the distributed switch.
Create a Link Aggregation Group
To migrate the network traffic of distributed port groups to a link aggregation group (LAG), you create a LAG on the distributed switch.
Procedure
Results
The new LAG is unused in the teaming and failover order of distributed port groups. No physical NICs are assigned to the LAG ports.
As with standalone uplinks, the LAG has a representation on every host that is associated with the distributed switch. For example, if you create LAG1 with two ports on the distributed switch, a LAG1 with two ports is created on every host that is associated with the distributed switch.
What to do next
Set the LAG as standby in the teaming and failover configuration of distributed port groups. In this way, you create an intermediate configuration that lets you migrate the network traffic to the LAG without losing network connectivity.
Set a Link Aggregating Group as Standby in the Teaming and Failover Order of Distributed Port Groups
The new link aggregation group (LAG) by default is unused in the teaming and failover order of distributed port groups. Because only one LAG or only standalone uplinks can be active for distributed port groups, you must create an intermediate teaming and failover configuration, where the LAG is standby. This configuration lets you migrate physical NICs to the LAG ports by keeping the network connectivity up.
Procedure
- Navigate to the distributed switch.
- From the Actions menu, select .
- Select Teaming and failover and click Next.
- Select the port groups where you want to use the LAG.
- In Failover order, select the LAG and use the up arrow to move it to the Standby uplinks list.
- Click Next, review the message that informs you about the usage of the intermediate teaming and failover configuration, and click OK.
- On the Ready to complete page, click Finish.
What to do next
Migrate physical NICs from standalone uplinks to the LAG ports.
Assign Physical NICs to the Ports of the Link Aggregation Group
Learn how to set the new link aggregation group (LAG) as standby in the teaming and failover order of distributed port groups. Having the LAG as standby lets you safely migrate the physical NICs from standalone uplinks to the LAG ports without losing network connectivity.
Prerequisites
- Verify that either all LAG ports or the corresponding LACP-enabled ports on the physical switch are in active LACP negotiating mode.
- Verify that the physical NICs that you want to assign to the LAG ports have the same speed and are configured at full duplex.
Procedure
- In the vSphere Client, navigate to the distributed switch where the LAG resides.
- From the Actions menu, select Add and Manage Hosts.
- Select Manage host networking.
- Select the host whose physical NICs you want to assign to the LAG ports and click Next.
- On the Select network adapter tasks page, select Manage physical adapters and click Next.
- On the Manage physical adapters page, select a NIC and click Assign an uplink.
- Select a LAG port and click OK.
- Repeat Step 6 and Step 7 for all physical NICs that you want to assign to the LAG ports.
- Complete the wizard.
Example: Configure Two Physical NICs to a LAG in the Add and Manage Hosts Wizard
For example, if you have a LAG with two ports, you configure a physical NIC to each LAG port in the Add and Manage Hosts wizard.
What to do next
Set the LAG as active and all standalone uplinks to unused in the teaming and failover order of distributed port groups.
Set the Link Aggregation Group as Active in the Teaming and Failover Order of the Distributed Port Group
Learn how to set the LAG as active and move all standalone uplinks as unused in the teaming and failover order of the distributed port groups, after you have migrated physical NICs to the ports of the link aggregation group (LAG.
Procedure
- Navigate to the distributed switch.
- From the Actions menu, select .
- Select Teaming and failover and click Next.
- Select the port groups where you set the LAG as standby and click Next.
- In Failover order, use the up and down arrows to move the LAG in the Active list, all standalone uplinks in the Unused list, and leave the Standby list empty.
- Click Next and click Finish.
Results
You safely migrated network traffic from standalone uplinks to a LAG for distributed port groups and created a valid LACP teaming and failover configuration for the groups.
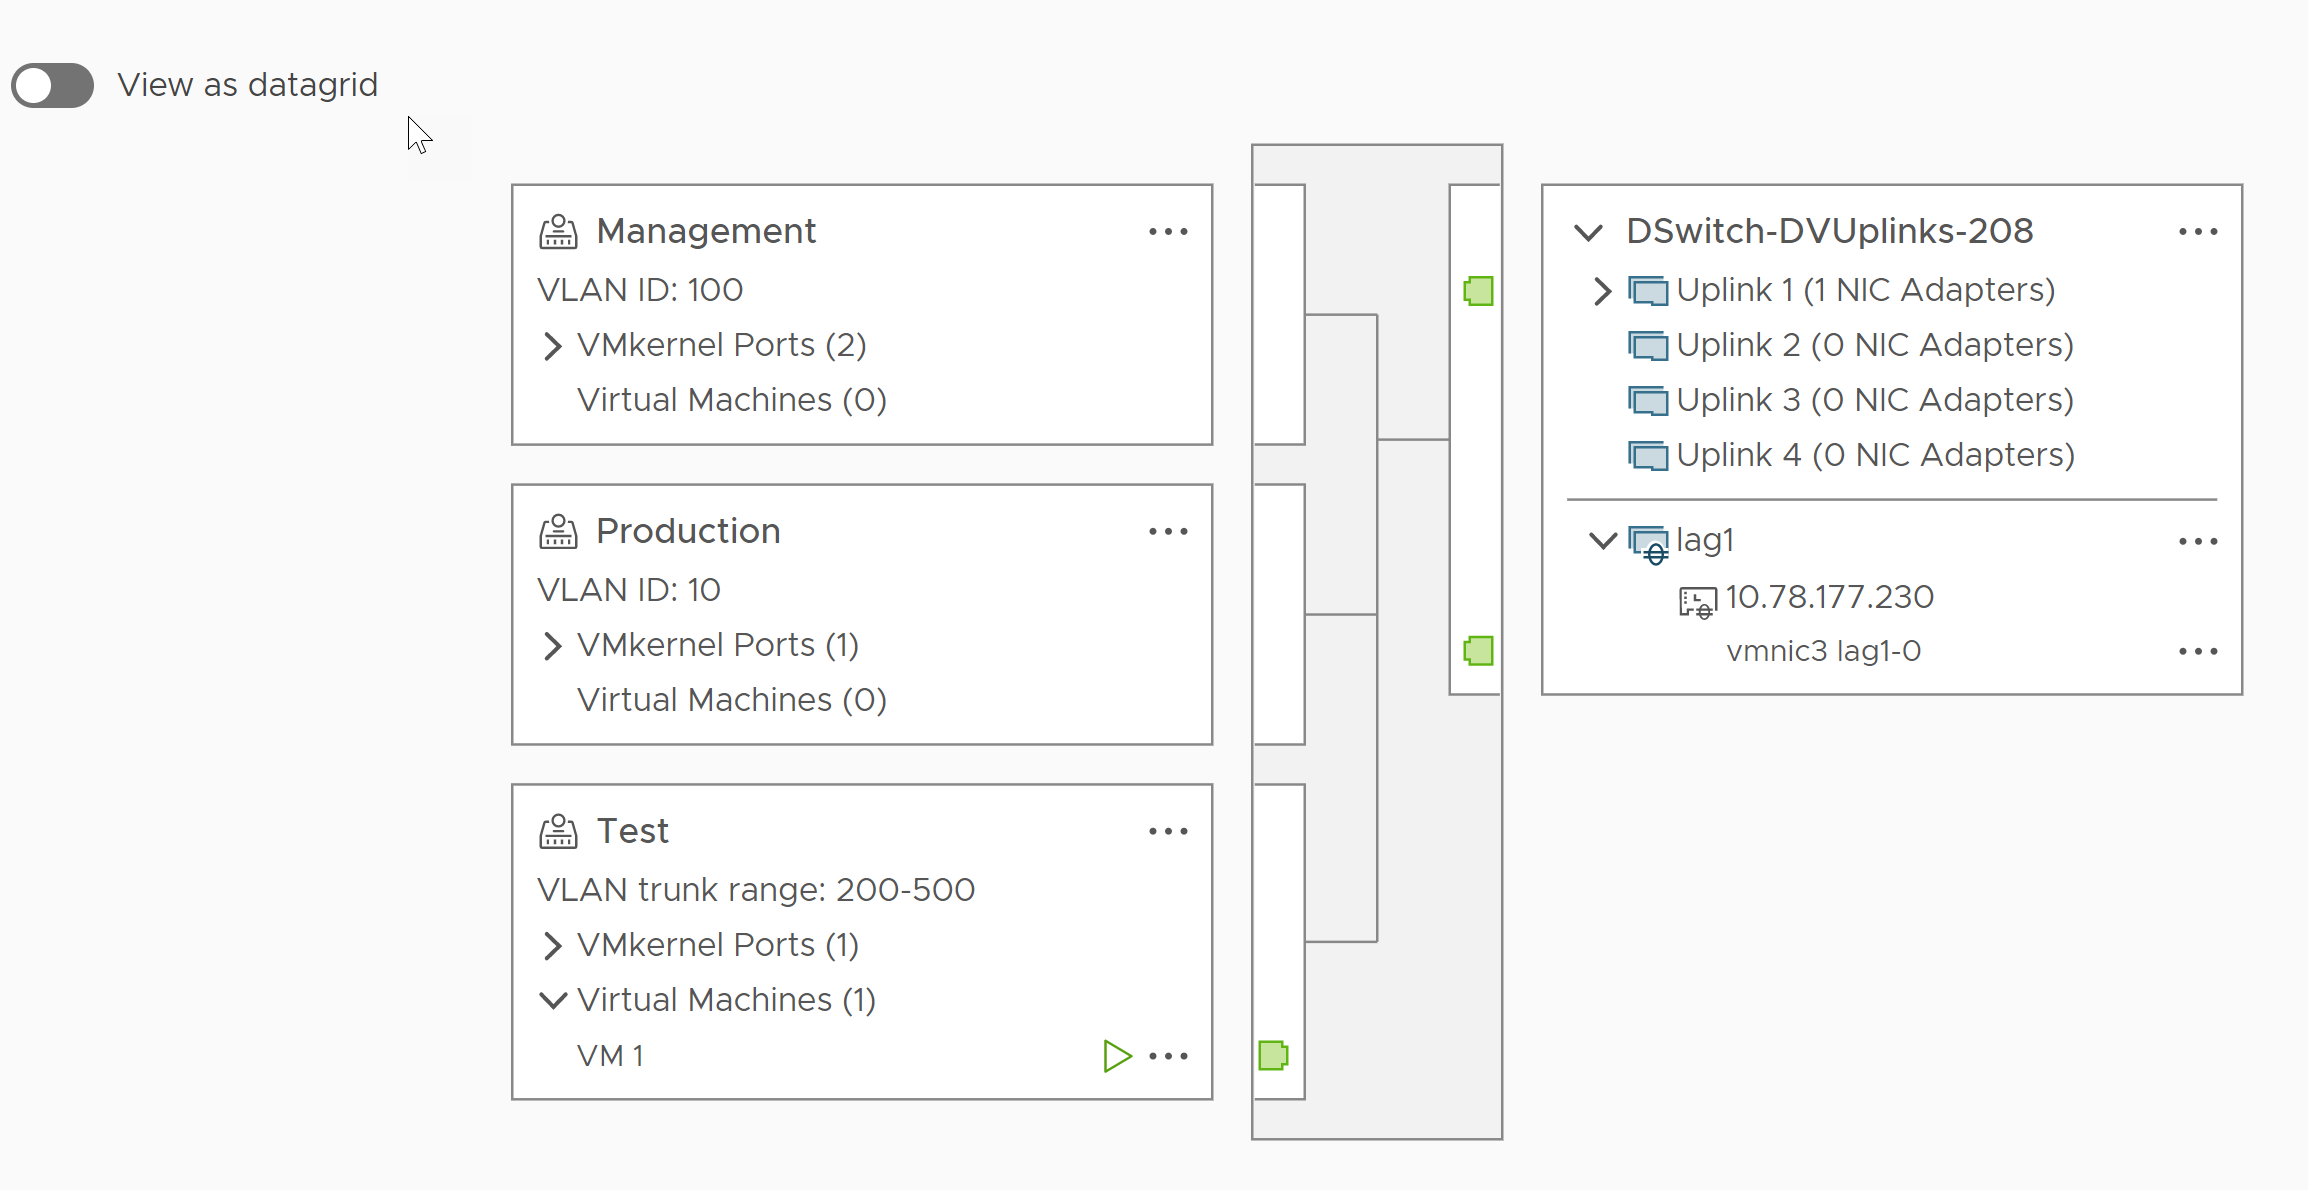
Example: Topology of a Distributed Switch that Uses a LAG
If you configure a LAG with two ports to handle the traffic of a distributed port group, you can check the topology of the distributed switch to view how it changed as a result of the new configuration.