When you start your ESXi host or rescan your storage adapter, the host discovers all physical paths to storage devices available to the host. Based on a set of claim rules, the host determines which multipathing module, the NMP, HPP, or an MPP, owns the paths to a particular device.

The module that owns the device becomes responsible for managing the multipathing support for the device. By default, the host performs a periodic path evaluation every five minutes and assigns unclaimed paths to the appropriate module.

For the paths managed by the NMP module, a second set of claim rules is used. These rules assign an SATP and PSP modules to each storage device and determine which Storage Array Type Policy and Path Selection Policy to apply.

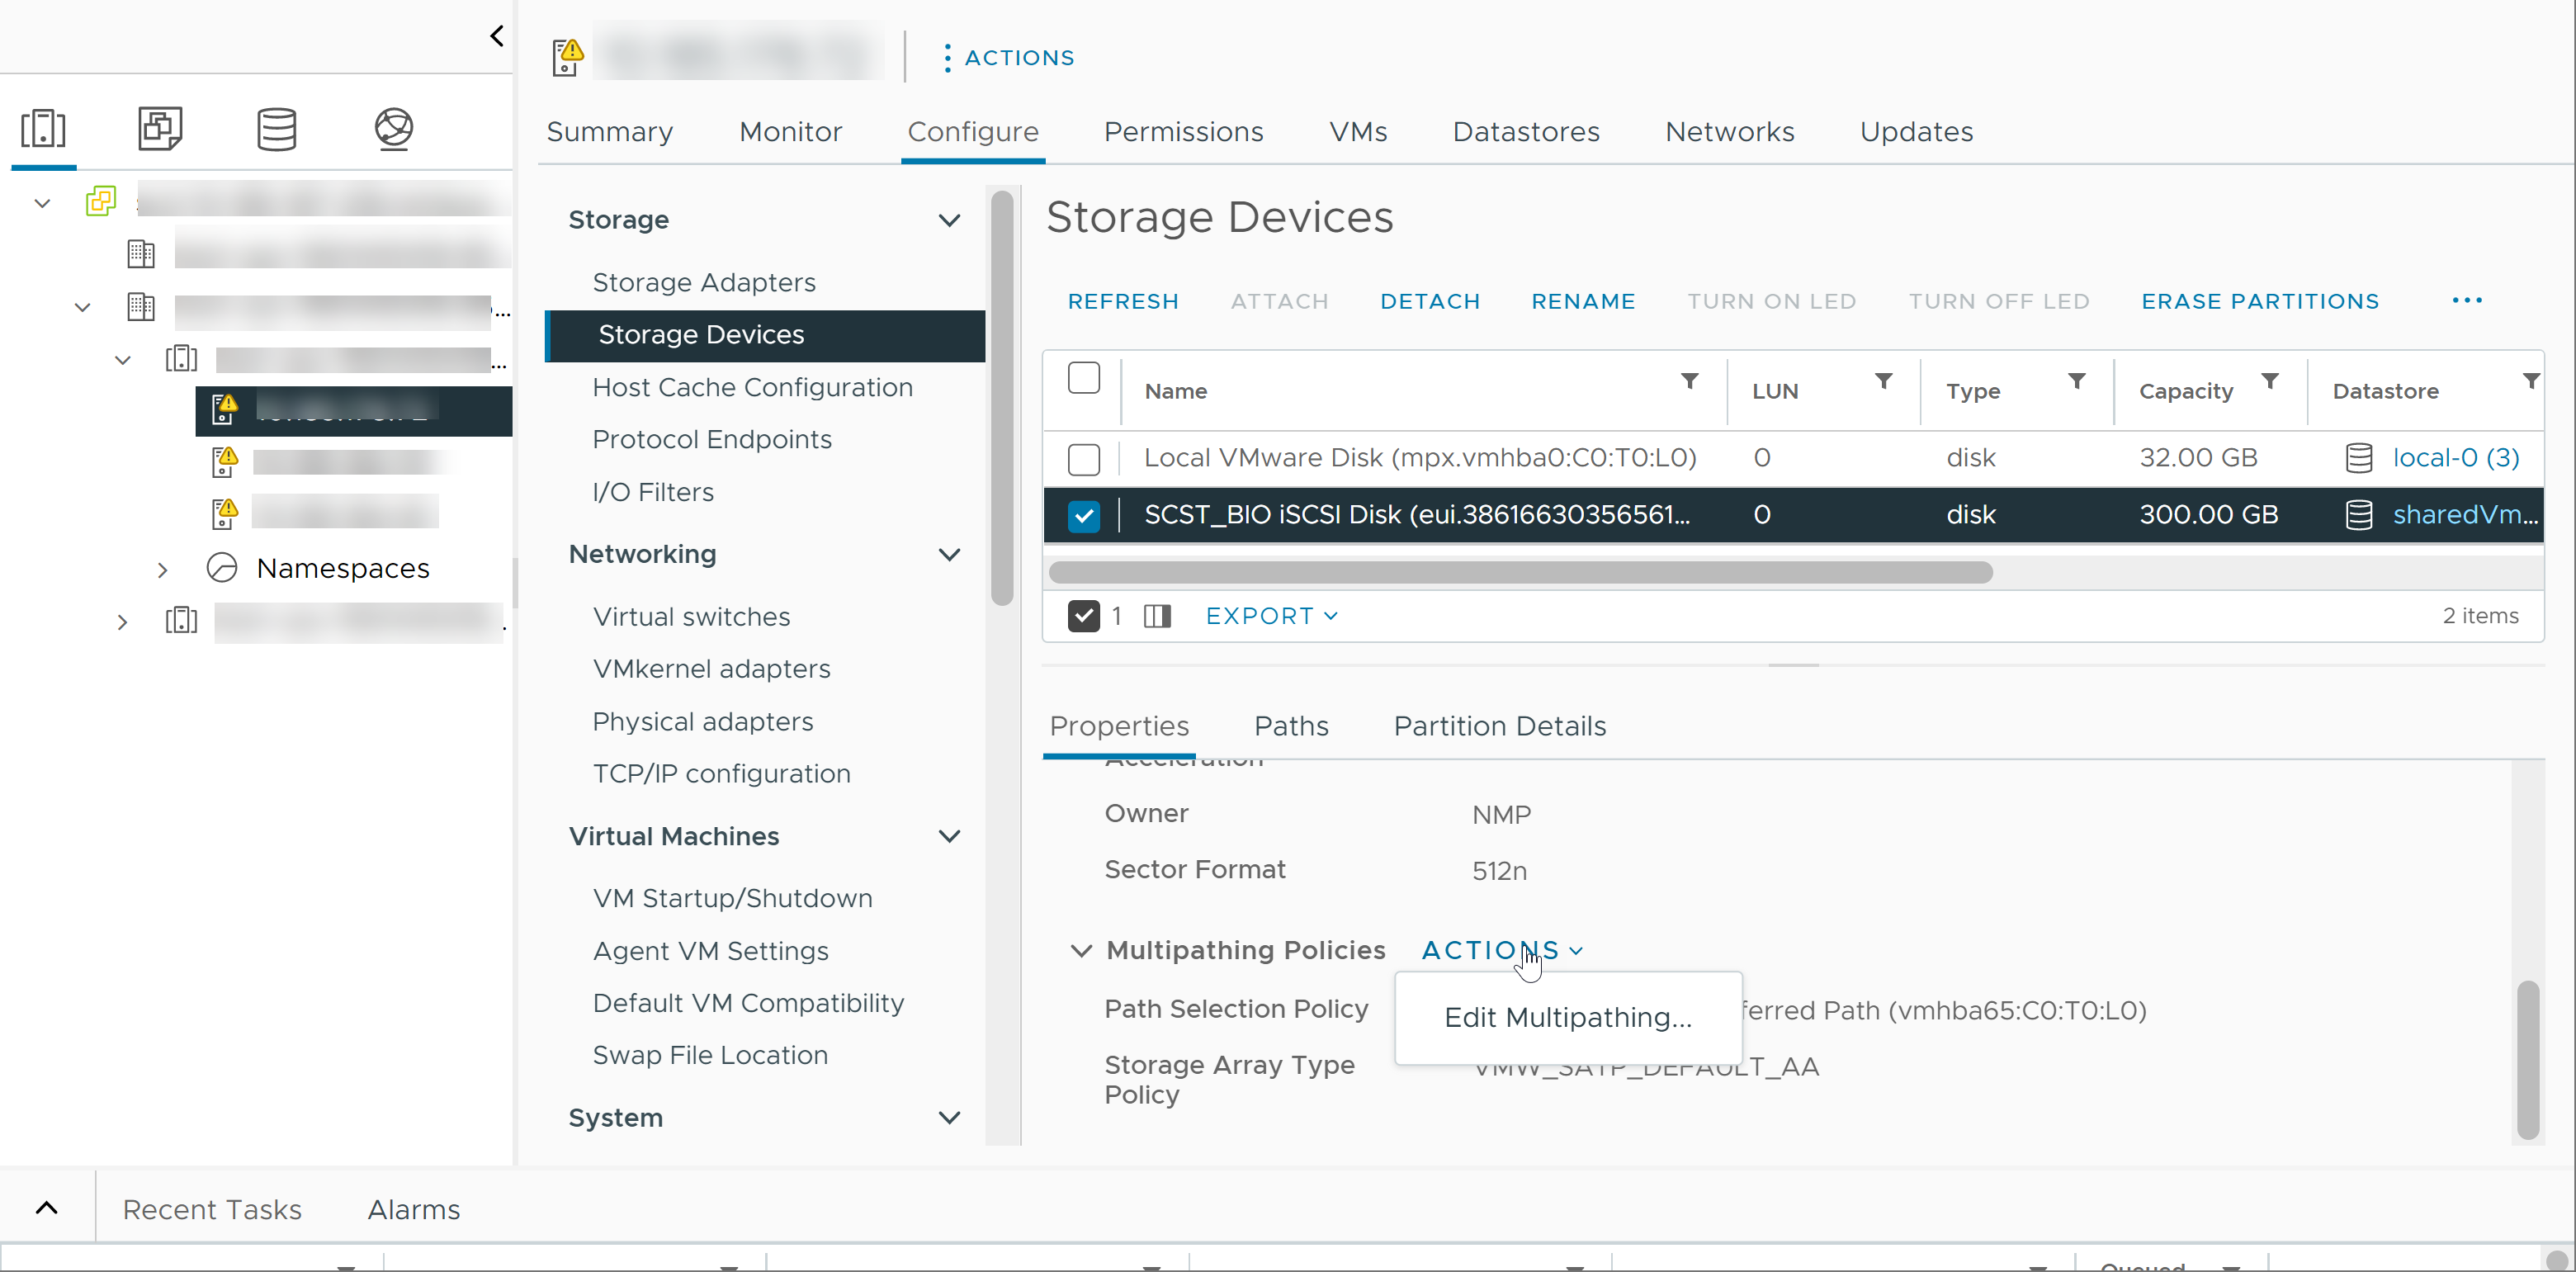
Use the vSphere Client to view the Storage Array Type Policy and Path Selection Policy assigned to a specific storage device. You can also check the status of all available paths for this storage device. If needed, you can change the default Path Selection Policy using the client.

To change the default multipathing module or SATP, modify claim rules using the vSphere CLI.

You can find some information about modifying claim rules in Using Claim Rules to Control ESXi Multipathing Modules.

To learn more about multipathing modules, see Multipathing Concepts and Acronyms.

View Storage Device Paths

View which multipathing policies the host uses for a specific storage device and the status of all available paths for this storage device.

Procedure

  1. In the vSphere Client, navigate to the ESXi host.
  2. Click the Configure tab.
  3. Under Storage, click Storage Devices.
  4. Select the storage device whose paths you want to view.
  5. Click the Properties tab and review the module that owns the device, for example, NMP or HPP.
    Under Multipathing Policies, you can also see the Path Selection Policy and, if applicable, the Storage Array Type Policy assigned to the device.
  6. Click the Paths tab to review all paths available for the storage device and the status of each path. The following path status information can appear:
    Status Description
    Active (I/O) Working path or multiple paths that currently transfer data.
    Standby Paths that are inactive. If the active path fails, they can become operational and start transferring I/O.
    Disabled Paths that are deactivated by the administrator.
    Dead Paths that are no longer available for processing I/O. A physical medium failure or array misconfiguration can cause this status.

    If you are using the Fixed path policy, you can see which path is the preferred path. The preferred path is marked with an asterisk (*) in the Preferred column.

View Datastore Paths

Review the paths that connect to storage devices backing your VMFS datastores.

Procedure

  1. In the vSphere Client, navigate to the datastore.
  2. Click the Configure tab.
  3. Click Connectivity and Multipathing.
  4. Select a host to view multipathing details for its devices.
  5. Under Multipathing Policies, review the module that owns the device, such as NMP. You can also see the Path Selection Policy and Storage Array Type Policy assigned to the device.
    For example, you might see the following:
    Path Selection Policy Preferred Path
    Storage Array Type Policy VMW_SATP_LOCAL
    Owner Plugin NMP
  6. Under Paths, review the device paths and the status of each path. The following path status information can appear:
    Status Description
    Active (I/O) Working path or multiple paths that currently transfer data.
    Standby Paths that are inactive. If the active path fails, they can become operational and start transferring I/O.
    Disabled Paths that are deactivated by the administrator.
    Dead Paths that are no longer available for processing I/O. A physical medium failure or array misconfiguration can cause this status.

    If you are using the Fixed path policy, you can see which path is the preferred path. The preferred path is marked with an asterisk (*) in the Preferred column.

Change the Path Selection Policy

Generally, you do not need to change the default multipathing settings that your ESXi host uses for a specific storage device. If you want to make any changes, you can use the Edit Multipathing Policies dialog box to modify the path selection policy. You can also use this dialog box to change multipathing for SCSI-based protocol endpoints.

Procedure

  1. In the vSphere Client, navigate to the ESXi host.
  2. Click the Configure tab.
  3. Under Storage, click Storage Devices or Protocol Endpoints.
  4. Select the item whose paths you want to change and click the Properties tab.
  5. Under Multipathing Policies, select Edit Multipathing from the Actions menu.
    The screenshot shows the Edit Multipathing option in the menu.
  6. Select a path policy and configure its settings. Your options change depending on the type of a storage device you use.
  7. To save your settings and exit the dialog box, click OK.

Change Default Parameters for Latency Round Robin

On the ESXi host, you can activate the latency mechanism for the Round Robin path selection policy. The mechanism considers I/O bandwidth and path latency to select an optimal path for I/O. When using the latency mechanism, the Round Robin policy can dynamically select the optimal path and achieve better load balancing results.

When latency is activated, usage of paths for the I/Os depends on the workload. When a large number of paths is available, but the workload is not high enough, the system might not use some paths for I/Os.

You use the esxcli command to change the default parameters of the latency mechanism or deactivate the mechanism.

Prerequisites

Set the path selection policy to Round Robin. See Change the Path Selection Policy.

Procedure

  1. Configure the latency mechanism by using the following command.
     esxcli storage nmp psp roundrobin deviceconfig set --type=latency --device=device ID
    The command takes the following parameters:
    Parameter Description
    -S|--num-sampling-cycles=sampling value When --type is set to latency, this parameter controls how many I/Os to use to calculate the average latency of each path. The default value of this parameter is 16.
    -T|--latency-eval-time=time in ms When --type is set to latency, this parameter controls the frequency at which the latency of paths is updated. Default is 3 minutes.
  2. Verify whether the latency Round Robin and its parameters are configured correctly.
     esxcli storage nmp psp roundrobin deviceconfig get --device=device ID
    or
     esxcli storage nmp device list --device=device ID

    The following sample output shows the path's configuration:

     Path Selection Policy: VMW_PSP_RR
       Path Selection Policy Device Config: {policy=latency,latencyEvalTime=180000,samplingCycles=16,curSamplingCycle=16,useANO=0; CurrentPath=vmhba1:C0:T0:L0: NumIOsPending=0,latency=0}
    

What to do next

To deactivate the latency mechanism, in the Advanced System Settings for your host, change the Misc.EnablePSPLatencyPolicy parameter to 0.

Deactivate Storage Paths

You can temporarily deactivate paths for maintenance or other reasons.

You deactivate a path using the Paths panel. You have several ways to access the Paths panel, from a datastore, a storage device, an adapter, or a Virtual Volumes Protocol Endpoint view.

Procedure

  1. In the vSphere Client, navigate to the ESXi host.
  2. Click the Configure tab.
  3. Under Storage, click one of the following items:
    • Storage Adapters
    • Storage Devices
    • Protocol Endpoints
  4. In the right pane, select the item whose paths you want to deactivate, an adapter, storage device, or Protocol Endpoint, and click the Paths tab.
  5. Select the path to deactivate and click Disable.
    The path's status changes to Disabled.