


This topic tells you how a Plan Admin uses Single Sign‑On for VMware Tanzu Application Service to manage user access to VMware Tanzu Application Service for VMs (TAS for VMs) apps, for users with accounts in external identity providers.
Manage Users from an External Identity Provider
For each external identity provider that Single Sign‑On connects to, a user admin pane lets you browse, delete, and update permissions for user accounts from external identity providers, such as Okta SSO Users.
To open the external identity provider user admin pane:
-
Log in to the SSO Operator Dashboard at
https://p-identity.SYSTEM-DOMAINusing your User Account and Authentication (UAA) admin credentials. You can find these credentials in your TAS for VMs tile in Tanzu Operations Manager under the Credentials tab. -
Click the plan name.
-
Click the external identity provider you want to manage and then select the Users tab for your IdP. This brings you to the user admin pane for that external identity provider.
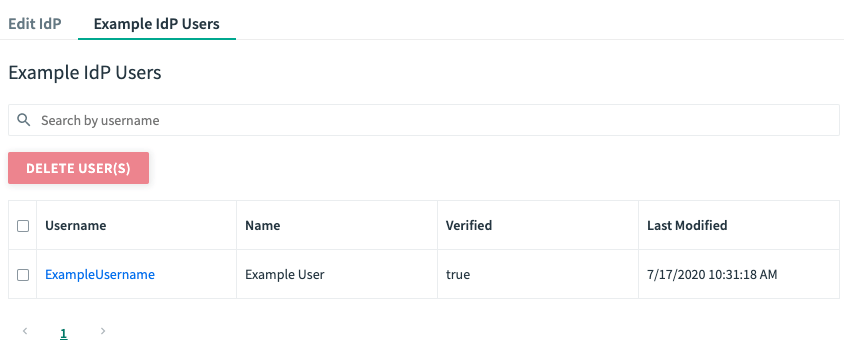
From the external identity provider user admin pane, you can:
- Search existing users: To do so, enter a value into the search bar and click Search. Entering a blank value returns all users in the service plan internal user store.
- Delete a user: To do so, select the checkbox next to their username and click Delete User(s).
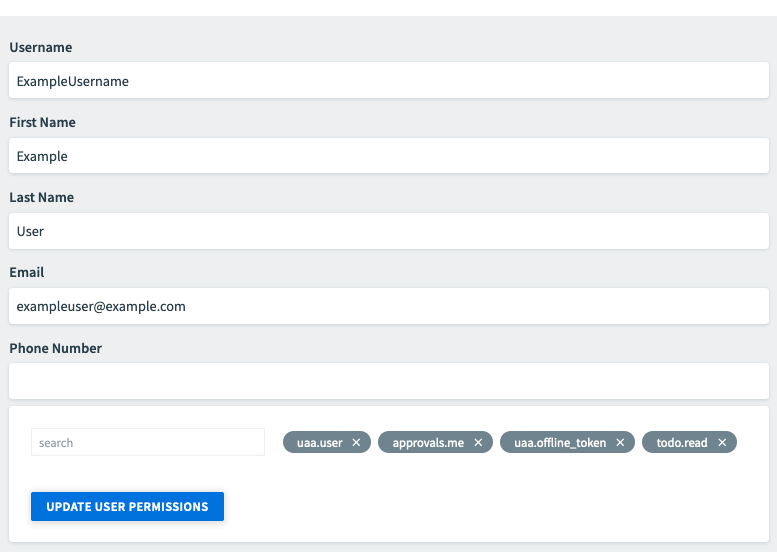
- View information about a user and their user permissions: To do so, click on their username.
- Update user permissions: To do so, type the corresponding permissions into the search field, press Enter, then click UPDATE USER PERMISSIONS.
Manage Users with the UAAC
You can also use the UAA Command Line Client (UAAC) to manage users for Single Sign‑On. For more information, see the UAAC repository in GitHub. You can use this approach to programmatically create new internal users or assign groups (scopes) to any internal or external user. These operations require administrative access through an admin client that an admin must configure for the service plan.
Clients and groups for Single Sign‑On should be created directly using the SSO Developer Dashboard or through app manifest bootstrapping. Do not create these through UAAC, as additional metadata is required for their usage by Single Sign‑On.
-
Install the UAAC by running:
gem install cf-uaac -
Target your service plan by running:
uaac target AUTH-DOMAIN.login.SYSTEM-DOMAINWhere:
AUTH-DOMAINis the Auth Domain you entered in Create or Edit Service Plans.SYSTEM-DOMAINis the domain for system-level components you chose when installing the TAS for VMs tile.
For example:
$ uaac target my-auth-domain.login.example.com
-
Record the App ID and App Secret from your admin client created by following the steps in Create Admin Client. You must give your admin client
scim.readto read user information. You can give your admin client eitherscim.writeto create users and modify group (scope) memberships orscim.createto only create users. -
Authenticate and obtain an access token for the admin client for your service plan by running:
uaac token client get ADMIN-APP-ID -s ADMIN-APP-SECRETWhere:
ADMIN-APP-IDis your App ID andADMIN-APP-SECRETis your App Secret.
For example:
$ uaac token client get MyAdminAppId -s MyAdminAppSecret
UAAC stores the token in
~/.uaac.yml. -
Display the client context by running:
uaac context -
Verify that you have the necessary
scim.writeorscim.createpermissions under thescopesection:For example:
$ uaac context [1]*[admin] client_id: MyAdminAppId access_token: aBcdEfg0hIJKlm123.e token_type: bearer expires_in: 43200 scope: scim.read scim.write jti: 91b3-abcd1233 -
Create a new internal user by running:
uaac user add NEW-USERNAME -p NEW-PASSWORD --emails NEW-EMAILWhere:
NEW-USERNAMEis the usernameNEW-PASSWORDis the passwordNEW-EMAILis the email address
For example:
$ uaac user add Adam -p newSecretPassword --emails adam@example.com -
Add any group to any internal or external user by running:
uaac member add GROUP USERNAMEWhere
GROUPis the group name andUSERNAMEis the user.For example:
$ uaac member add my-app.my-scope Adam
-
Delete any group from any internal or external user.
uaac member delete GROUP USERNAMEWhere
GROUPis the group name andUSERNAMEis the user.For example:
$ uaac member delete my-app.my-scope Adam
