


This section explains the steps to configure Avi Load Balancer for IDM Horizon Service (HTTPS 443).
Once the Avi Load Balancer Controller has been deployed, and the cloud configuration is completed, configure the virtual service and other entities as explained below: For the purpose of this document, we have all the services running on different backend ports.
Prerequisites
It is assumed that Avi Load Balancer Controller is deployed, and cloud configuration is done.
Procedure
- Creating HTTP Application Profile
- To create new application profile, navigate to .
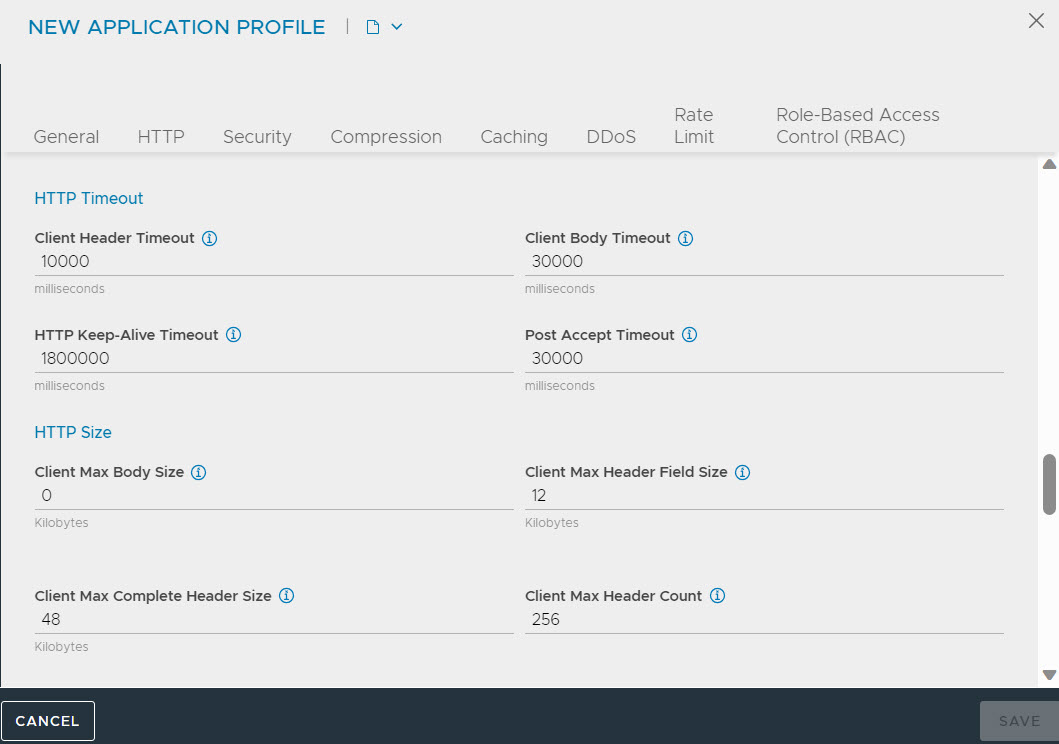
- Click Create and select HTTP from the Type drop-down menu.
- For versions prior to 22.1.3, insert an XFF header without removing pre-existing XFF headers, use either a DataScript or an HTTP Request Policy. For Avi Load Balancer Controller version 22.1.3 and above, configure X-Forwarded-For as follows:
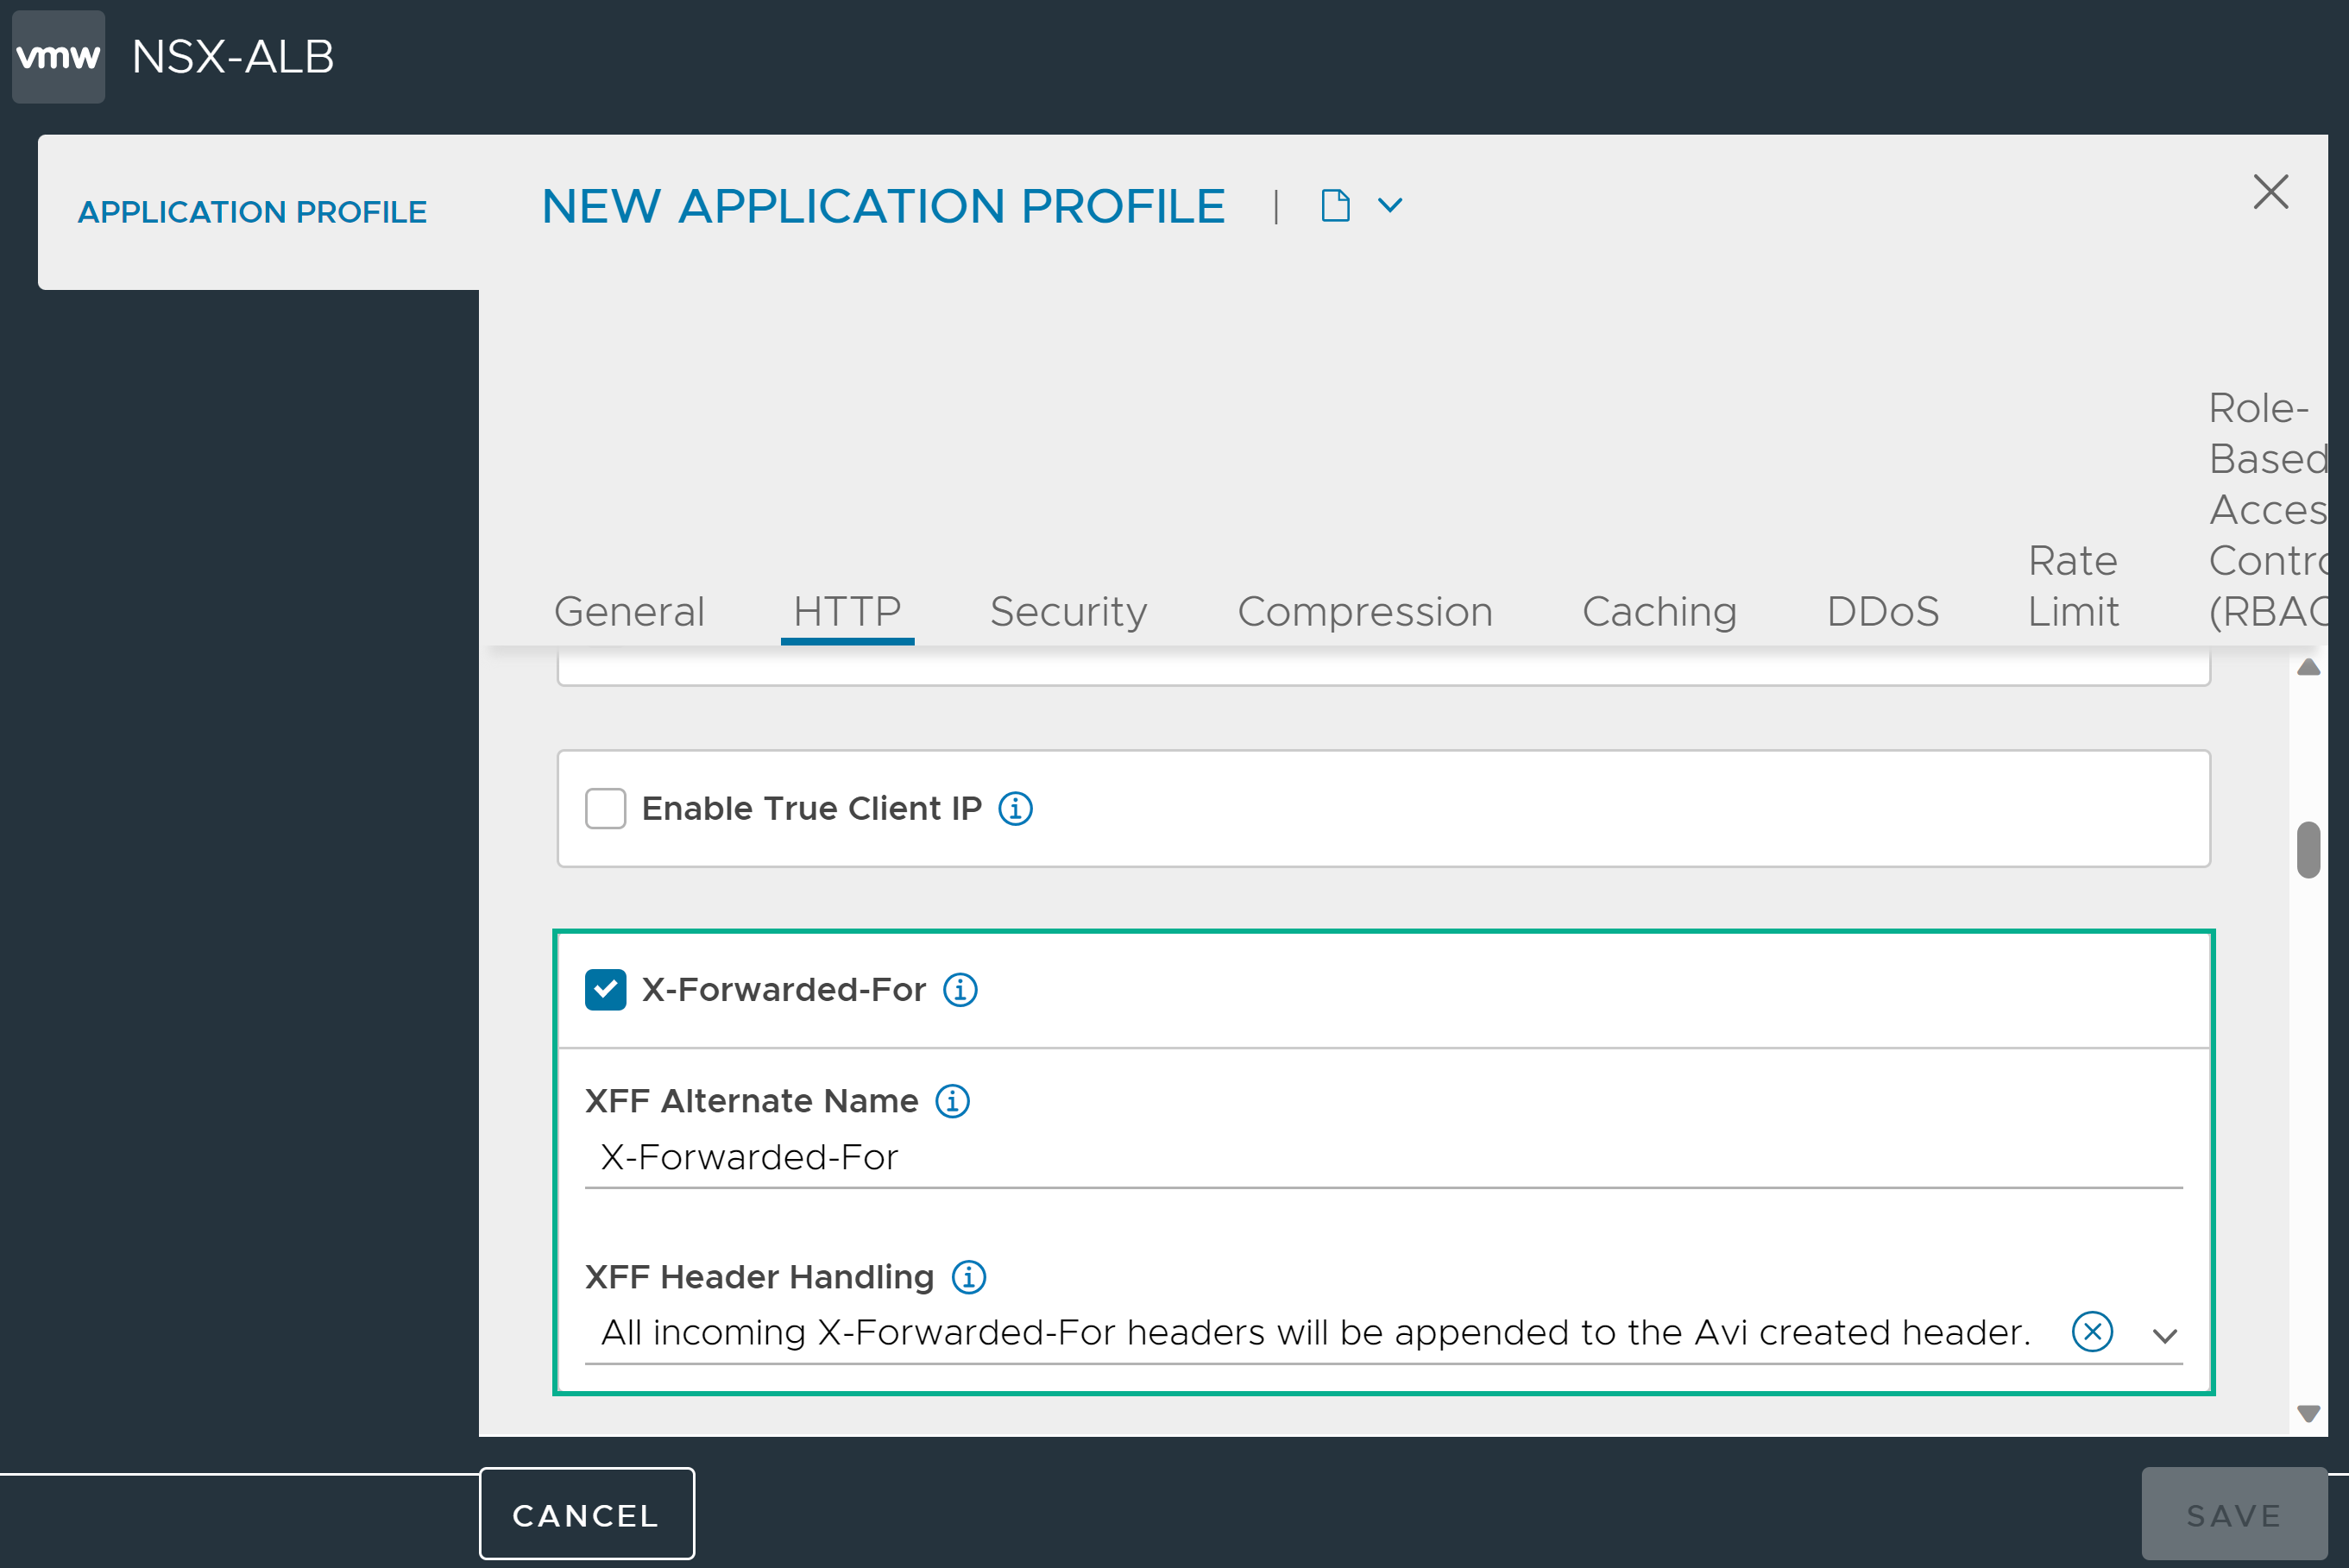
- Navigate to the DDoS tab and set the HTTP Keep-Alive Timeout value to 1800000 ms.
- Click Save and proceed to the next step.
- Creating TCP Profile
- For TCP/UDP, navigate to and click Create.
- ClickTCP Proxy tab and select Custom.
- Set the value of Idle Duration to 3600 seconds. This value can be increased as per the requirement.
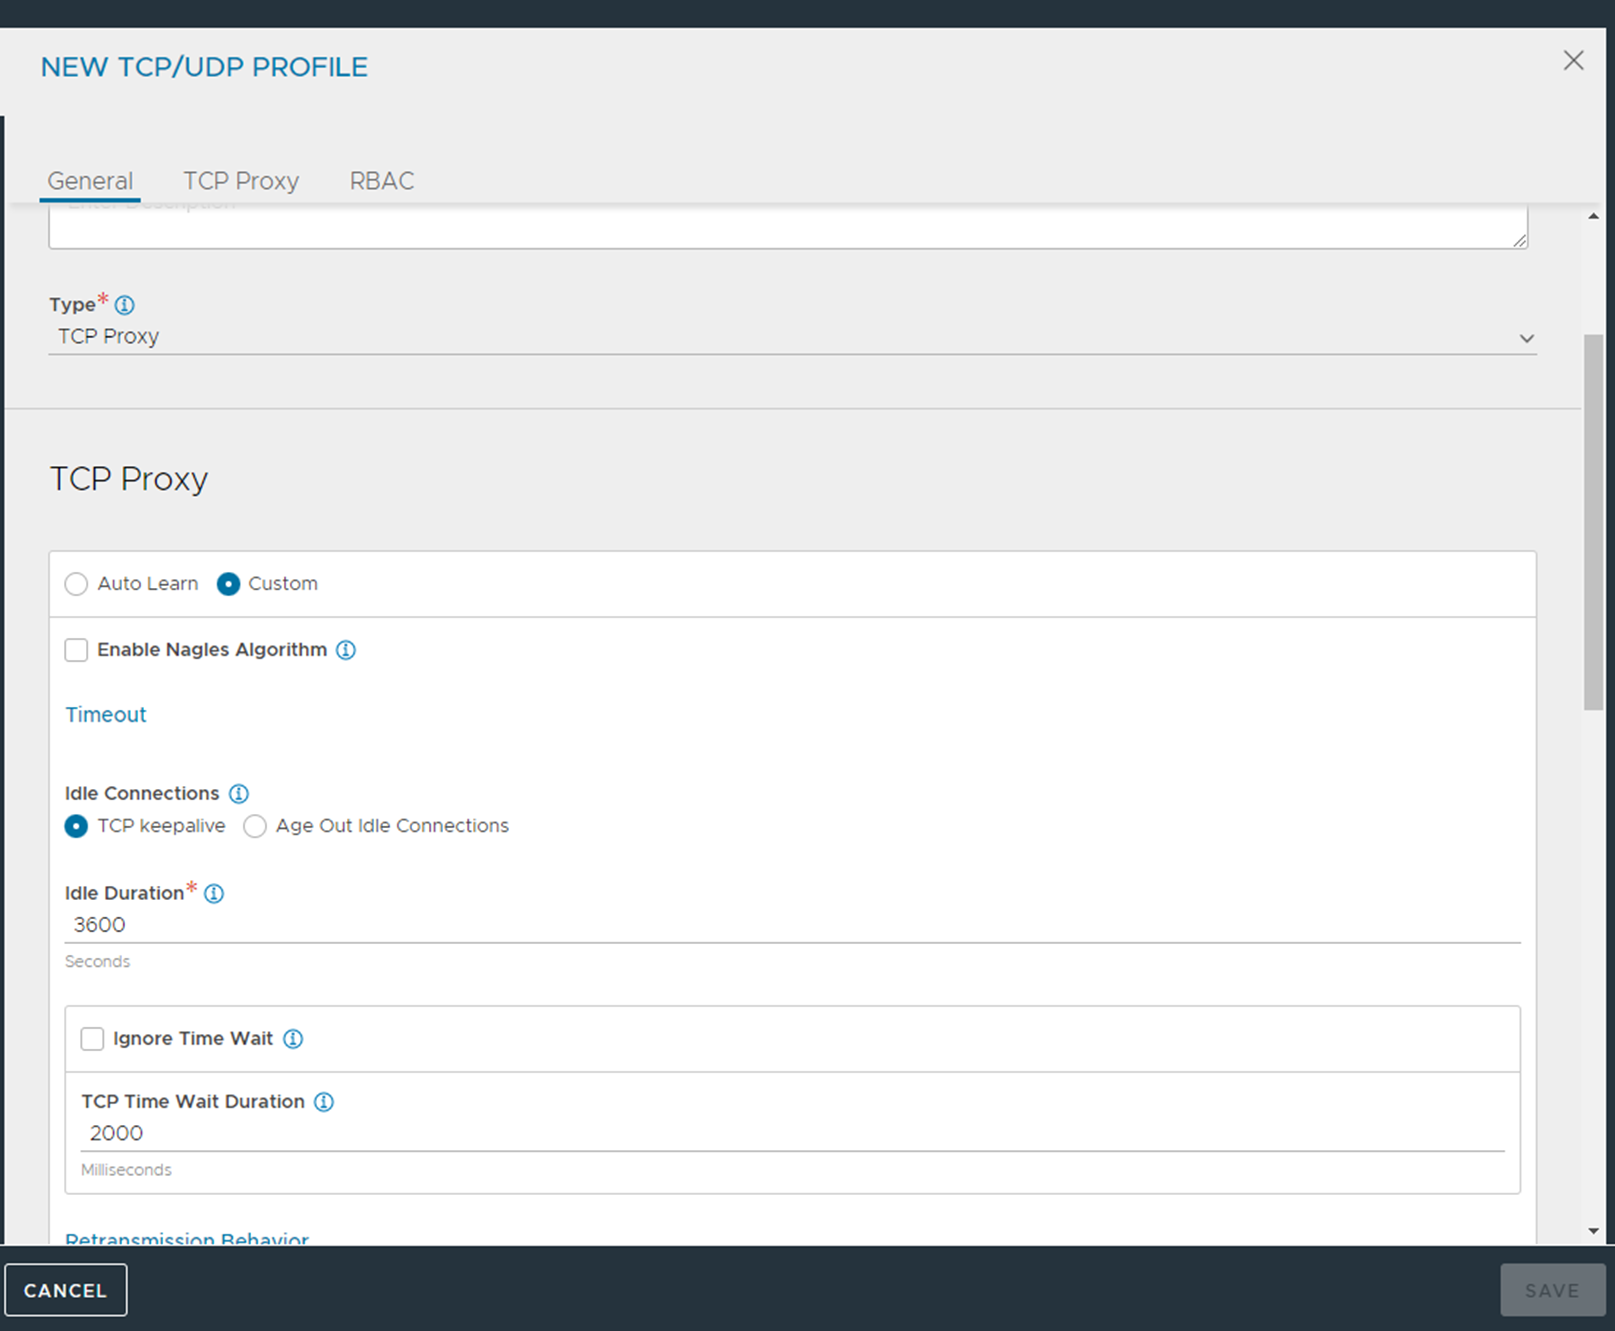
- Click Save.
- Creating Custom Health Monitor
- To create a custom health monitor, navigate to .
- Click Create.
- Enter the required details for the new health monitor and click Save.

- Creating Persistence Profile
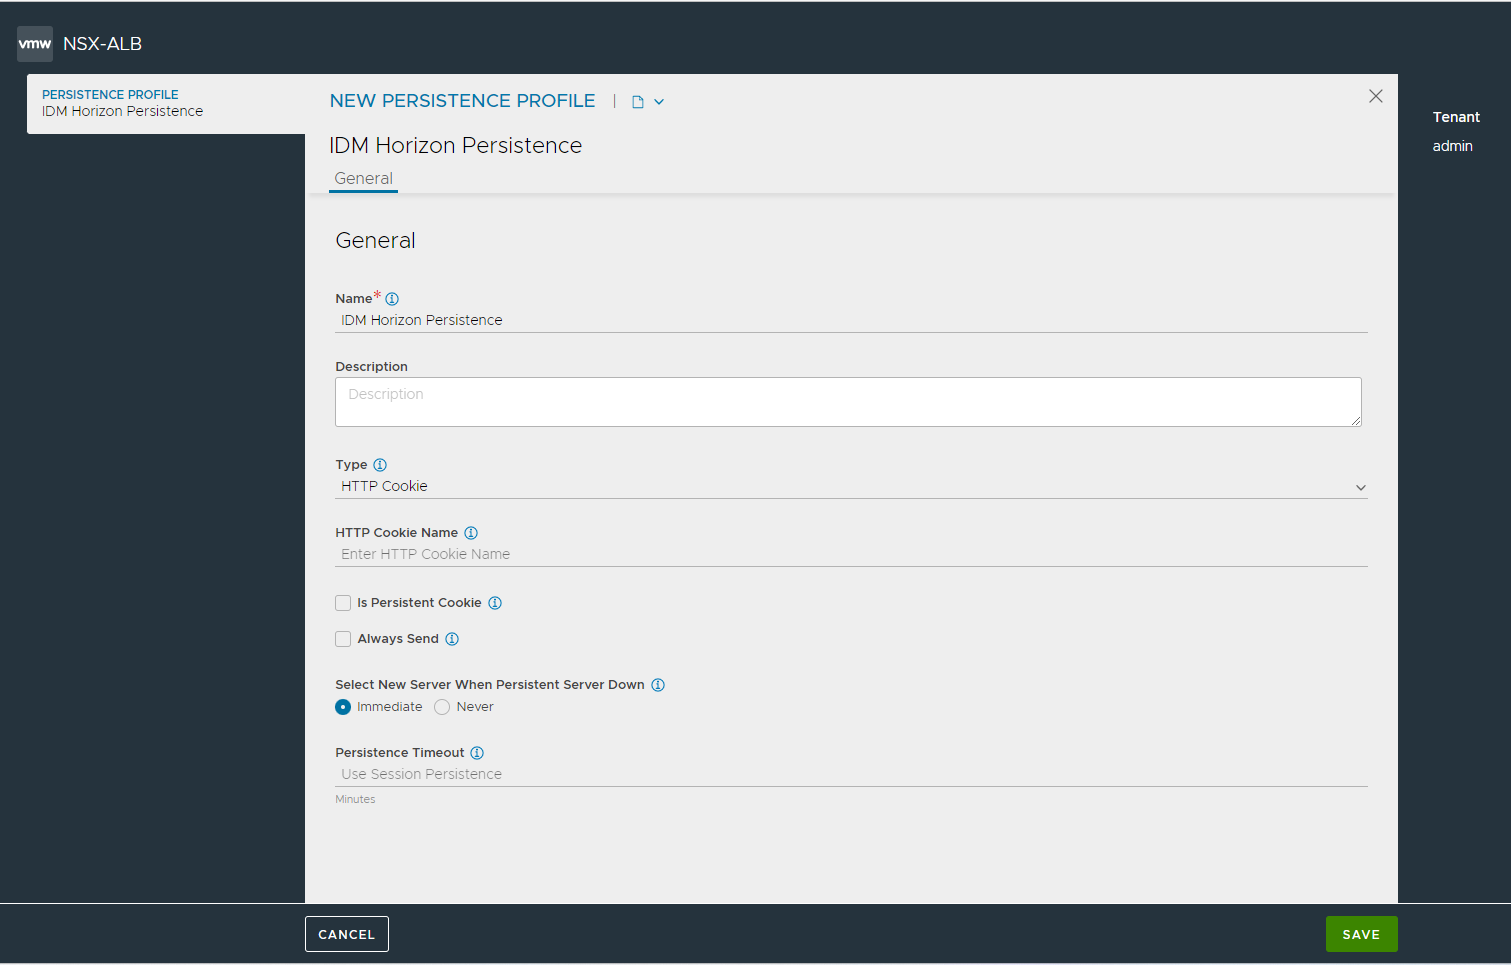
- To create the persistence profile, navigate to .
- Click Create.
- Provide the following details as shown below for the New Persistence Profile screen.
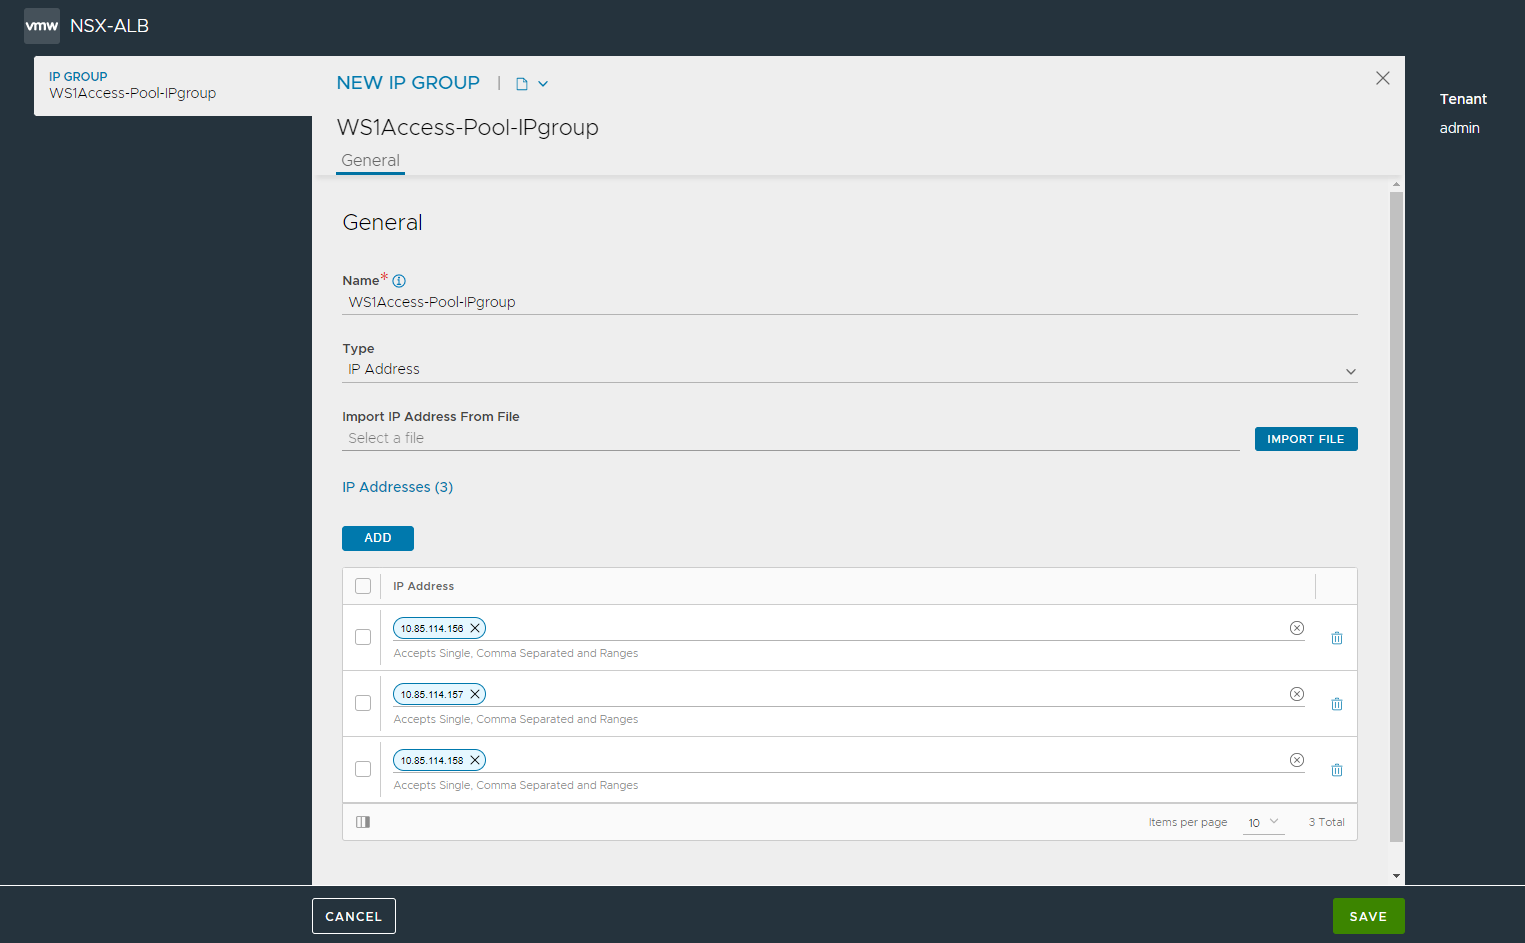
- Creating IP Group - This step is to group all the three WS1 Access/vidm IP addresses in one IP group for the ease of use.
- To create the IP group, navigate to and select Create.
- Enter the required details and click Save.
- Create Server SSL Profile
There is no recommended profile as such. However, if you have iOS users then Apple iOS App Transport Security requirements apply to the Workspace ONE app on iOS. To enable users to use the Workspace ONE app on iOS, the load balancer must have ciphers with forward secrecy. The following ciphers meet this requirement: ECDHE_ECDSA_AES and ECDHE_RSA_AES in GCM or CBC mode as stated in the iOS 11 iOS Security document.
- To create an SSL profile, navigate to and click Create.
- In the NEW SSL/TLS Profile screen, select the Type as Application.
- Enter the required details and click Save.
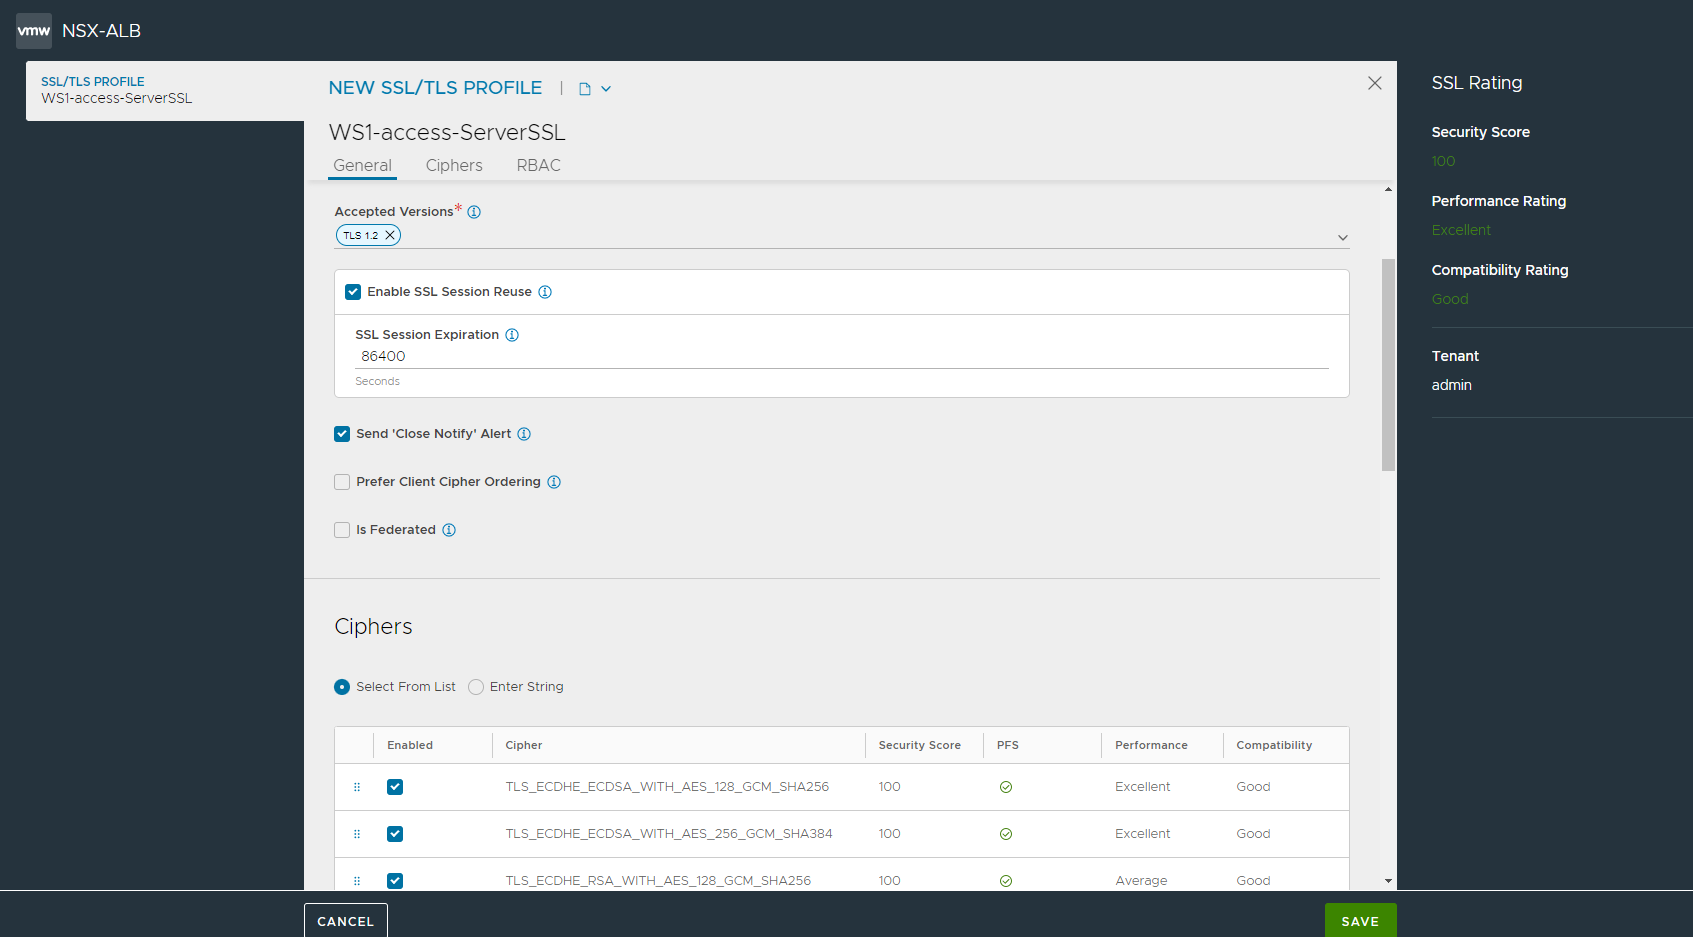
Note:This step is optional. We can also use default System SSL profile. This step is just to showcase the procedure of creating a new SSL profile if required based on any customization that you might want to do.
- Creating Client SSL Profile (Optional)
You can use same profile for client and server side. For the purpose of this document, we have shown two different profiles. This could be done in scenario where you want to allow old ciphers for frontend for old clients, but different ciphers are required for backend communication.
We can also use default System SSL profile. This step is just to showcase the procedure of creating a new SSL profile if required based on any customization that you might want to do. There is no recommended profile as such. However, if you have iOS users then Apple iOS App Transport Security requirements apply to the Workspace ONE app on iOS.
To enable users to use the Workspace ONE app on iOS, the load balancer must have ciphers with forward secrecy.
The following ciphers meet this requirement: ECDHE_ECDSA_AES and ECDHE_RSA_AES in GCM or CBC mode as stated in the iOS 11 iOS Security document.
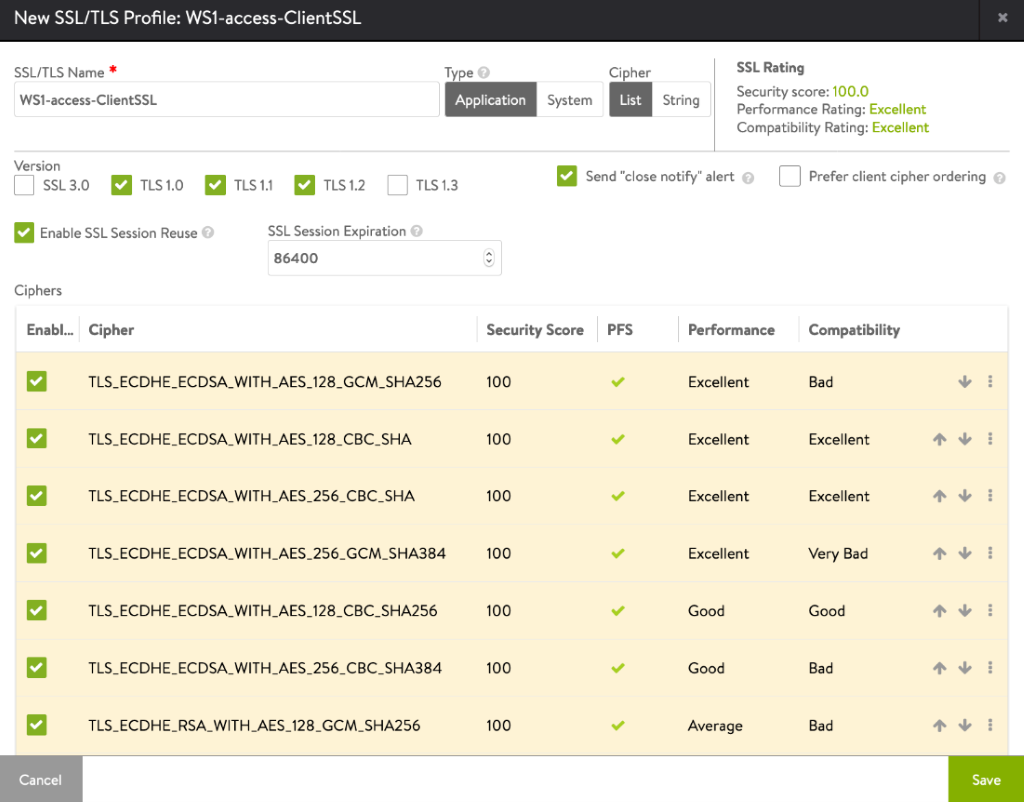
We can also use default System SSL profile. This step is for the reference for creating a new SSL profile if required based on any customization that you might want to do.
- Creating Pool
- To create the pool, navigate to and select Create Pool.
- Enter the details as shown in the section below (for the respective services).
- Click Health monitor tab to bind the monitor, click Add under Health Monitors section and select the custom monitors that were created in the previous step
- Click on Enable SSL and select the server SSL profile that was created in the previous step.
- In the Servers tab, select IP Group field and select the IP group of the servers that we created above.
- Click Save.

