


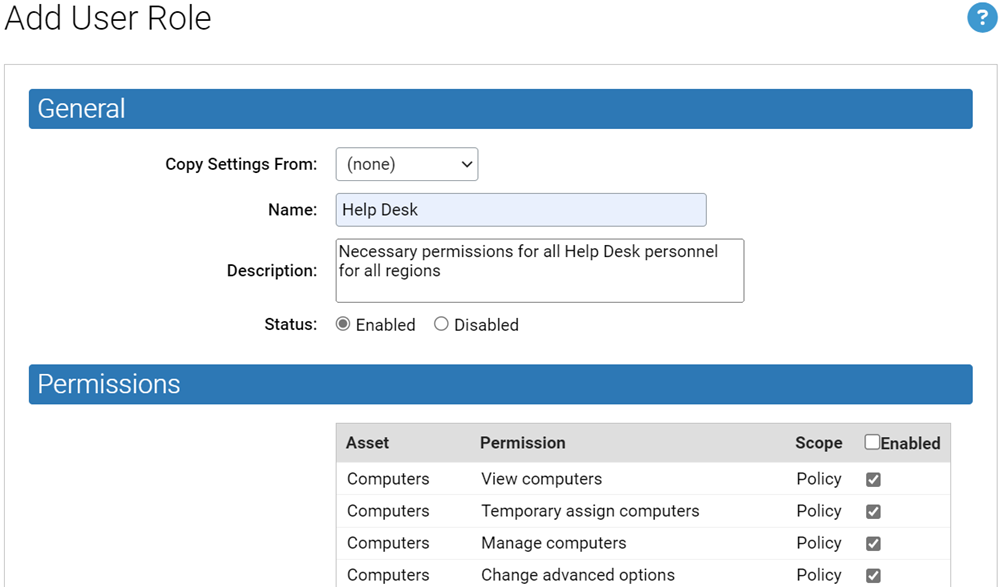
Although the built-in user roles provide options for different levels of feature access, users with sufficient permission can create new custom user roles and modify roles. You might want to have a special user role whose level of access falls between two of the built-in options. Creating a special user role can not only prevent unauthorized access to critical features but also might make it easier for users with limited roles to learn those roles without having to see features they will not use.
For example, you might want to allow members of a help desk team to view all information available through the console but only to be able to change policy for a computer, put a computer into local approval, or access debugging features. You can create a user role with these characteristics. See User Role Parameters for detailed information used to define a user role.
Create a New User Role
You can follow this procedure to create a new console user role.
Procedure
- Check the box next to each permission you want to enable for this role, and un-check any permissions you do not want this role to have. See Permissions Settings for User Roles for a complete list of permissions.
Note: If you are giving this role permission to perform most console activities, it might be more efficient to click the Enabled box in the table header, which checks all boxes, and then remove the few permissions you don’t want to provide.
- If you want to limit this role so that it has access to computers in certain policies only, scroll to the bottom of the page, click the Selected Policies radio button, and check the box next to each policy you want this role to have access to.
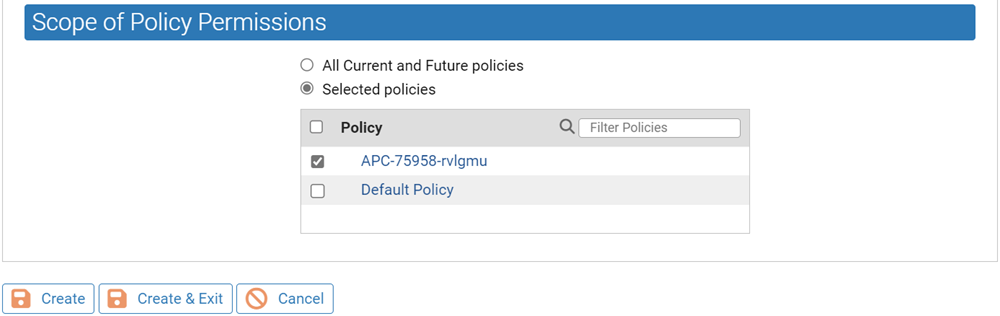
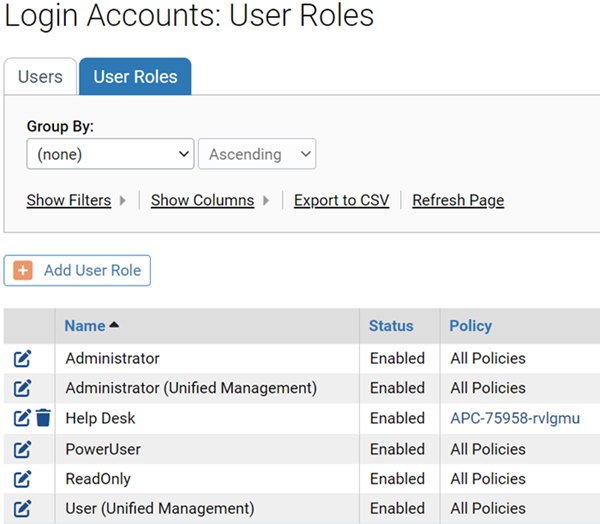
- When you have finished configuring this role, click Create & Exit at the bottom of the page. The new role appears in the Login Accounts: User Roles table. Notice that it includes a delete button since, unlike a built-in role, a user-created role can be deleted.
User Role Parameters
| Field | Description |
|---|---|
| Name (required) |
Name that will appear in the Login Accounts: User Roles list and will be used when assigning a role to a login account. Enter any combination of letters, numbers, or English-keyboard characters fewer than 40 characters in length. Role names are not case sensitive. Note: User names created in the console cannot contain the “\” or “@” characters. This helps avoid conflicts with AD-based user names using user@domain or domain\user format. |
| Description |
Optional descriptive information about this role, such as who should be in it and perhaps a high-level summary of its permissions. |
| AD Mapping Name |
If AD-based login mapping is enabled, the AD security group that you would like mapped to this role. |
| Status |
Determines whether this role is Enabled or Disabled. Note that disabling a role disables it for accounts it is assigned to and prevents AD-mapping from matching it. If you disable the only role assigned to a user, that user loses console access. |
| Permissions |
A table of checkboxes that determine what users with this role are allowed to do in the console. See Permissions Settings for User Roles for a complete description. |
