


Initially, the request or justification Status is Submitted and the Resolution is Not Resolved. The Status field indicates where the request stands in your work flow between New and Closed. The Resolution field indicates what you did to resolve the request, including approval by different rule types or rejecting the request.
Changing the request Status to Open helps indicate that you have begun working on it and is required before you can modify the editable fields in a request. You can Open the request using the Action menu on Approval Requests table page, or the Open Request button or Actions menu on the Approval Request Details page.
When you have reviewed the information in a request or justification and are ready to make a decision about what to do in response, take the following high-level steps:
- Open the request to indicate that you are working on it.
- If you are not rejecting the request, make any needed file state or rule changes.
- Use the information panels on the Approval Request Details page to investigate the request.
- Update the status of the request itself and optionally make comments about your decision and actions. For example, if you determine that the request is especially important but are not ready to resolve it, you could change its status to Escalated. Status is for auditing purposes and also can be used to provide feedback to the requester.
- Close the request to indicate that you have finished working on it. If automatic email responses are enabled, this also sends an email to the user that made the request, indicating the decision you made.
- If automatic responses are not enabled and you choose to do so, send mail to the user requesting the approval, indicating the outcome of the request.
Open, Review, and Resolve an Approval Request
Procedure
- Select Open Request in the Actions menu.
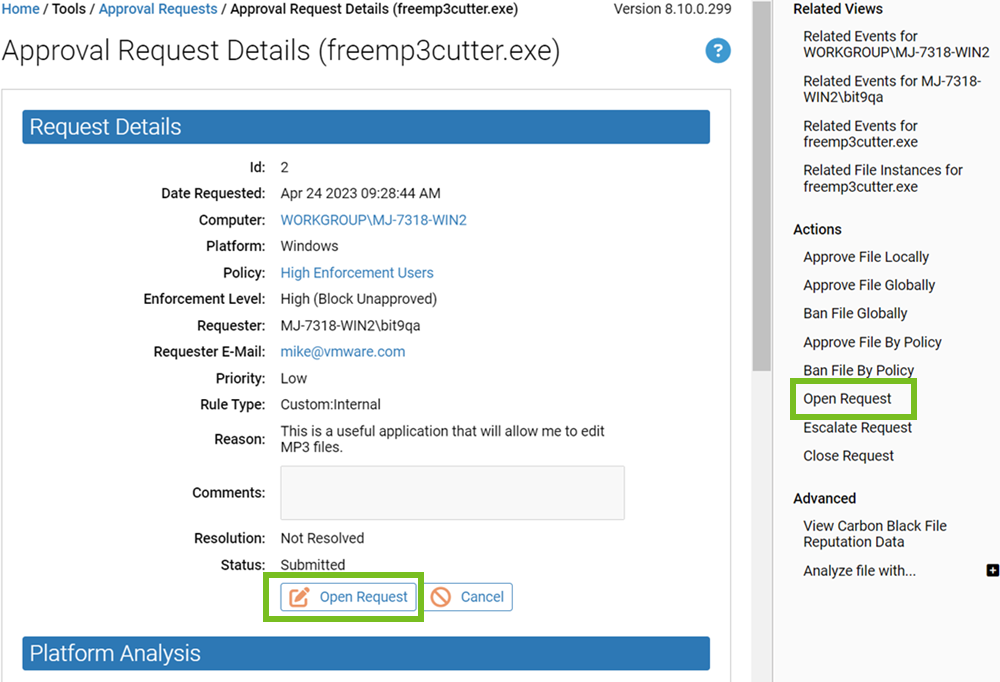 This step activates the Comments, Resolution, and Response E-mail fields.
 - Indicate what you did (or did not do) in response to the request by selecting from the Resolution drop-down menu in the Approval Request Details page.
This is for informational purposes only and does not affect file or device state. If you are not allowing access to the requested item, select Reject.Note: The request status must be Open for the Resolution drop-down menu to be active.

Request Management Work Flow Shortcuts
Beginning with Carbon Black App Control 8.0.0, shortcuts are available that address all of the approval request elements with one choice. These shortcuts appear on both the Action drop-down menu on the Approval Requests and Justifications page and on the right Actions menu on the Approval Request (or Justification) Details page.
The Approval Request work flow involves three elements:
- The Resolution you choose for the request
- The Status of the request
- The specific action taken (if any) on a file or rule to address the request
You can take an action, such as locally or globally approving a file, without changing either the status or the resolution shown for an Approval Request. Similarly, you can choose a Resolution value without actually having made any changes to rules. In some cases, you might deal with all of these elements separately.
The shorcuts that address the three elements apply to requests that can be resolved by a change in file state – they are not applicable when an action is blocked by a Custom, Memory, or Registry rule. For requests involving those rules, see Opening Rule Details from the Rule Information Panel.
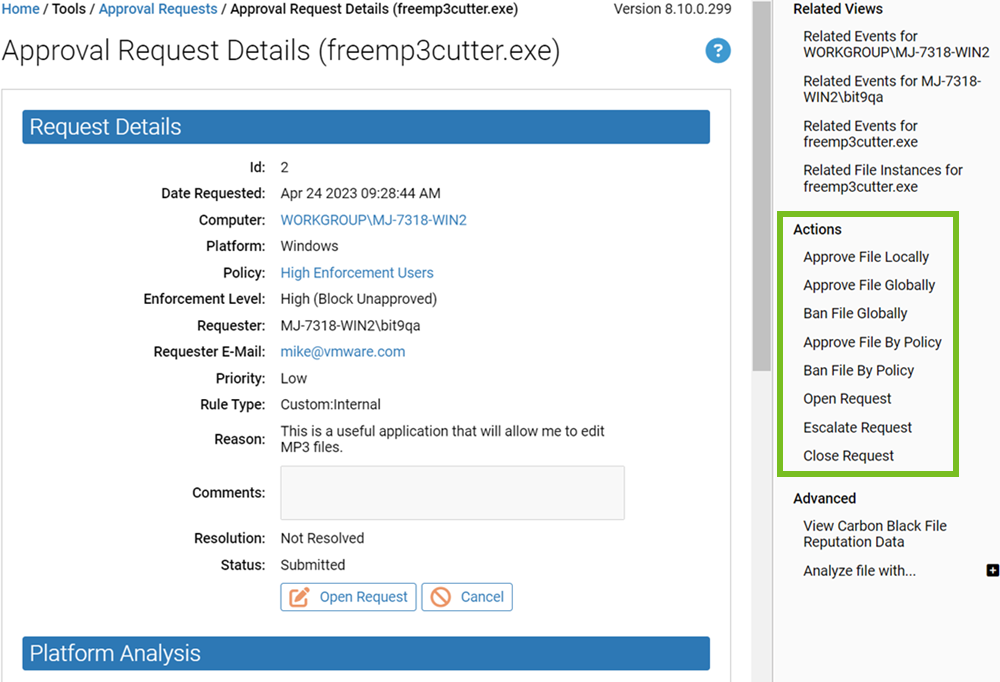
Actions Menu on the Approval Request Details page
On the Approval Request Details page, the right menu includes the commands Approve File Locally, Approve File Globally, and Ban File Globally.
- Provide a comment describing what you did in response to the request and why you did it
- Check a box to close and resolve the request automatically
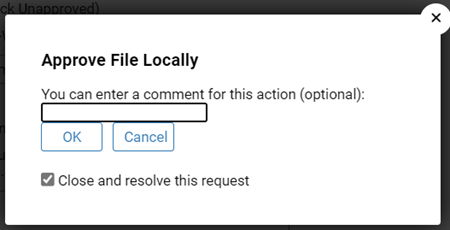
When you choose one of these commands and click OK, the changes you specified are made and the view returns to the Approval Requests and Justifications table. If you chose to close the request, an email is sent to the requestor if the Approval Request email is configured.
The menu choices Approve File by Policy and Ban File by Policy open the Add File Rule page where you can define the policies for which you want the approval or ban to apply and make any other changes available on that page. These "by policy" commands do not change the Resolution or Status of the request.
If you approve or ban a file referenced in a request, one or more of the following commands are added to the right menu on the Approval Request Details page:
- Remove Local File Approval
- Remove Global Approval/ Remove Global Ban
- Edit Global File Approval/Edit Global File Ban
Action Menu on the Approval Requests and Justifications Table Page
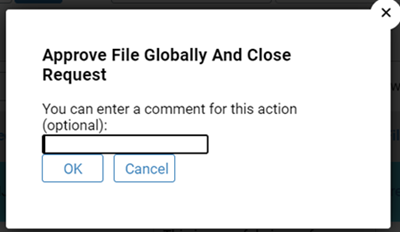
On the Approval Requests and Justifications page, the Action menu includes the commands Approve File Locally and Close Request, Approve File Globally and Close Request, Ban File Globally and Close Request.
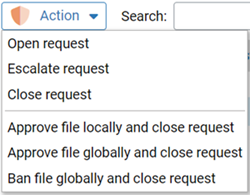
You can check the box next to one or more requests in the table and apply these commands to them. Each of these commands opens a dialog box in which you can provide a comment. If you choose OK on the dialog, the action you chose is taken and the request is closed and resolved.
Opening Rule Details from the Rule Information Panel
The Action menu on the Approval Requests and Justifications table page and the Actions menu on the Approval Requests Details page include shortcut commands to ban or approve a requested file. If an action in a request was blocked due to a Custom, Registry, or Memory rule, these shortcuts do not apply.
On the Approval Request Details page, a Rule Information section shows the type of rule that blocked the action referenced in the request.

The Rule Information section provides different information depending upon the type of rule involved:
-
Banned or Unapproved Files – If the action was blocked because the file was banned or was unapproved in a policy that blocks unapproved files, a more generic description of the rule is provided, and there is no link. Any modifications in response to the request can be made using the shortcuts in the Actions commands in the right menu, described in Request Management Work Flow Shortcuts.

-
Custom, Memory, and Registry Rules – If the rule that blocked the action was a Custom, Memory, or Registry rule, the panel shows the name and type of the rule, and the name is a link to the Edit Rule Details page.

If you open the details page for a rule and make changes, the rule information panel for the request that involved that rule shows that the rule has been modified. Modification might involve changing parameters such as the rule path, which could mean that the rule was limited to certain users or policies or that the rule was disabled.

If a rule is deleted, the rule name link is disabled (since there is nothing to link to) and “(Deleted)” is appended to the name.

Keep in mind that if you address a request by deleting or modifying a Custom, Memory, or Registry Rule, even if you do so through the Rule Information panel, you must separately change the Resolution for the request and change its status to Closed. Unlike requests that involve file state, there is no shortcut that combines all of the actions in one step.
Managing Duplicate and Related Requests
You can receive multiple requests for access to the same file. Carbon Black App Control separates these requests into two categories.
- Duplicate Requests – These are requests for approval of the same file (identified by hash) from the same user and computer. This might occur if a user is anxious for a resolution to a request but administrators have been delayed in providing feedback.
- Related Requests – These are requests for the same file (identified by hash) from different users or computers. This might occur if multiple users become aware of a particular application at the same time, or if a file multiple users have been using becomes blocked or unapproved.
Columns may be added to the Approval Requests and Justifications table showing duplicate and related requests.
Viewing and Resolving Duplicate Requests
For duplicate requests, since only one resolution should be necessary to handle all of them, only the first request is listed in the Approval Requests and Justifications table and shown on the Approval Request Details page.
In the details page for a request that has duplicates, an additional Duplicates field appears in the Request Details section, showing the number of duplicate requests for this file from this user on this computer. Moving the mouse over the number of requests in either the table or the details page displays a popup that gives the date, time, priority, and comments for the original and each additional request.
Viewing and Resolving Related Requests
For Related requests (same file, different user or computer), you might want different resolutions for different users, even though they involve the same file. If you include the Related column in the table, moving the mouse over the number of related requests for any request in the table displays a popup similar to the one shown for duplicates, showing all requests related to the one in that row.
The Approval Request Details page for a request that has related requests includes a Related Requests panel. This panel allows you to choose one or more of the related requests to address, and includes an Action menu for that purpose.

In addition, the right menu commands are modified to allow you to open, escalate, or close all of the related requests in one step. If you choose to resolve more than one of the related requests in one action and resolution email is enabled, all users who made the request receive mail when you close the request.
Notifying Users of Approval Request Resolution
You can choose to notify a user that an approval request they made has been resolved. Carbon Black App Control provides two ways to do this via an email.
- Manual – You can click on the Response E-mail field on the Approval Request Details page to open a pre-configured email form in your default mailer.
- Automatic – You can add automatic notification to your request work flow. Automatic email notification is activated on the Mail tab of the System Configuration page. This is disabled by default.
For either method, the response mail goes to the email address (if any) that the requestor provided with their request.
To enable automatic email responses for approval request, see Enable Automatic Email Response.
When Notifications are Sent
After the server mail configuration is correctly configured and approval request notification mail is enabled, closing an Approval Request causes a mail notification to be sent in the following cases:
- The Resolution field is changed to any Resolved option from Not Resolved or Rejected.
- The Resolution field is changed to Rejected from any other option.
- The Resolution field is Not Resolved when an open request is closed.
Notification mail is not sent if the Resolution field is changed from one Resolved option to another (for example, from Resolved - Approved to Resolved - Updater).
Also, notification mail is not sent unless the Status is changed to Closed.
When approval request notification is enabled, notifications are not sent for requests that have already been closed. However, if a request is opened for the first time (or re-opened) after notification is enabled, the requestor will be notified if the Status and Resolution fields meet the criteria above.
The Carbon Black App Control Server keeps a record of request resolution mail, including a timestamp of when it was sent from the server. This is a record of mail being sent, not received. If the email address for the recipient is incorrect, the server will still record that the message was sent. If there is no email address for the requestor, the server does not indicate that mail was sent.
The record of when a request response was sent appears in the Mail Sent field. In the Approval Requests table, this is an optional column that you can add using the Show Columns feature. On the Approval Request Details page, it always appears if a message was sent.

Notification Mail Content
When approval request resolution mail is sent, it contains the following information:
- The filename for which the approval was requested
- The Resolution (i.e., the choice made on the Resolution menu)
- Any comments added by Carbon Black App Control administrator in the Approval Request Details.
- The reason for the request (if provided by the requestor).
- The requestor's email address
- The date of the request
- The hostname of the Carbon Black App Control Server
Enable Automatic Email Response
You can use the Carbon Black App Control console to enable automatic approval request email responses.
Prerequisites
Procedure
- On the console menu, click the Settings (gear) icon, and select System Configuration.
- On the System Configuration page, click the Mail tab.
- In the Approval Request Settings panel, select the Mail Notification Enabled check box.
- If you have not already configured a mail server for Carbon Black App Control, provide the necessary information in the Server Settings panel, and validate the server by sending a message to a test address.
- To save your settings, click the Update button at the bottom of the page.
