


This section covers how to use the Cloud Access Security Broker (CASB) feature for the VMware Cloud Web Security service. The first part covers using CASB Application Visibility, and concludes with configuring CASB Application Control.
Overview
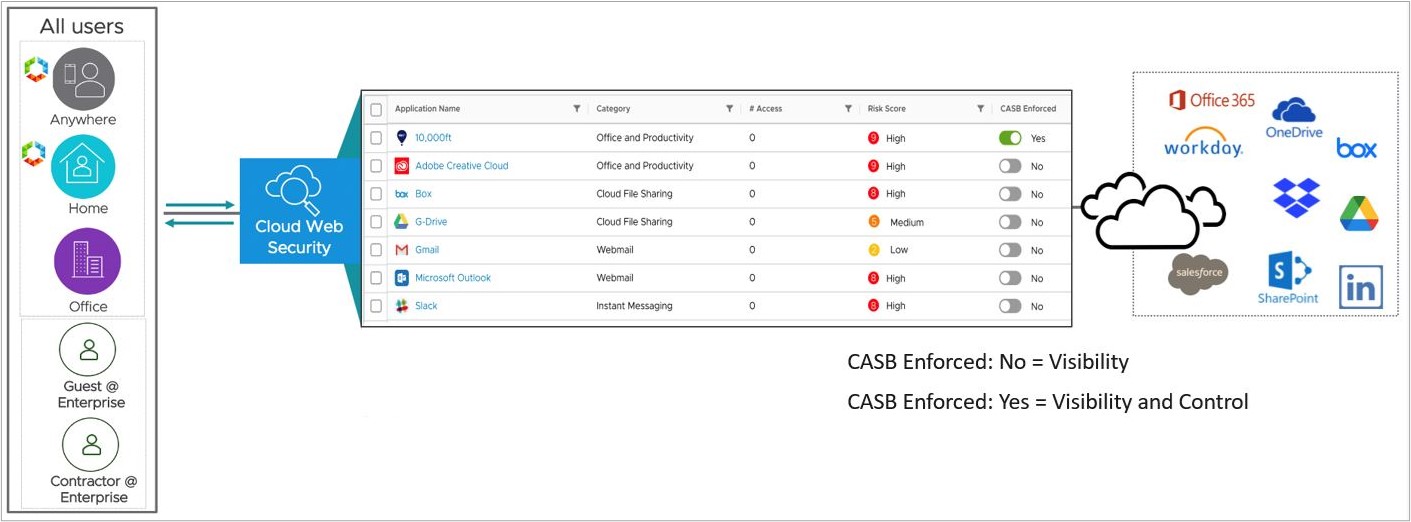
The CASB feature includes the following capabilities:
Application Visibility (part of both Cloud Web Security standard and advanced packages): A customer has the ability to view the different SaaS applications being accessed by users within their network. For each application, a customer using CASB Application Visibility can observe:
- The risk score for each application.
- The number of times users have accessed an application.
- The application’s category.
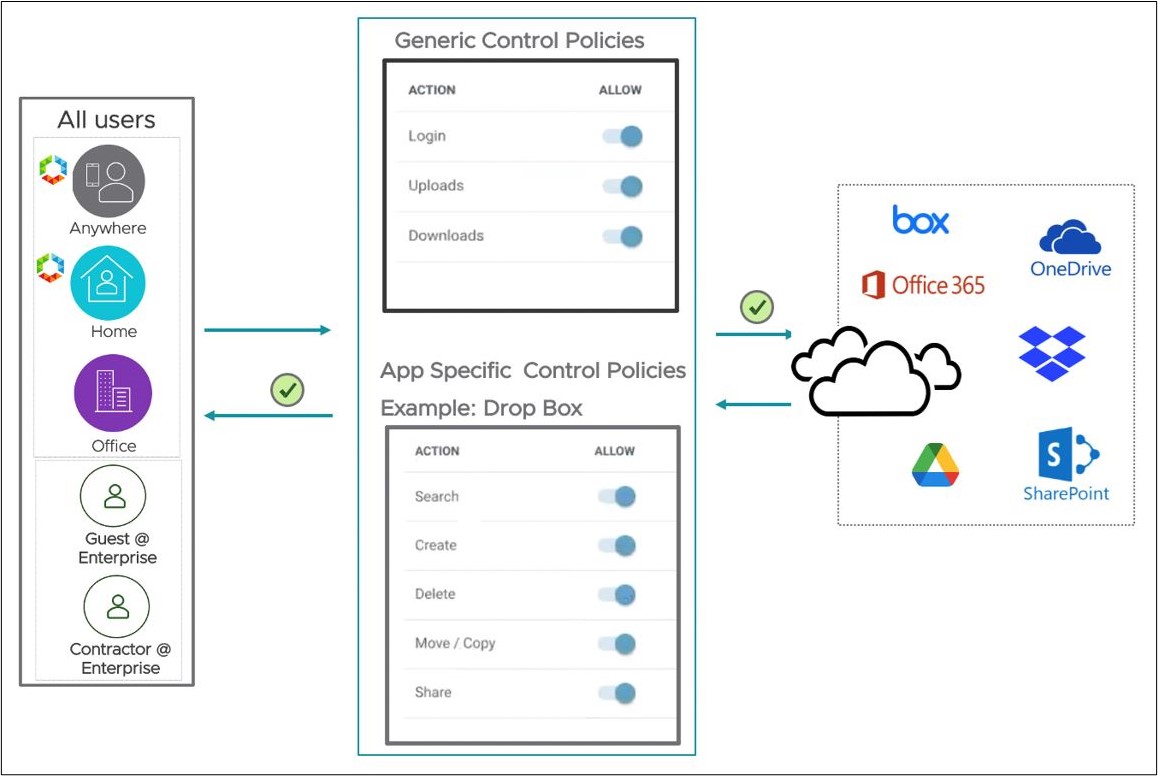
For each application, a customer using CASB Application Control can control:
- Initial access to the application site (Allow or Block).
- Additional actions including Login, Upload/Download Content, Search, Edit, Share, Create, Delete, Like, or Post.
Customers can see the currently available actions for the applications they would like to control.
Prerequisites
- A customer enterprise on a production VMware SASE Orchestrator with Cloud Web Security Enabled.
- The customer SD-WAN Edges, the SASE PoPs, and the Orchestrator must all use Release 4.5.0 or later.
- CASB Application Visibility is useable for all Cloud Web Security customers whether they have a Standard or Advanced package.
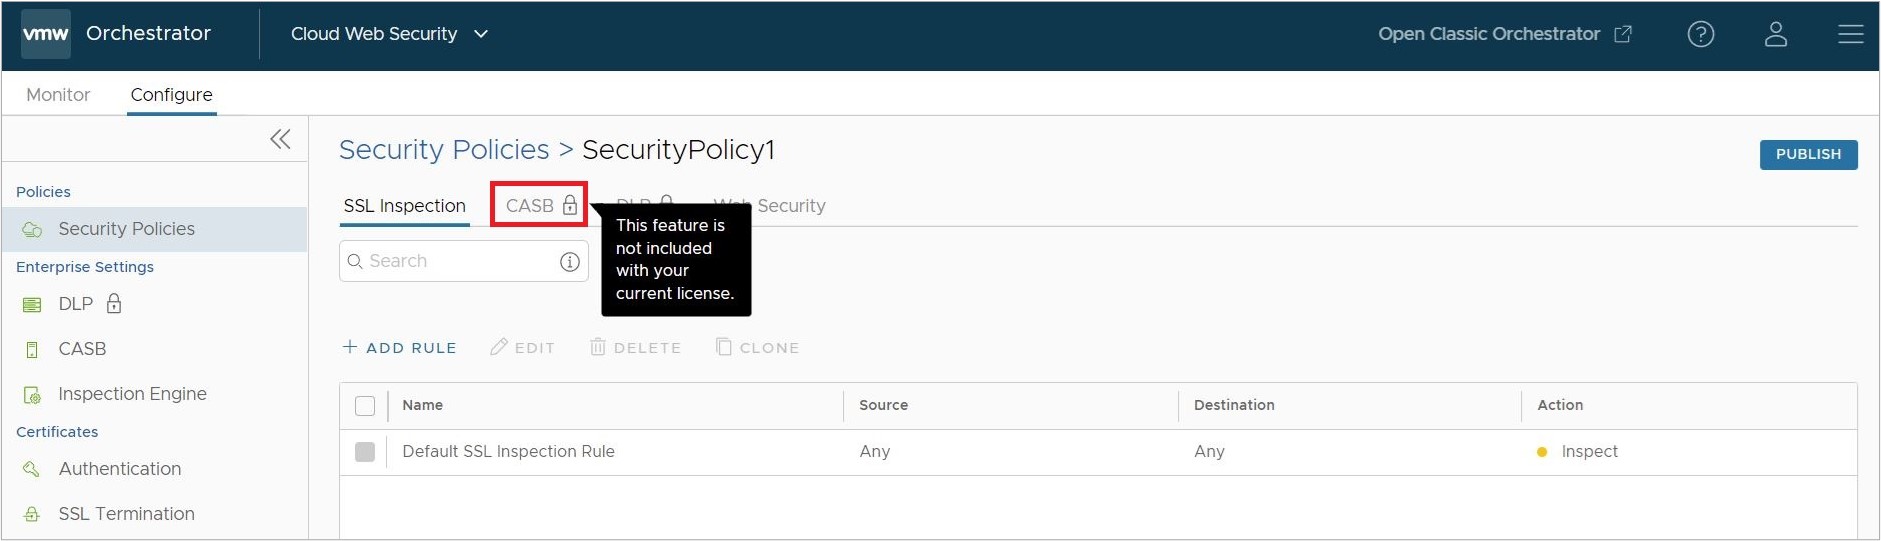
- To access CASB Application Control, a customer must have a Cloud Web Security Advanced package.
If a user navigates to and clicks on an existing Policy or create a new Policy, the CASB tab will include a lock icon. This indicates that only CASB Visibility is allowed with the Standard Edition license and that to create CASB Control policies, the Advanced Edition license is required.
- Optional: An Identity Provider (IdP) if the customer plans to have user-based rules. For more information on configuring either Workspace ONE or Azure Active Directory (AD) as an identity provider, consult the respective guides on the Single Sign-On Guides (SAML) page.
Create, Configure, and Apply a Security Policy
For details on Creating, Configuring, or Applying a Security Policy for the Cloud Web Security service, consult the relevant documentation in the Cloud Web Security Guide.
CASB Application Visibility
Once a Security Policy has been associated to a customer segment, traffic from endpoints devices behind the SD-WAN Edge or coming via Secure Access clients are being inspected and monitored if it passes through the Cloud Web Security policy.
- On the VMware SASE Orchestrator UI, navigate to
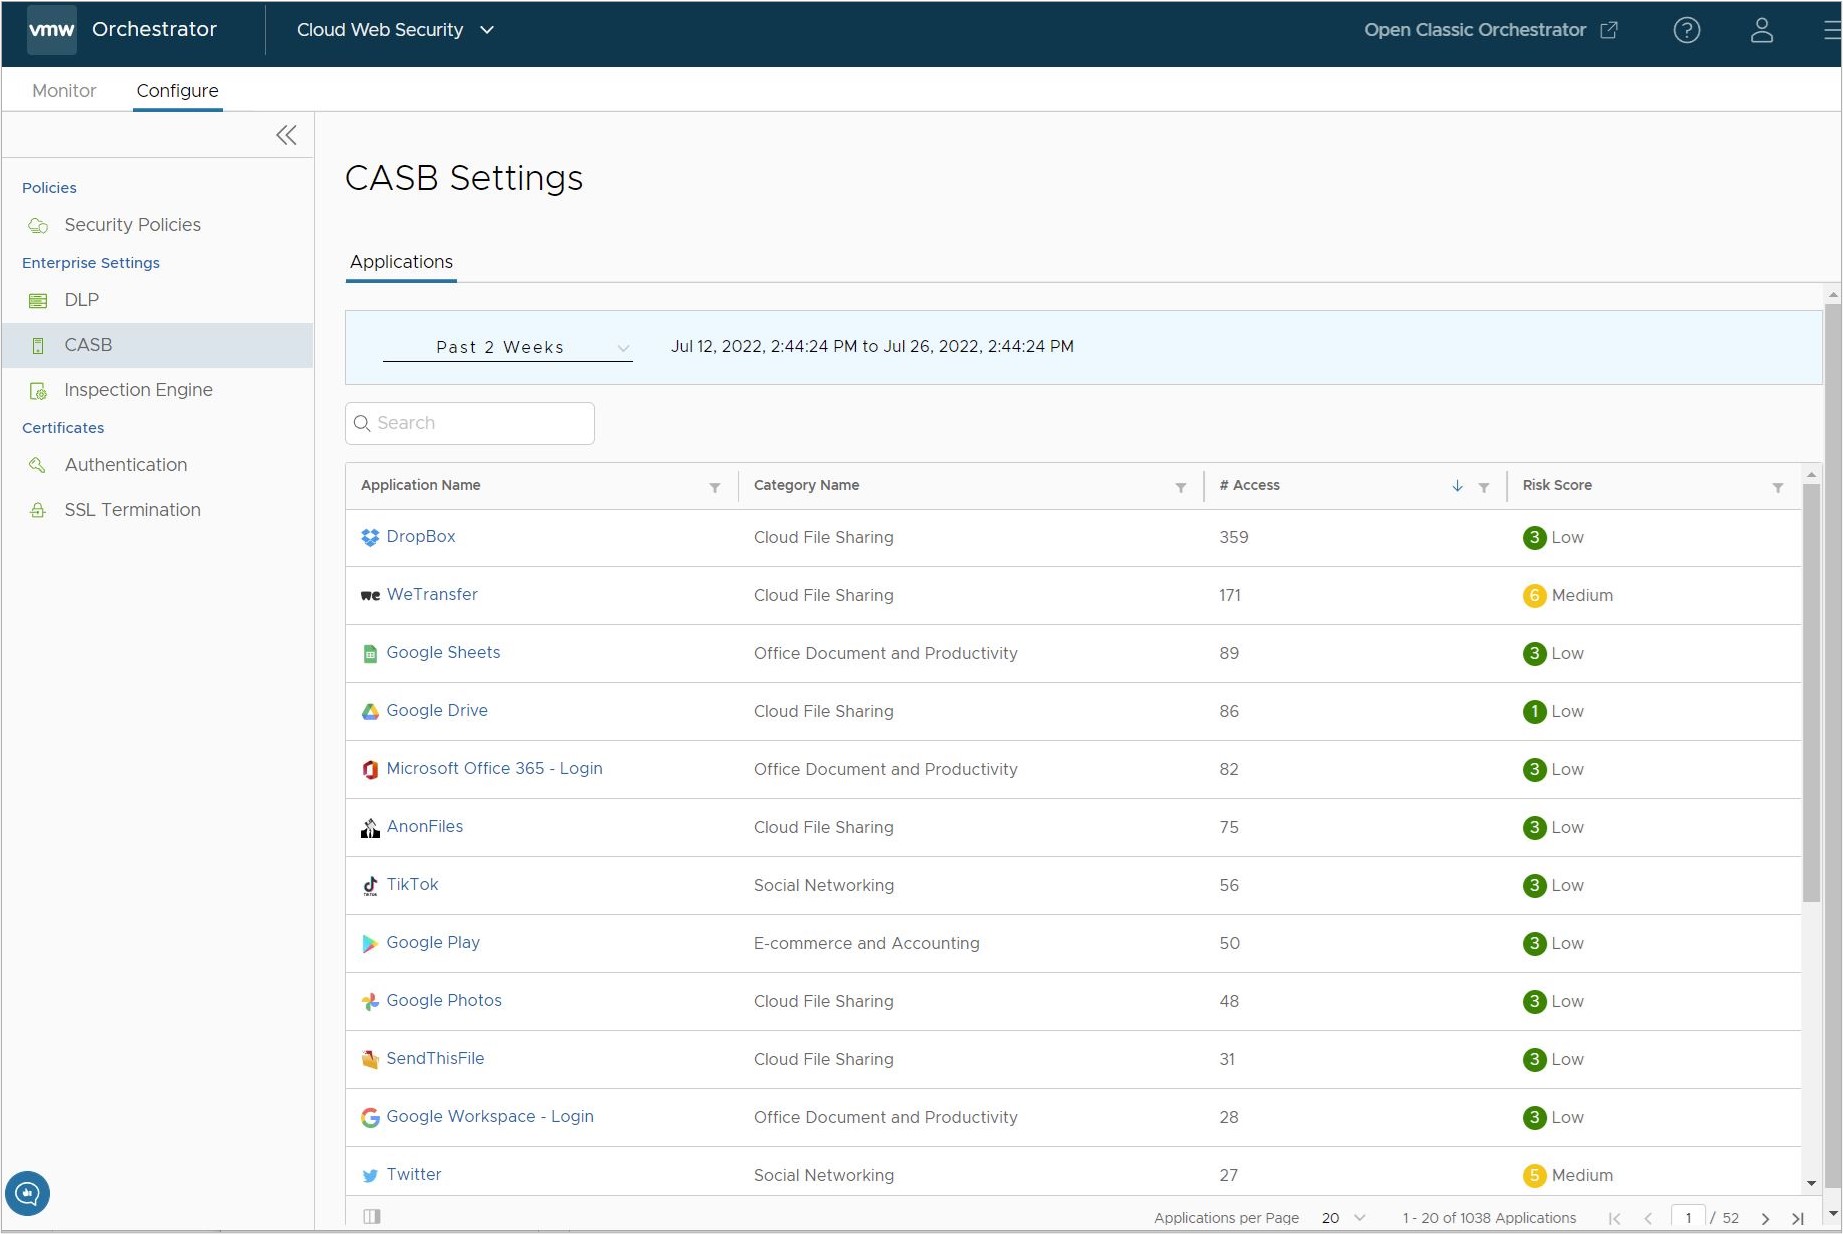
- The CASB Settings page provides a list of Applications which match a Security Policy Rule and are sorted by default for the highest Number of Access (the number of times a particular application has been accessed within the specified time period).
- Each Application will also have a Risk Score associated with it: Low (1-3), Medium (4-6), or High (7-9).
- The Applications table can be sorted by Application Name, Category Name, # of times Accessed, or Risk Score by clicking on the column header. Or by clicking the sort icon for a column, a user can search for a partcular term or number in that column.
- The CASB Settings page by default displays 20 Applications per Page, the user can scroll to the bottom of the page and specify up to 100 Applications per Page. The user can also select a new page of Applications either by clicking one the arrow icons or specifying a specific page in the text box.
- As more traffic passes through the Cloud Web Security service, the Applications list may change depending on which websites are being visited. These changes can include application order, number of applications, access events, and risk score may change depending.
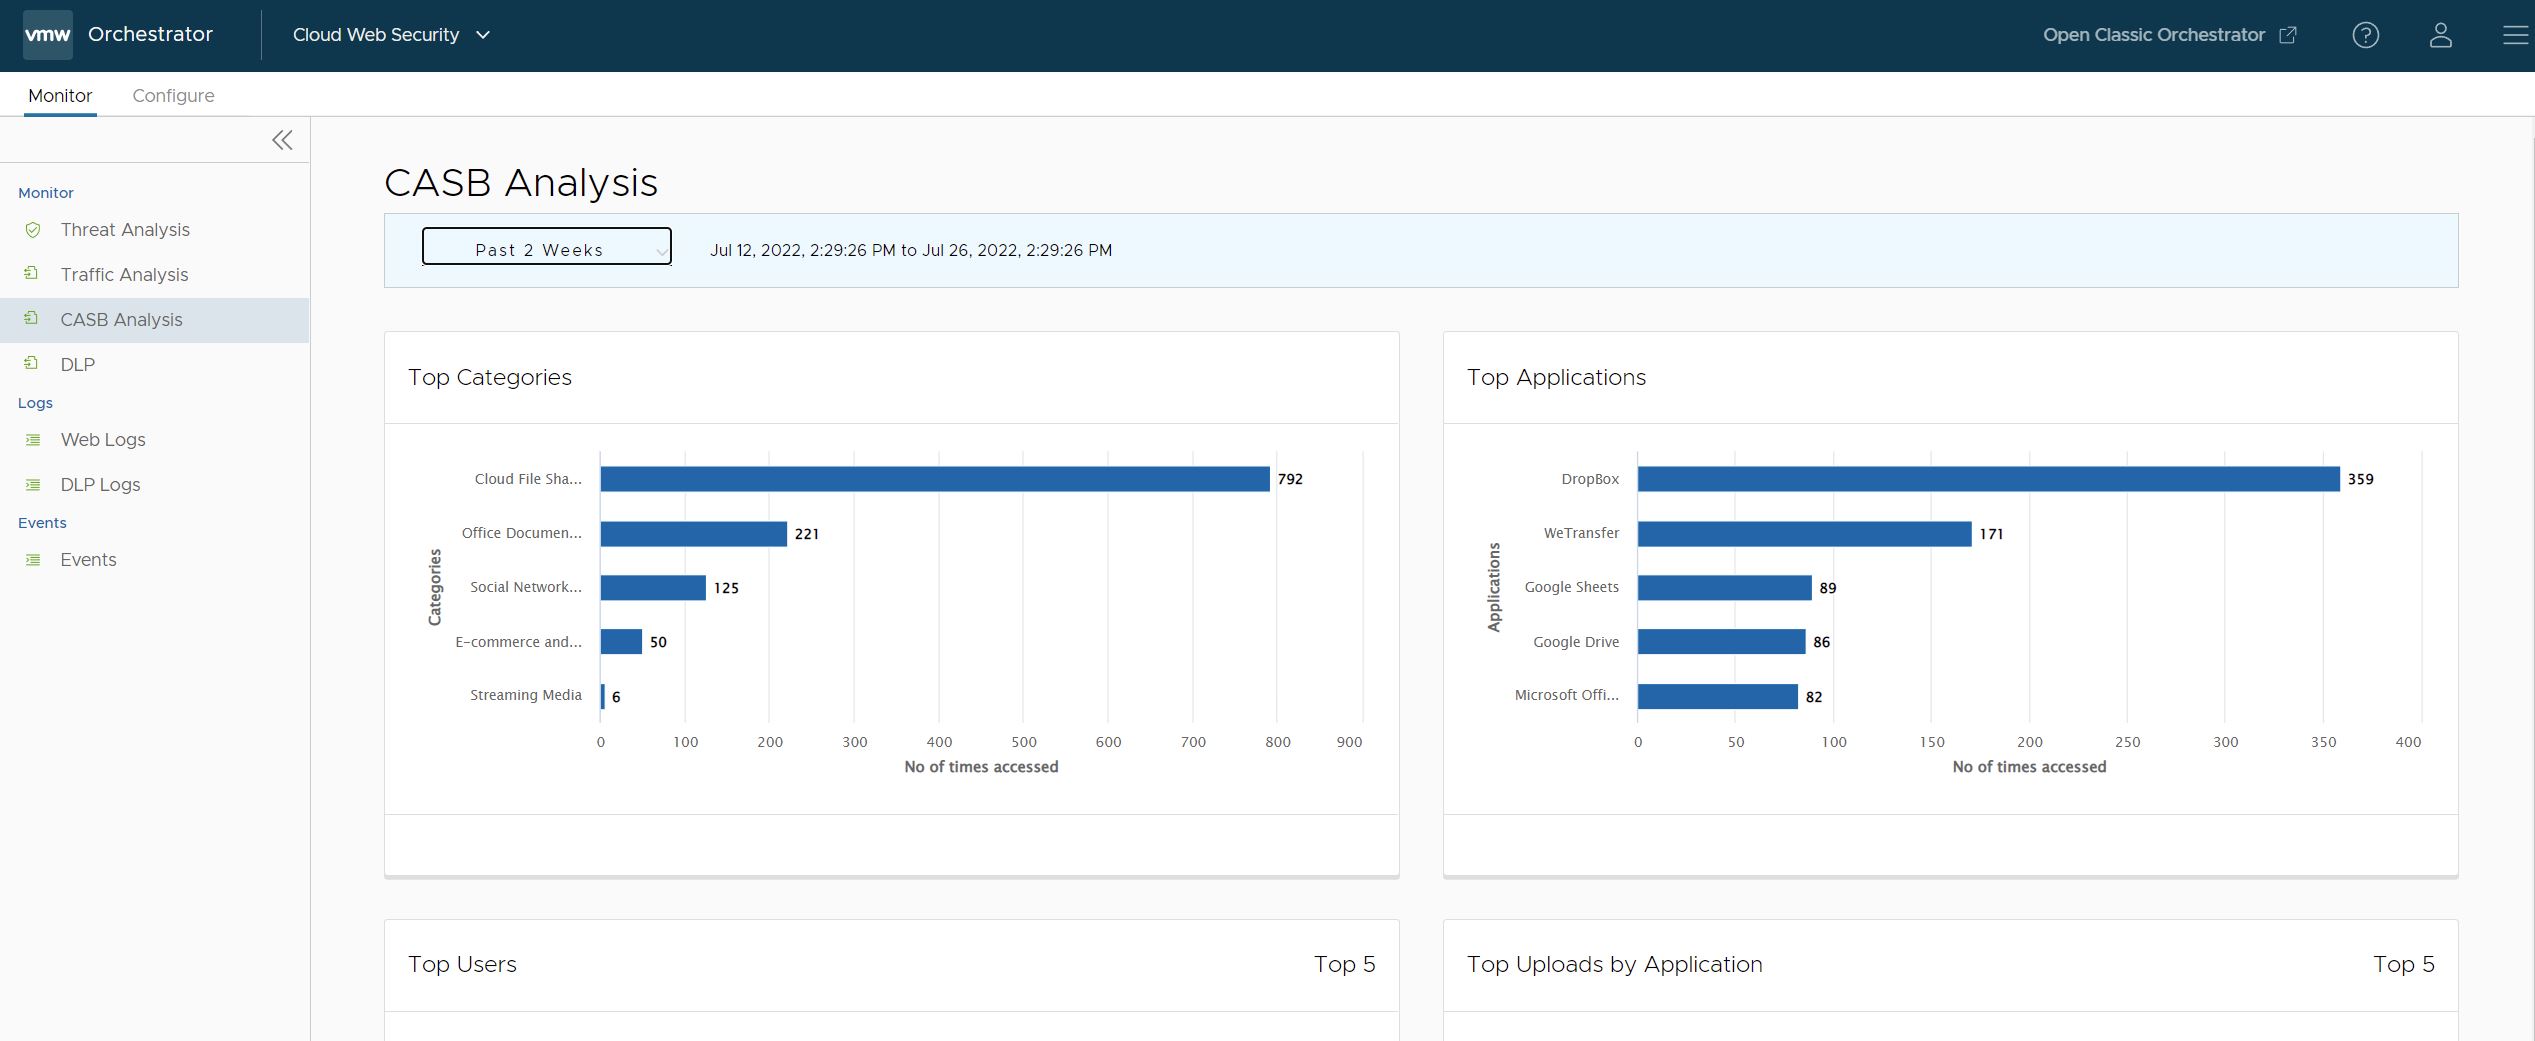
- Navigate to .
- On the CASB Analysis page, the user can view a selection of bar charts for Top Categories, Top Applications, Top User, and Top Uploads by Application.
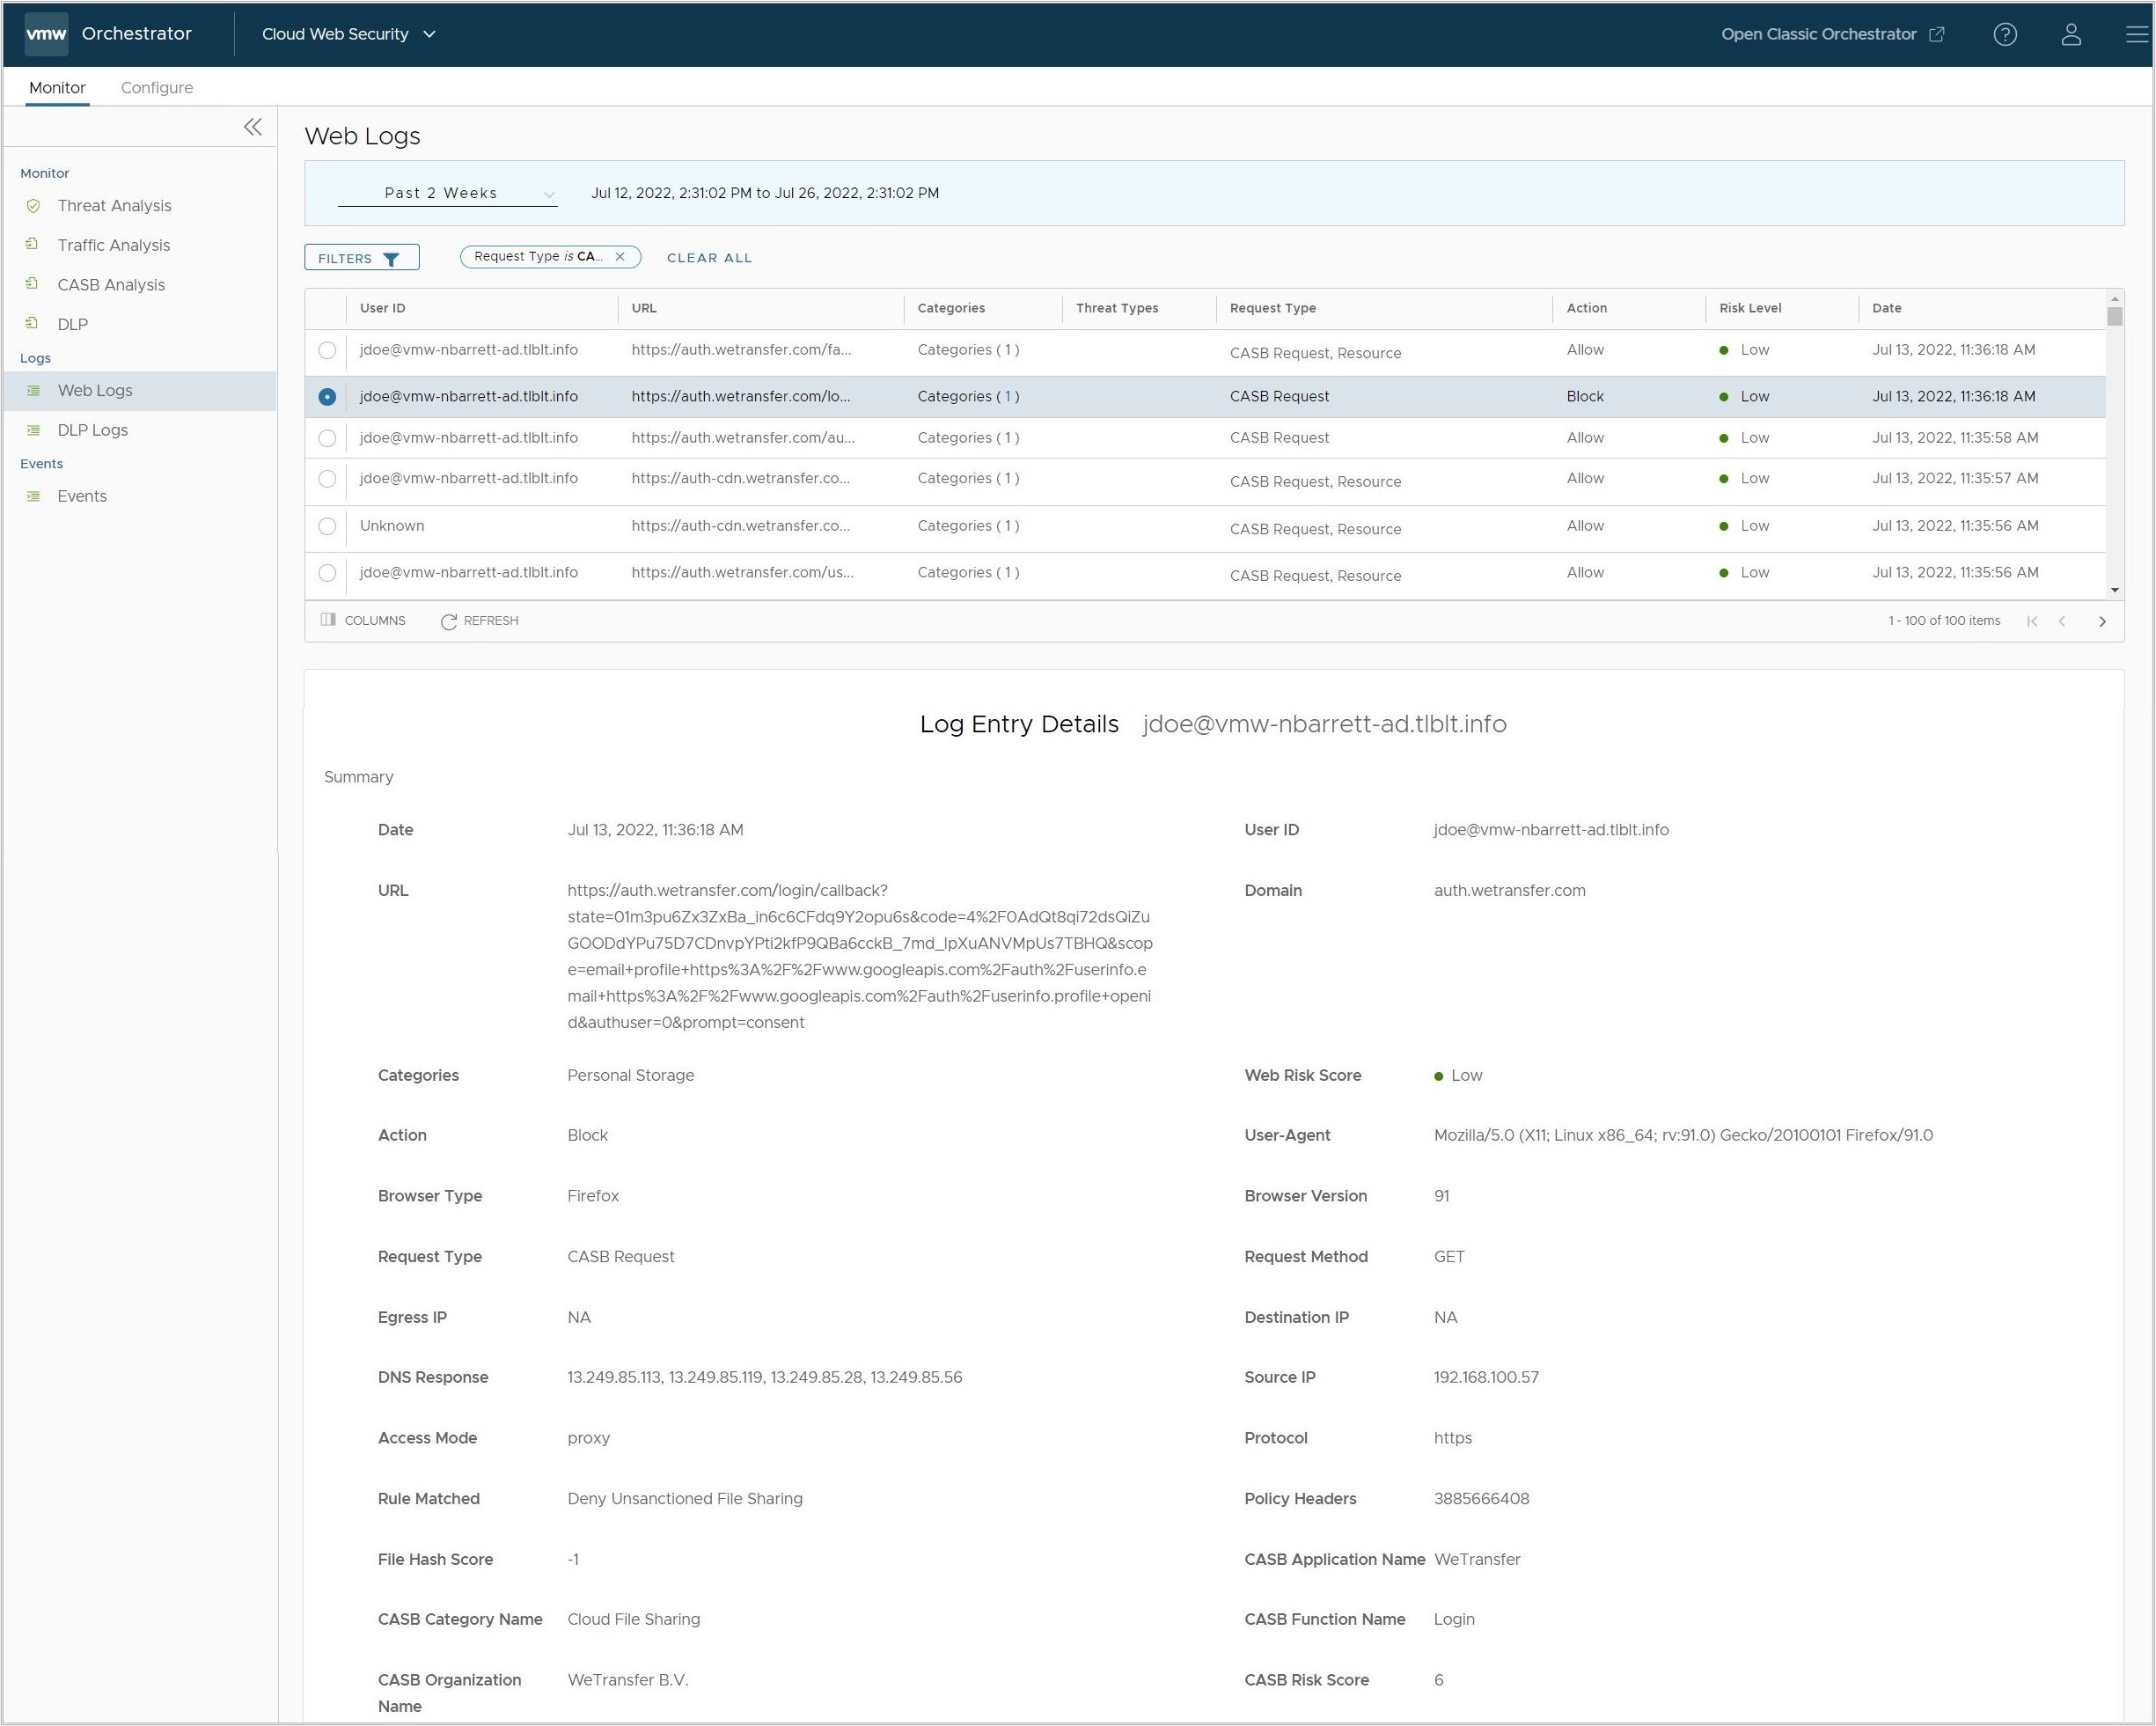
- Web Logs: page a user can learn greater details about an application access event. For any CASB Application event, user can click the bubble associated with that log entry to see the full Log Entry Details.
CASB Application Control
CASB Control is an additional feature available for customers with the Cloud Web Security Advanced Edition and which grants the customer the ability to control specific actions that can be performed on each SaaS application.
Create and Apply a CASB Control Rule
- On the VMware SASE Orchestrator, navigate to .
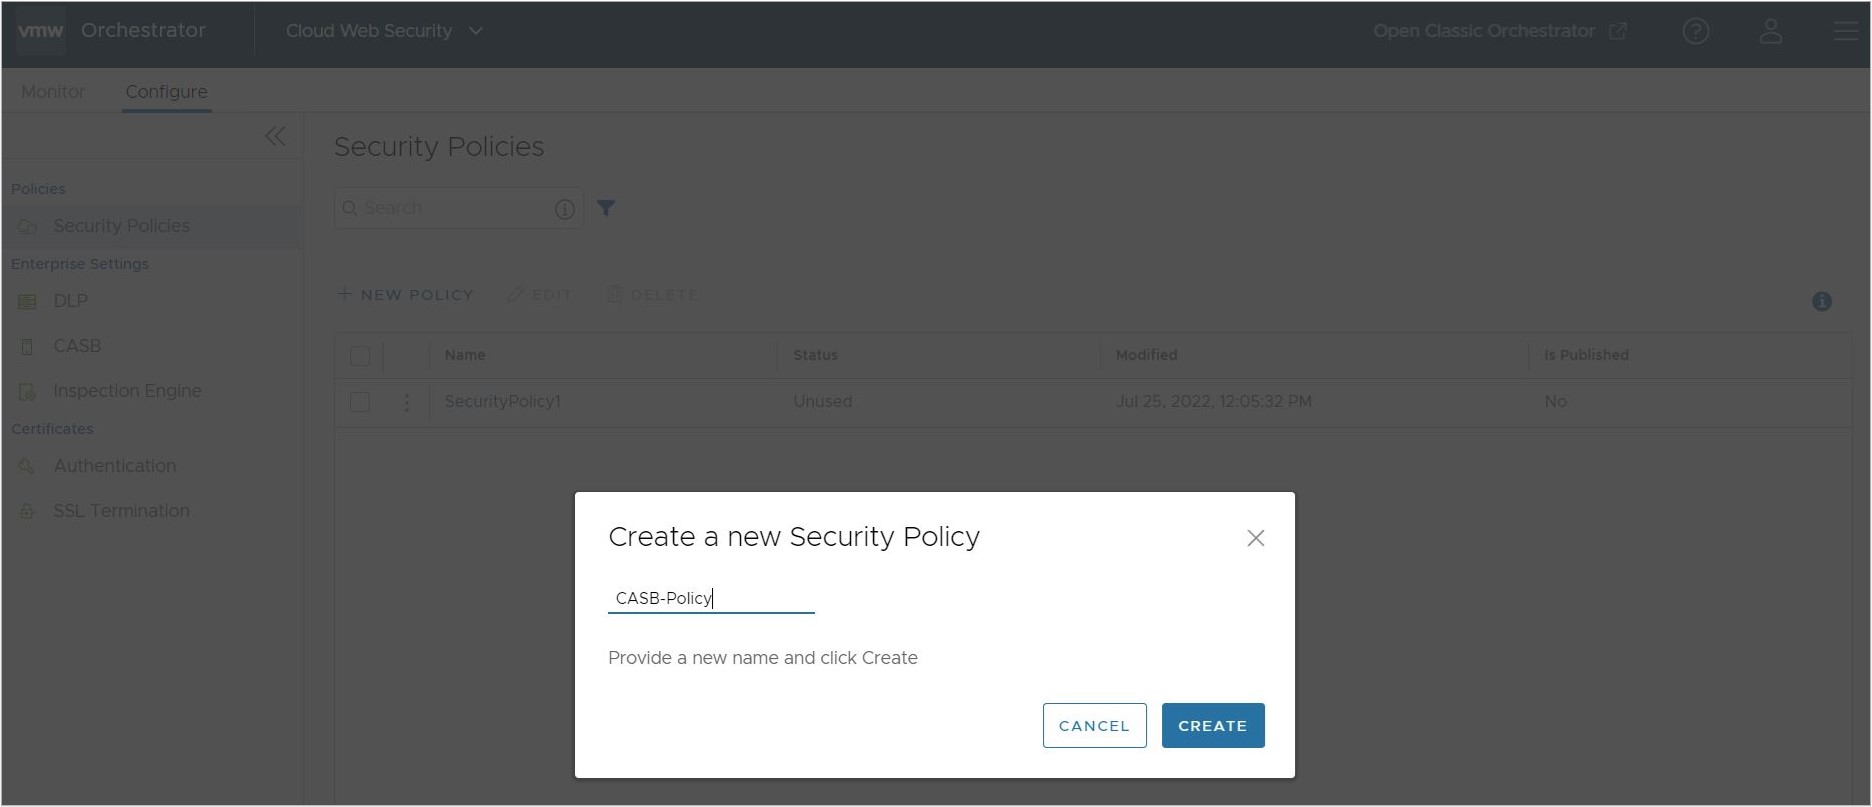
- Either Edit an existing policy or select + New Policy to create a new Security Policy. This workflow will focus on creating a new Security Policy but steps 4 and later apply equally to an existing Security Policy.

- For the new Security Policy, enter a policy name and click Create.
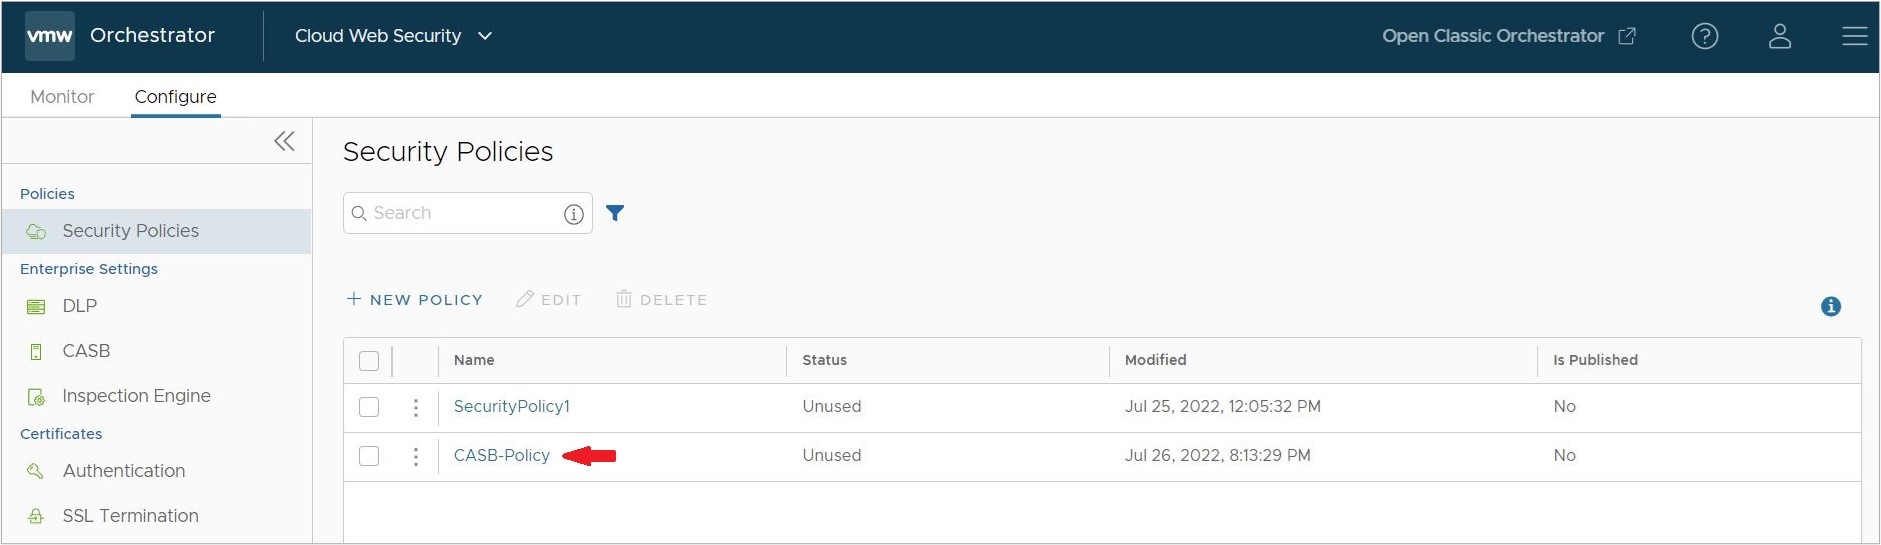
- Once the new Security Policy is created, click on the named policy. This policy is created with default rules only.
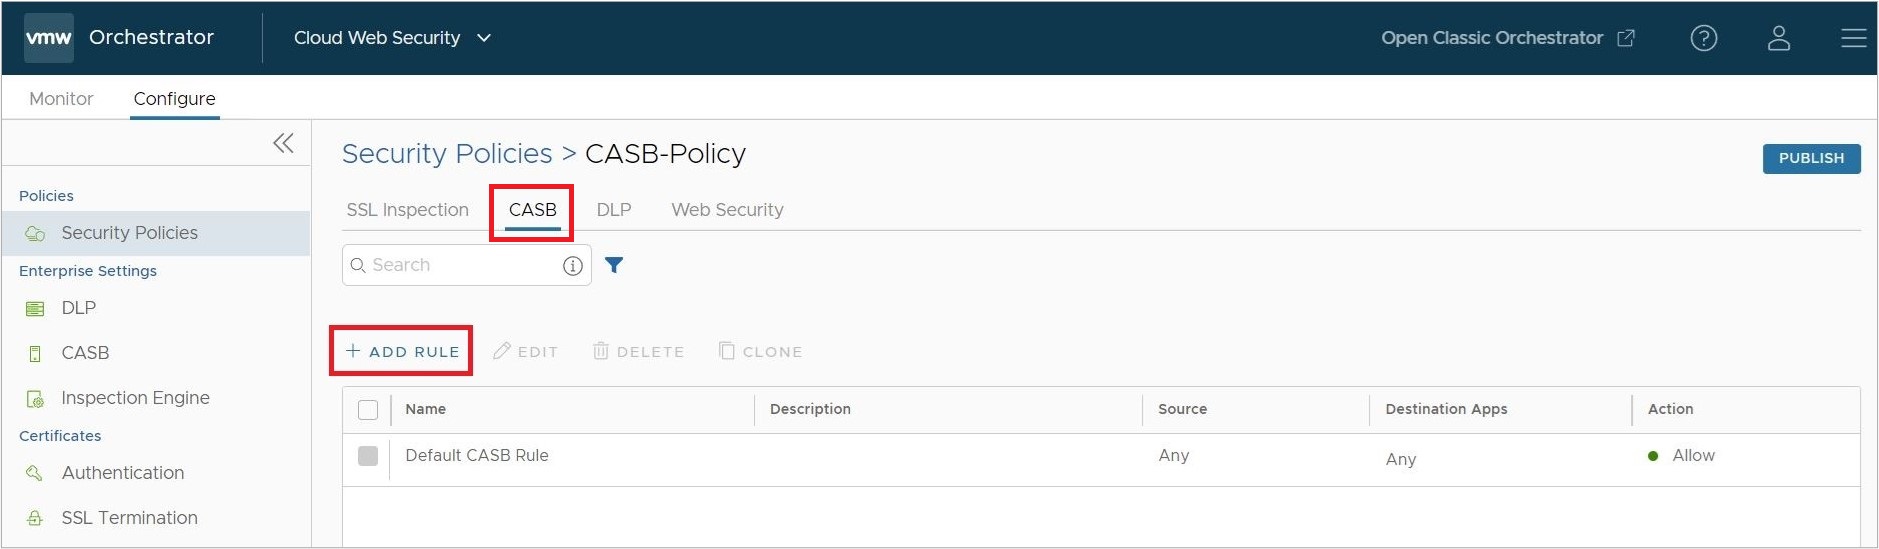
- On the rules screen for the Security Policy, click on the CASB tab, and then click Add Rule.
- Begin on the CASB rule configuration screen by selecting a Source, this can be either:
- All Users and Groups.
Note: All Users and Groups is the only option for customers that do not have an Identity Provider (IdP) like Workspace ONE or Azure Active Directory (AD) configured for Cloud Web Security.
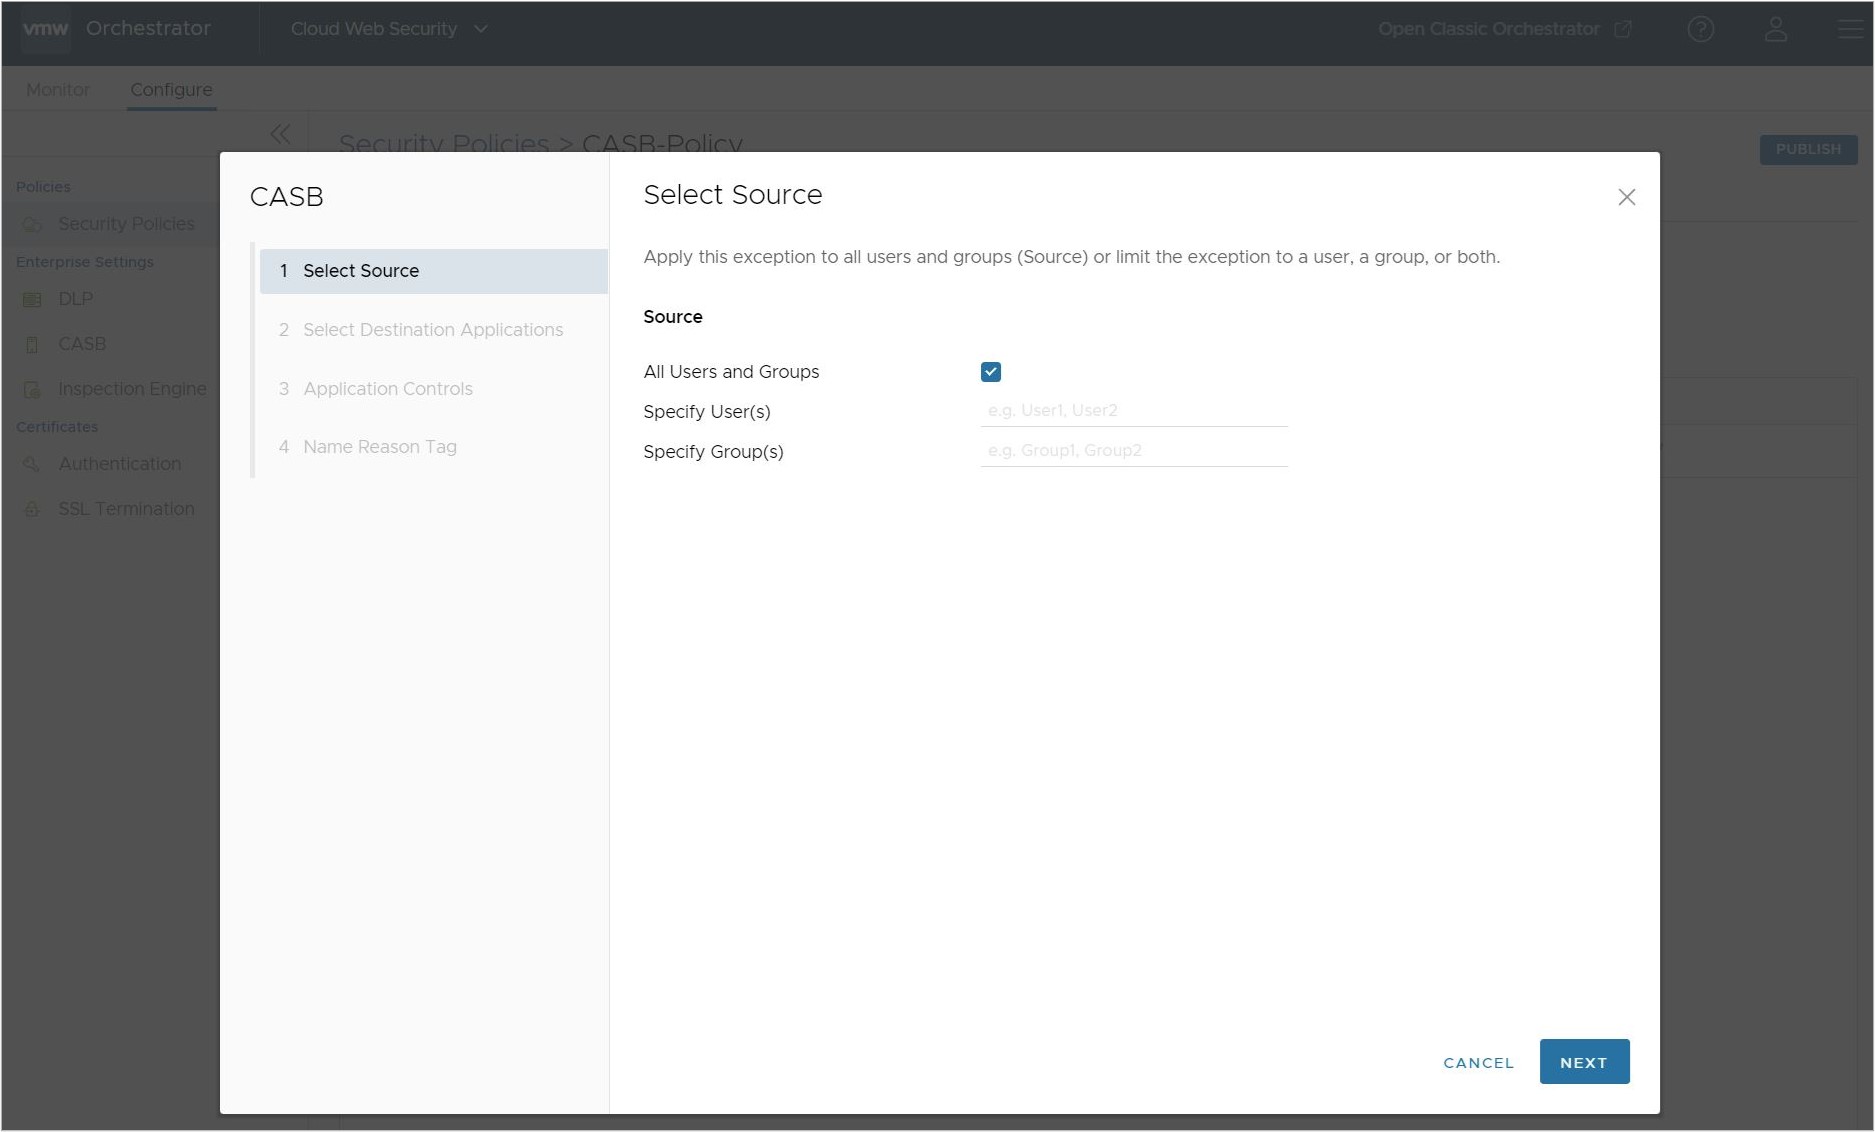
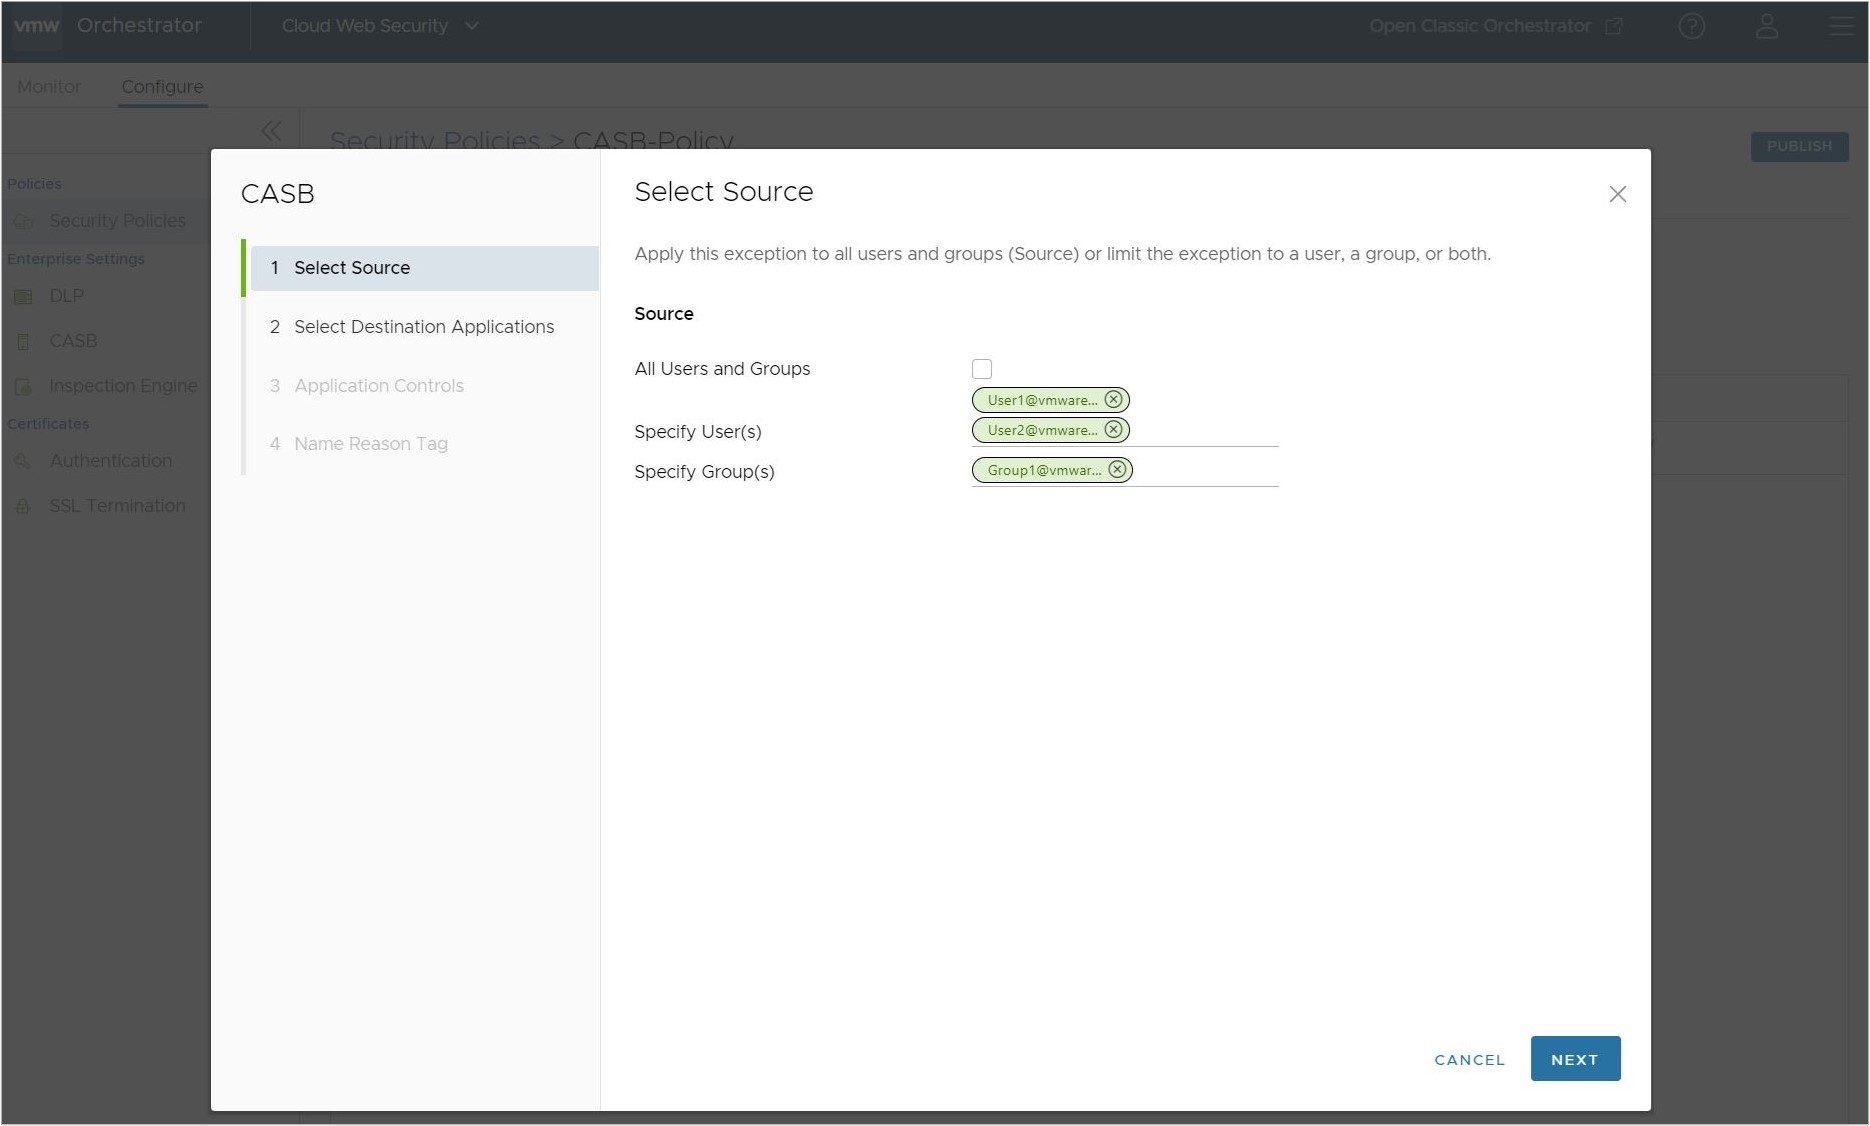
- Or can be a specific set of Users and Groups.
Important: Cloud Web Security must be configured with an Identity Provider (IdP) like Workspace ONE or Azure Active Directory (AD) for specific Users and Groups to work.
Whichever Source is configured, click Next to continue.
- All Users and Groups.
- On the Select Destination Applications screen, the user can configure the CASB Control rule with one or more applications which will be applied to the rule. The selection screen allows the user to sort applications by name, category name, or risk score.
Note: At the bottom of the screen, the user can configure the number of applications shown at one time, to a maximum of 100. The default value is 10. The user also has the option of showing all applications or only the applications the user has selected.
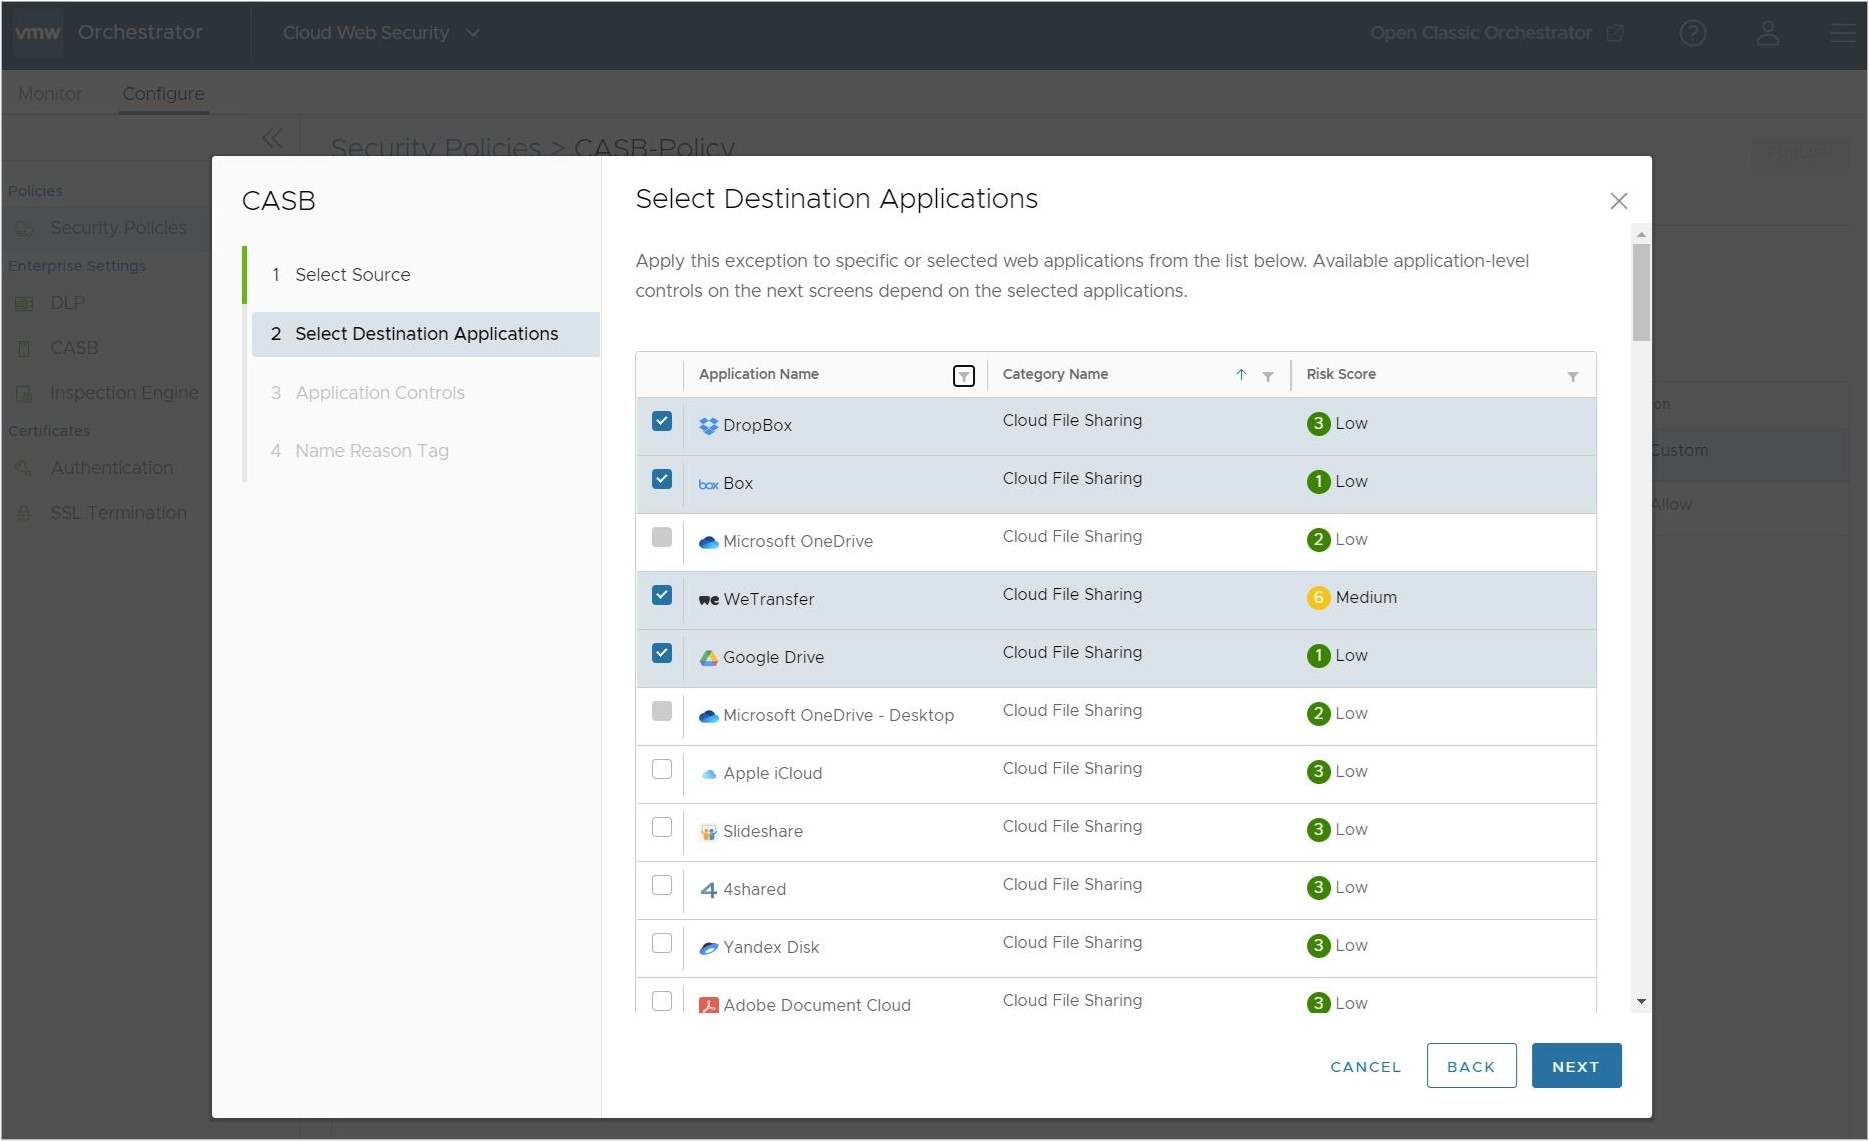
Once the applications have been selected for this CASB Control rule, click Next.
- On the Applications Controls screen, the user several application actions that they can either block or allow. This includes Login, Upload, Download, Search, Edit, Share, Create, Delete, Like, and Post. The user can choose two paths for controlling the selected applications:
- The user can elect to block all application controls, in effect preventing the selected applications from operating in any way on the client's browser.

- Or the user can select which controls are blocked and which are allowed. In this instance blocking all application controls but one: downloading files.
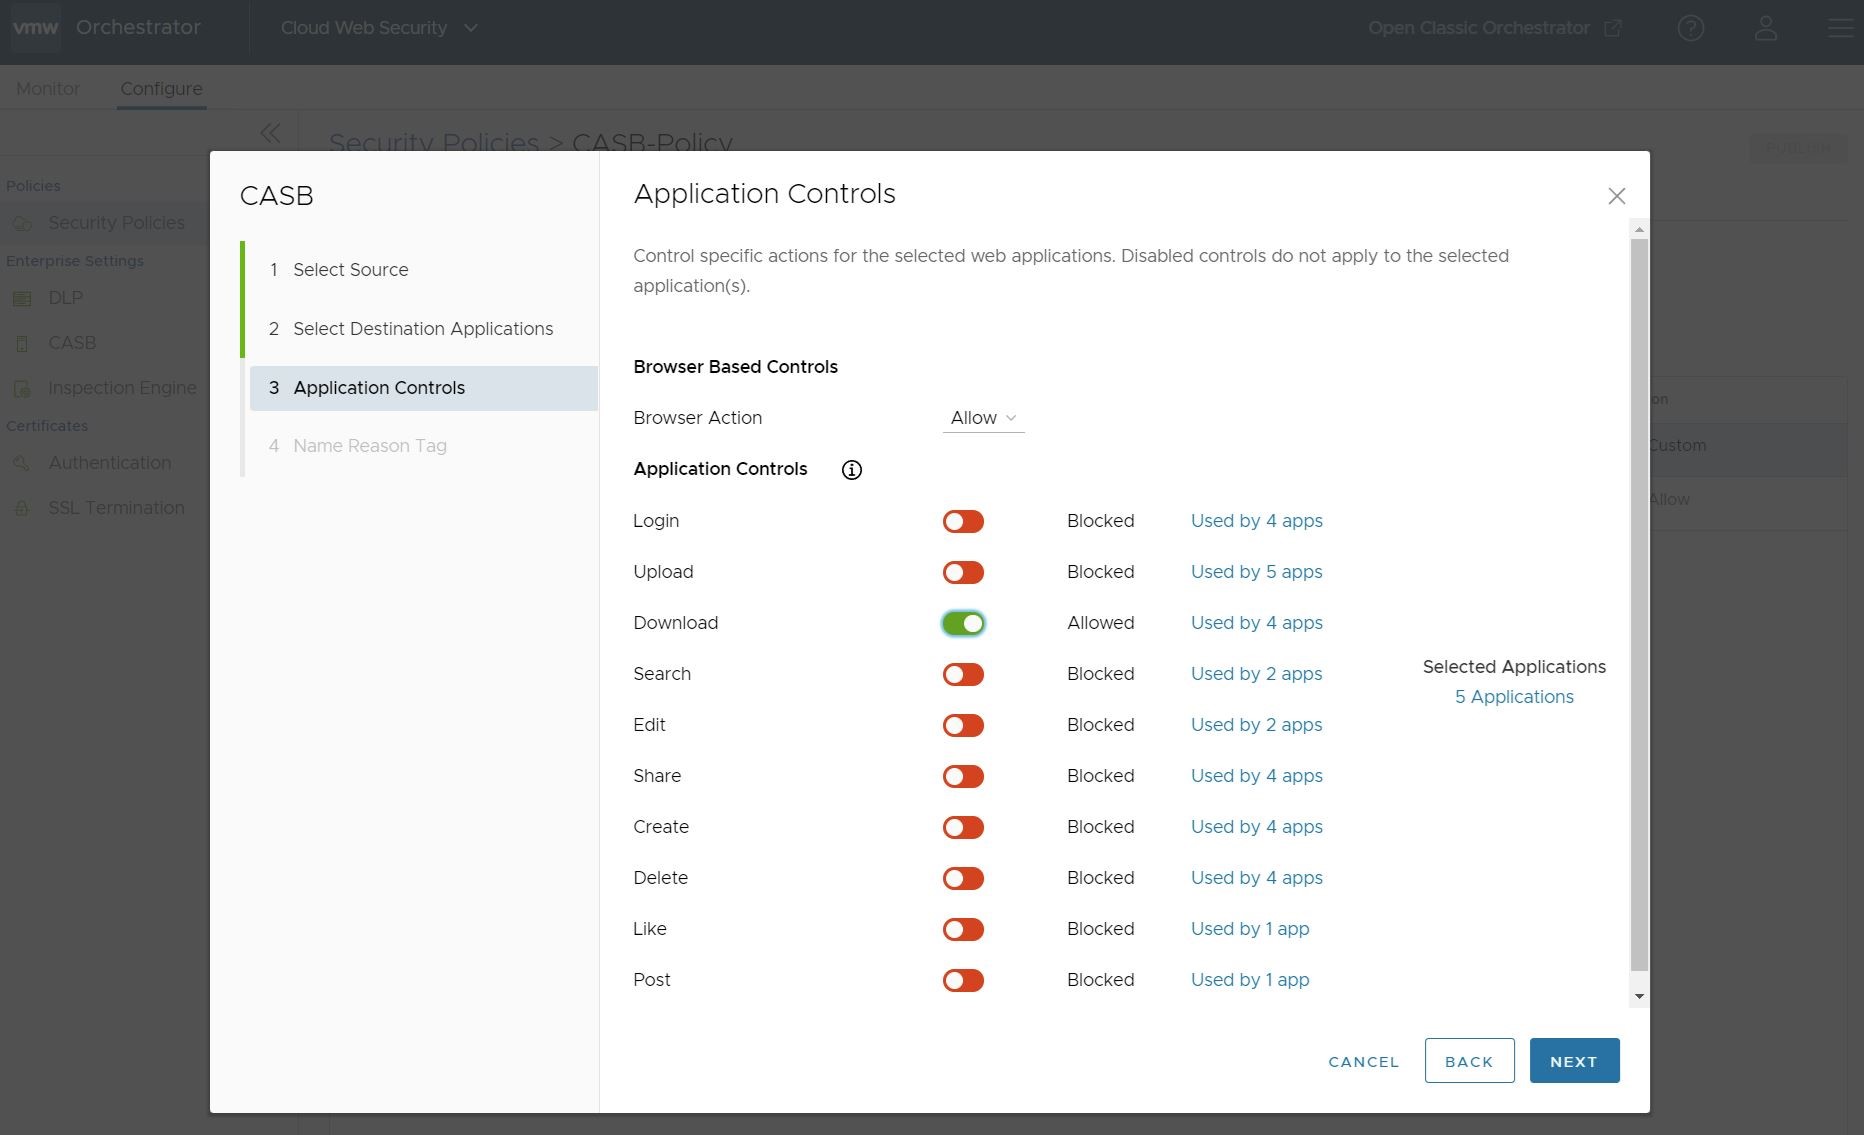
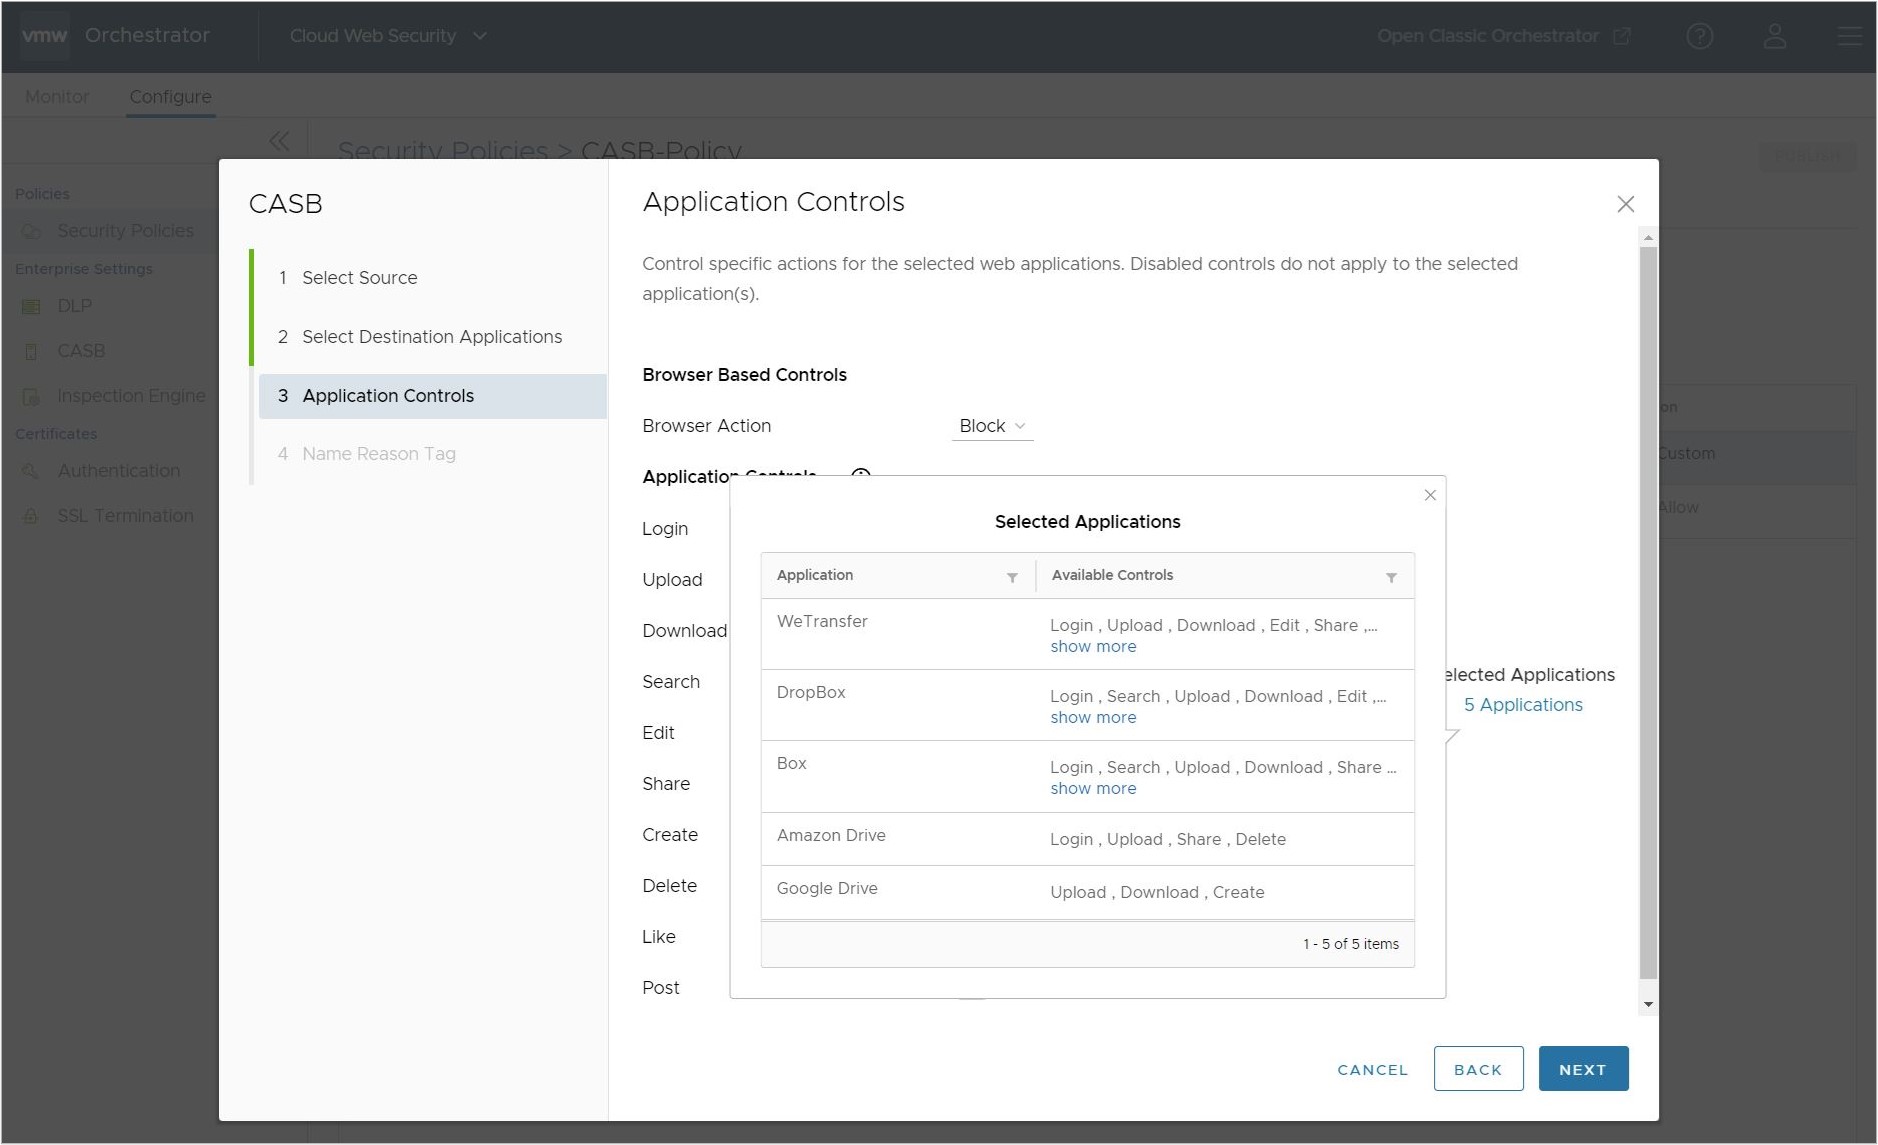
On the Applications Controls Screen, the user can confirm which Applications are being used by this rule by clicking # Applications under the Selected Applications heading to the right of the screen.
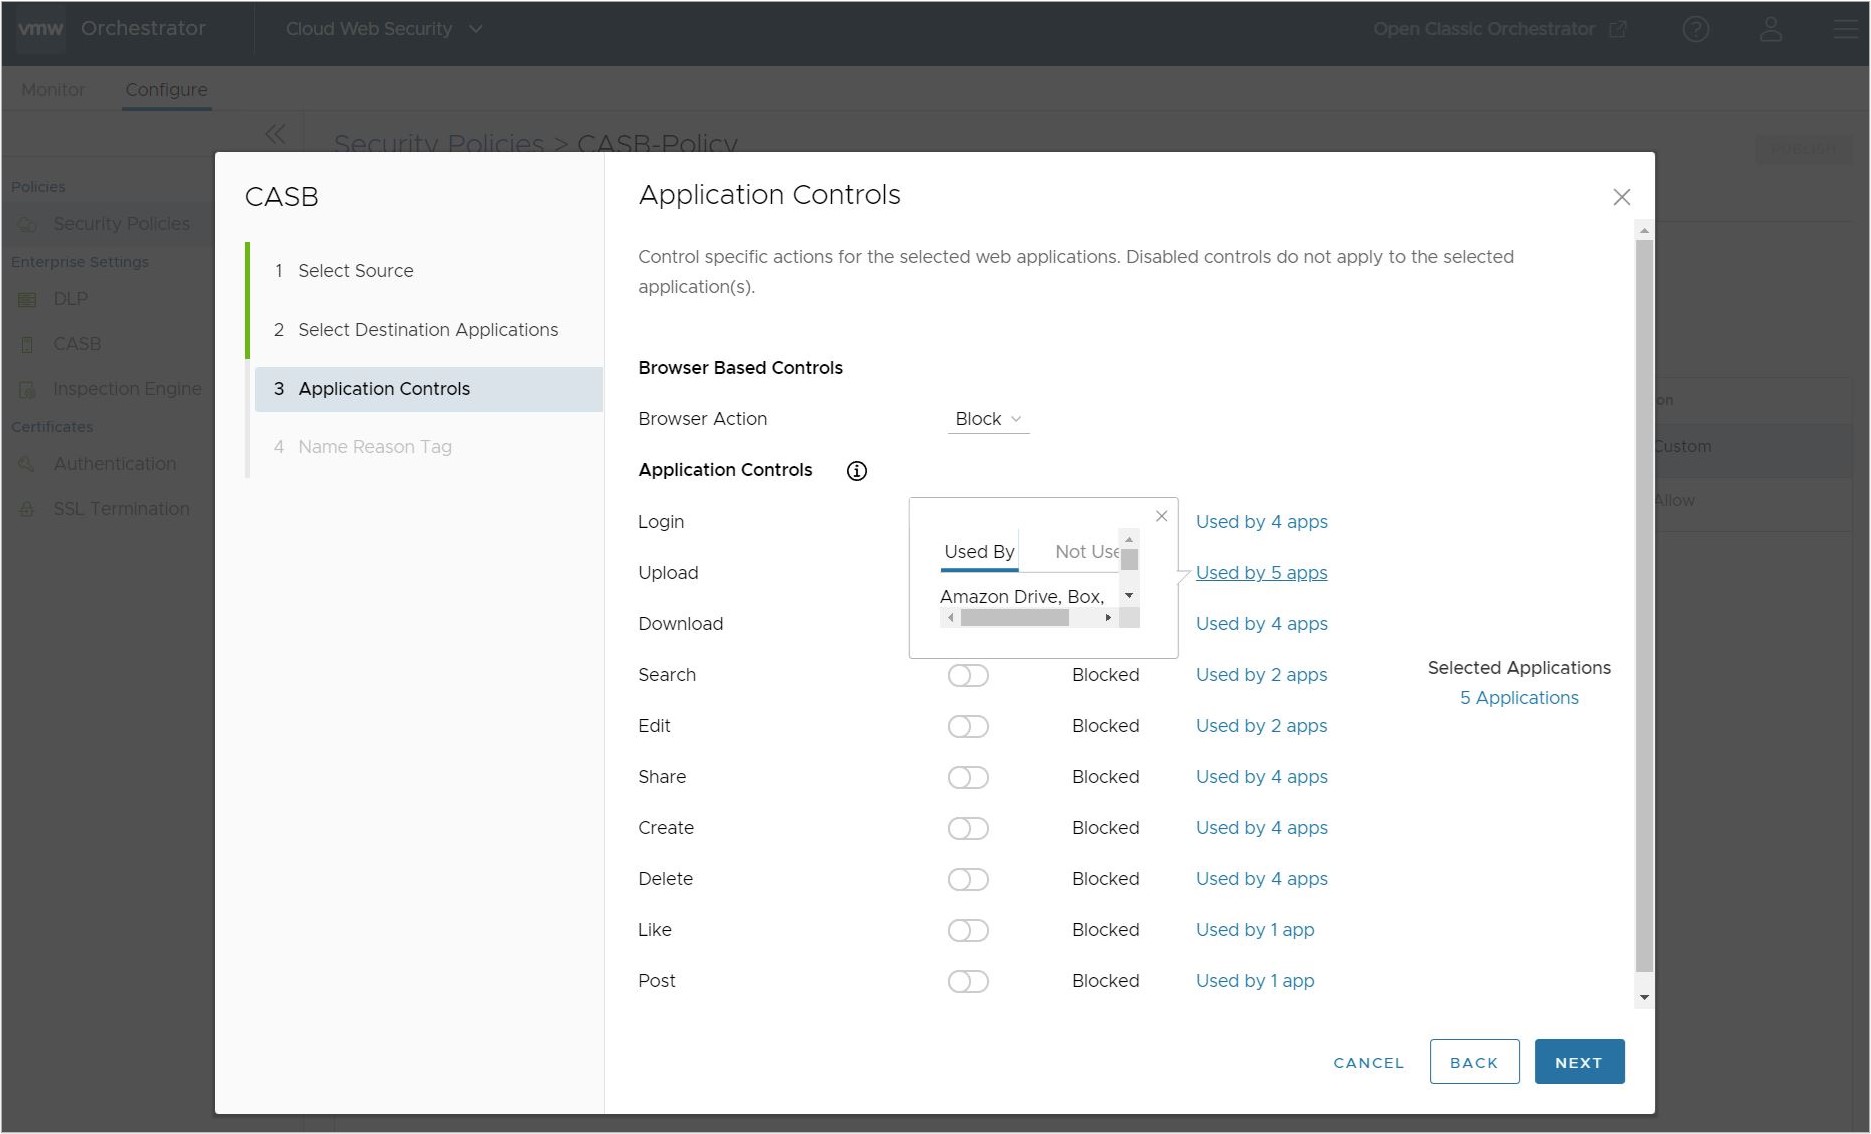
The user can also see which applications are used by a specific Application Control rule by clicking on the Used by # apps to the right of a particular Application Control.
Once satisfied by the set of Application Controls to be applied, click Next.
- The user can elect to block all application controls, in effect preventing the selected applications from operating in any way on the client's browser.
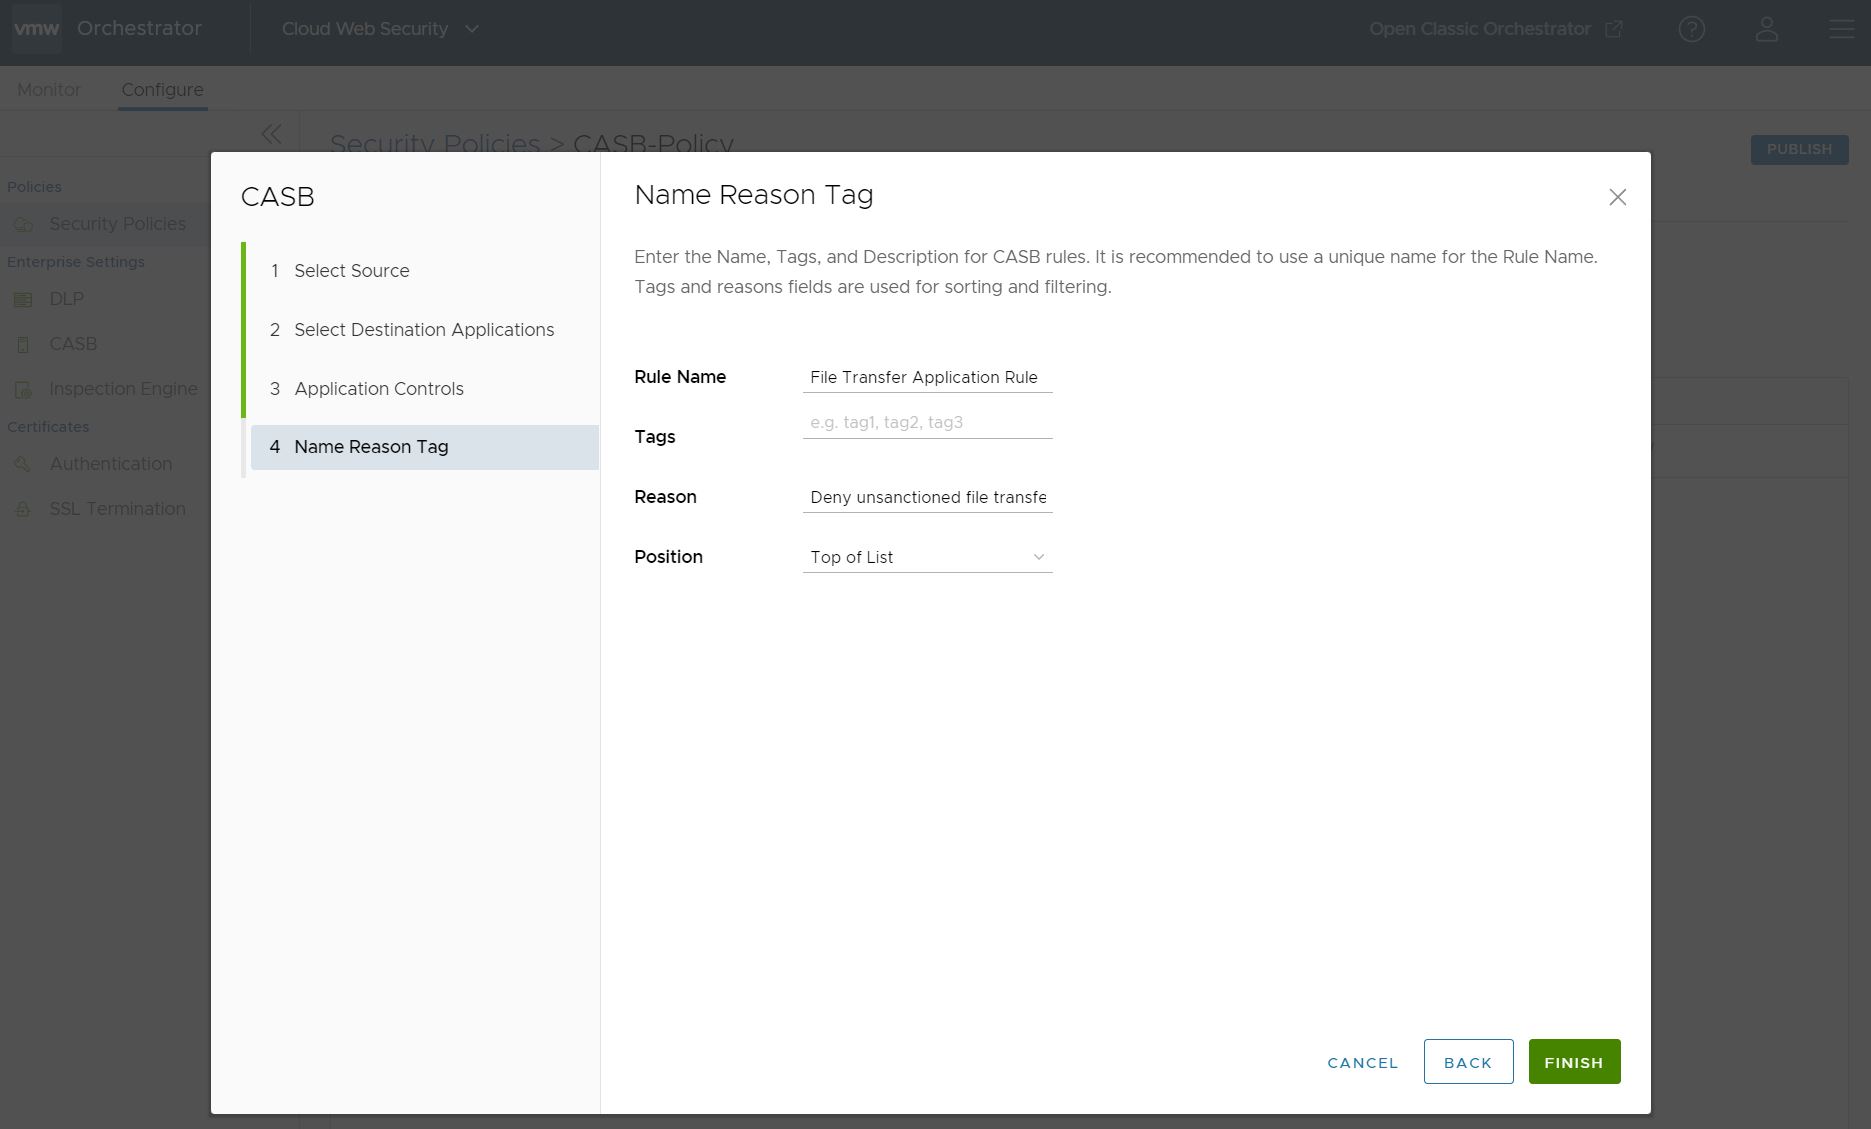
- Finally, on the Name Reason Tag screen, provide a Rule Name (required), Tags (if used), Reason (if desired), and a Position for the rule on the list of CASB rules (the options are either top of the list or bottom of the list). Once completed, click Finish.
- A rule is now created for the applications selected earlier. To apply the CASB Control Rule to traffic, click Publish.
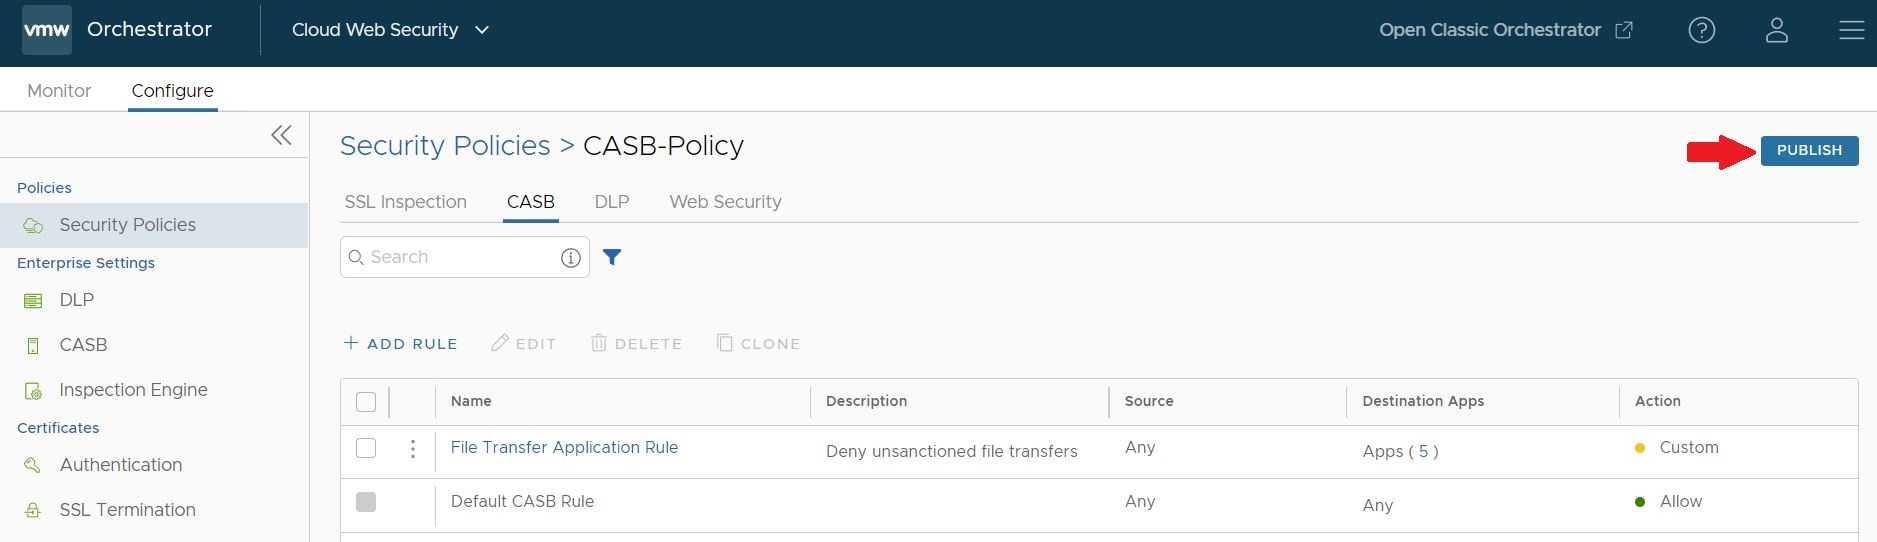 Note: The Orchestrator requires up to five minutes to successfully publish the new rules.
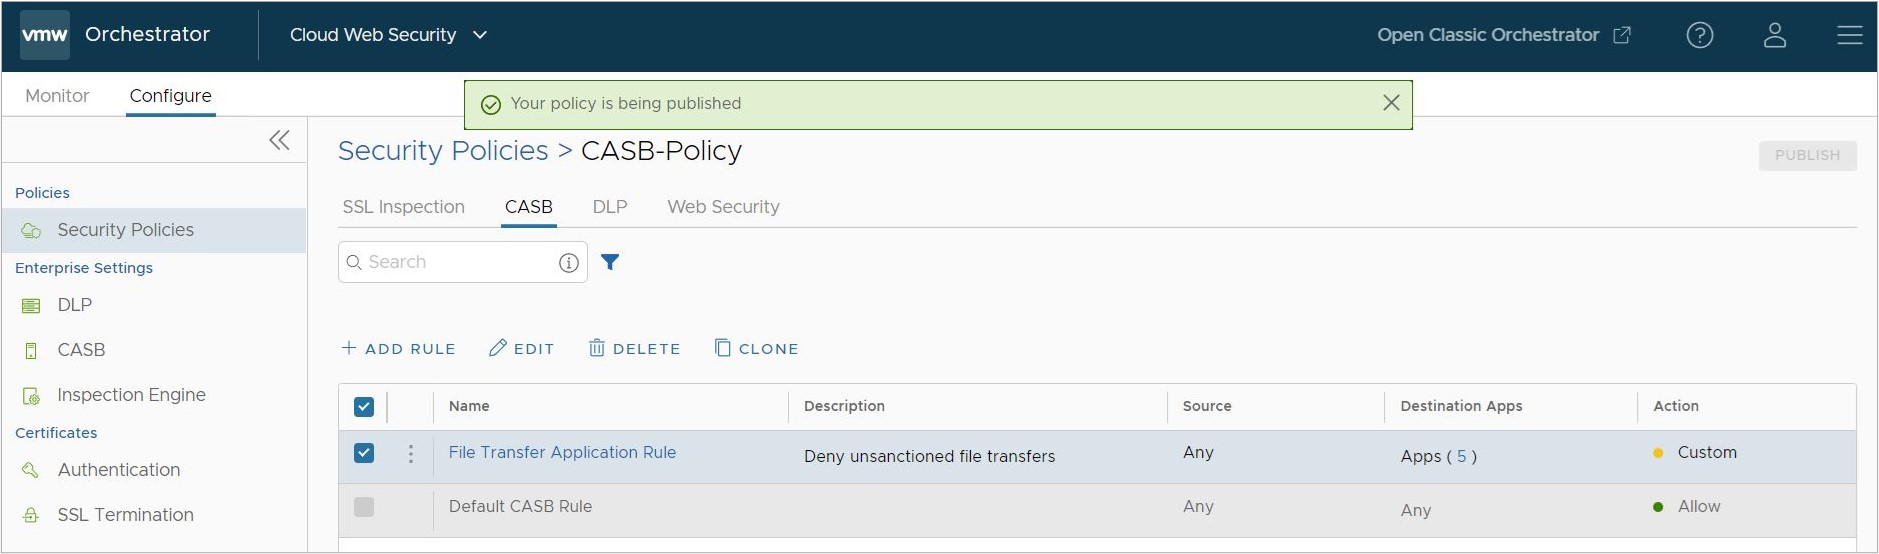 Once published, a rule can be edited and republished as needed in the same way that it was edited above.
Note: The Default CASB Rule cannot be edited or changed in any way.
Once published, a rule can be edited and republished as needed in the same way that it was edited above.
Note: The Default CASB Rule cannot be edited or changed in any way. - After the Security Policy with the CASB Control Rule is published, go to a website affected by the rule and test the control features to confirm it is working as expected. To verify that the applications have CASB controls configured, use the page. For example, in an instance where a user tried to log into the WeTransfer website and was blocked as per the published CASB Control rule. The Web logs show the blocked login attempt.
