


Unified Access Gateway is an appliance that is normally installed in a demilitarized zone (DMZ). Unified Access Gateway is used to ensure that the only traffic entering the corporate data center is traffic on behalf of an authenticated remote user. Unified Access Gateway directs authentication requests to the appropriate server and discards any unauthenticated request. Users can access only the resources that they are authorized to access.
Prerequisites
- Download the UAG OVF appliance using the My VMware account.
- Create DNS record mapping for UAG1 and UAG2 in the Active Directory for both internal and external IPs.
Procedure
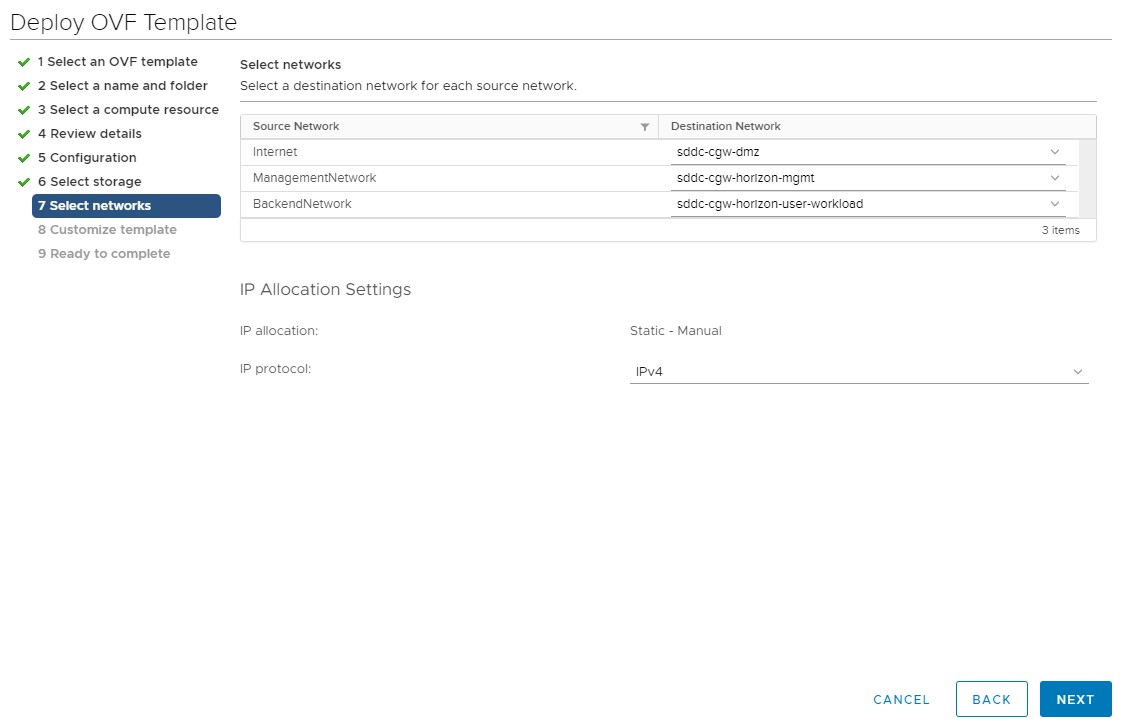
- Select appropriate networks and click Next.
For example, select networks as shown in in the following figure, where:
- sddc-cgw-dmz is a DMZ network.
- sddc-cgw-horizon-mgmt is a Horizon management network.
- sddc-cgw-horizon-user-workload is a Horizon desktop network.
- In the Customize Template window, do the following:
- IPMode for NIC 1 (eth0): Select STATICV4.
- IPMode for NIC 2 (eth1): Select STATICV4.
- Configure the NIC 1 details.
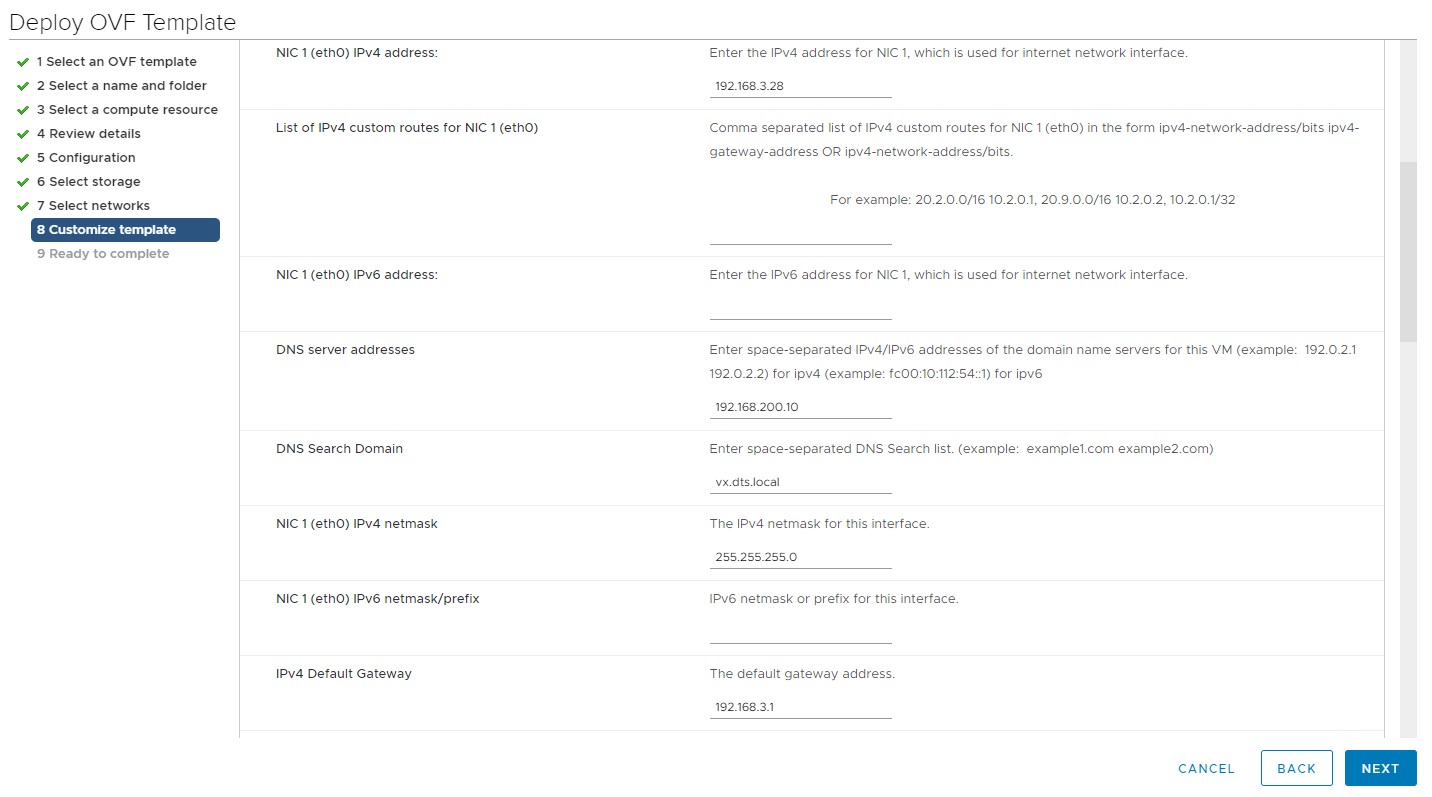
- NIC 1 (eth0) IPv4 address: Enter the IPv4 address for NIC 1 to be used as an Internet network interface.
- DNS server address: Enter the IP4 addresses of the domain name server.
- DNS Search Domain: Enter the DNS search list.
- NIC 1 (eth0) IPv4 netmask: Enter the IP4 netmask for the Internet network interface.
- IPv4 Default Gateway: Enter the default gateway address.
- Configure the NIC 2 details.
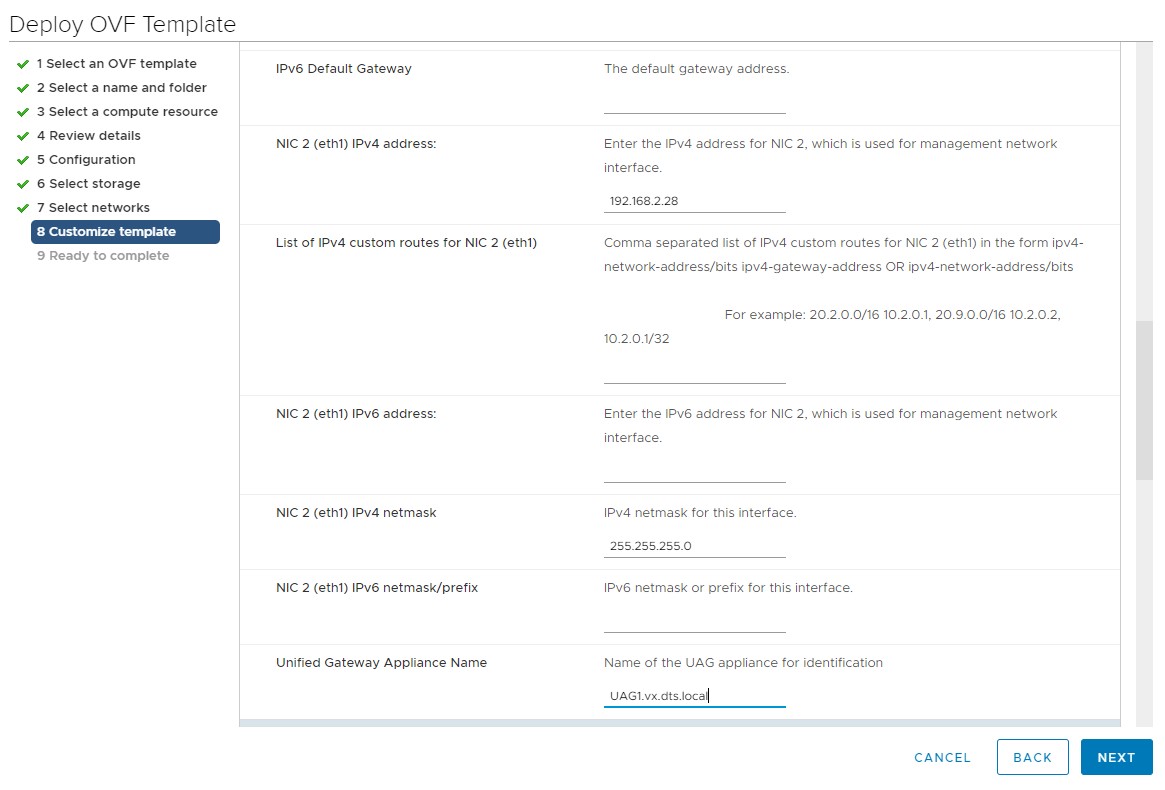
- NIC 2 (eth1) IPv4 address: Enter the IPv4 address for NIC 2 to be used as a management network interface.
- List of IPv4 custom routes for NIC 2 (eth1): Enter the list of IPv4 custom routes.
- NIC 2 (eth1) IPv4 netmask: Enter the IP4 netmask for the management network interface.
- Unified Access Gateway Appliance Name: Enter the name of the Unified Access Gateway.
- Select Join the VMware Customer Experience Improvement Program to join CEIP check box and enter the password.
This is required for root and REST API access for the Unified Access Gateway appliance.
- Select the Enable SSH check box and click Next.
Results
The Unified Access Gateway appliance is deployed and starts automatically.
