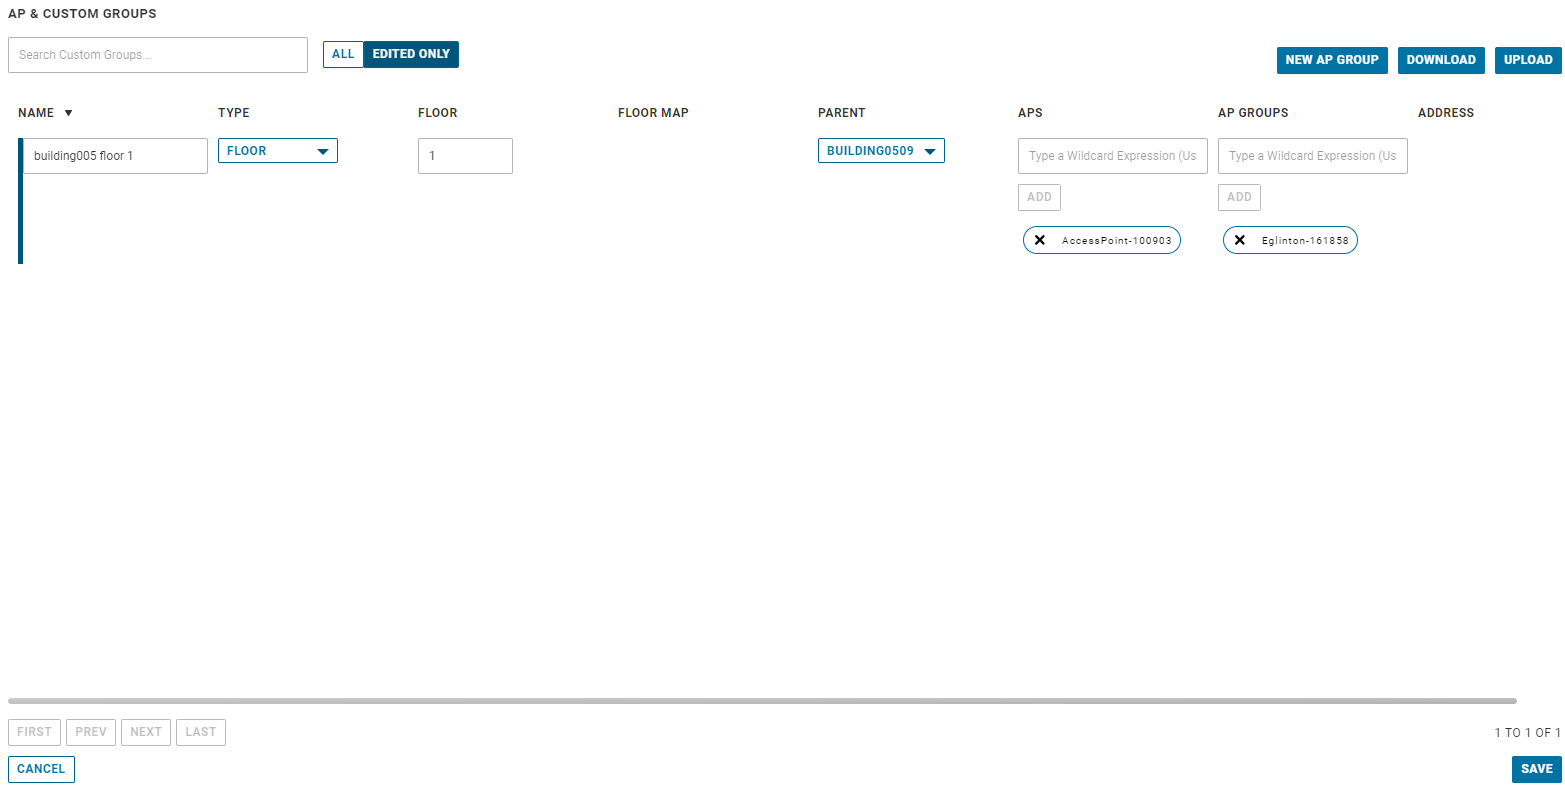
To add individual custom groups, perform the following steps.
Procedure
- Log into the VMware Edge Network Intelligence portal.
- Go to My Account > Admin Settings > AP & Custom Groups.
The AP & CUSTOM GROUPS page appears.

In the table of custom groups, there is a column for Floor and Floor Map. The Floor column references the floor number – 1st floor, 2nd floor, and so on. The Floor Map column specifies if there is an existing floor map applied.
You can sort the Floor Map column by clicking on the column header to easily locate any groups that already have floor maps applied.
- Click EDIT TABLE to create a new custom group, or to modify an existing custom group.
A table of all existing custom groups appears in the Edit mode.
- To add a new custom group, click New AP GROUP.

- Enter the following details for the new custom group.
- NAME - Enter a unique name to identify the custom group.
- TYPE - Select one of the following options: BUILDING, FLOOR, or CUSTOM, from the drop-down list.
- If the custom group type is FLOOR, enter the floor number and associate it with a building selected from the PARENT drop-down list.
- If the custom group type is BUILDING, select an existing site as parent of the building, from the PARENT drop-down list.
- If the custom group type is CUSTOM, select a building, floor, or a site as parent of the custom group.
- To summarize the relationship:
- Building belongs to a Site
- Floor belongs to a Building
- Custom can belong to a Site, Building or a Floor
- Define the custom group by adding either a set of APs or AP groups, or both.
- APS - Enter a set of APs to define the custom group. Full AP names or Wildcard expressions (using *) are allowed.
- AP GROUPS - Enter a set of AP groups to define the custom group. Full AP group names or Wildcard expressions (using *) are allowed.
- ADDRESS – Allows to set the addressif the custom group type is BUILDING. You can use the default address (which is the address of the parent site) or enter a different address for the building by using the UPDATE ADDRESS button. You can either type in the address or use the visual map to pinpoint the location of the building.
- Once all the required details are entered, click SAVE.
Note:
- Option to Save is hidden until all the required fields are completed.
- If a required field is not filled or filled in incorrectly, it will appear with a red border indicating error and the option to Save the custom group will be hidden.
Results
The new custom group is added and appears in the table of custom groups.