This section describes how to activate and configure HCX Connector for private cloud (on-premises) sites.

Prerequisites

Procedure

  1. Browse to the appliance management interface and log in using the admin user credentials.

    Browse to https://hcx-ip-or-fqdn:9443.

    The activation screen appears.
  2. If you are activating HCX for VMware Cloud on AWS GovCloud, accept the monitoring notice by clicking I Agree.
    The monitoring notice appears each time you log in to a VMware secure environment.

    Image of the U.S. Government (USG) Consent to Monitoring Notice. The lower right corner of the image has the selections Exit and I Agree.

  3. Enter the HCX Activation Server URL and the HCX License Key.
    The HCX Activation Server URL is automatically set to connect with VMware, but you must enter the HCX License Key.
    Note: If you are activating HCX for VMware Cloud on AWS GovCloud enter the Secure Cloud Activation Proxy URL and HCX License Key. The Secure Cloud Activation Proxy URL is the HCX Manager URL in the GovCloud SDDC: https//hcx.sddc-*.vmwarevmcgov.com.
  4. Click Activate.
    The system location screen appears.
  5. Enter the location where you are deploying the system.
    Select the nearest major city to where the system is geographically located. HCX sites are represented visually in the Dashboard.
  6. Click Continue.
    A screen appears prompting you for a system name.
  7. Enter the system name, and click Continue.
    A screen appears indicating that you have successfully activated HCX with a prompt to continue setting up HCX Manager.
  8. Click Yes, Continue.
    A screen appears prompting you to enter the information for connecting HCX Manager with the vCenter Server.
  9. Enter the vCenter Server information:
    • vCenter Server IP address or FQDN: https://vc_ip/fqdn
    • Username
    • Password
  10. (Optional) If your on-premises site uses NSX, at the bottom of the screen check the box Connect your NSX Manager.
    A panel appears for entering the NSX Manager information.
  11. Enter the NSX Manager information:
    • NSX Manager IP address or FQDN: https://nsx_ip/fqdn
    • Username
    • Password
  12. Click Continue.
    A screen appears prompting you to configure the SSO/PSC information.
  13. Enter the Identify Sources information: https://sso_ip/fqdn.
    The system verifies the configuration and displays a system configuration summary screen. The summary information lists the Location, System Name, vCenter Server, NSX Manager, and SSO information. The summary includes instructions to restart the Application Service and Web Service for the changes to take effect, and to configure vSphere roles after restarting the services.

    ""

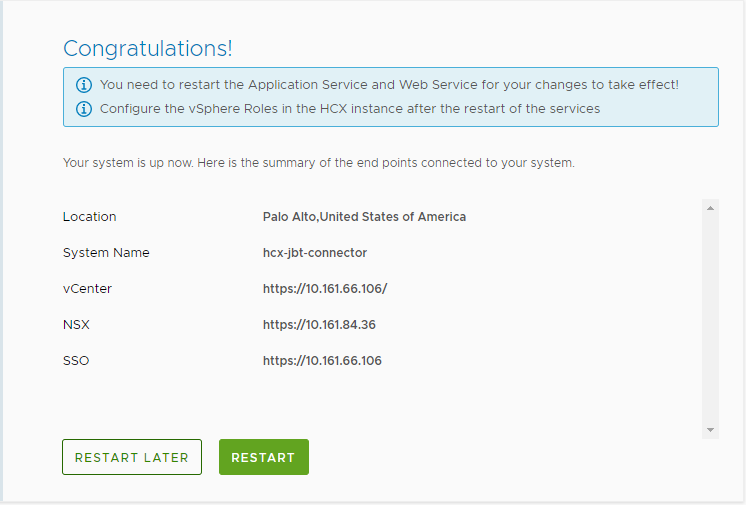
  14. To reload the system, click Restart at the bottom of the screen.
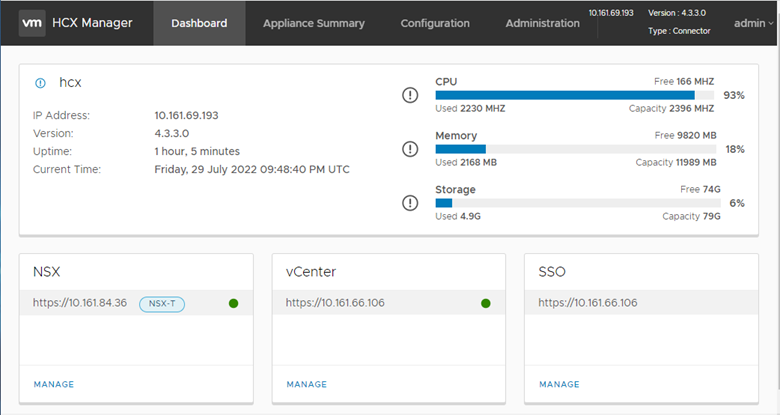
    Reinitializing the system can take several minutes. During this process, the appliance management interface is not available.
    After the system reloads, it displays the appliance management dashboard. For more information about the dashboard, see Understanding the Appliance Management Dashboard.

    Management dashboard tabs: Dashboard, Appliance Summary, Configuration, and Administration.

  15. Configure roles:
    1. In the Appliance Management Dashboard, navigate to Configuration > HCX Role Mapping.
    2. Assign roles to the vCenter User Groups that are allowed to perform HCX operations.
      By default, HCX Manager maps the Administrator role to the local vSphere administrator group. For HCX Cloud deployments, the system displays the optional Tenant role, which is intended for use by Service Providers.
    3. Click Save.

Results

The system-level activation and configuration is complete.

What to do next

Deploy any additional sites, and then go to "Configuring and Managing the HCX Interconnect."