


After you find good snapshots of VMs, badge them, power off and stage them, you can recover those VMs to the original protected site.
When you recover VMs in a protected site where the VMs originated from, you replace the original VMs with the snapshots of the VMs you staged for recovery. The system preserves all the data that is common between the protected site and staged VMs and transfers only differences during recovery.
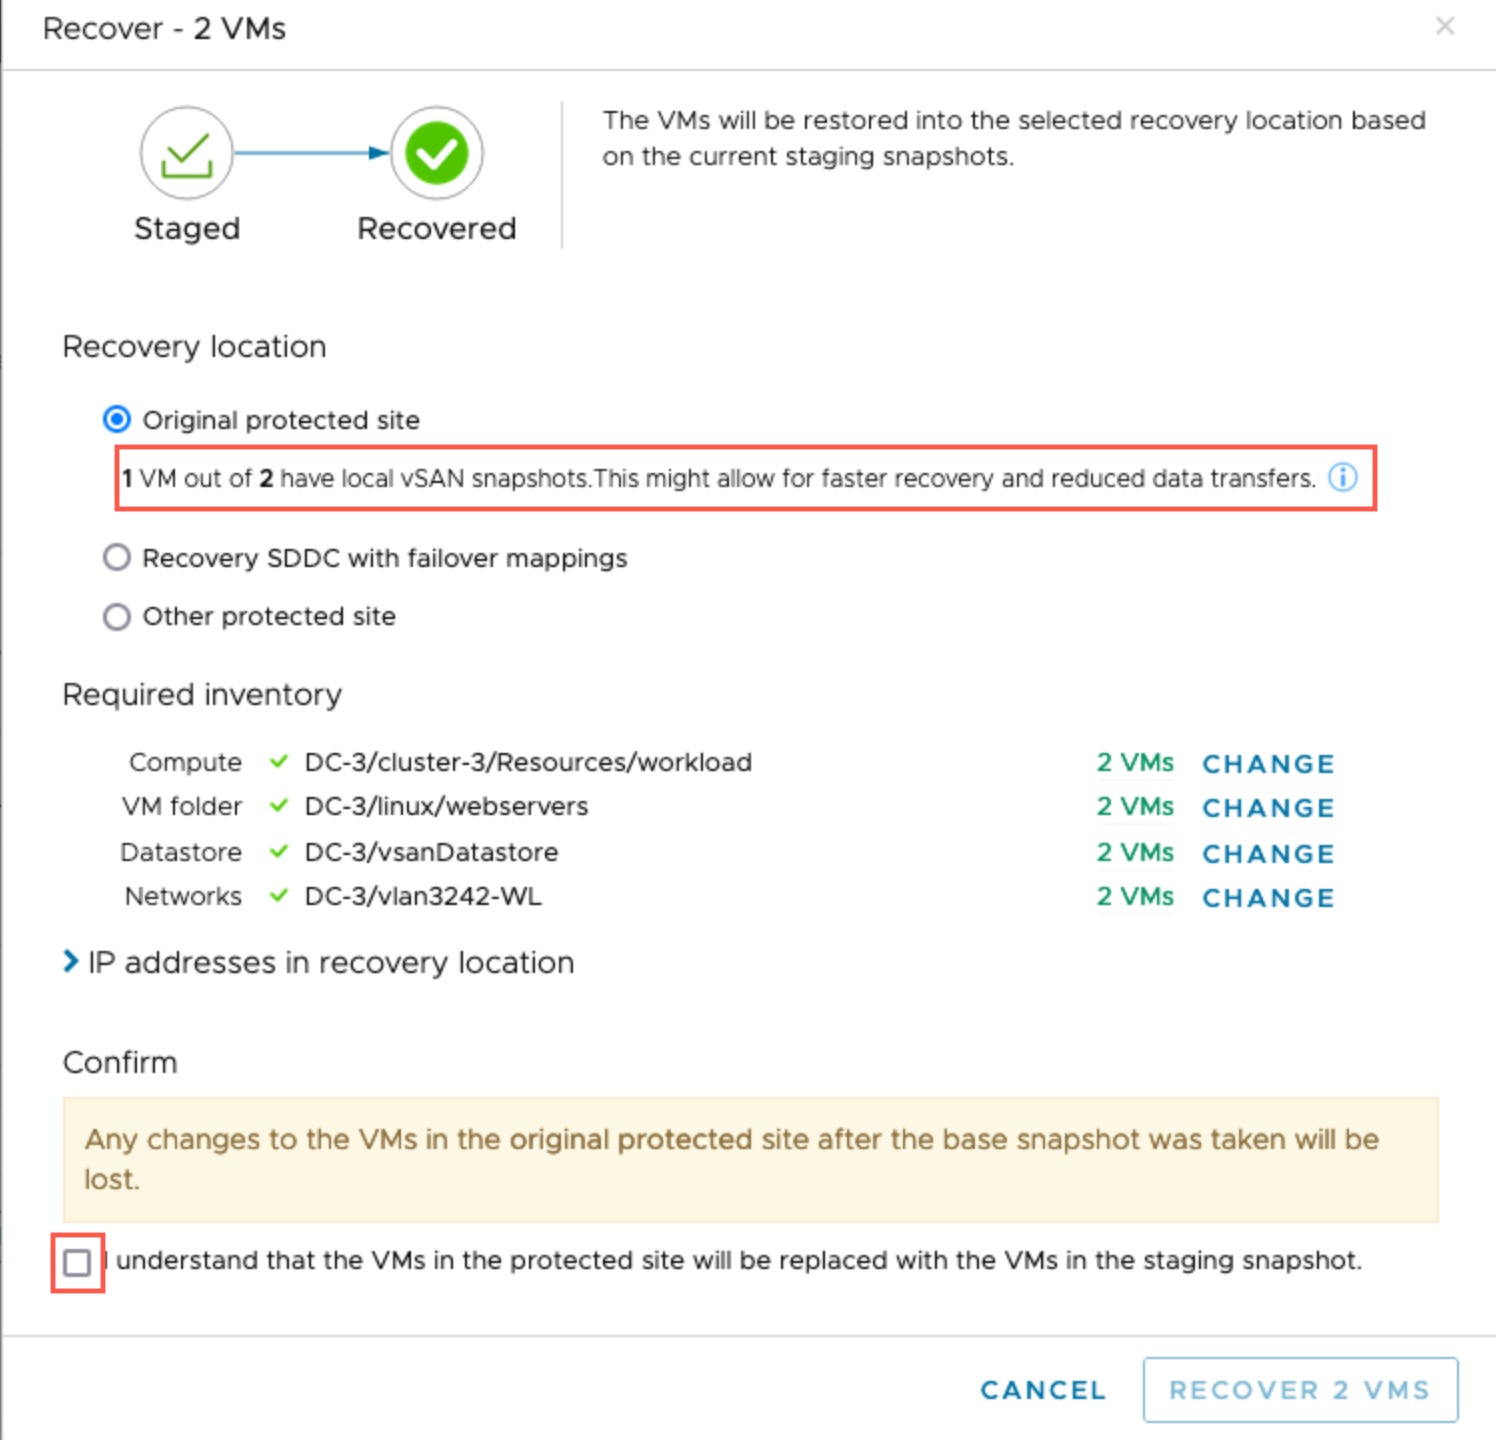
When you recover VMs to a protected site, the system checks all required resource inventory mappings, and shows missing mappings in red text. If a mapping is missing, you can click the Change link to override the recovery resource.
You can also change VM IP addresses before you recover them; for example, if the network settings on the original protected site changed or no longer exist, you can reset the VM IP address, subnet mask, and any DNS servers currently being used.
- A snapshot that originated from the on-premises protected site. (Protected SDDCs do not support this functionality.)
- A snapshot that was created on the recovery SDDC after cleansing the VM of ransomware and is staged for recovery.
Fast Restore with vSAN Snapshots
If your site vCenter is using VMware vSAN with Snapshot Manager protection groups, you can use the VMware vSAN snapshots when recovering VMs after ransomware recovery. Leveraging local vSAN snapshots helps avoid large, time consuming data transfers when failing back clean VMs to an original protected site.
If you protected site vCenter is compatible, then when you restore VMs, those VMs with vSAN snapshots will recover much more quickly.
- The VM must reside on a vSAN Express Storage Architecture (ESA) datastores with Snapshot Manager deployed and with replication schedules configured.
- vSphere on the protected site must be on version 8.0u3 or higher.
- The VMs are part of a VMware Live Cyber Recovery protection group taking high-frequency snapshots and included in a ransomware recovery plan.
- The vSAN protection groups should have snapshot schedules configured with a retention policy that aligns with the schedule configured in VMware Live Cyber Recovery.
- Fast restore is only available when using the ransomware recovery workflow and recovering to an on-premises protected site. Fast restore is not supported for protected SDDCs.
Procedure
- Confirm that you understand that the VM on the protected site will be replaced (overwritten) by VMs from the staging snapshots.
The dialog box will indicate if the original protected site has vSAN snapshots, in which case recovery for those VMs will be much faster than usual. For more information, see Fast Restore Using VMware vSAN Local Snapshots.
 You can click the
 to view more information about which VMs will be recovered using fast restore with vSAN snapshots.
What to do next
You can start validating other VMs, or you can end ransomware recovery for the plan.
