You can upgrade the NSX Application Platform to a later build version using the NSX Manager UI.
The upgrade process retains the form factor being used for the current platform deployment. If you deployed the platform using an Evaluation form factor and want to continue using an Evaluation form factor, but use a later platform version, you must delete your current NSX Application Platform deployment first. You then redeploy the platform using a later platform version.
Upgrading to a newer version of the NSX Application Platform involves multiple steps. You must first configure and deploy the Upgrade Coordinator before you can proceed with upgrading the platform and each of the currently activated NSX-T Data Center features. The Upgrade Coordinator orchestrates all of the upgrade steps, and the system provides status on the UI as it upgrades each component.
Beginning with NSX-T Data Center 3.2.3.1 release, the VMware-hosted NSX Application Platform registry and repository locations no longer support ChartMuseum-compatible private container registry, such as Harbor.
If you are currently using an NSX-T Data Center version prior to 3.2.3.1, consider upgrading to NSX-T Data Center version 3.2.3.1 before attempting to upgrade your current NSX Application Platform deployment.
If you are unable to access the public VMware-hosted NSX Application Platform registry and repository locations, work with your infrastructure administrator to upload the NSX Application Platform Helm chart and Docker images to your company's private Helm repository and Docker registry locations. Both privately-hosted locations must be accessible from the Kubernetes cluster and the NSX Manager appliance you are using for the NSX Application Platform deployment. If you need to continue using the ChartMuseum provided by Harbor, the Harbor version must be earlier than version 2.8.1. See Upload the NSX Application Platform Docker Images and Helm Charts to a Private Container Registry for details.
Prerequisites
Review the NSX-T Data Center Release Notes for any known upgrade issue and workaround documented for the NSX Application Platform.
Ensure that there are no open alarms detected on the NSX Application Platform.
Verify that you have met all of the prerequisites and system requirements listed in NSX Application Platform Deployment Prerequisites.
You must have Enterprise Admin privileges.
Procedure
- Deploy the Upgrade Coordinator.
- In the NSX Application Platform card, click Upgrade.
This step can take some time as the system obtains the information from the VMware-hosted Helm repository. When the information is obtained successfully, the Prepare for Upgrade tab is displayed with the text boxes prepopulated with the information obtained for Helm Repository, Docker Registry, and Platform Target Version, as illustrated in the following image. Note that the values shown in the image are the default values for the VMware-hosted Helm repository and Docker registry locations, and the latest available NSX Application Platform version.
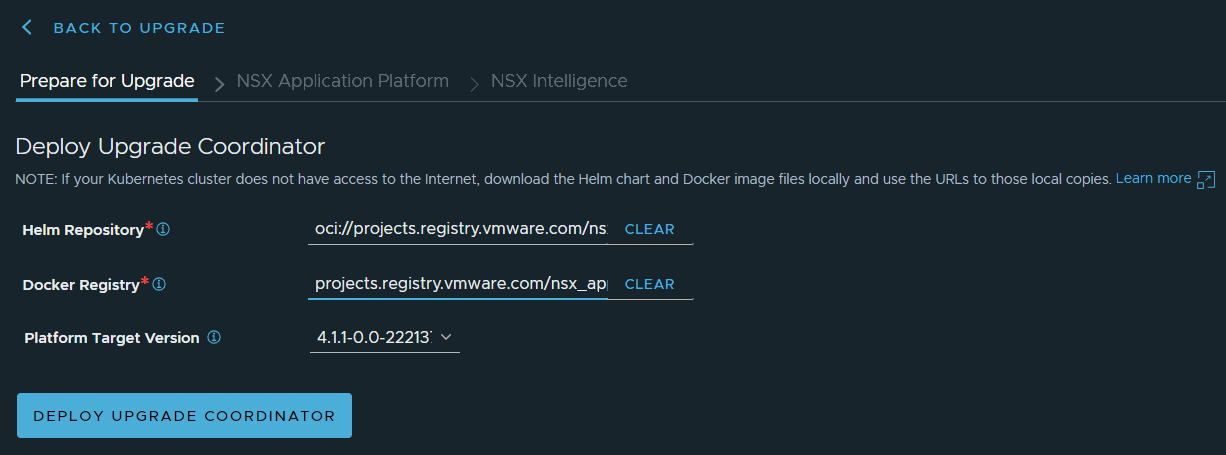
- (Optional) If you are using a private Helm repository and Docker registry location, provide the private locations of the required Helm charts and Docker images.
Use the following information for the Helm Repository text box.
- For OCI-compatible Helm private repository, use the format
oci://<your-private-registry-server-fqdn>/<your-private-registry-name>/helm-charts. -
For ChartMuseum-compatible Helm private repository, use the format
https://<your-private-registry-server-fqdn>/chartrepo/<your-private-registry-name>.
For the Docker Registry text box, use the format
<your-private-registry-server-fqdn>/<your-private-registry-name>/clustering.Click Save URL.
- For OCI-compatible Helm private repository, use the format
- In the Platform Target Version text box, verify that the build version that you want to use for the upgrade is selected.
- Click Deploy Upgrade Coordinator.
This step can also take some time as the system deploys the Upgrade Coordinator to your TKG Cluster on Supervisor pod or upstream Kubernetes pod.
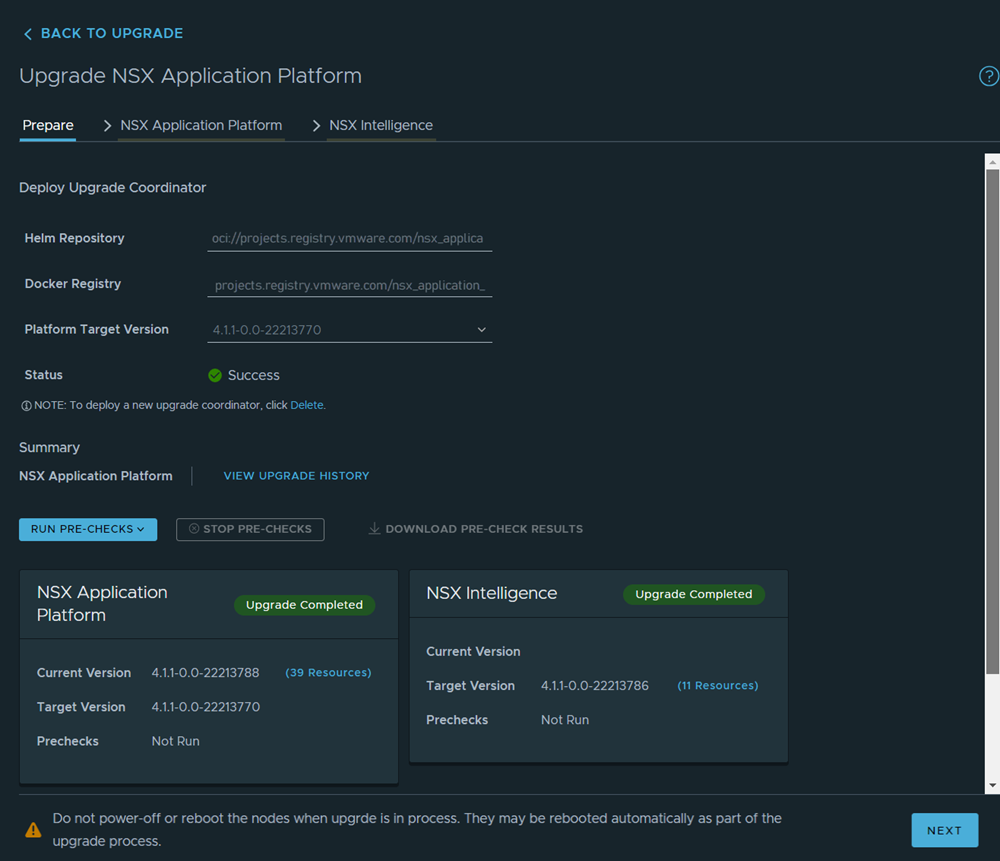
After the Upgrade Coordinator deployment completes, the Prepare tab is displayed. The Status section displays the Success status.
- In the NSX Application Platform card, click Upgrade.
- Review the Summary section located in the lower half of the Prepare tab.
The NSX Application Platform card displays the status information for the platform. The Upgrade Completed indicates that the Upgrade Coordinator has been upgraded with the target NSX Application Platform version successfully. The card shows the current version and the target version to which the platform will be upgraded. The card also shows the precheck status.
If other NSX-T Data Center features that are hosted on the NSX Application Platform are activated, those features are also checked and scheduled for the upgrade. A separate feature card for each activated feature is also displayed. For example, the NSX Intelligence feature card appears in the following image because it is currently an activated NSX-T Data Centerfeature on the NSX Application Platform. The system upgrades the activated features after the platform upgrade finishes successfully.