


Destination NAT changes the destination address in IP header of a packet. It can also change the destination port in the TCP/UDP headers. The typical usage of this is to redirect incoming packets with a destination of a public address/port to a private IP address/port inside your network.
You can create a rule to either enable or disable destination NAT.
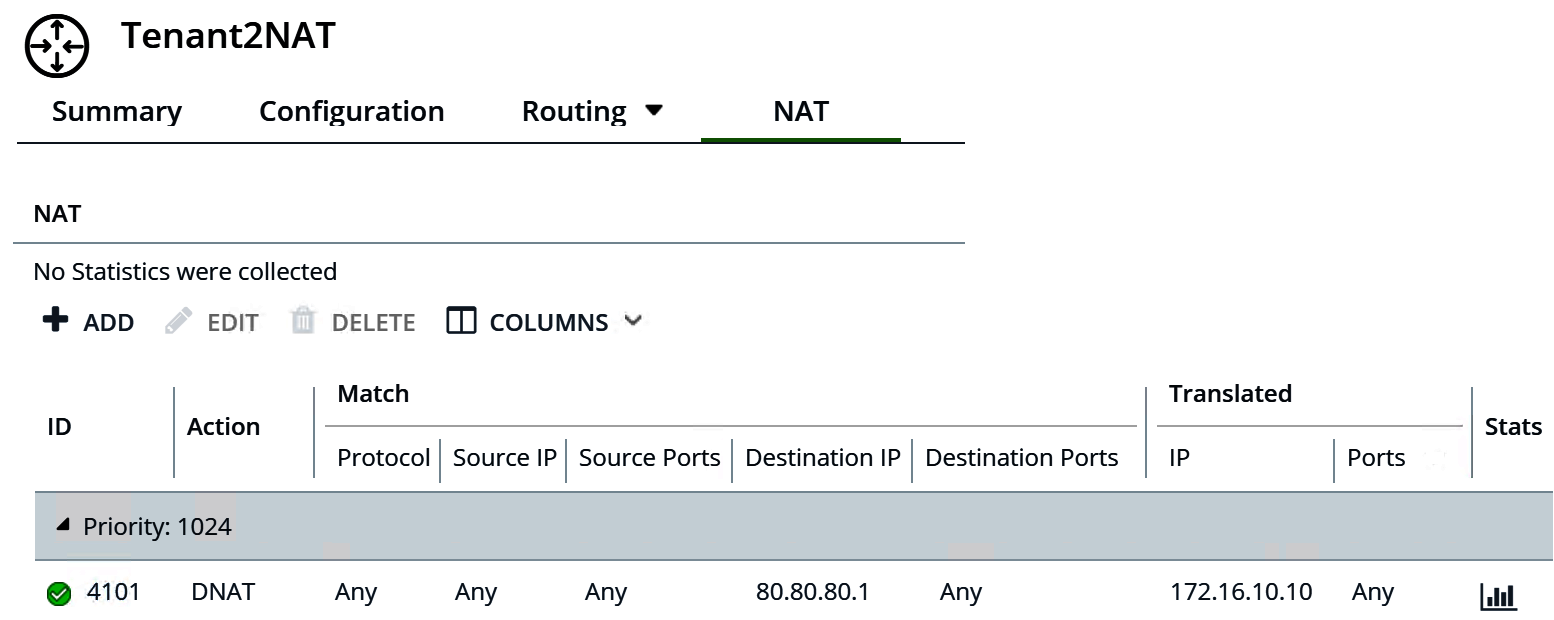
In this example, as packets are received from the app VM, the Tenant2NAT tier-1 router changes the destination IP address of the packets from 172.16.10.10 to 80.80.80.1. Having a public destination IP address enables a destination inside a private network to be contacted from outside of the private network.
Prerequisites
- The tier-0 router must have an uplink connected to a VLAN-based logical switch. See Connect a Tier-0 Logical Router to a VLAN Logical Switch for the NSX Edge Uplink in Manager Mode.
- The tier-0 router must have routing (static or BGP) and route redistribution configured on its uplink to the physical architecture. See Configure a Static Route in Manager Mode, Configure BGP on a Tier-0 Logical Router in Manager Mode, and Enable Route Redistribution on the Tier-0 Logical Router in Manager Mode.
- The tier-1 routers must each have an uplink to a tier-0 router configured. Tenant2NAT must be backed by an NSX Edge cluster. See Attach Tier-1 Router to a Tier-0 Router in Manager Mode.
- The tier-1 routers must have downlink ports and route advertisement configured. See Add a Downlink Port on a Tier-1 Logical Router in Manager Mode and Configure Route Advertisement on a Tier-1 Logical Router in Manager Mode.
- The VMs must be attached to the correct logical switches.
-
Verify that Manager mode is selected in the NSX Manager user interface. See NSX Manager. If you do not see the Policy and Manager mode buttons, see Configure the User Interface Settings.
Procedure
Results
The new rule is listed under NAT. For example:
What to do next
Configure the tier-1 router to advertise NAT routes.
To advertise the NAT routes upstream from the tier-0 router to the physical architecture, configure the tier-0 router to advertise tier-1 NAT routes.
