


The following procedure demonstrates how to use the Polling and Thresholds Console to create a VLAN impact propagation group by disabling impact propagation and adding matching criteria to the default VLAN Impact Propagation Group named VLANs:
-
In a Polling and Thresholds Console that is attached to an IP Availability Manager or IP Performance Manager, click the Thresholds tab to display the thresholds group tree.
-
In the thresholds group tree, click the plus signs (+) to expand the VLAN Impact Propagation Groups as shown in the following display, and then click Problem Impact propagation policy over VLANs to display its setting configuration window.
Figure 1. Setting “Problem Impact propagation policy over VLANs” 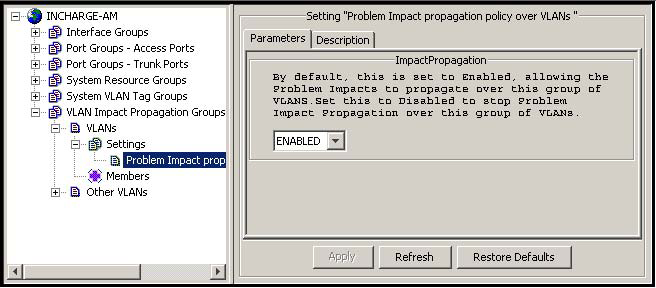
-
In the setting configuration window, click the drop-down menu and select DISABLED from the menu; ENABLED is the default.
-
Click Apply to save your changes.
-
In the thresholds group tree, click VLANs to display the configuration window.
-
In the configuration window, click Matching Criteria to display the Matching Criteria tab.
-
In the Disabled Criteria list of the Matching Criteria tab, select VLANKey and then click Enable to move the VLANKey attribute to the top of the Matching Criteria tab.
Figure 2. VLAN Configuration 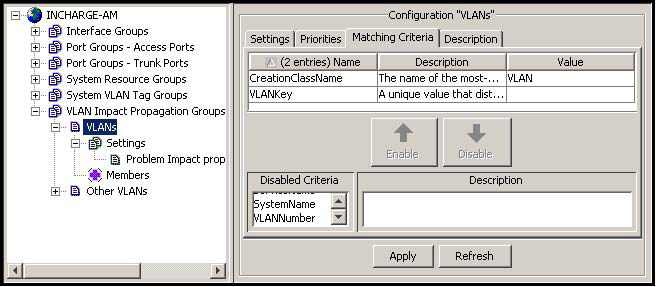
-
Double-click the Value field of the VLANKey attribute and type the matching criteria that will allow only the target VLANs to become members of this group. The procedure for specifying matching criteria is given in “Editing matching criteria” on page 108.
Note:Specify matching criteria broad enough so that all VLANs supported by a particular group of switches and routers become members of this group. Otherwise, the IP Manager will continue to propagate impacts over the VLAN or VLANs that do not become a member of this group.
For example, if the VLANs supported by a particular group of switches have VLANKey values containing the string “1,” “2,” or “3”(as in the example given in VLAN Configuration ), set the VLANKey value to *1|2|3 to ensure that all of those VLANs become members of the VLANs group.
The isImpactPropOverVLANEnabled attribute value of any VLAN that becomes a member of the VLANs group will automatically be set to the value that you selected in step 3:
-
ImpactPropagation = DISABLED will set isImpactPropOverVLANEnabled to FALSE.
-
ImpactPropagation = ENABLED will set isImpactPropOverVLANEnabled to TRUE.
-
-
-
Optional: In the Matching Criteria tab, specify additional matching criteria for the VLANs group.
-
Click Apply to save your changes.
-
Click Reconfigure to implement your changes.
Create a VLAN propagation impact group for each group of VLANs for which you want to disable impact propagation.
To create additional VLAN impact propagation groups, create new groups from the VLANs group configured in the preceding procedure and repeat that procedure for the newly created groups. To create VLAN impact propagation groups for VLANs that have a CreationClassName attribute value other than “VLAN,” start with the default VLAN impact propagation group named Other VLANs.
