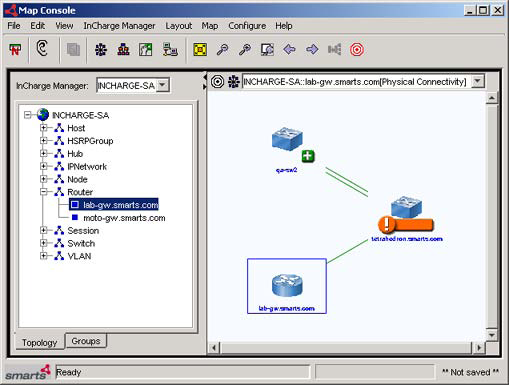
The right panel displays the map. After you select an instance from the expanded map tree, the map displays and the selected device is surrounded by a blue box. Alternatively, if you used the Show Map option for a selected notification, this panel shows a map containing your selection.
“Map menus and shortcut menus� on page 30 summarizes menu options for the Map Console. “Map Console toolbar buttons� on page 34 summarizes toolbar buttons specific to the Map Console.
The left arrowhead on the panel divider hides the map tree and enlarges the right panel for a larger display area. The right arrowhead on the panel divider unhides or enlarges the map tree.
Indicators, at the top of the right panel, show if coloring by root cause is enabled and the map’s layout type. “Adjusting the appearance of a map” on page 94 includes additional information.
A history field list box lists the current map (instance and map type) and other recently viewed maps.
The map legend provides a list of map elements and color indicators. To view the legend, select Map > Map Legend.
You can customize individual maps with a map filter. The filter enables you to add and remove classes from a map.
You can customize the font and point size of the map icon text. The default map icon font is Helvetica. The default map icon font size is 12 point. The font and font size can be modified by changing the com.smarts.mapNodeText.font and the con.smarts.mapNodeText.fontsize properties. “Adjusting Java properties” on page 151 provides detailed information.
Figure 2 on page 29 displays an example of a Physical Connectivity map.