


Global credentials appear in bold. Network credentials are plain text.
Auto Discovery uses your device class preferences to determine how to discover devices into your Network. Bulk Import utilities can also be used to trigger Auto Discovery or populate the device database.
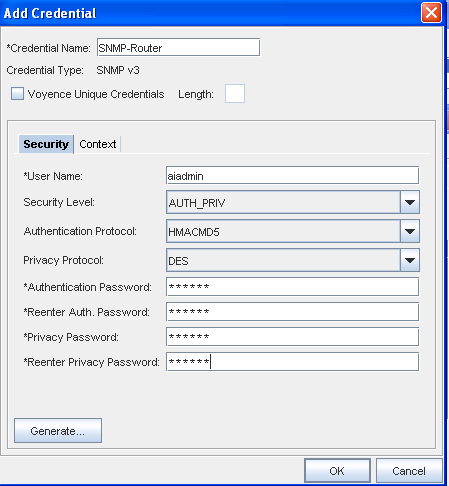
Network Configuration Manager supports the use of standard R/O and RW Community strings, or the use of SNMPv3 credentials. SNMP strings are typically used for initial device discovery, and for pulling hardware information from the device MIB.
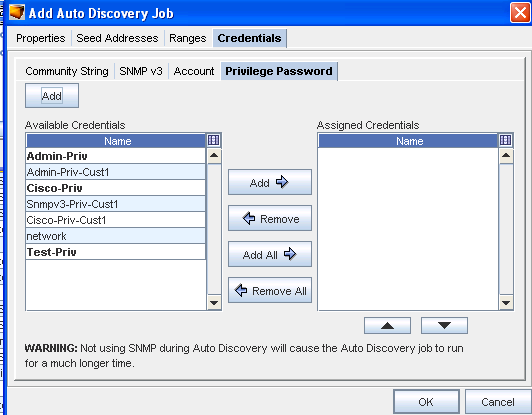
The Credentials tab contains four separate tabs.
-
Community String
-
SNMP v3
-
Account
-
Privilege Passwords

To work with the Community String window (in the Credentials tab),
-
From the Available Credentials listing, select a Credential, then click the Add button to move that credential into the Assigned Credentials list. You can also use the Add All arrow if needed.
 If you have added more than one credential into the Assigned column, you can use the up and down arrows to change the order of the list.
 -
Click Ok to preserve the credentials within the list, and the order of the list.
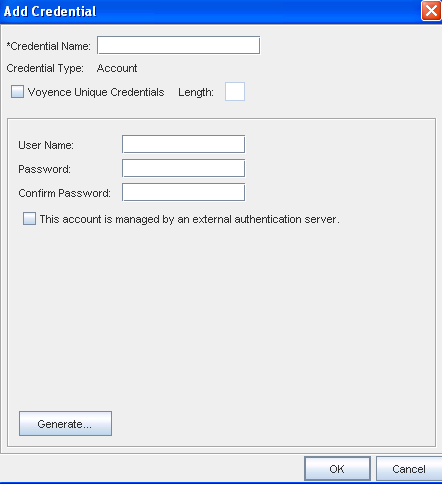
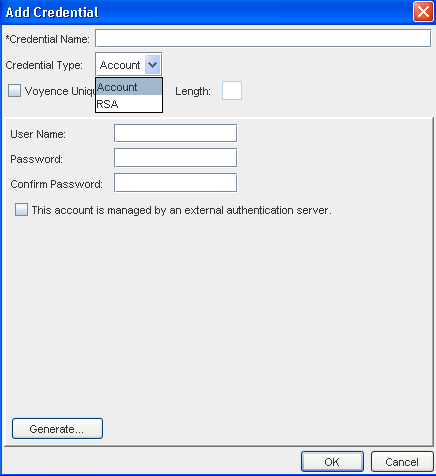
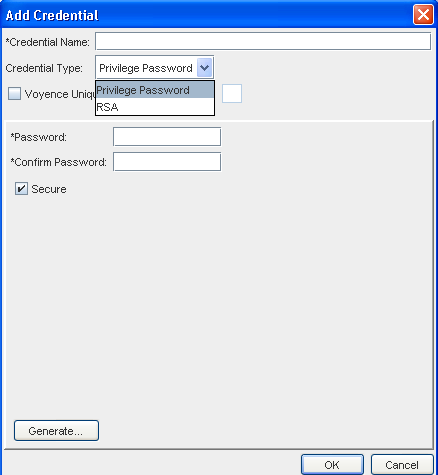
To Add a Credential,
-
To add a new credential, click Add.
-
The Add Credential window displays.
-
Enter a Credential Name.
-
If this is a Voyence Unique Credential, select the check box , and then enter the exact length of the unique credential.
Note:-
Community Strings are authorized credentials used by SNMP to communicate with devices.
-
Multiple Read-Only (RO) or Read-Write (RW) Community Strings can be added to support network environments requiring unique Community Strings for different devices or device types. The sequence of each type of Community String can be adjusted using the up and down arrows.
-
During Auto Discovery, when SNMP is enabled, each RO and RW Community String is tried until matches are found. The following fields are available:
-
-
Enter the information needed for that window, and click Ok when you are finished.
Field
Description
Community String
Text field for entering community strings
Read-Write
Read-Writer community string list, which when discovered, can be updated with configs
Read-Only
Read-Only community strings list, which when discovered, cannot be written to or can a config be pulled from it
Generate button : Use the Generate button to have the system automatically generate Read Only and Read Write strings.
To work with the SNMP v3 window,
-
From the Available Credentials listing, select a Credential, then click the Add button to move that credential into the Assigned Credentials list. You can also use the Add All arrow if needed.
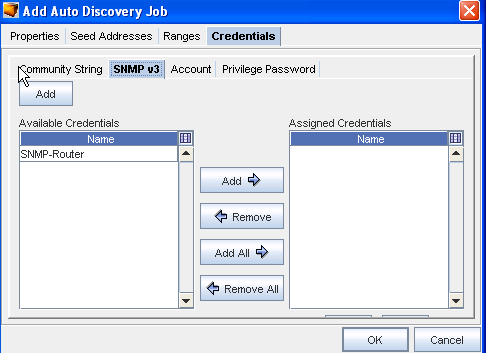 If you have added more than one credential into the Assigned column, you can use the up and down arrows to change the order of the list.
 -
To add a credential, click the Add button on the Add Auto Discovery Job windows (just above the Available Credentials pane).
-
The Add Credential window displays.
-
Enter the information needed for that window, and click Ok when you are finished.
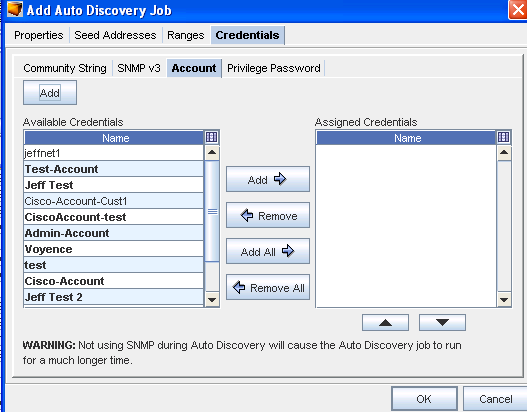
To work with the Account window,
-
From the Available Credentials listing, select a Credential, then click the Add button to move that credential into the Assigned Credentials list. You can also use the Add All arrow if needed.
-
Click Ok to preserve the credentials within the list, and the order of the list.
-
To add a new credential, click Add.
-
The Add Credential window displays.
-
Enter the information needed for that window, and click Ok when you are finished.
To work with the Privilege Password tab,
-
From the Available Credentials listing, select a Credential, then click the Add button to move that credential into the Assigned Credentials list. You can also use the Select All arrow if needed.
-
To Add a new Credential, click Add.
-
The Add Credential window displays.
-
Enter the information needed for that window, and click Ok when you are finished.
Edit the Auto Discovery settings
