


Accessing your new cluster
After you have provisioned a cluster in your cloud provider account using VMware Tanzu Mission Control, you can connect to the cluster and run commands against it using the Tanzu Mission Control CLI (tmc) and kubectl. Tanzu Mission Control provides a kubeconfig file to enable the connection.
The following provides the steps to access your newly provisioned cluster.
What to do first
Before you access your new cluster, ensure the following:
-
You can log in to the Tanzu Mission Control console. See Getting access and launching Tanzu Mission Control.
-
You have provisioned a cluster. See Provisioning a new EKS cluster.
-
You have installed the Kubernetes command-line interface (
kubectl). See kubectl in Kubernetes Documentation.
Before you attempt to connect to a newly provisioned cluster, make sure it is up and running. After the provisioning and creating process is complete, the status is updated to Ready and the type shows that it is a Provisioned cluster in your cloud provider account.
Access your cluster
Do the following to access your cluster:
-
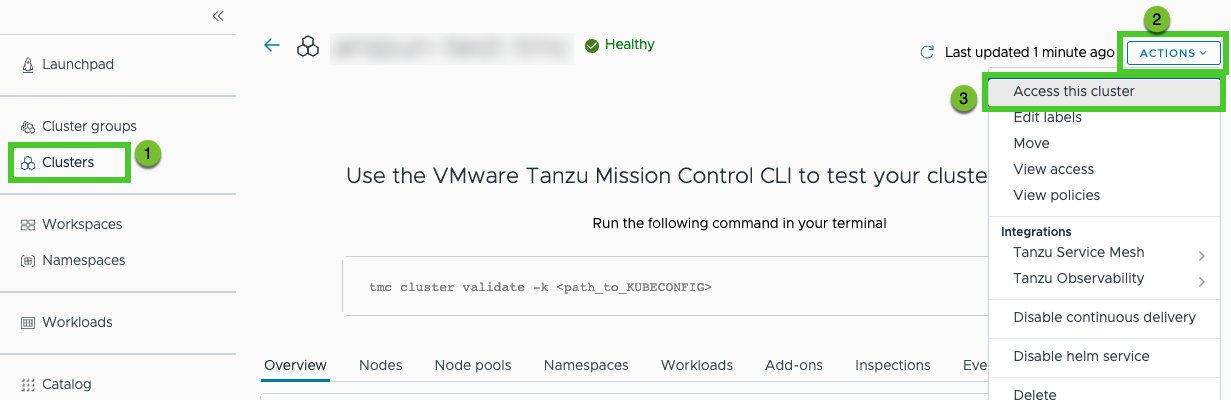
Click Clusters in the left navigation pane, and then search or sort to find the cluster you created.
-
Click the cluster name to go to the cluster detail page.
-
In the upper right corner, click Actions.
-
Choose Access this cluster from the dropdown menu.
-
In the resulting popup modal, click Download KUBECONFIG file.
-
Save the downloaded YAML file in a location that is accessible to
kubectl.For example, in
~/.kube/configor in a location specified in theKUBECONFIGenvironment variable. -
Download and install the Tanzu Mission Control CLI (tmc) for your platform.
- In the left navigation pane of the Tanzu Mission Control console, click Automation center.
- On the Automation Center page, click , and Download CLI.
- Choose the environment where you want to use the CLI.
-
After the download completes, move the
tmcexecutable to an accessible bin directory. For example,~/binor%UserProfile%\bin.Make sure that the bin directory is accessible on your PATH.
-
In a command window, run a
kubectlcommand to initialize the configuration.For example, the following command retrieves a list of namespaces in your cluster.
kubectl get namespacesOptionally, use the
--kubeconfigflag to specify the location and name of your downloadedkubeconfigYAML file. The command looks something like this:kubectl --kubeconfig=/path/to/kubeconfig-my-provisioned-cluster.yaml get namespacesNote
The path/file value that you pass to the
--kubeconfigflag must be an absolute path. - After you have connected
kubectlto your cluster, click OK to close the dialog.
