


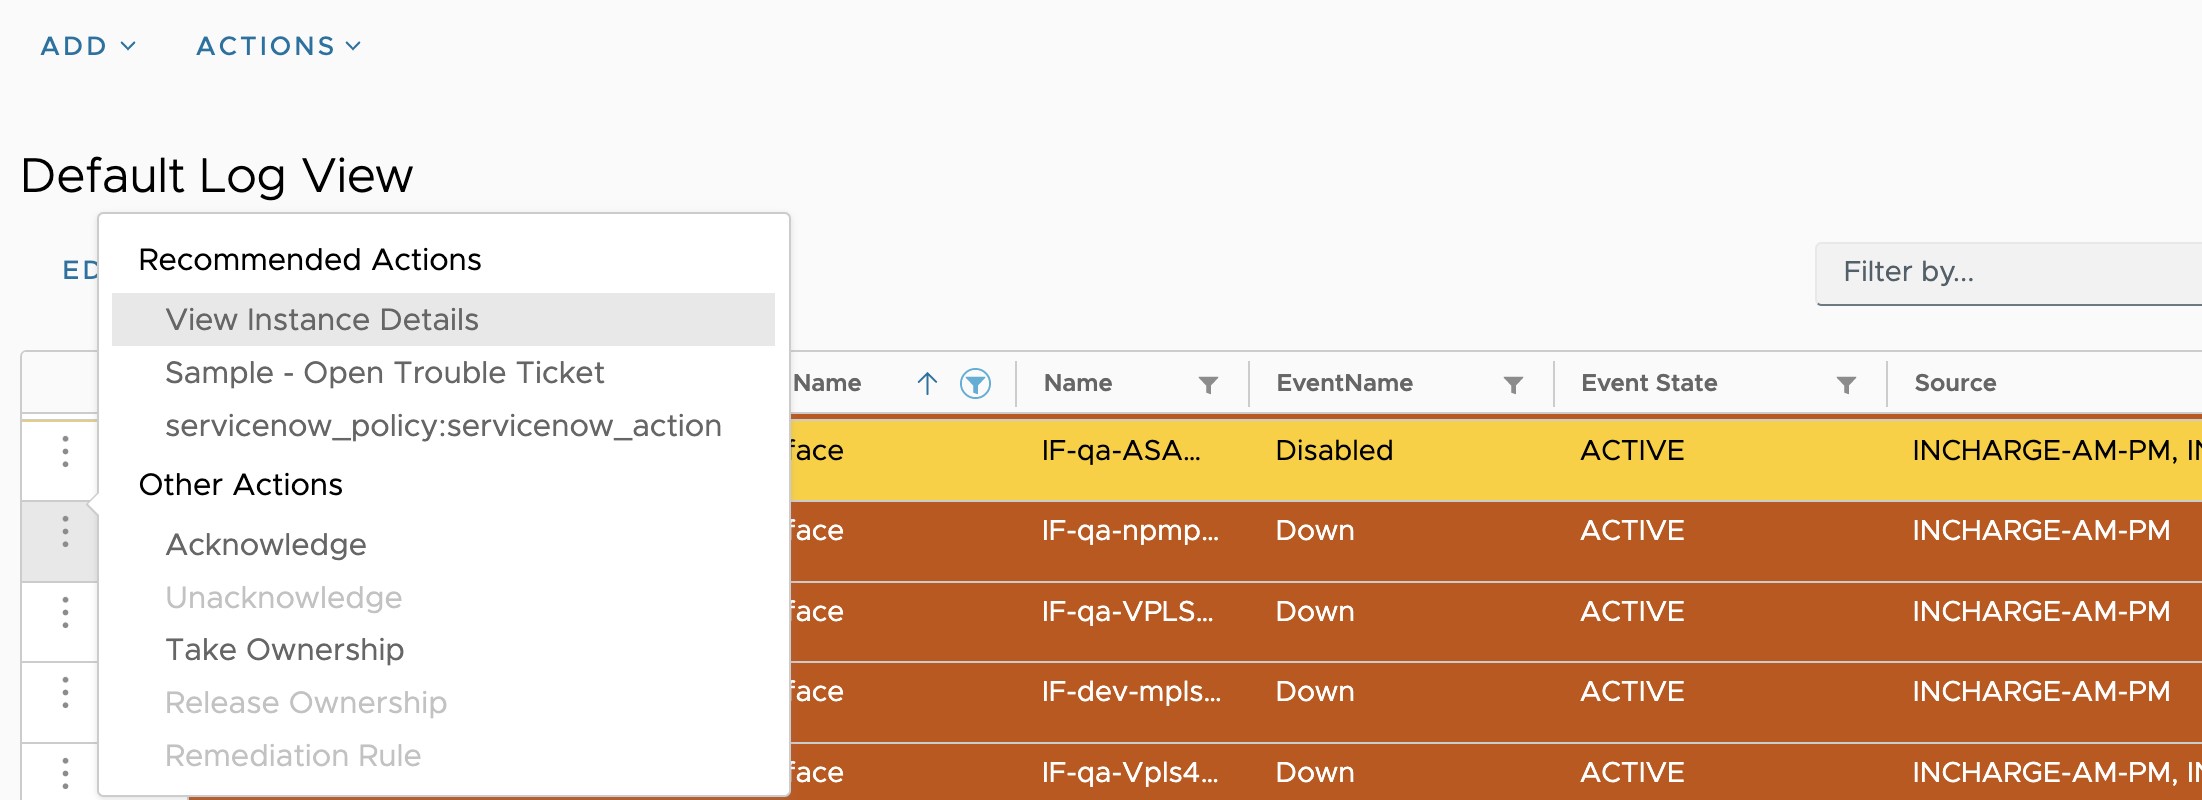
You can view and start Remediation Actions for a particular notification in the VMware Telco Cloud Service Assurance Notification Console.
To view the Remediation Actions in the Notification Console, you must click on the desired notification. You can view both default and user-defined actions in the Notification Console.
To configure Remediation Rules and Actions, see Add Remediation Rule and Add an Action topics in the VMware Telco Service Assurance Configuration Guide.
Prerequisites
Procedure
- Under Recommended Actions, click the desired remediation action.
The following screenshot is an example of default action with manual remediation.
 The Remediation Action dialog box appears.
 - To start the Remediation Action, click Start.
Once you start the remediation action, you can view the progress of action in the Tasks section. For more information, see Managing Tasks topic.To identify if a notification is a problem or an event:
- Click Edit.
- Under Available Columns, click Is Problem.
- Click Update View.
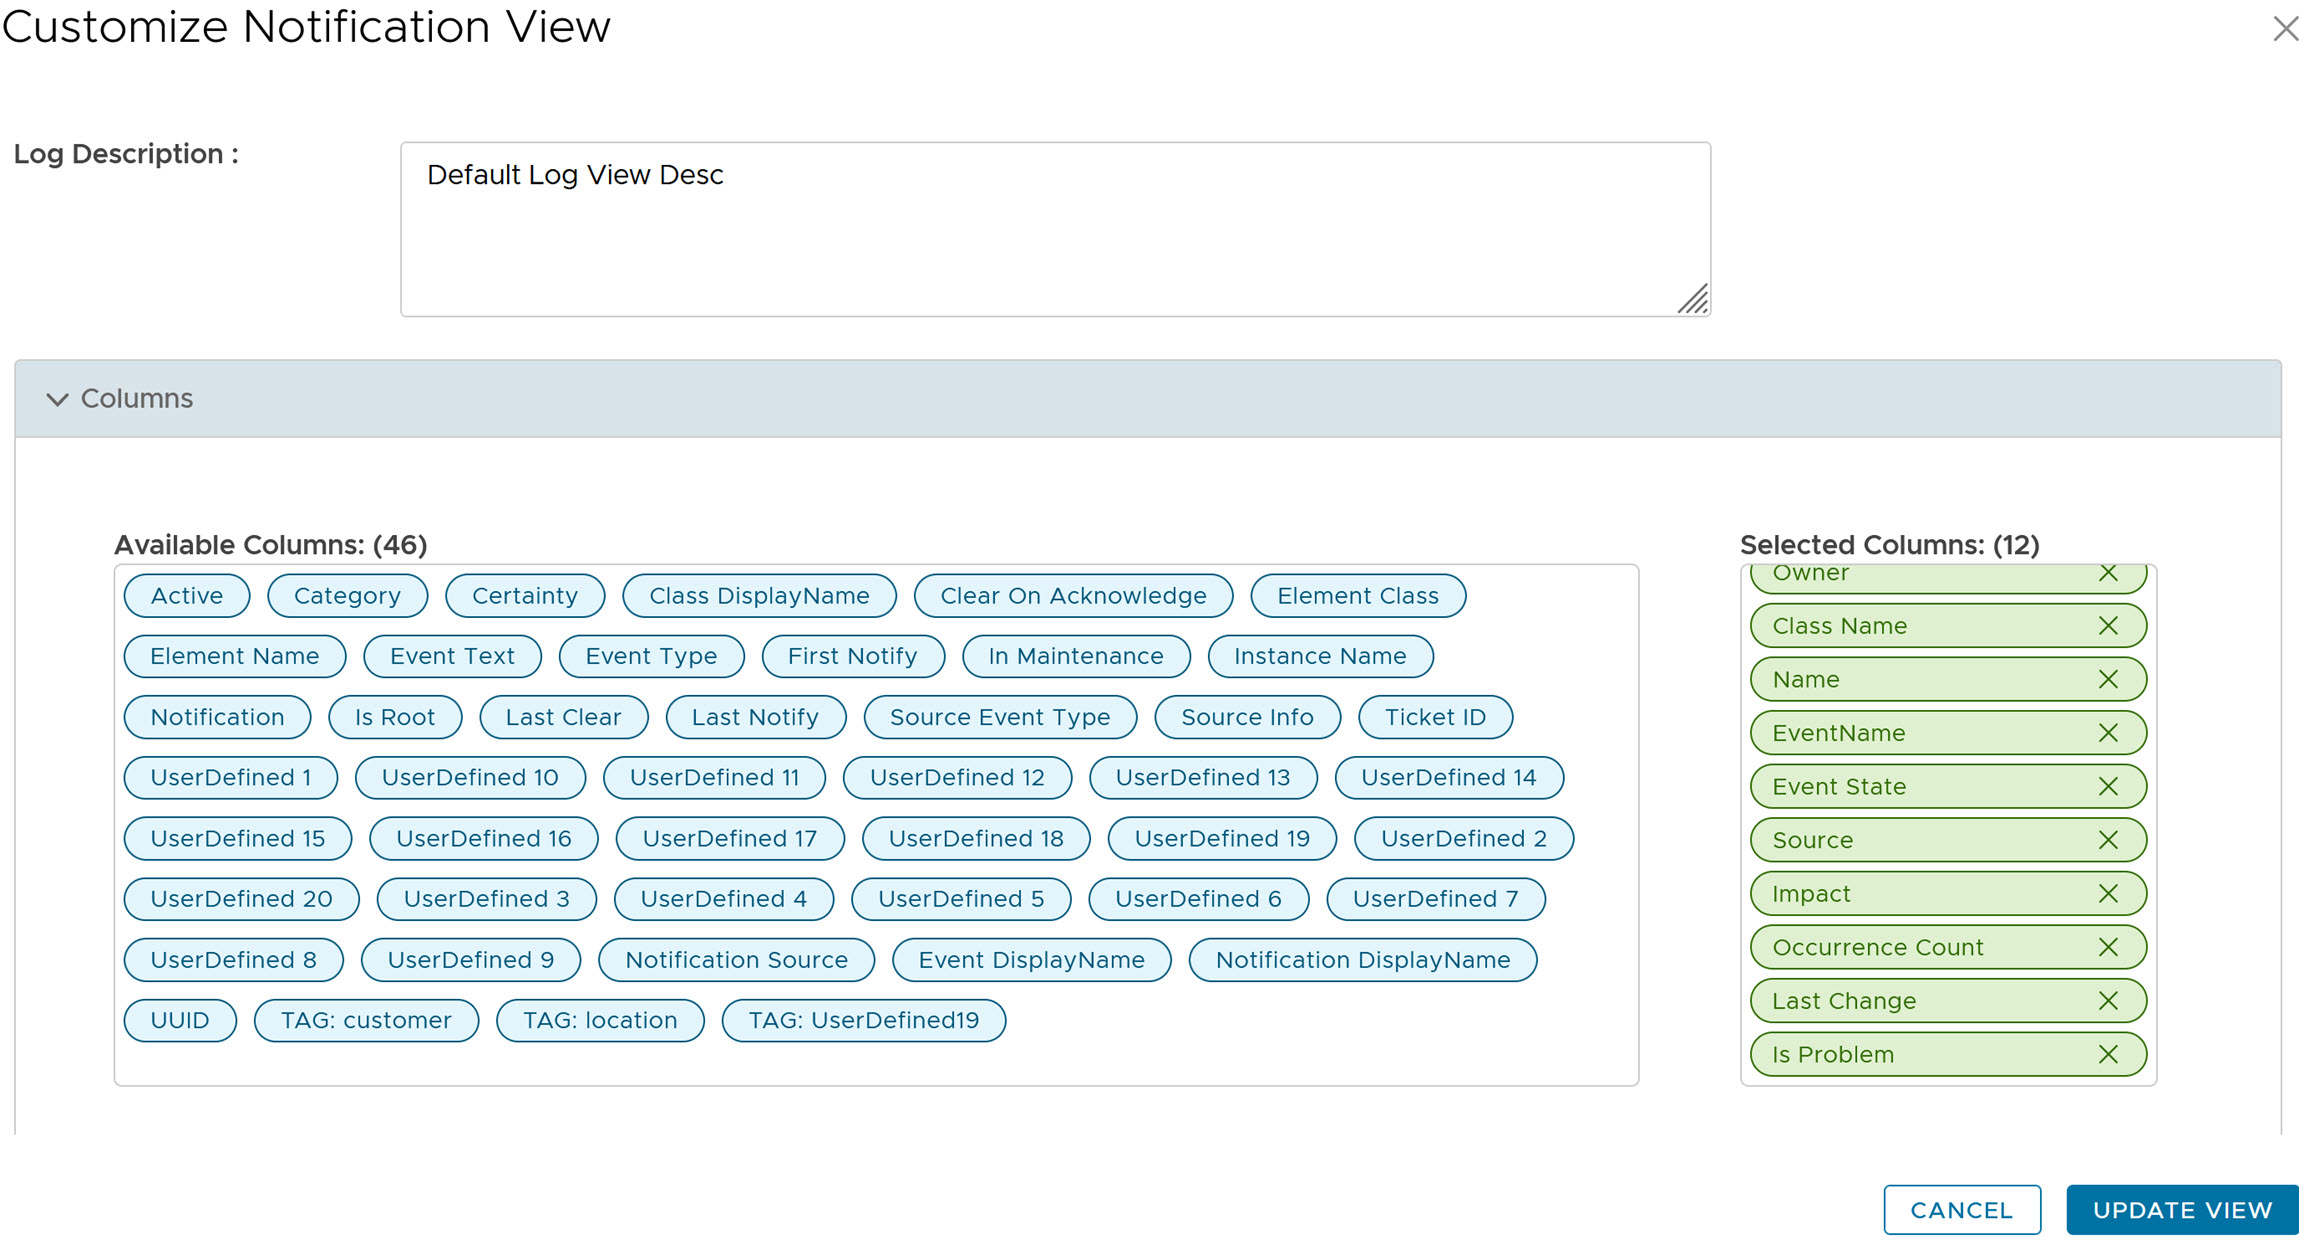 Note: If Is Problem set to true, then the notification is a problem, else it is an event.
