


This topic explains how to install and configure VMware Tanzu GemFire for Tanzu Application Service.
With a Tanzu Operation Manager role that has permissions to install and configure, follow the steps below to install GemFire for Tanzu Application Service on VMware Tanzu Application Service for VMs (Tanzu Application Service for VMs).
For more information about Tanzu Operation Manager role, see Configuring Role-Based Access Control in Tanzu Operations Manager in the VMware Tanzu Operations Manager documentation.
Procedure
- Download the tile from Broadcom Support.
- Click Import a Product to import the tile into Tanzu Operations Manager.
- Click the + symbol next to the uploaded product description.
- Click on the GemFire for Tanzu Application Service tile.
- Complete all the configuration steps in the Configure Tile Properties section below.
- Return to the Ops Manager Installation Dashboard. Click Review Pending Changes. For more information, see Reviewing Your Pending Product Changes in Tanzu Operations Manager in the VMware Tanzu Operations Manager documentation.
- Click Apply Changes to complete the installation of the GemFire for Tanzu Application Service tile.
Configure Tile Properties
Configure the sections listed on the left side of the page.

As you complete a section, save it. A green check mark appears next to the section name. Each section name must show this green check mark before you can complete your installation.
- Procedure
- Configure Tile Properties
- Assign Availability Zones and Networks
- Smoke Test Plan Settings
- Allow Outbound Internet Access Settings
- Default Distributed System ID Settings
- Sharable Instances Settings
- Enable Creation of a Service Gateway Setting
- Configure Platform Tags
- Configure Service Plans
- VM Extensions
- Global Settings
- Configure Non-Co-Located Plans
- Configure Co-Located Single VM Plans
- Configure Co-Located Multi VM Plans
- Syslog
- Service Instance Upgrades
- Security
- Errands
Assign Availability Zones and Networks
To select Availability Zones (AZs) and networks for VMs used by GemFire for Tanzu Application Service, do the following:
-
Click Assign AZs and Networks.
-
Configure the fields on the Assign AZs and Networks pane as follows:
Field Instructions Place singleton jobs in Select the region that you want for singleton VMs. Balance other jobs in Select the AZs that you want to use for distributing other cluster VMs. VMware recommends that you select all of them. Network Select your Tanzu Application Service for VMs network. Service Network Select the network to be used for cluster VMs. -
Click Save.
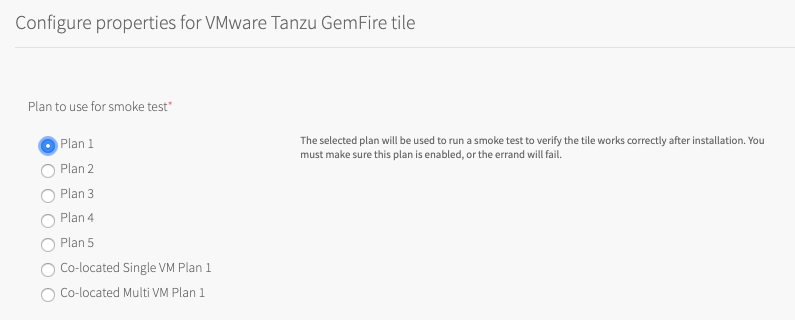
Smoke Test Plan Settings
The smoke-tests errand that runs after tile installation. The errand verifies that your installation was successful. By default, the smoke-test errand runs on the system org and the p-cloudcache-smoke-test space.
Note: Smoke tests will fail unless you enable global default application security groups (ASGs). You can enable global default ASGs by binding the ASG to the system org without specifying a space. To enable global default ASGs, use cf bind-running-security-group.
To select which plan to use for smoke tests, do the following:
-
Select a plan to use when the
smoke-testserrand runs. -
Ensure that the selected plan is enabled and configured. For information about configuring plans, see Configure Service Plans below. If the selected plan is not enabled, the
smoke-testserrand fails.
VMware recommends that you use the smallest four-server plan for smoke tests. Because smoke tests create and later destroy this plan, using a very small plan reduces installation time.
Allow Outbound Internet Access Settings
By default, outbound internet access is not allowed from service instances.
If BOSH is configured to use an external blob store, you must allow outbound internet access from service instances. Log forwarding and backups, which require external endpoints, might also require internet access.
To allow outbound internet access from service instance, do the following:
- Select Allow outbound internet access from service instances (IaaS-dependent).
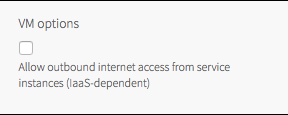
Note: Outbound network traffic rules also depend on your IaaS settings. Consult your network or IaaS administrator to ensure that your IaaS allows outbound traffic to the external networks that your require.
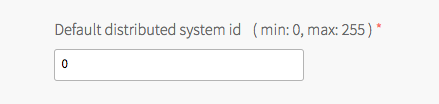
Default Distributed System ID Settings
Every service instance has an integer identifier called a distributed system ID. The ID defaults to the value 0. Service instances that form a distributed system that communicate across a WAN must have distinct IDs. Those distinct ID values are set when creating the service instance.
To change the default distributed system ID value, do the following:
- Replace the default value of
0with your new default value. Acceptable values are integers greater than or equal to0and less than or equal to255.
Sharable Instances Settings
To enable service-instance sharing for a GemFire for Tanzu Application Service service instance, do the following:
- Set Shareable Instances to
Yes.

For more information about service-instance sharing, see Service-Instance Sharing
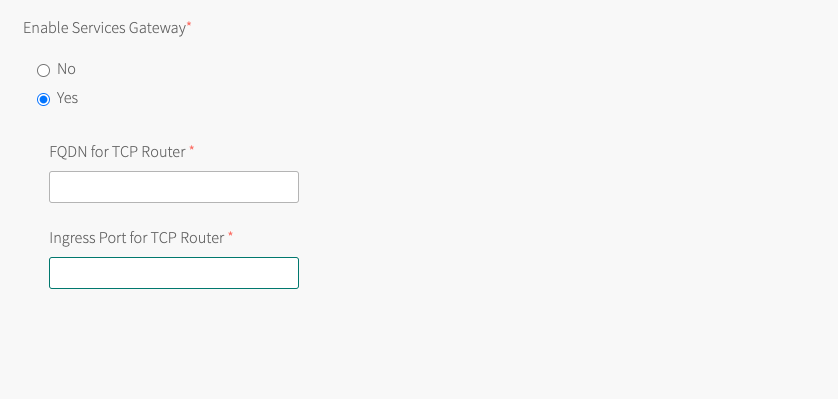
Enable Creation of a Service Gateway Setting
The service gateway permits apps running outside the services foundation (VMware Tanzu Application Service for VMs) to communicate with the GemFire for Tanzu Application Service service instance. See The App’s Location in Tanzu GemFire Architecture for an introduction to the service gateway.
-
If the communication between apps and the GemFire for Tanzu Application Service service instance require a service gateway, select the Yes radio button in the Enable Service Gateway setting. This permits the instantiation of the service gateway when a service instance is created and specifies a service gateway.
-
Enter a Fully Qualified Domain Name (FQDN) for the FQDN for TCP Router field. This was the FQDN that you used when you enabled TCP routing. You can also find the in the output of the
cf domainscommand. From the output, select thenamefield with typetcp. -
Set the Ingress Port for TCP Router field with an unused port that you noted when you enabled TCP routing. Alternatively, to find the range of ports from which to choose, in Ops Manager click Tanzu Application Service, then select Networking. The range of ports from which to choose is near the bottom of the page in a field named TCP routing ports under the heading TCP routing.
-
Click Save.
Configure Platform Tags
Platform tags are key-value pairs that are assigned to all service instance VM instances at the IaaS level. You can use these tags to organize and categorize your service instances. The accepted format for these key-value pairs depends on the underlying Cloud Provider. For example, Google Cloud Platform does not allow uppercase characters.
To use platform tags:
-
In the Tags text box, enter a comma-separated list of key-value pairs.

-
Click Save.
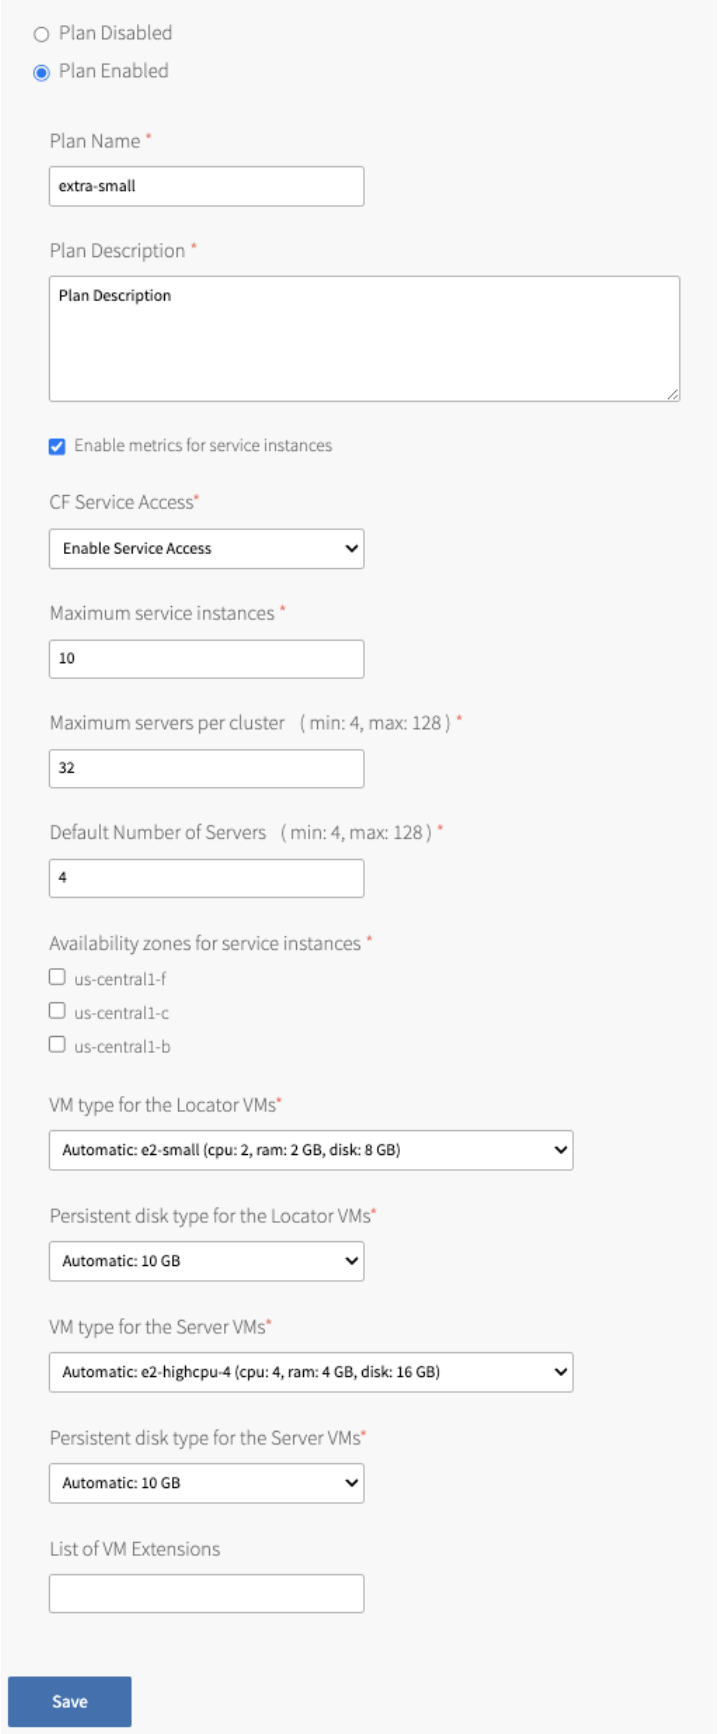
Configure Service Plans
You will configure 11 individual plans by selecting each of the tabs. There are Plan 1 through Plan 5, three plans that reside on a single VM (called Co-located Single VM Plan), and three plans that spread locators and servers among three VMs (called Co-located Multi VM Plan).
-
The Plan Enabled option is selected by default. If you do not want to add this plan to the CF service catalog, select Plan Disabled. You must enable at least one plan.
-
The Plan Name text field allows you to customize the name of the plan. This plan name is displayed to developers when they view the service in the Marketplace.
-
The Plan Description text field allows you to supply a plan description. The description is displayed to developers when they view the service in the Marketplace.
-
The Enable metrics for service instances checkbox enables metrics for service instances created using the plan. Once enabled, the metrics are sent to the Loggregator Firehose.
-
The CF Service Access drop-down menu gives you the option to display or hide the service plan in the Marketplace.
- Enable Service Access displays the service plan the Marketplace.
- Disable Service Access makes the plan unavailable in the Marketplace. If you choose this option, you cannot make the plan available at a later time.
- Leave Service Access Unchanged makes the plan unavailable in the Marketplace by default, but allows you to make it available at a later time.
-
The Maximum service instances field sets the maximum number of GemFire for Tanzu Application Service clusters that can exist simultaneously.
-
When developers create or update a service instance, they can specify the number of servers in the cluster. The Maximum servers per cluster field allows operators to set an upper bound on the number of servers developers can request. If developers do not explicitly specify the number of servers in a service instance, a new cluster has the number of servers specified in the Default Number of Servers field.
-
The Availability zones for service instances setting determines which AZs are used for a particular cluster. The members of a cluster are distributed evenly across AZs.
CautionAfter you select AZs for your service network, you cannot add additional AZs. Adding additional AZs causes existing service instances to lose data on update.
Most of the remaining fields control the VM type and persistent disk type for servers and locators. The total size of the cache is directly related to the number of servers and the amount of memory of the selected server VM type. VMware recommends the following configuration:
- For the VM type for the Locator VMs field, select a VM that has at least 2 CPUs, 1 GB of RAM and 4 GB of disk space.
- For the Persistent disk type for the Locator VMs field, select 10 GB or higher.
- For the VM type for the Server VMs field, select a VM that has at least 2 CPUs, 4 GB of RAM and 8 GB of disk space.
- For the Persistent disk type for the server VMs field, select 10 GB or higher.
For more information about VM memory allocation, see VM Memory Allocation.
- The List of VM Extensions setting is a comma-separated list of names of VM extensions to apply to service instances created under this plan. These are applied in addition to any global VM extensions that are configured under the Configure List of VM Extensions section.
When you finish configuring the plan, click Save to save your configuration options.
VM Extensions
The GemFire for Tanzu Application Service tile implements the VM Extension feature following the RabbitMQ tile’s approach. The procedures in this topic are nearly identical regarding VM Extensions as described in Configure Global Settings and Configure the service plans.
Global Settings
After configuring platform tags as described in Installing and Configuring GemFire for Tanzu Application Service, you can add the list of VM extensions. For more information, see Configure Global Settings. This enters the names of VM extensions to apply to all service instances. You can separately apply added sets of VM extensions on each specific plan. For more information, see the preceding section, Configure Service Plans.
You can manage custom VM Extensions in Tanzu Operations Manager or through the OM CLI. For more information, see Create or Update a VM Extension or om create-vm-extension in GitHub.
You can use this to deactivate IaaS-specific behavior. For example, you can use a VM extension to deactivate vMotion in a vSphere infrastructure.
To remove a VM extension, click the trash icon.
Configure Non-Co-Located Plans
With the v2.1 release of GemFire for Tanzu Application Service, you can now dynamically set the number of locators in plans that are not co-located.
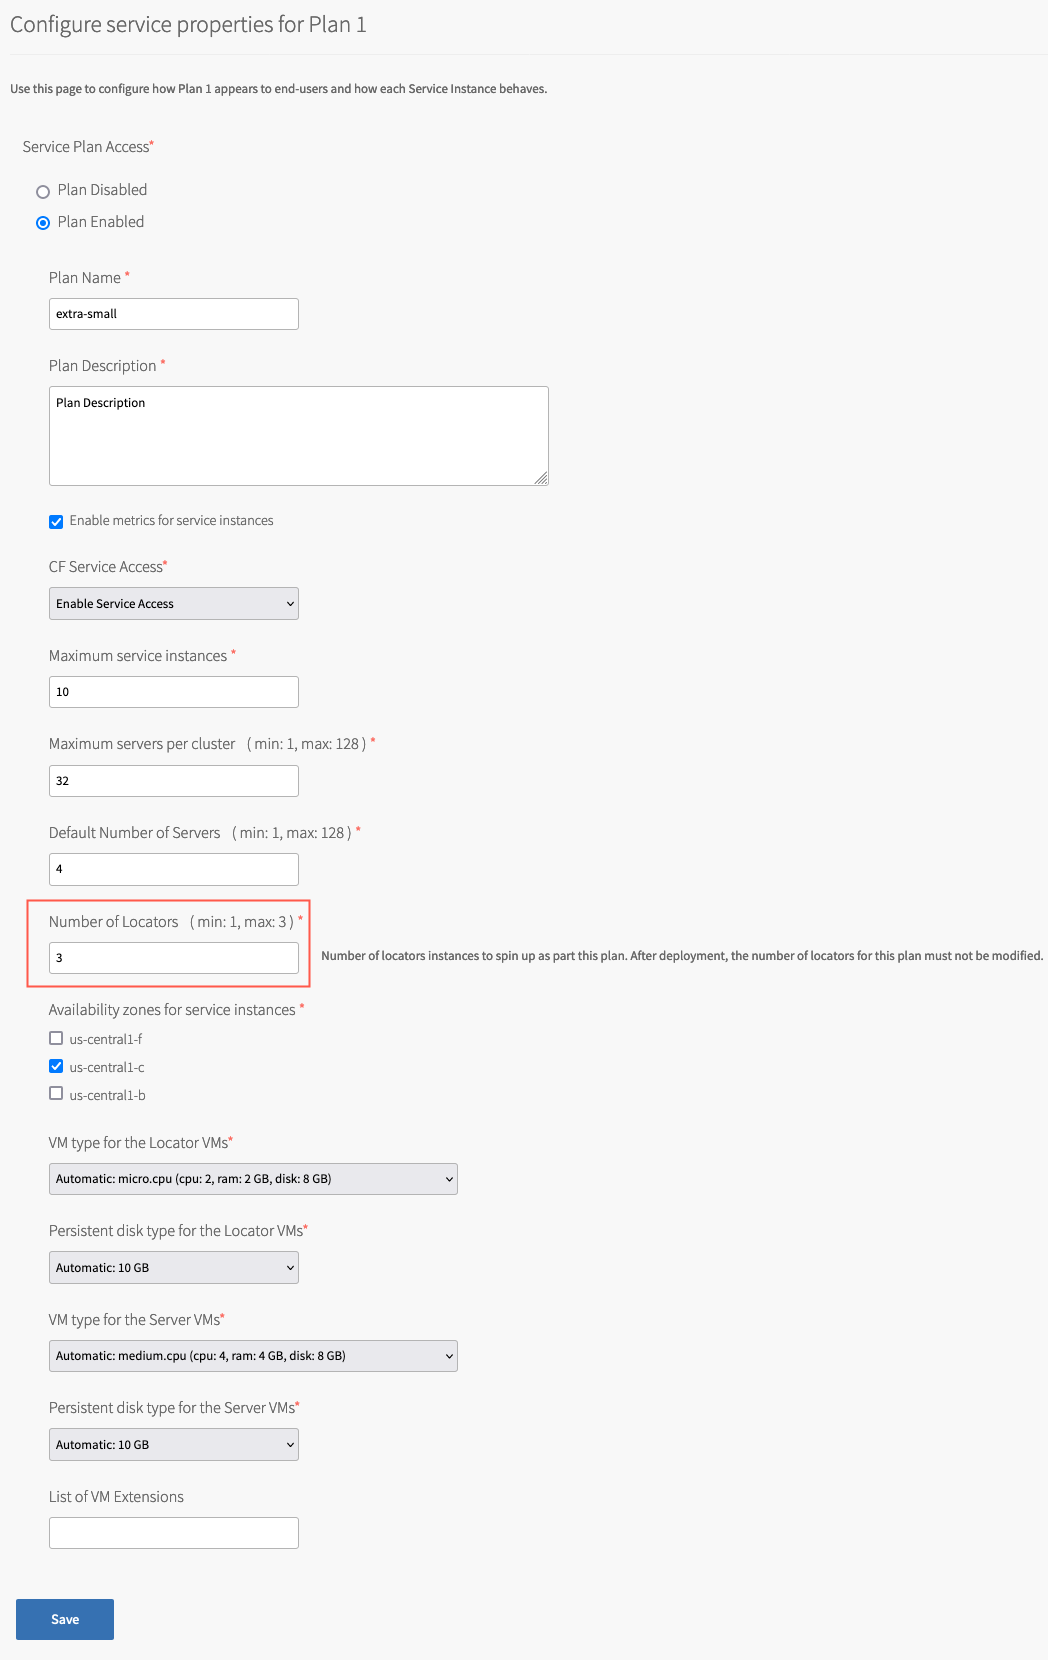
The default value for Number of Locators, which is 3, can be changed to a valid integer ranging from a minimum of 1 to a maximum of 3. With this, you can increase or decrease the number of locators before applying your changes.
ImportantThe number of locators can only be changed before deploying the tile. Once you’ve applied your changes and the tile has been deployed, this value cannot be altered. If you try to change the number of locators after the tile has been deployed, when you apply changes, you get an error message stating the job-process failed to run.
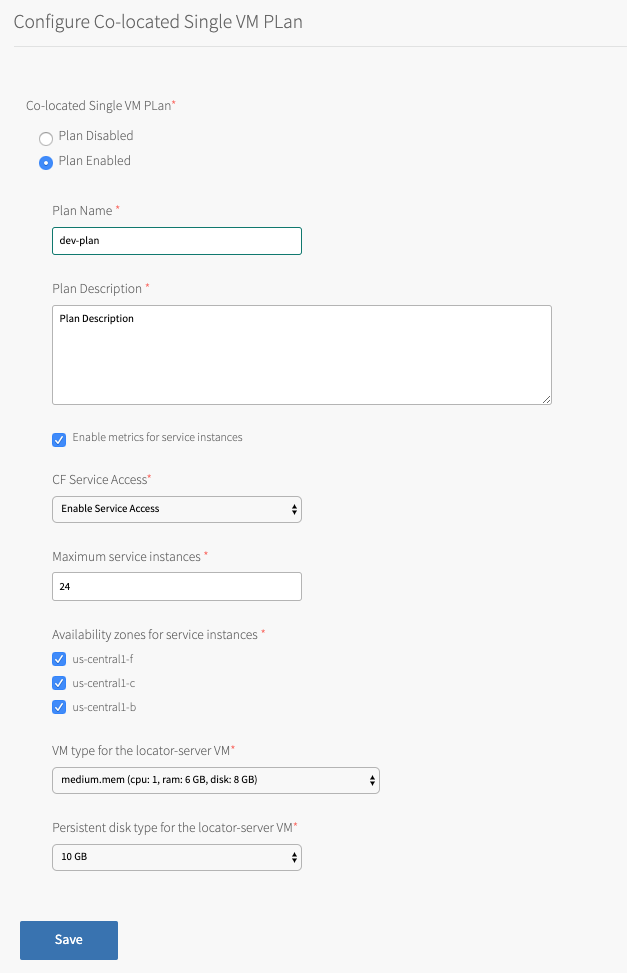
Configure Co-Located Single VM Plans
A Co-located Single VM Plan is a type of service plan. The plan provides a single locator and server, which are colocated within a single VM.
CautionData loss results when the single VM that this plan provides powers down or restarts.
The plan automatically creates a single region named example_partition_region. The region type is PARTITION, a partitioned region without redundancy or persistence of entries. You can create other regions as necessary with a Co-located Single VM Plan service instance.
There are three Co-located Single VM Plans to configure. The page for configuring this plan is similar to the page for configuring other service plans. To configure a Co-located Single VM Plan, input information in the fields and make selections from the options on each Configure Co-Located Single VM Plan page.
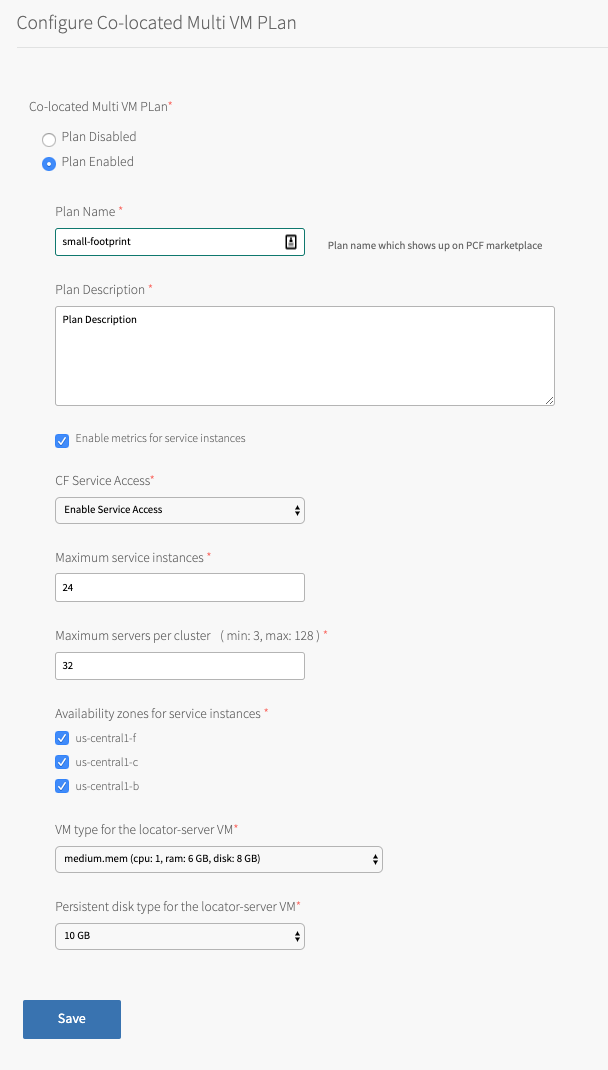
Configure Co-Located Multi VM Plans
Any of the Co-located Multi VM Plans use three VMs to implement a default plan with three locators and three servers. Each of the three VMs has one locator and one server. Co-located Multi VM Plan 1 has a default plan name of small-footprint.
This type of plan is appropriate for production installations that can tolerate the diminished load-handling capacity and reduced resilience that would result from the loss of a VM. Installations needing resilience in the face of a VM loss should use a plan in which each GemFire for Tanzu Application Service cluster member resides within its own VM.
You can create a GemFire for Tanzu Application Service service instance using a Co-located Multi VM Plan with more servers than the default three servers. Follow the instructions in Create or Delete a Service Instance to increase the number of servers.
Scale up an existing service instance by increasing the number of servers, as specified in Updating a GemFire for Tanzu Application Service Service Instance.
Whether creating a new service instance or updating an existing service instance to have more servers, each additional server will be within its own VM.
Scaling down the quantity of servers within an existing service instance is accomplished one server at a time to ensure redundancy is correctly maintained. To scale down, use the cf update-service command as described in Updating a GemFire for Tanzu Application Service Service Instance to specify one server fewer than the total quantity of servers currently running.
An error message will be issued if you attempt to scale down by more than one server at a time, or if you attempt to reduce the number of servers below the minimum size of the default Co-located Multi VM Plan size of three servers.
To configure a Co-located Multi VM Plan, enable the plan with the Co-located Multi VM Plan tab.
Syslog
By default, syslog forwarding is not enabled in GemFire for Tanzu Application Service. However, GemFire for Tanzu Application Service supports forwarding syslog to an external log management service, for example, to Papertrail, Splunk, or your custom enterprise log sink. Use the broker logs for debugging problems creating, updating, and binding service instances.
To enable remote syslog for the service broker, do the following:
- Click Syslog.
-
Configure the fields on the Syslog pane as follows:
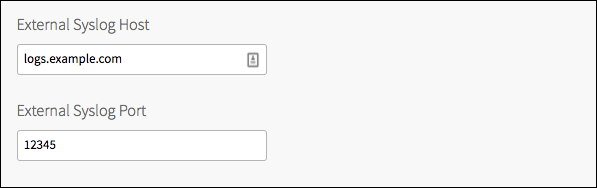
Field Instructions Do you want to configure Syslog for VMware GemFire? Select Yesto enable.Address Enter the address or host of the syslog server for sending logs, for example, logs.example.com.Port Enter the port of the syslog server for sending logs, for example, 29279.Transport Protocol Select TCP,UDP, orRELP.Send service instance logs to external By default, only the broker logs are forwarded to your configured log management service. To forward server and locator logs from all service instances, select this option. This lets you monitor the health of the clusters, but generates a large volume of logs files.
If you do not enable this option, only the broker logs which include information about service instance creation are forwarded, without logs about on-going cluster health.Enable TLS Select to enable secure log transmission through TLS. Without this, remote syslog sends unencrypted logs. VMware recommends that you enable TLS, as most syslog endpoints such as Papertrail and Logsearch require TLS. Permitted Peer This option is required if TLS is enabled. If several peer servers can respond to remote syslog connections, provide a regex, such as *.example.com.SSL Certificate Specifies the CA certificate for TLS communication. If the server certificate is not signed by a known authority, for example, an internal syslog server, provide the CA certificate of the log management service endpoint. -
Click Save.
Service Instance Upgrades
You can upgrade a configurable number of service instances concurrently by entering a new value that is greater than 1 and less than the BOSH worker count for the Number of simultaneous upgrades.
-
Specify a set of service instances to act as canaries for the upgrade process by changing the Number of upgrade canary instances to a value greater than
0. If all canary instances successfully upgrade, the remaining instances are upgraded. If any canary instance fails to upgrade, the upgrade fails and no further instances are upgraded.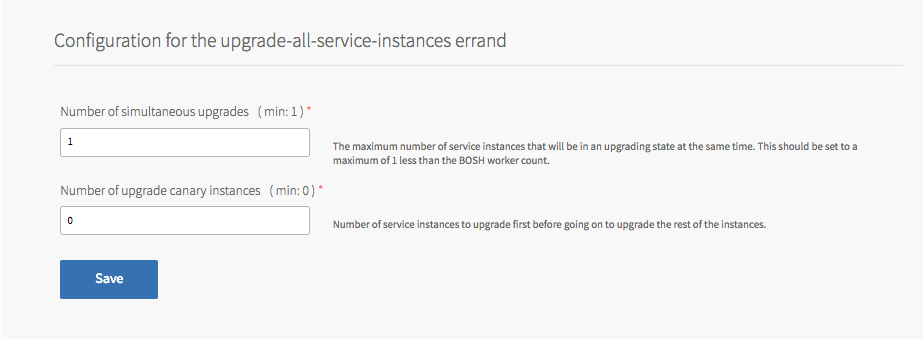
-
Click Save.
Security
There are three configuration aspects to the Security settings. Each of the three must be considered and appropriately handled within these settings. Once the Security properties settings have been set, click Save. The Security properties Settings page appears as:
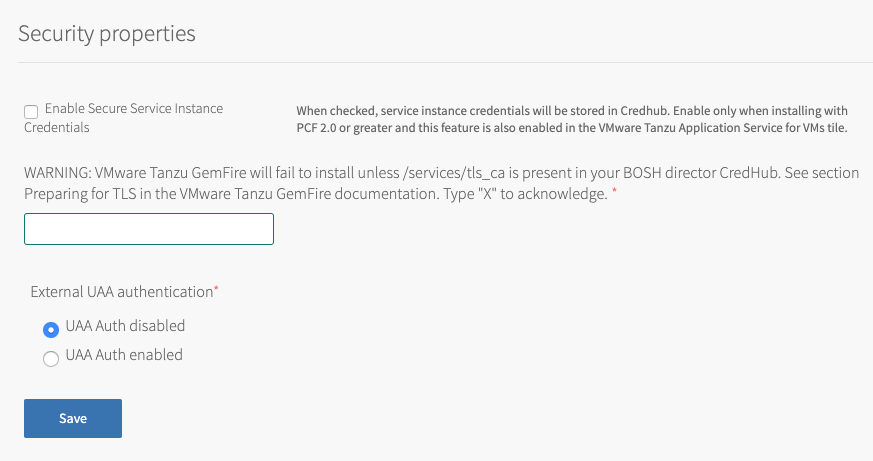
The three items in this page to handle are:
-
The environment may be configured to more securely store service keys within CredHub, instead of within the cloud controller’s data store. To enable this functionality, click on the box labeled Enable Secure Service Instance Credentials to enable use of CredHub. When service keys are stored within CredHub, output from the
cf env APP-NAMEcommand will not show credentials. -
An
Xis required in the text box to promote the understanding that the environment must be set up to handle TLS encryption. For information about preparing the Tanzu Application Service for VMs environment, see Preparing for Transport Layer Security (TLS). -
If User Account and Authentication (UAA) of GemFire for Tanzu Application Service users will use an external system, enable this with the radio button labeled UAA Auth enabled. With UAA enabled, create a UAA client before doing this tile installation as explained in Create a User Account and Authentication (UAA) Client. Follow the instructions in Configuring User Account and Authentication (UAA) Roles to complete the configuration by setting up the user roles. With UAA enabled, two text boxes will appear. Fill the boxes with the UAA client name and that client’s secret, which were set when the client was created.
Errands
By default, post-deploy and pre-delete errands always run. VMware recommends keeping these defaults. However, if necessary, you can change these defaults as follows.
For general information about errands in Tanzu Application Service for VMs, see Managing Errands in Your Tanzu Operations Manager Deployment in the VMware Tanzu Operations Manager documentation.
-
Click Errands.
-
Change the setting for the errands.
-
Click Save.
