


This topic describes how to configure BOSH Director for vSphere with NSX-T integration for VMware Tanzu Kubernetes Grid Integrated Edition (TKGI).
Prerequisites
Before you begin this procedure, ensure that you have successfully completed all preceding steps for installing Tanzu Kubernetes Grid Integrated Edition on vSphere with NSX-T, including:
- Preparing to Install Tanzu Kubernetes Grid Integrated Edition on vSphere with NSX-T Data Center
- Hardware Requirements for Tanzu Kubernetes Grid Integrated Edition on vSphere with NSX-T
- NSX-T v3.0: Installing and Configuring NSX-T Data Center v3.0 for Tanzu Kubernetes Grid Integrated Edition
- Deploying Ops Manager with NSX-T for Tanzu Kubernetes Grid Integrated Edition
- Generate and Register the NSX-T Management SSL Certificate and Private Key in Installing and Configuring NSX-T Data Center v3.0 for TKGI
How Ops Manager Accesses NSX-T Manager
To create, delete, and modify NSX-T networking resources, Ops Manager tiles, and APIs use a VMware NSX Manager account with the Enterprise Administrator role and permissions.
Users configure Ops Manager to authenticate to NSX Manager for different purposes in different tiles:
- Tanzu Kubernetes Grid Integrated Edition tile
The Tanzu Kubernetes Grid Integrated Edition tile uses NSX Manager to create load balancers, providing a Kubernetes service described in the Create an External Load Balancer section of the Kubernetes documentation.
To configure the Tanzu Kubernetes Grid Integrated Edition tile’s authentication to NSX Manager, see the topic Generating and Registering the NSX Manager Superuser Principal Identity Certificate and Key. - BOSH Director for vSphere tile
The BOSH Director for vSphere tile uses NSX Manager to configure networking and security for external-facing Ops Manager component VMs, such as VMware Tanzu Application Service for VMs routers.
To configure the BOSH Director for vSphere tile’s authentication to NSX Manager, see Configure vCenter for Tanzu Kubernetes Grid Integrated Edition, below.
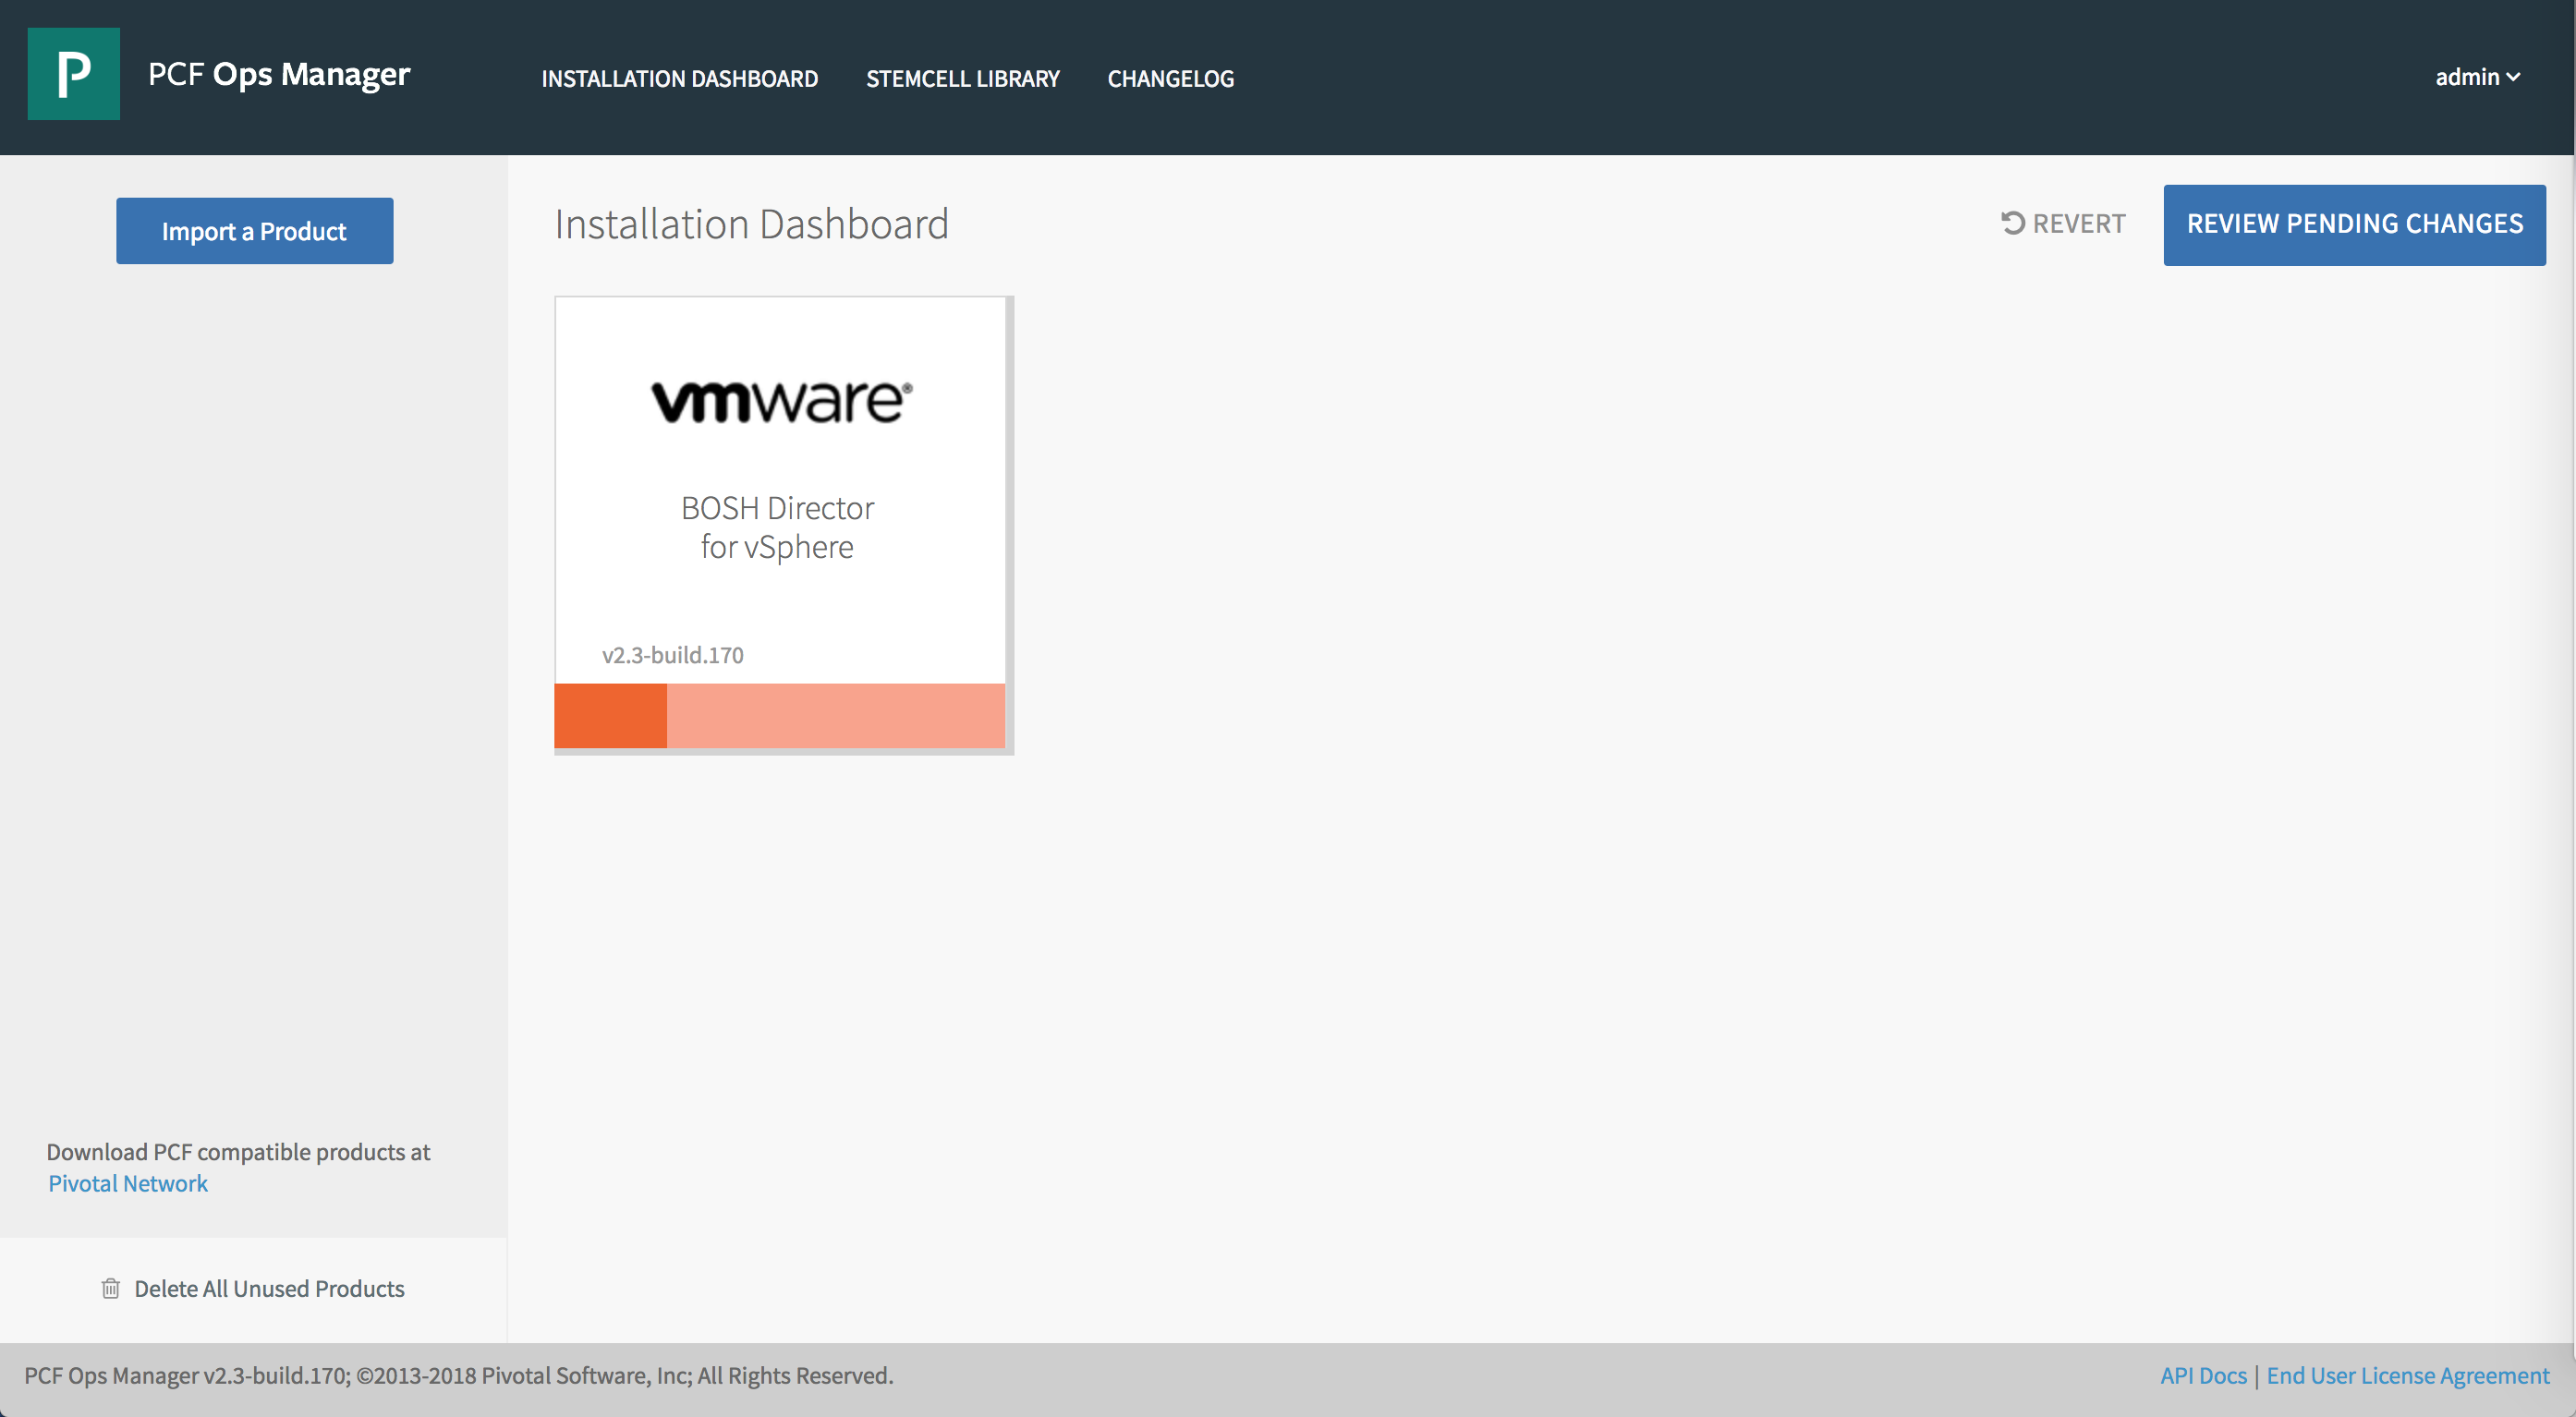
Step 1: Open the BOSH Director Tile
To configure BOSH Director:
-
Log in to Ops Manager with the user name and password credentials that you set up in Configure Ops Manager for Tanzu Kubernetes Grid Integrated Edition.
-
Click the BOSH Director for vSphere tile.
Step 2: Configure vCenter for Tanzu Kubernetes Grid Integrated Edition
To configure BOSH Director with your vCenter settings:
-
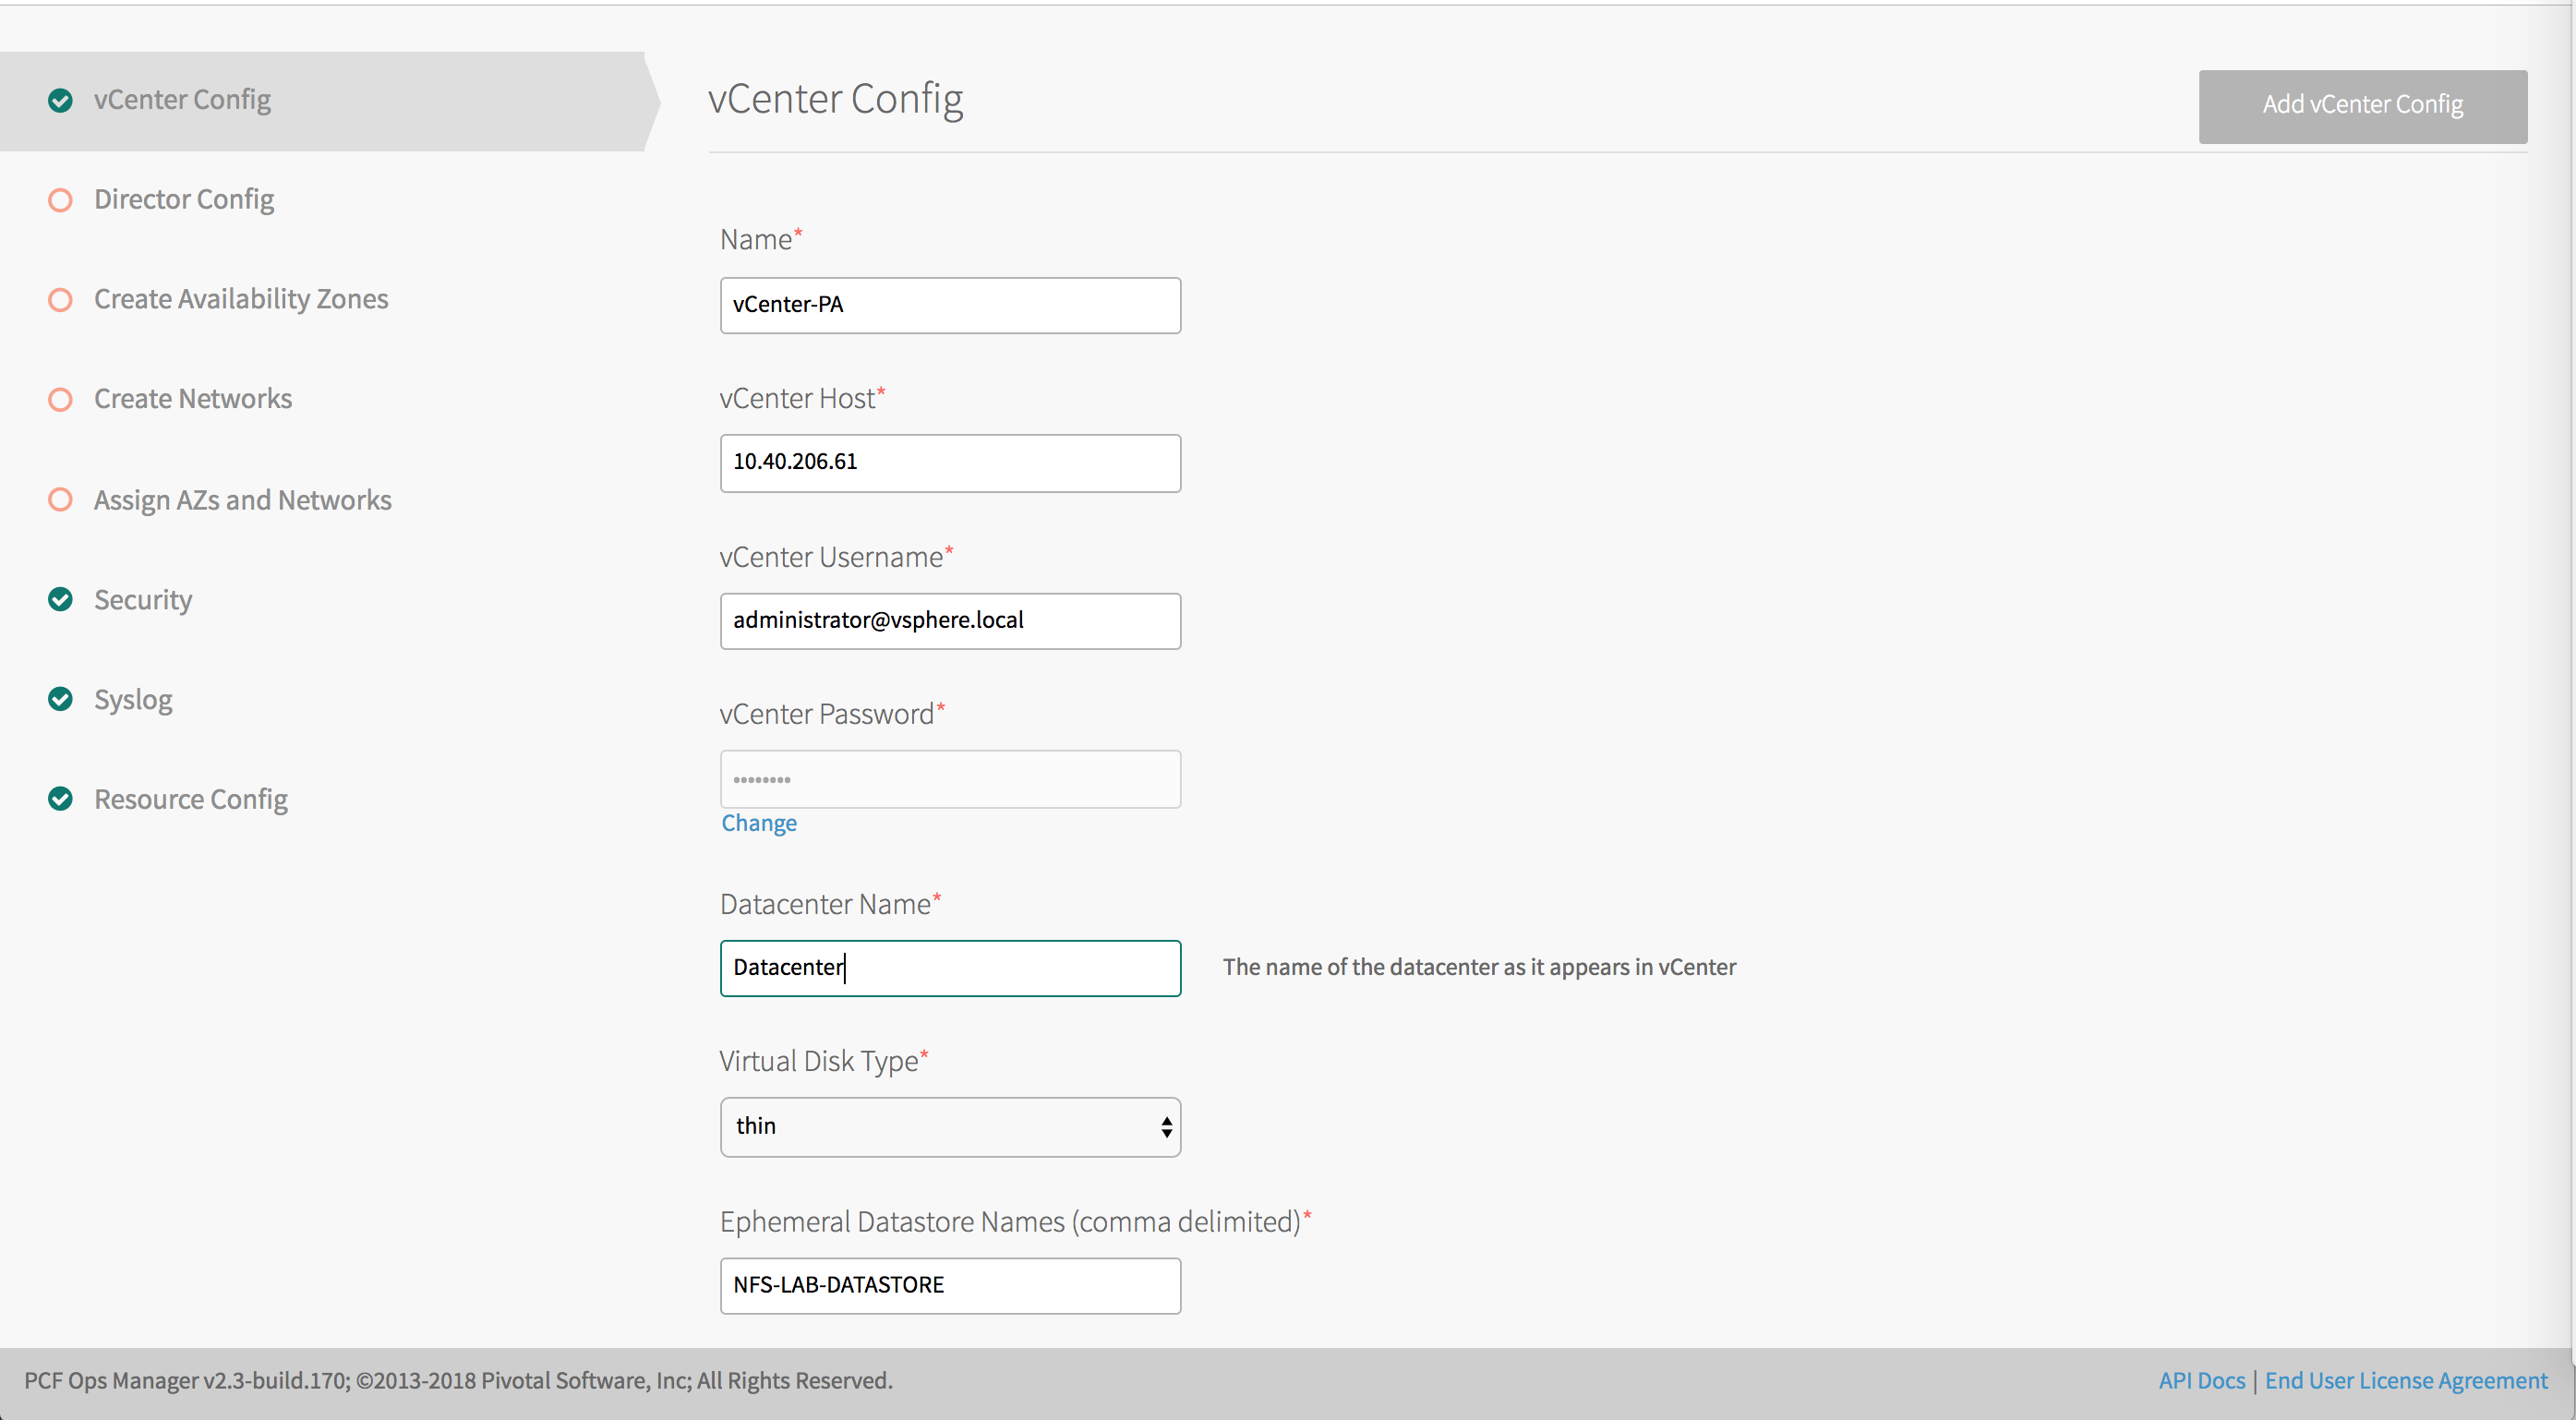
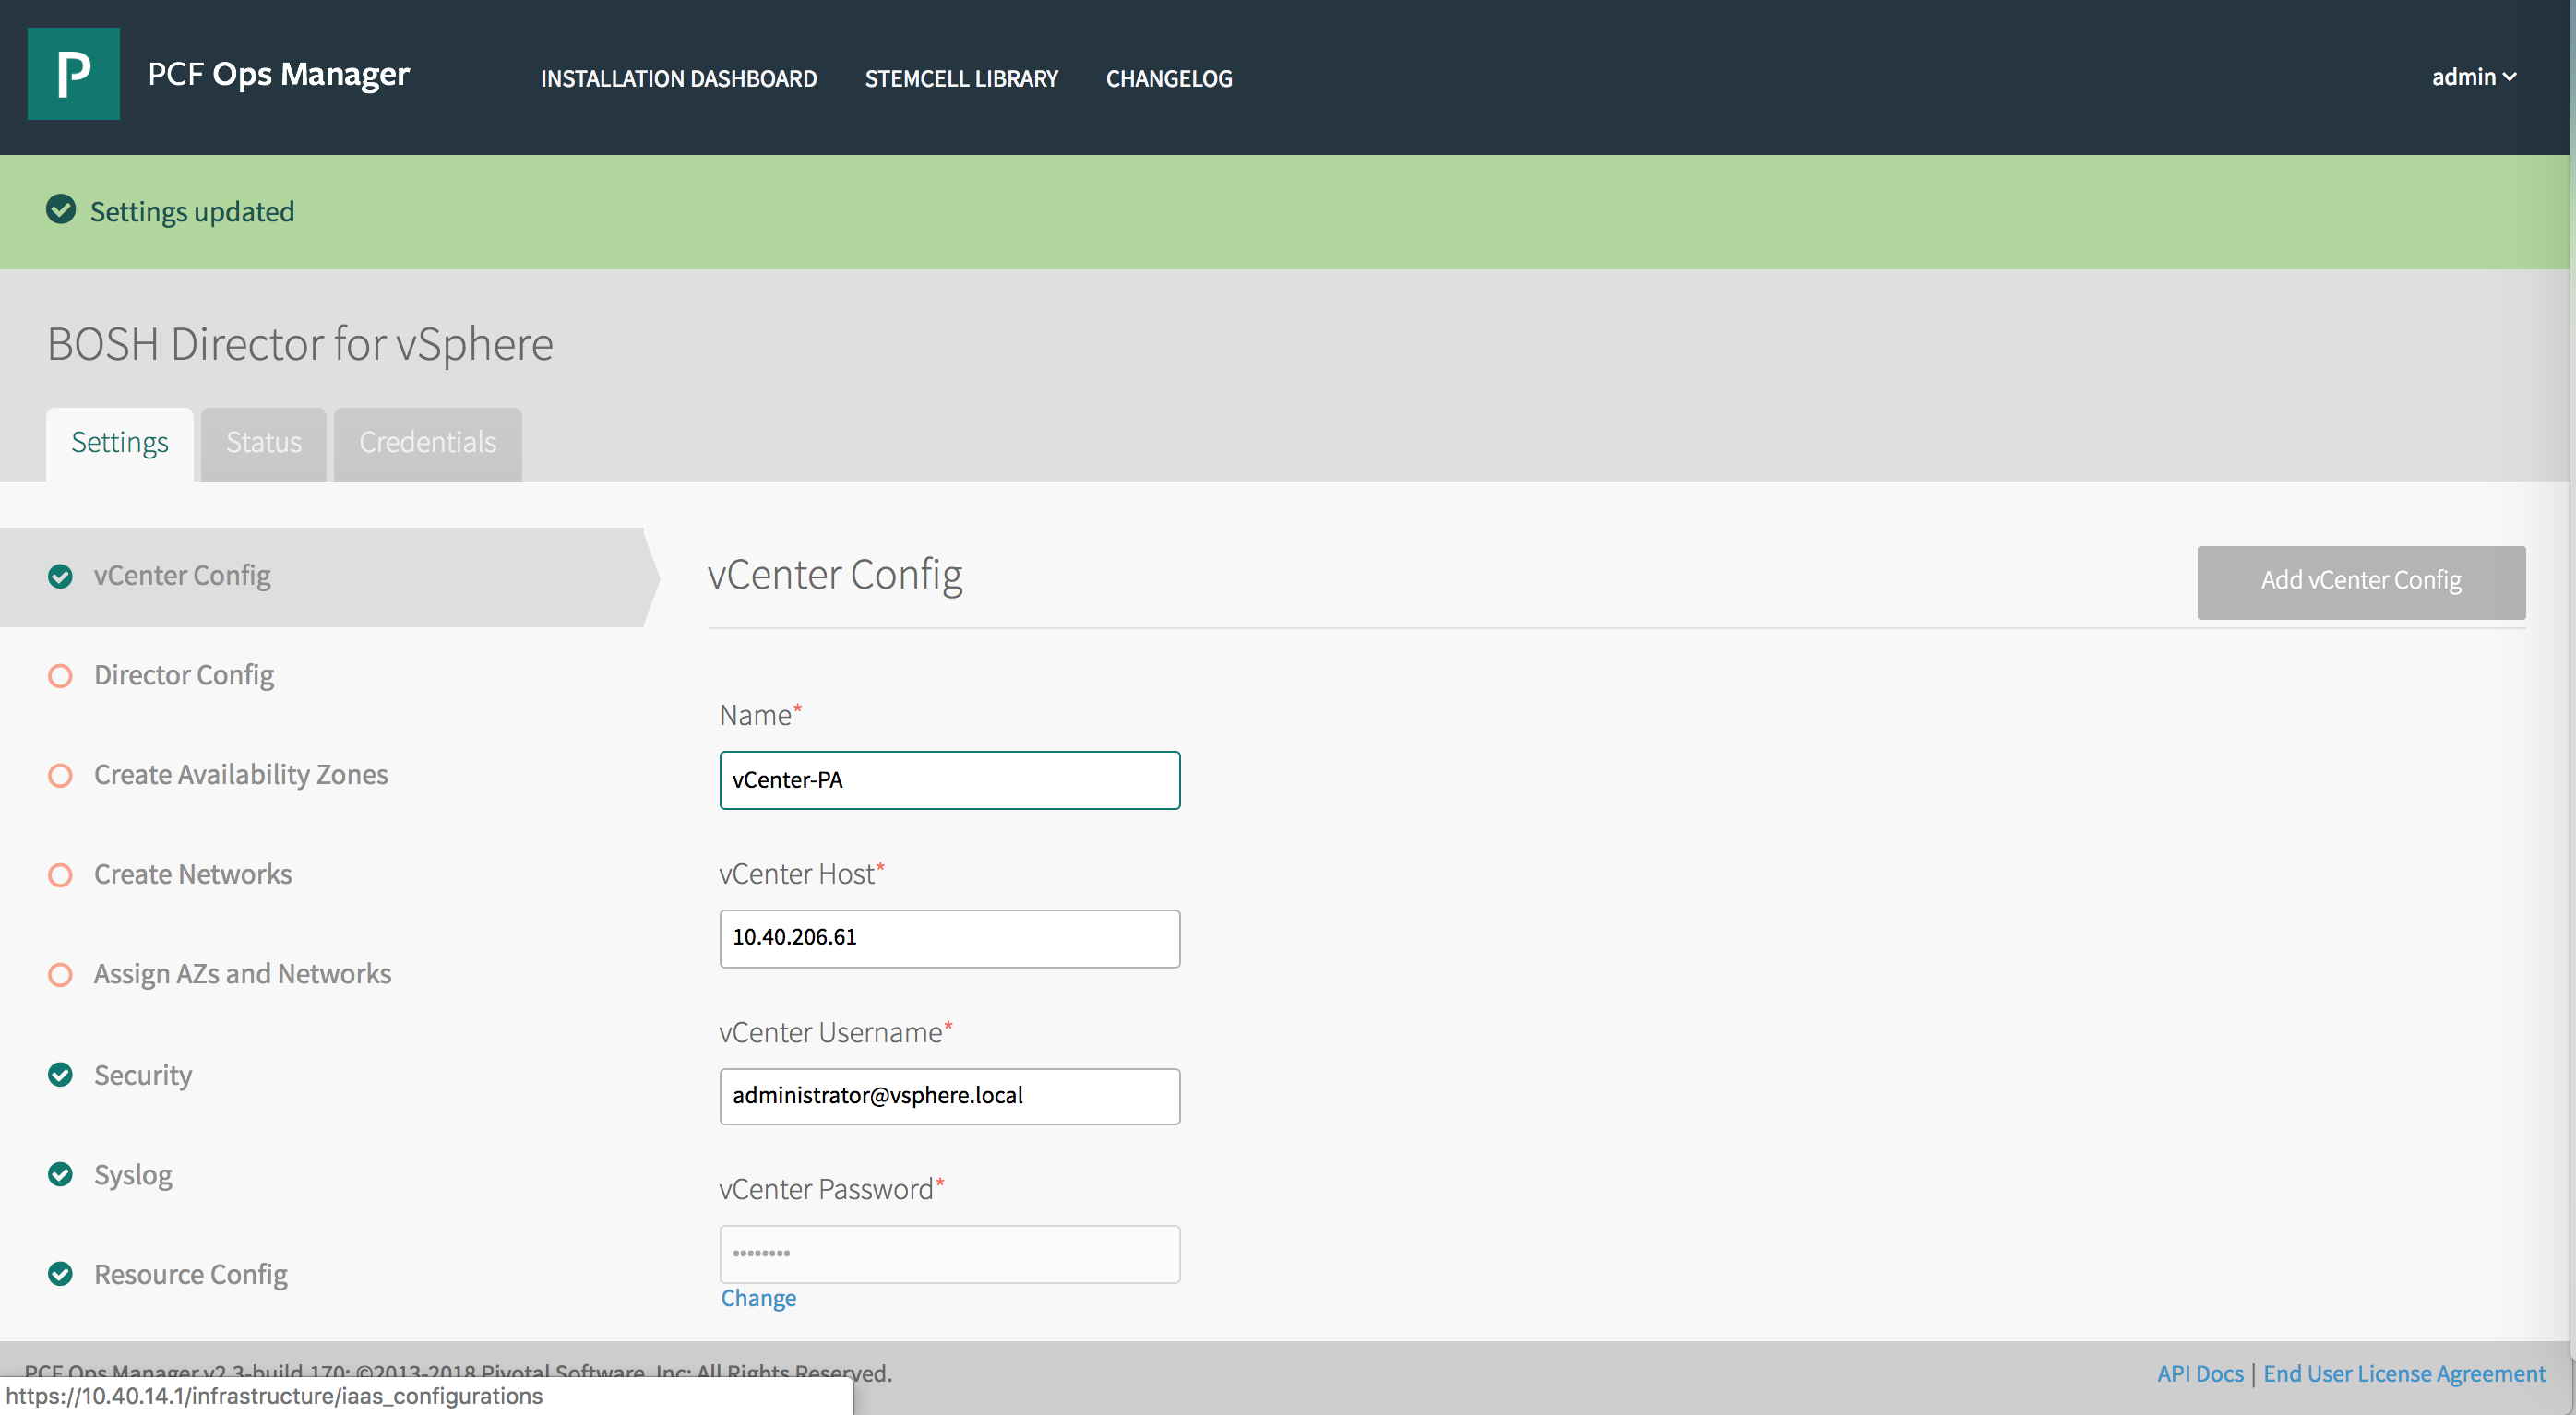
Select vCenter Config in BOSH Director.
-
Enter the following information:
- Name: A name that you provide for your vCenter configuration. This field is used to identify the data center configuration in Ops Manager if you are configuring multiple data centers.
- vCenter Host: The hostname of the vCenter that manages ESXi/vSphere.
Note: The FQDN for the vCenter Server cannot contain uppercase letters.
- vCenter Username: A vCenter user name with create and delete privileges for virtual machines (VMs) and folders.
- vCenter Password: The password for the vCenter user specified above.
- Datacenter Name: The name of the data center as it appears in vCenter.
- Virtual Disk Type: The Virtual Disk Type to provision for all VMs. For guidance on selecting a virtual disk type, see vSphere Virtual Disk Types.
- Ephemeral Datastore Names (comma delimited): The names of the datastores that store ephemeral VM disks deployed by Ops Manager.
- Persistent Datastore Names (comma delimited): The names of the datastores that store persistent VM disks deployed by Ops Manager.
Note: The vSphere datastore type must be Datastore. Tanzu Kubernetes Grid Integrated Edition does not support the use of vSphere Datastore Clusters with or without Storage DRS. For more information, see Datastores and Datastore Clusters in the vSphere documentation.
-
For Networking, select NSX Networking.

-
Configure NSX networking as follows:
- NSX Mode: Select NSX-T to use NSX-T networking for dynamically created node networks.
- NSX Address: Enter the FQDN or IP address of the NSX-T Manager, or the VIP address of the NSX-T Management Cluster.
- NSX Authentication: Select the authentication mode, either Local User Authentication or Certificate Authentication.
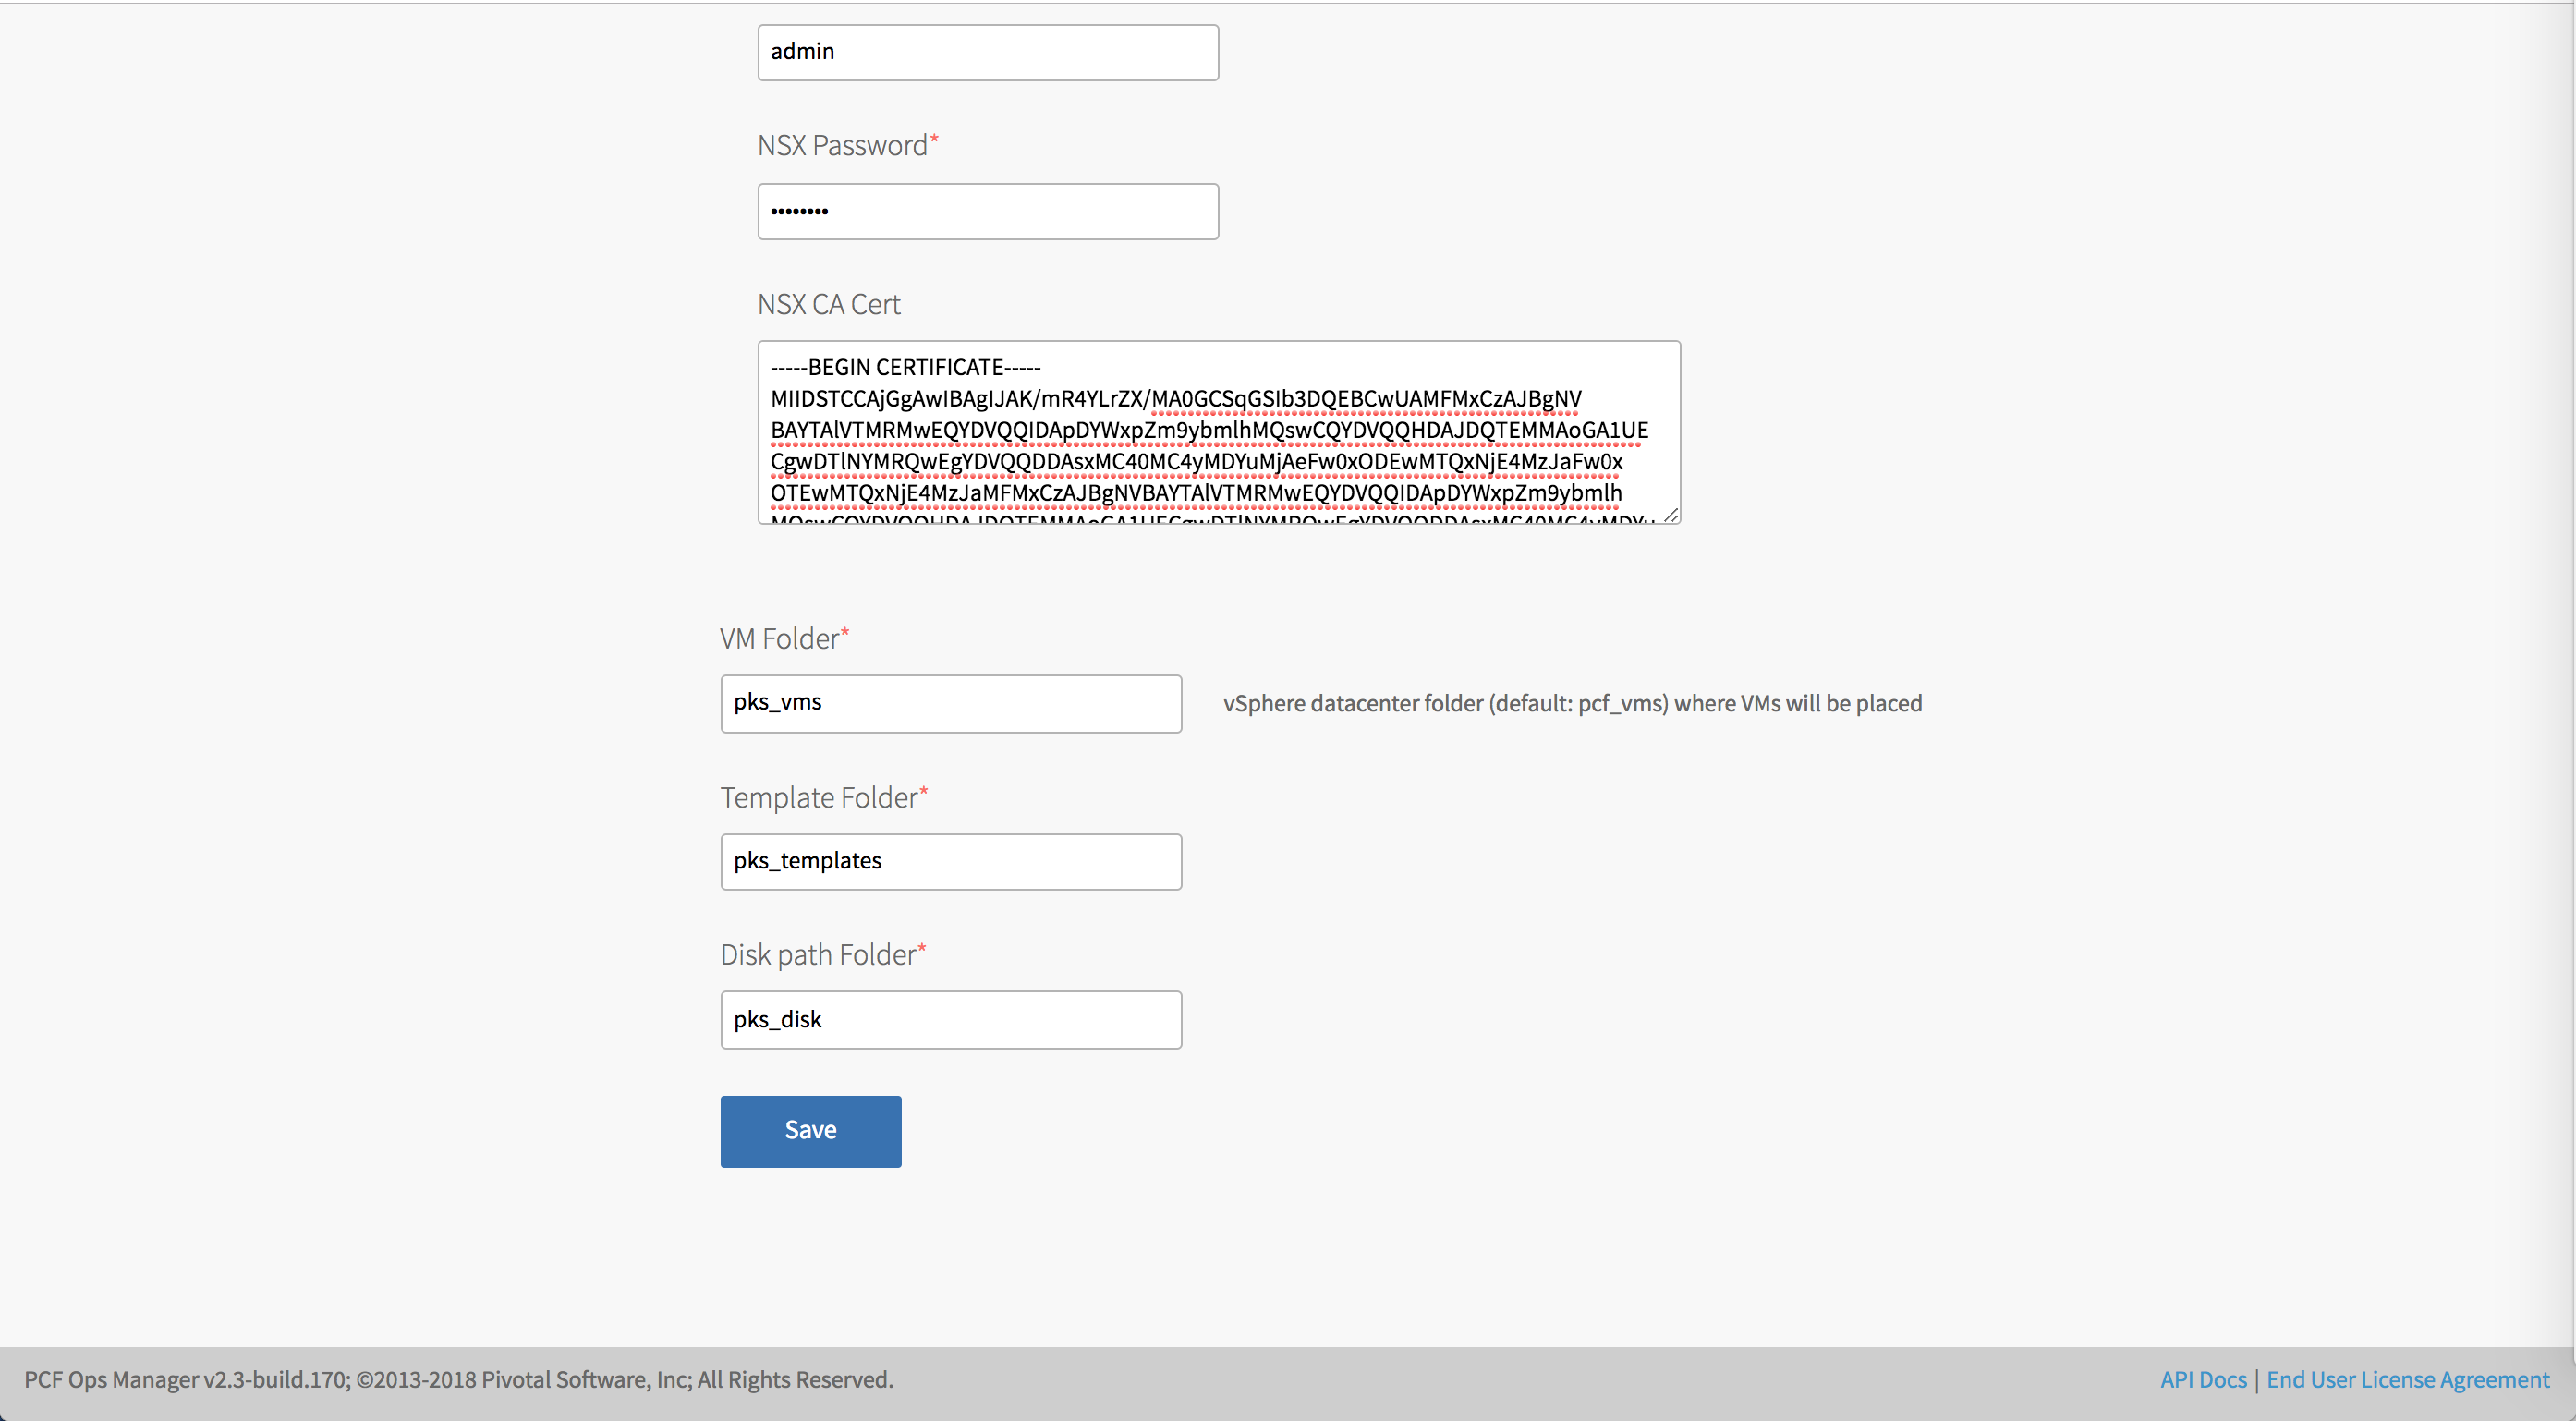
- NSX Username and NSX Password: If you selected Local User Authentication, enter the NSX-T Manager user name and password.
- NSX Manager Principal Identity Certificate and NSX Manager Principal Identity Private Key: If you selected Certificate Authentication, enter the NSX Manager Principal Identity Certificate and Private Key. For more information, see Generating and Registering the NSX Manager Superuser Principal Identity Certificate and Key.
- Use NSX-T Policy API: Select this option to use the NSX-T Policy API instead of the NSX-T Management API. For more information, see Considerations for Using the NSX-T Policy API with TKGI.
- NSX CA Cert: Provide the CA certificate in PEM format that authenticates to the NSX server. Copy the contents of the NSX CA certificate that you generated in Generate and Register the NSX-T Management SSL Certificate and Private Key to this field.
-
Configure the following folder names:
- VM Folder: The vSphere data center folder where Ops Manager places VMs.
- Template Folder: The vSphere data center folder where Ops Manager places VMs.
- Disk path Folder: The vSphere datastore folder where Ops Manager creates attached disk images. You must not nest this folder.
Note: After your initial deployment, you cannot edit the VM Folder, Template Folder, and Disk path Folder names.
-
Click Save.
Step 3: Configure BOSH Director
To configure BOSH Director settings:
-
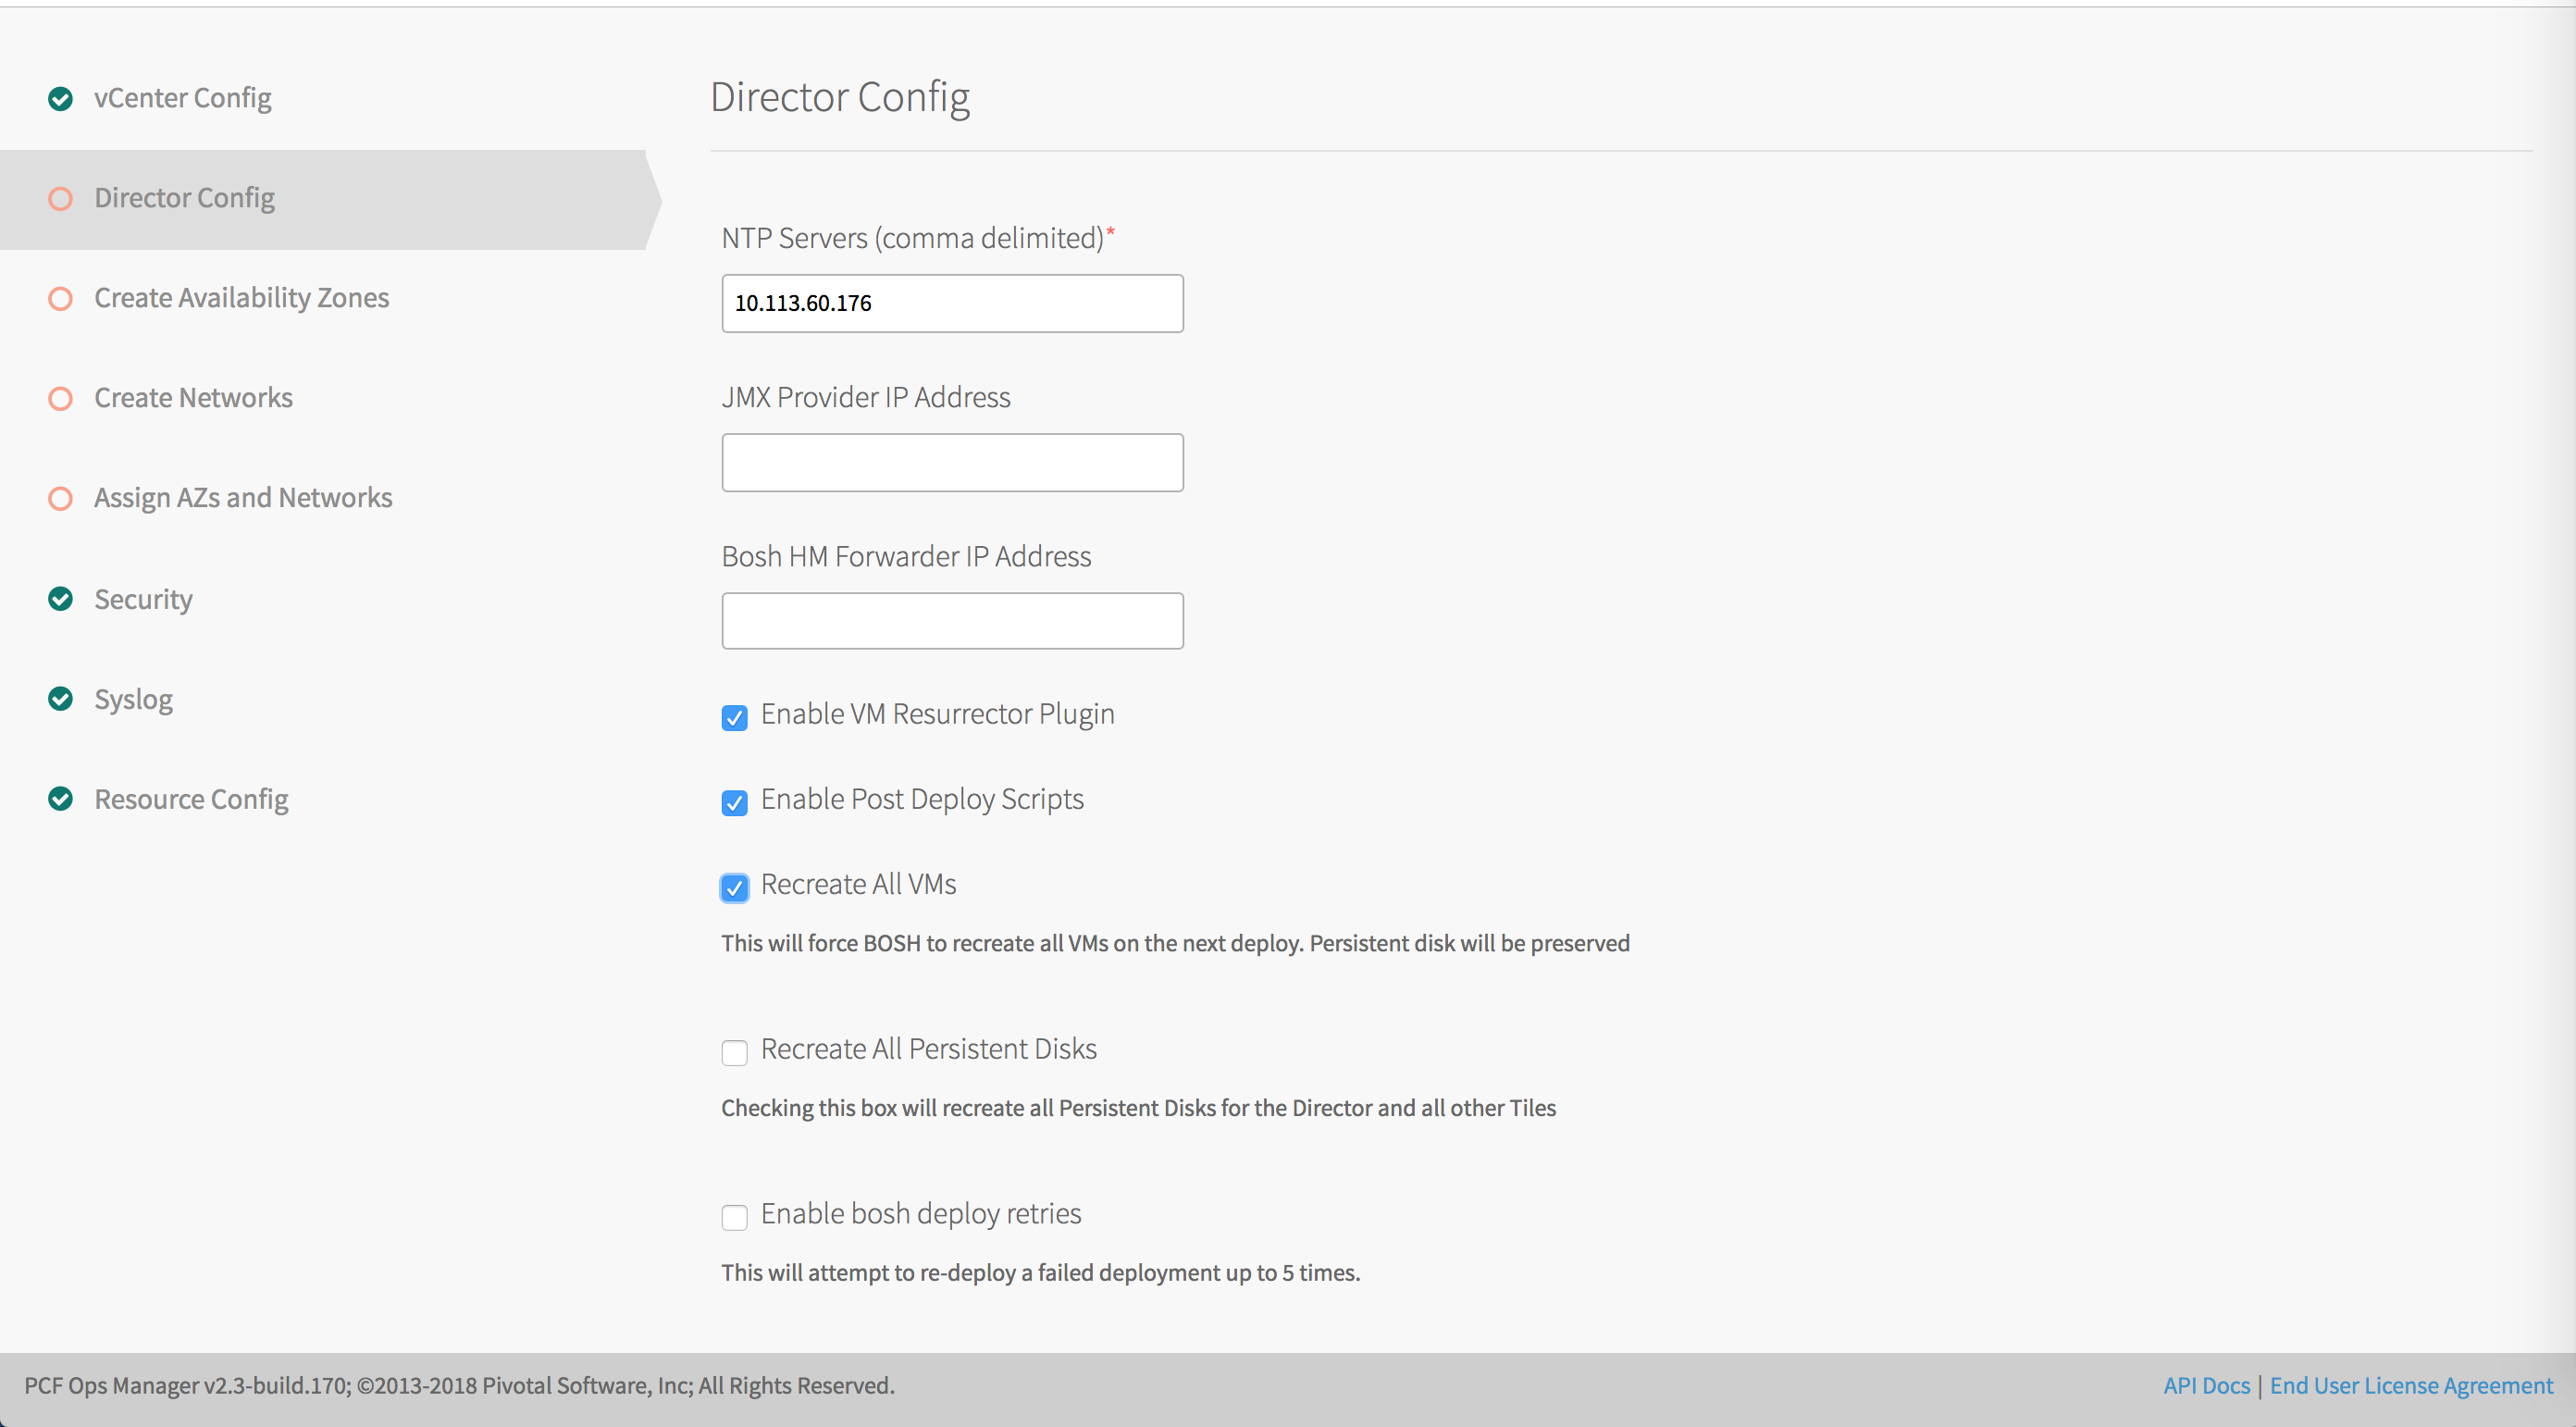
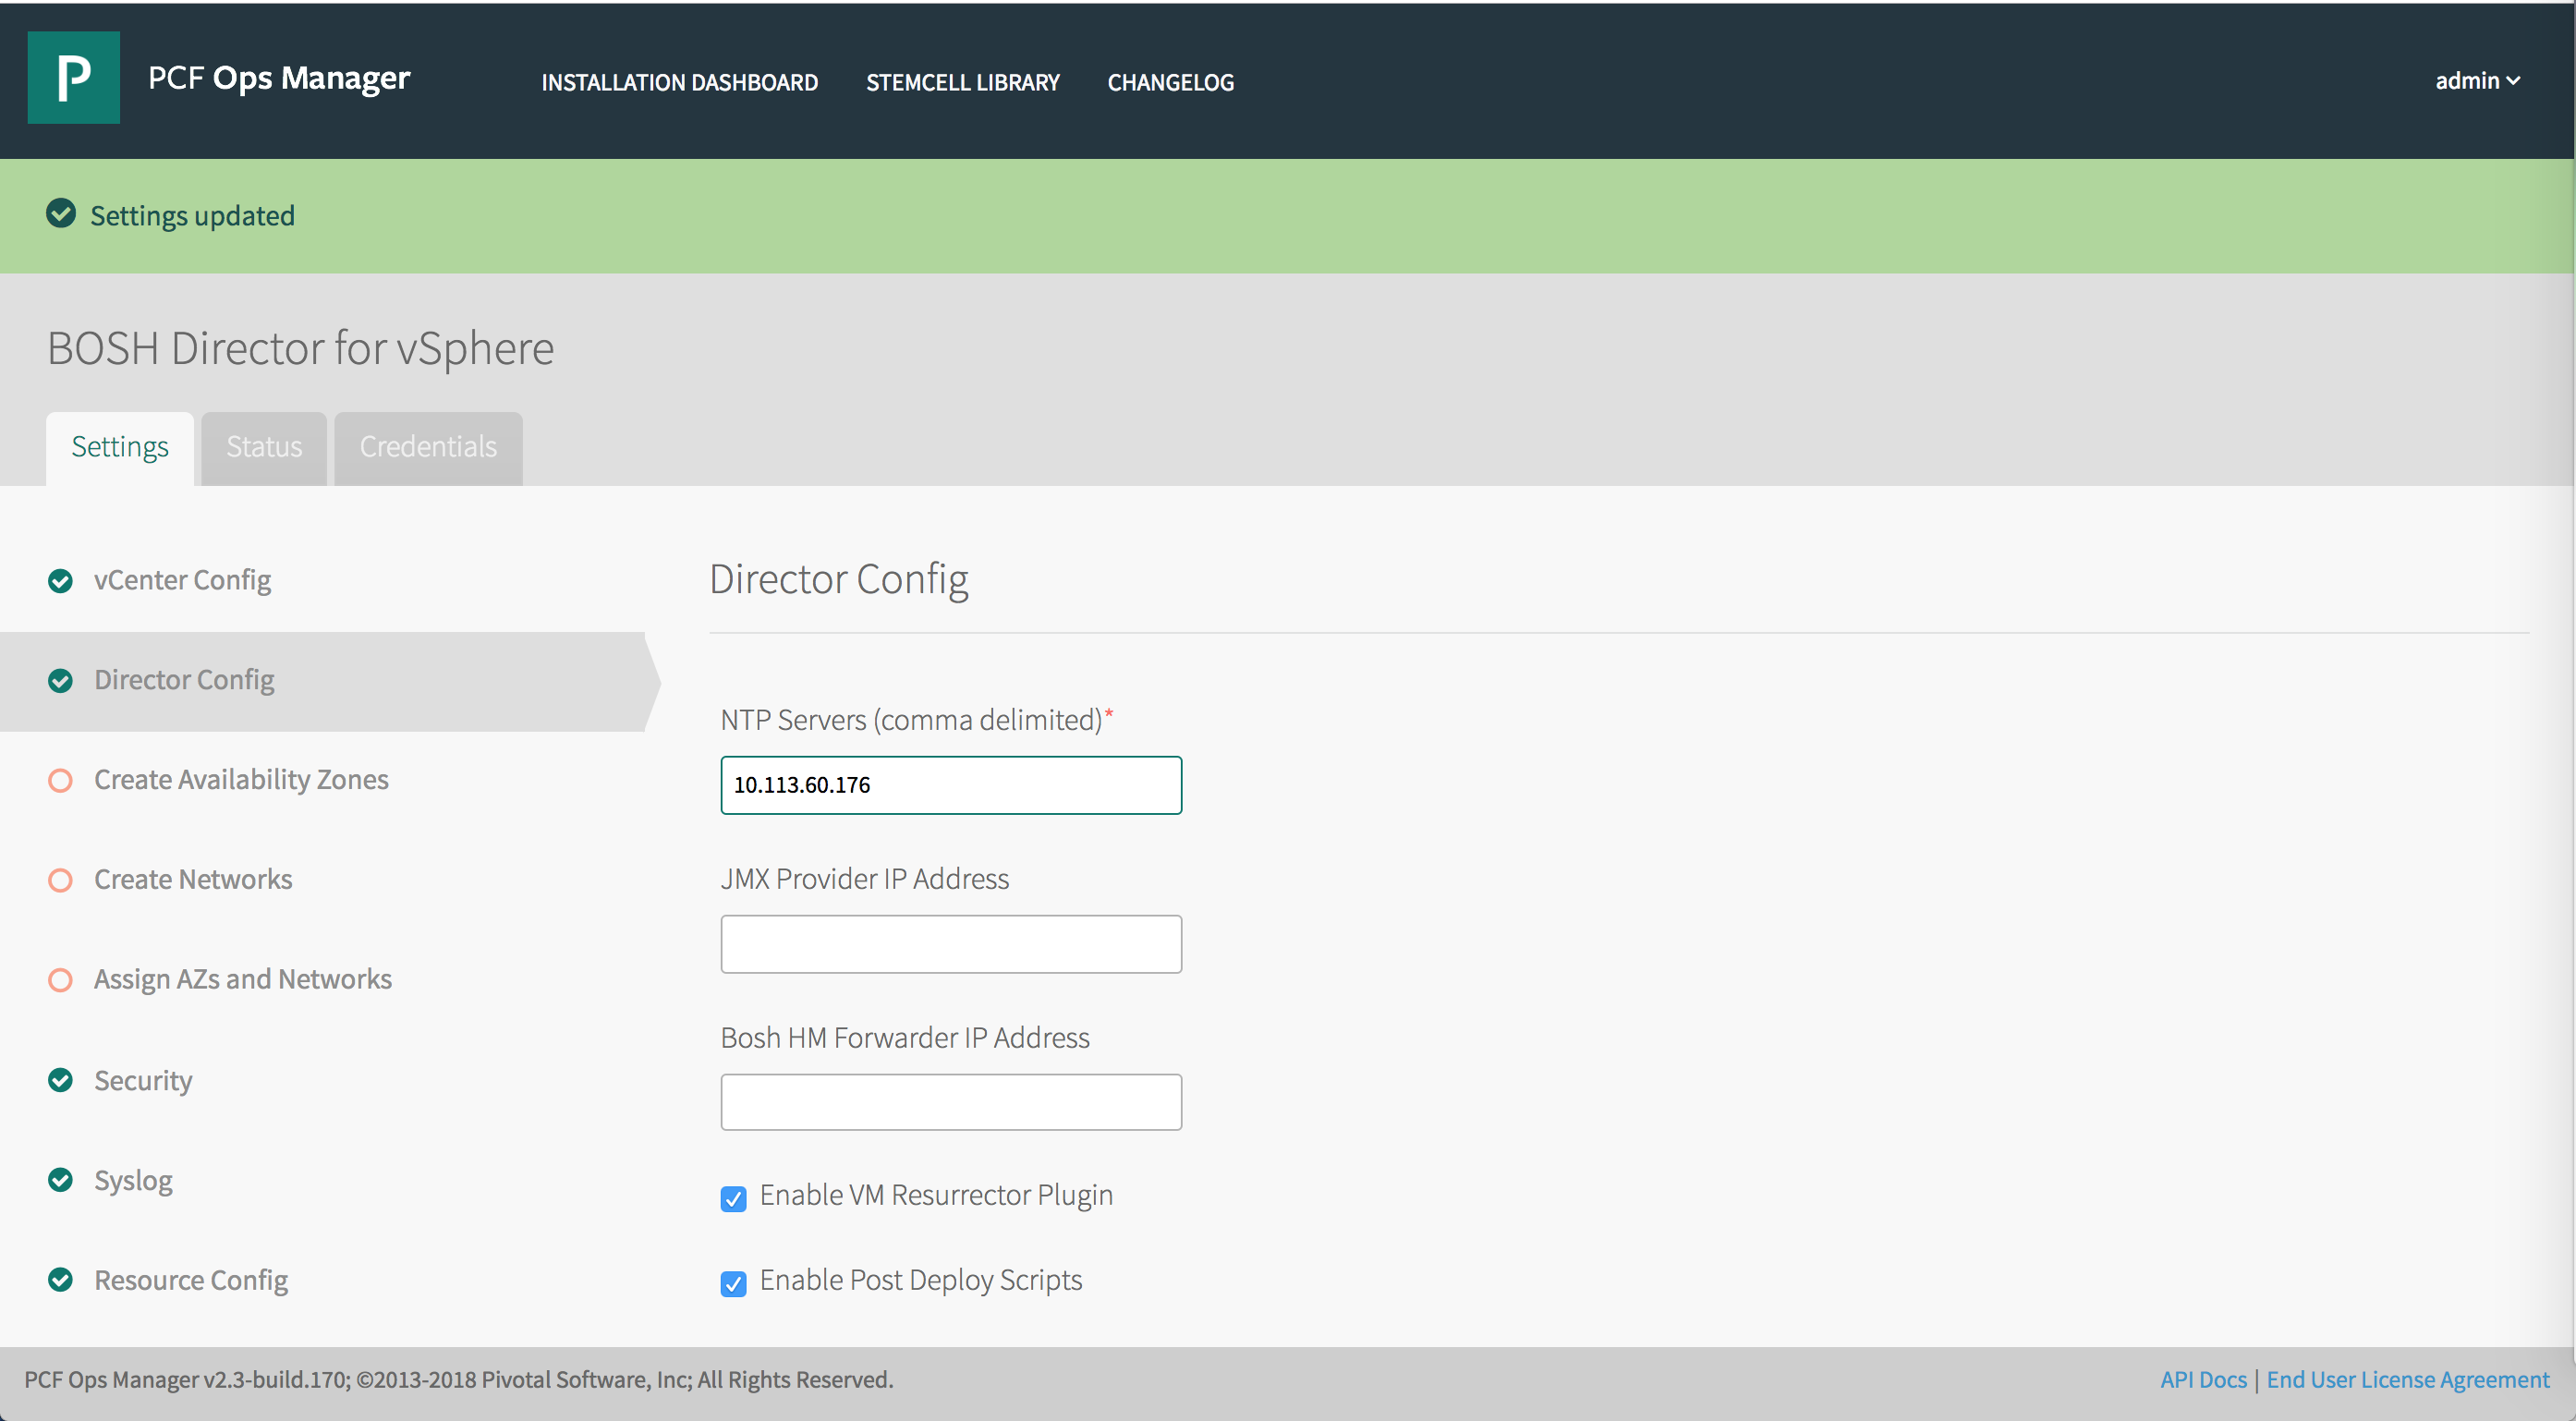
Select Director Config in BOSH Director.
-
In the NTP Servers (comma delimited) field, enter your NTP server addresses.
Note: The NTP server configuration only updates after VM recreation. Ensure that you select the Recreate VMs deployed by the BOSH Director check box if you modify the value of this field.
-
Leave the JMX Provider IP Address field blank.
-
Leave the Bosh HM Forwarder IP Address field blank.
-
Select the Enable VM Resurrector Plugin to enable BOSH Resurrector functionality.
-
Select Enable Post Deploy Scripts to run a post-deploy script after deployment. This script allows the job to execute additional commands against a deployment.
Note: You must enable post-deploy scripts to install Tanzu Kubernetes Grid Integrated Edition.
-
Select Recreate VMs deployed by the BOSH Director to force BOSH to recreate all BOSH-managed VMs on the next deploy. This process does not destroy any persistent disk data.
-
For typical Tanzu Kubernetes Grid Integrated Edition deployments, the default settings for all other BOSH Director configuration parameters are suitable. Optionally you can apply additional configurations to BOSH Director. See Director Config Pane in Configuring BOSH Director on vSphere in the Ops Manager documentation for details.
Note: If you need to be able to remotely access the BOSH Director VM using the BOSH CLI, and you are deploying Tanzu Kubernetes Grid Integrated Edition with NSX-T in a NAT topology, you must provide the Director Hostname for BOSH at the time of installation. See Director Config Pane in Configuring BOSH Director on vSphere in the Ops Manager documentation for details.
-
Click Save.
Step 4: Create Availability Zones
On vSphere with NSX-T, operators define and create Availability Zones (AZs) using vCenter clusters and resource pools. Plans defined in the TKGI tile then use these AZs to enable high availability for TKGI clusters.
The Tanzu Kubernetes Grid Integrated Edition control plane also runs in one of the AZs.
For more information on AZs in TKGI, see Availability Zones in Tanzu Kubernetes Grid Integrated Edition Architecture.
To configure Availability Zones:
-
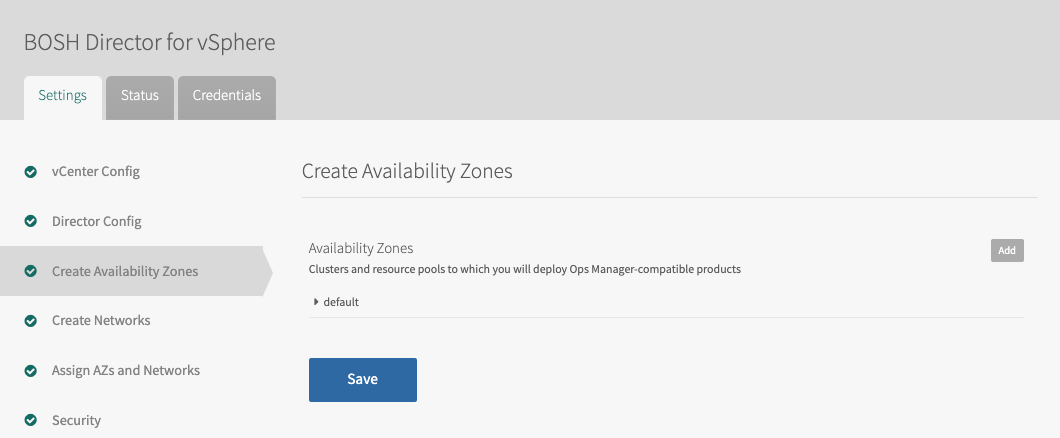
Select Create Availability Zones in BOSH Director.
-
Use the following steps to create one or more Availability Zones for Tanzu Kubernetes Grid Integrated Edition to use:
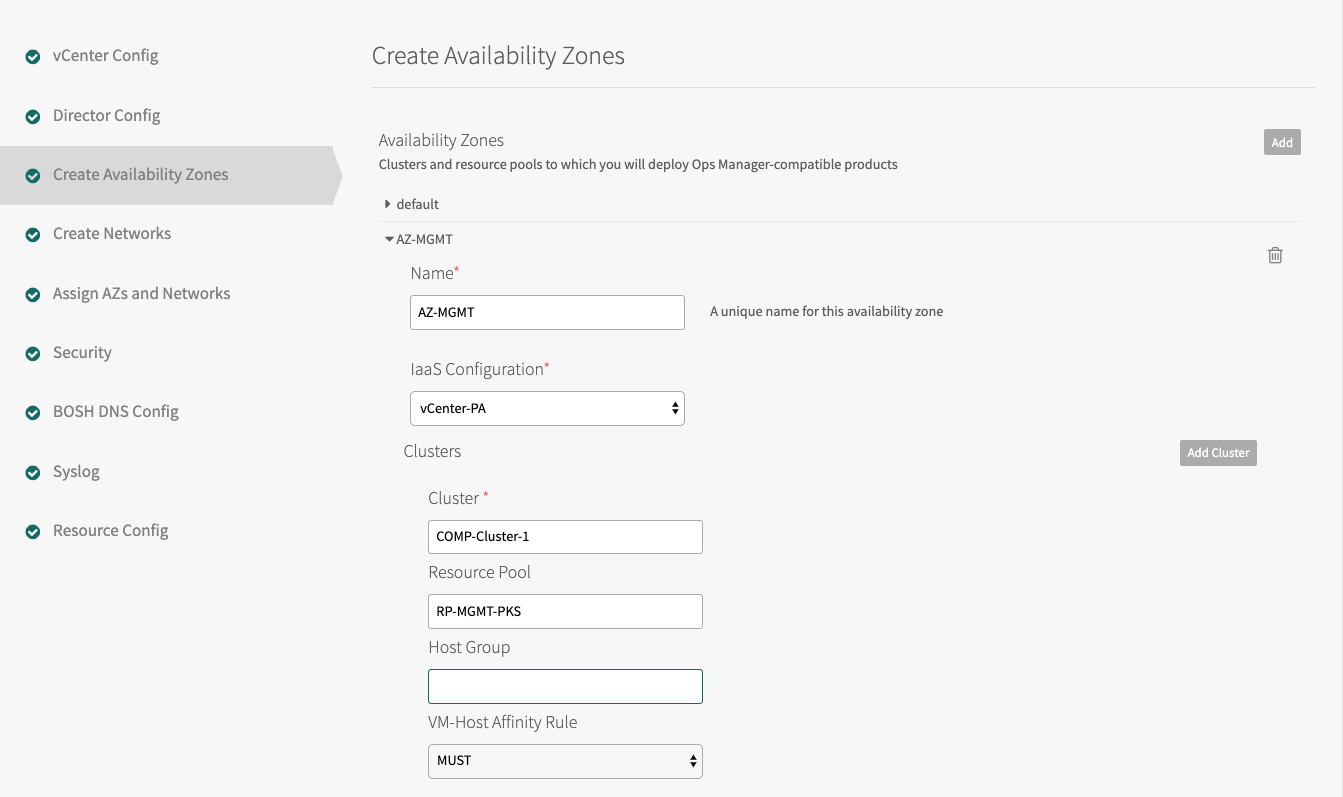
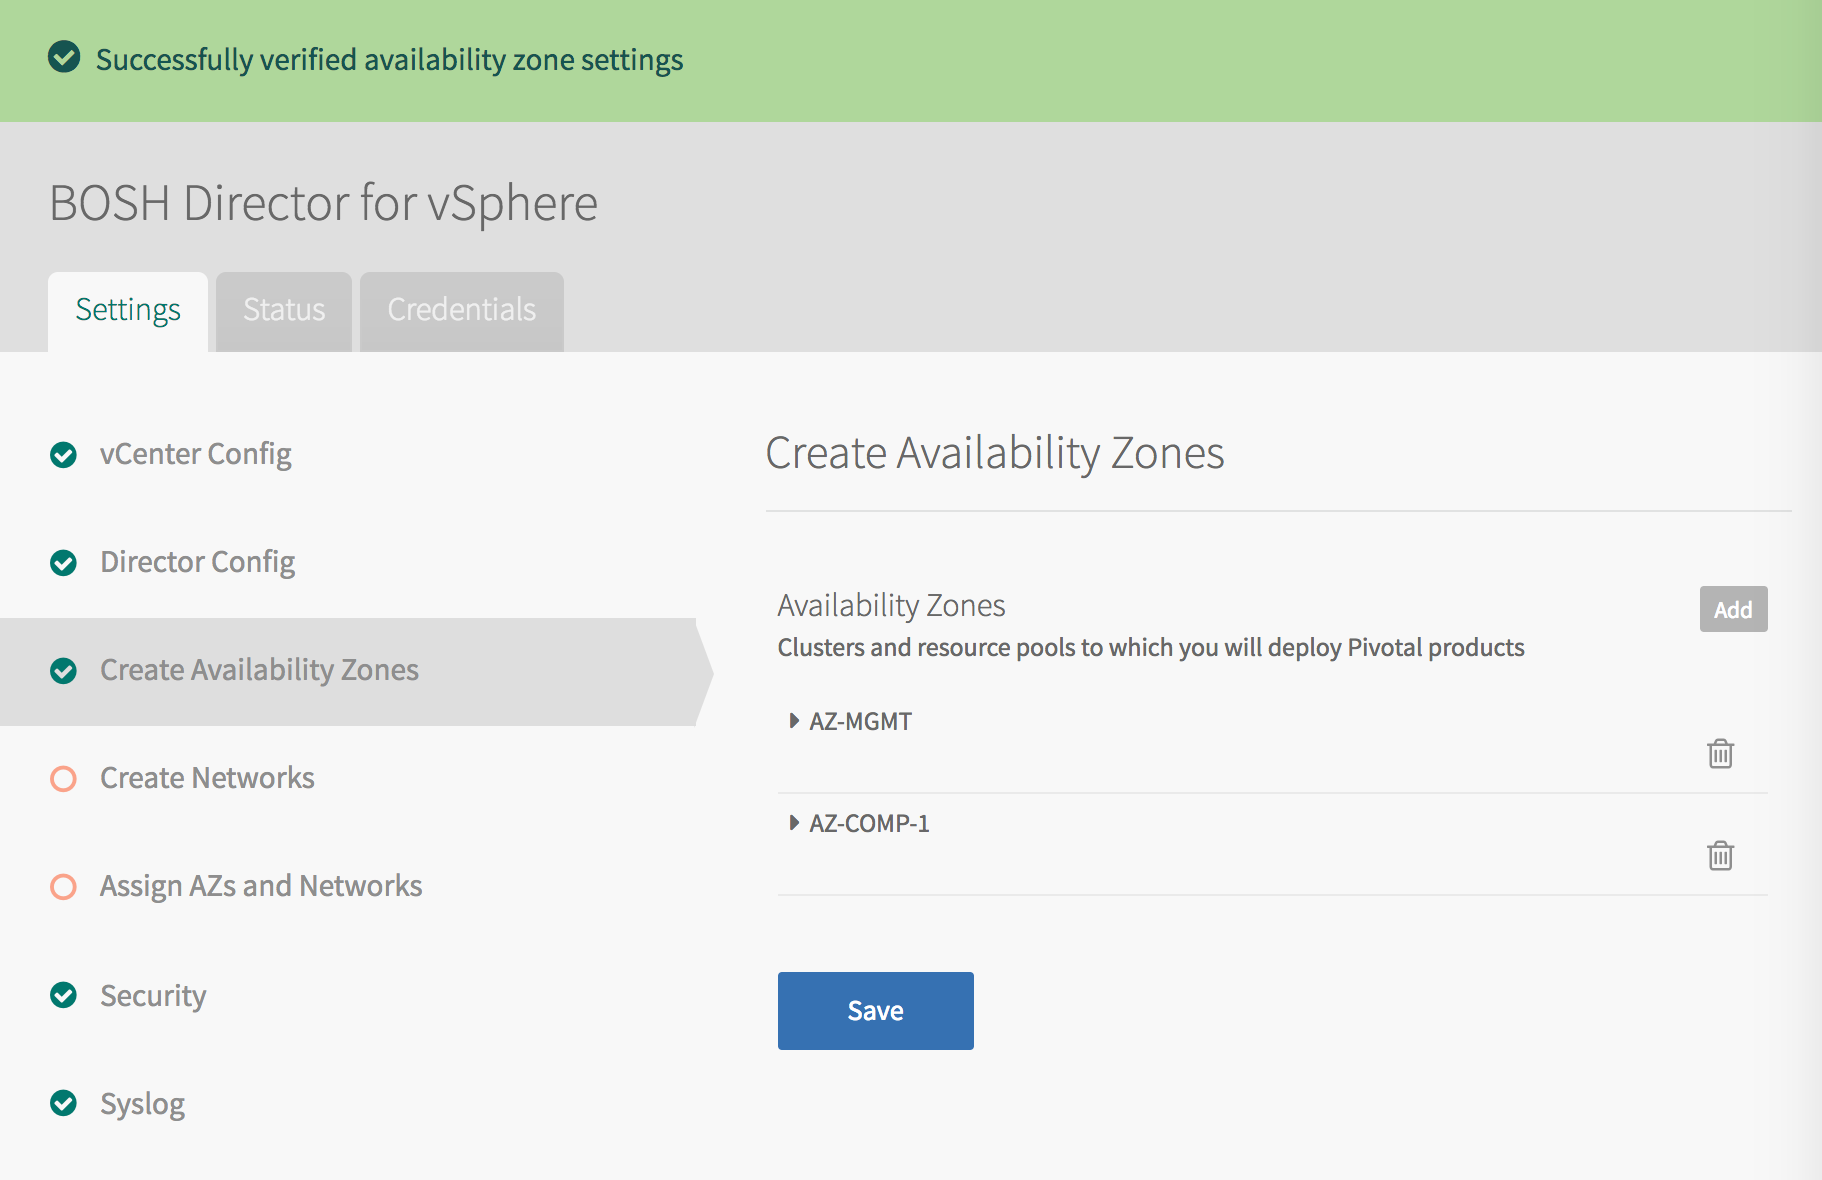
- Click Add and create the Tanzu Kubernetes Grid Integrated Edition Management AZ.
- Enter a unique Name for the Availability Zone, such as
AZ-MGMT. - Select the IaaS configuration (vSphere/vCenter).
- Enter the name of an existing vCenter Cluster to use as an Availability Zone, such as
COMP-Cluster-1. - Enter the name of the Tanzu Kubernetes Grid Integrated Edition Management Resource Pool in the vCenter cluster that you specified above, such as
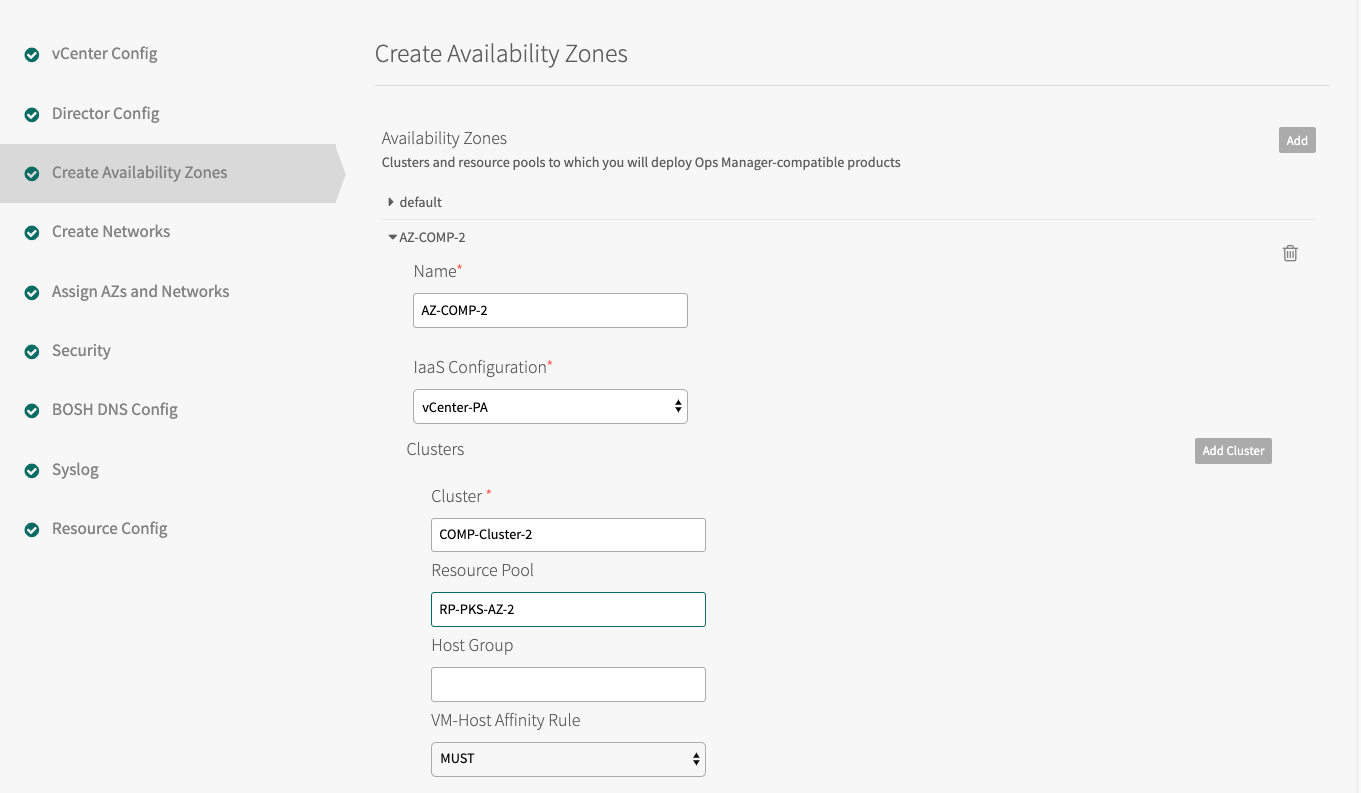
RP-MGMT-TKGI. The jobs running in this Availability Zone share the CPU and memory resources defined by the pool. - Click Add Cluster and create at least one Tanzu Kubernetes Grid Integrated Edition Compute AZ.
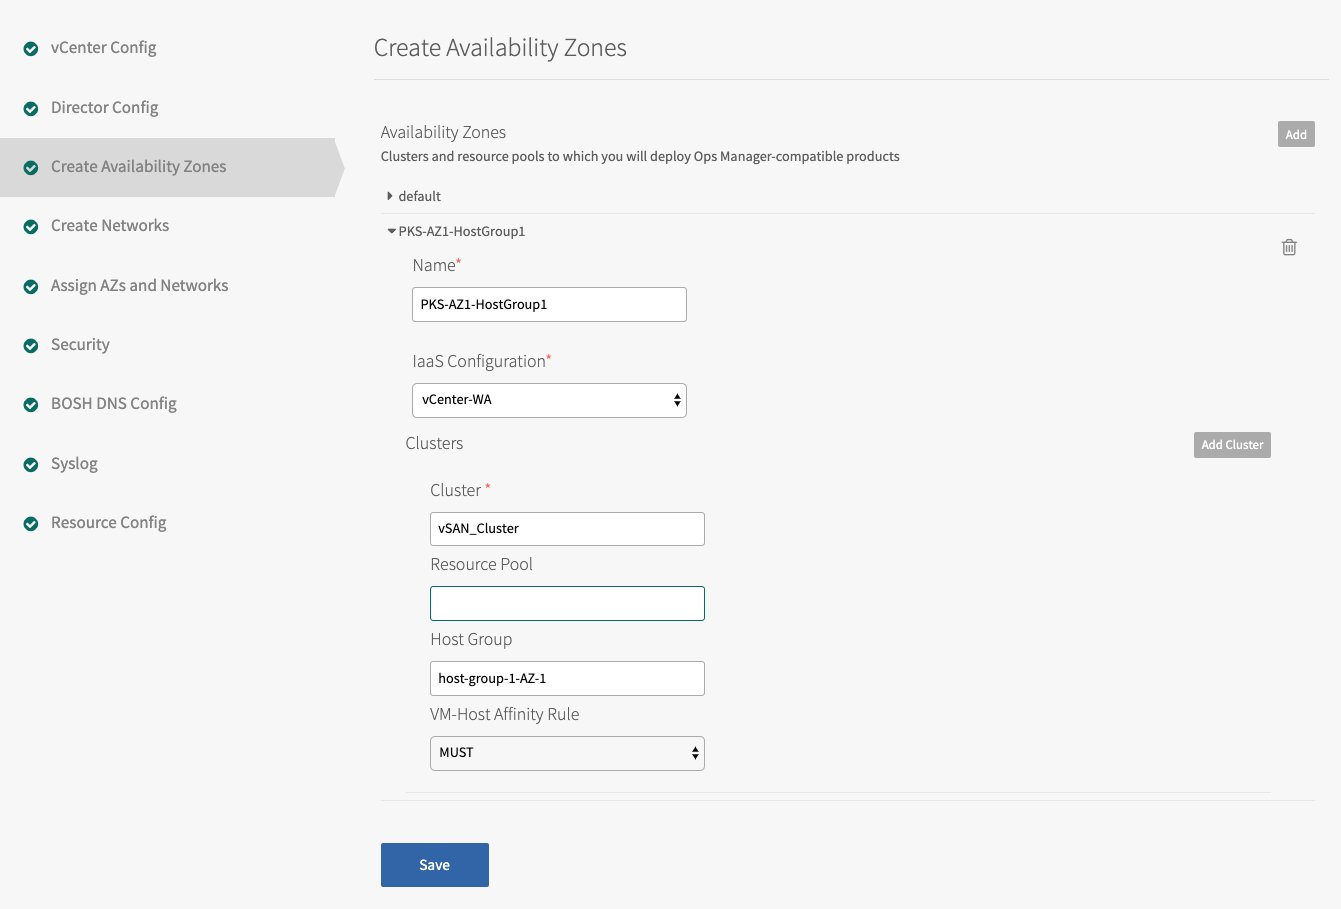
- Specify the Cluster and the Resource Pool, such as
RP-TKGI-AZ. Alternatively, specify the Cluster and the Host Group. See Using vSphere Host Group for more information. - (Optional) If you are using a host group with vSAN Stretched Clusters, set the VM-Host Affinity Rule dropdown to
SHOULD. This setting maintains high availability by letting TKGI restart VMs in another host group if their AZ fails. TKGI ignores this setting if the vSAN cluster has no host group configured. - Add additional clusters as necessary. Click the trash icon to delete a cluster. The first cluster cannot be deleted.

-
Click Save.
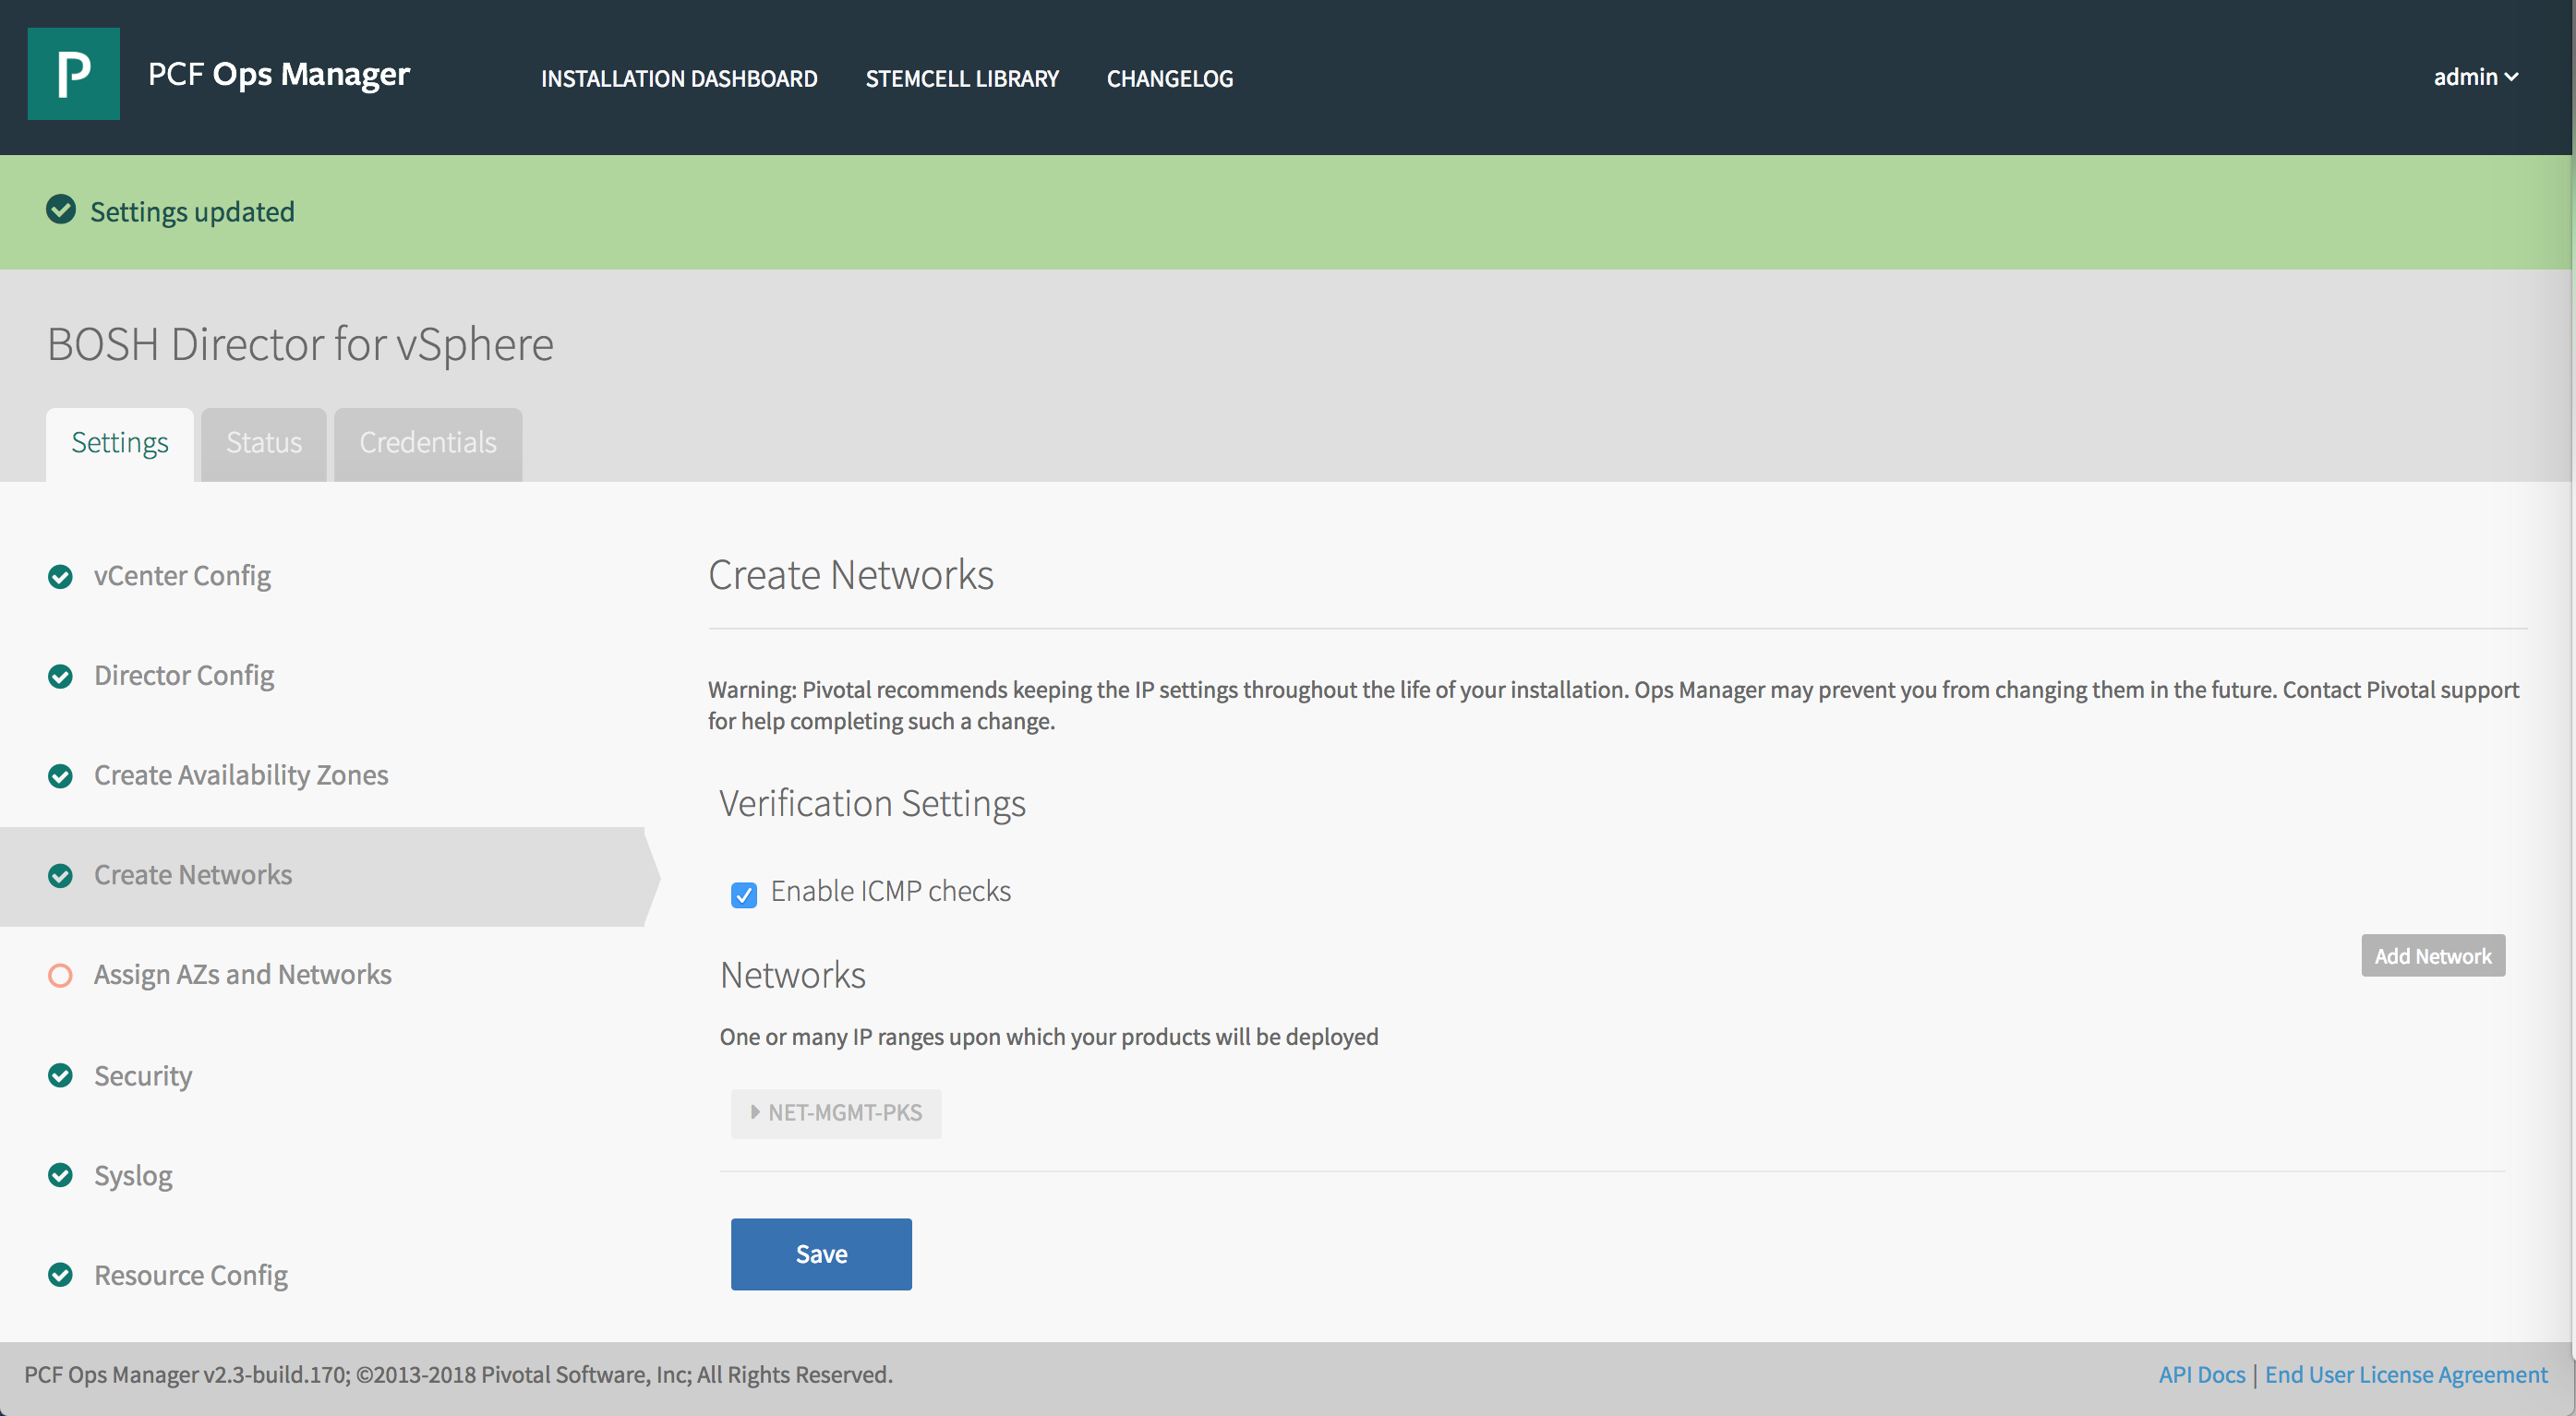
Step 5: Create Networks
You must configure and create BOSH Director networking.
Note: If you are using No-NAT with Virtual Switch (VSS/VDS) Topology, create the infrastructure network and optionally the TKGI network by following the instructions in Create Networks Pane in Configuring BOSH Director on vSphere in the Ops Manager documentation. While completing the steps in Create Networks Pane, do not create the services network. With TKGI on NSX-T, NSX-T manages the dynamically created networks.
To configure BOSH Director networking:
-
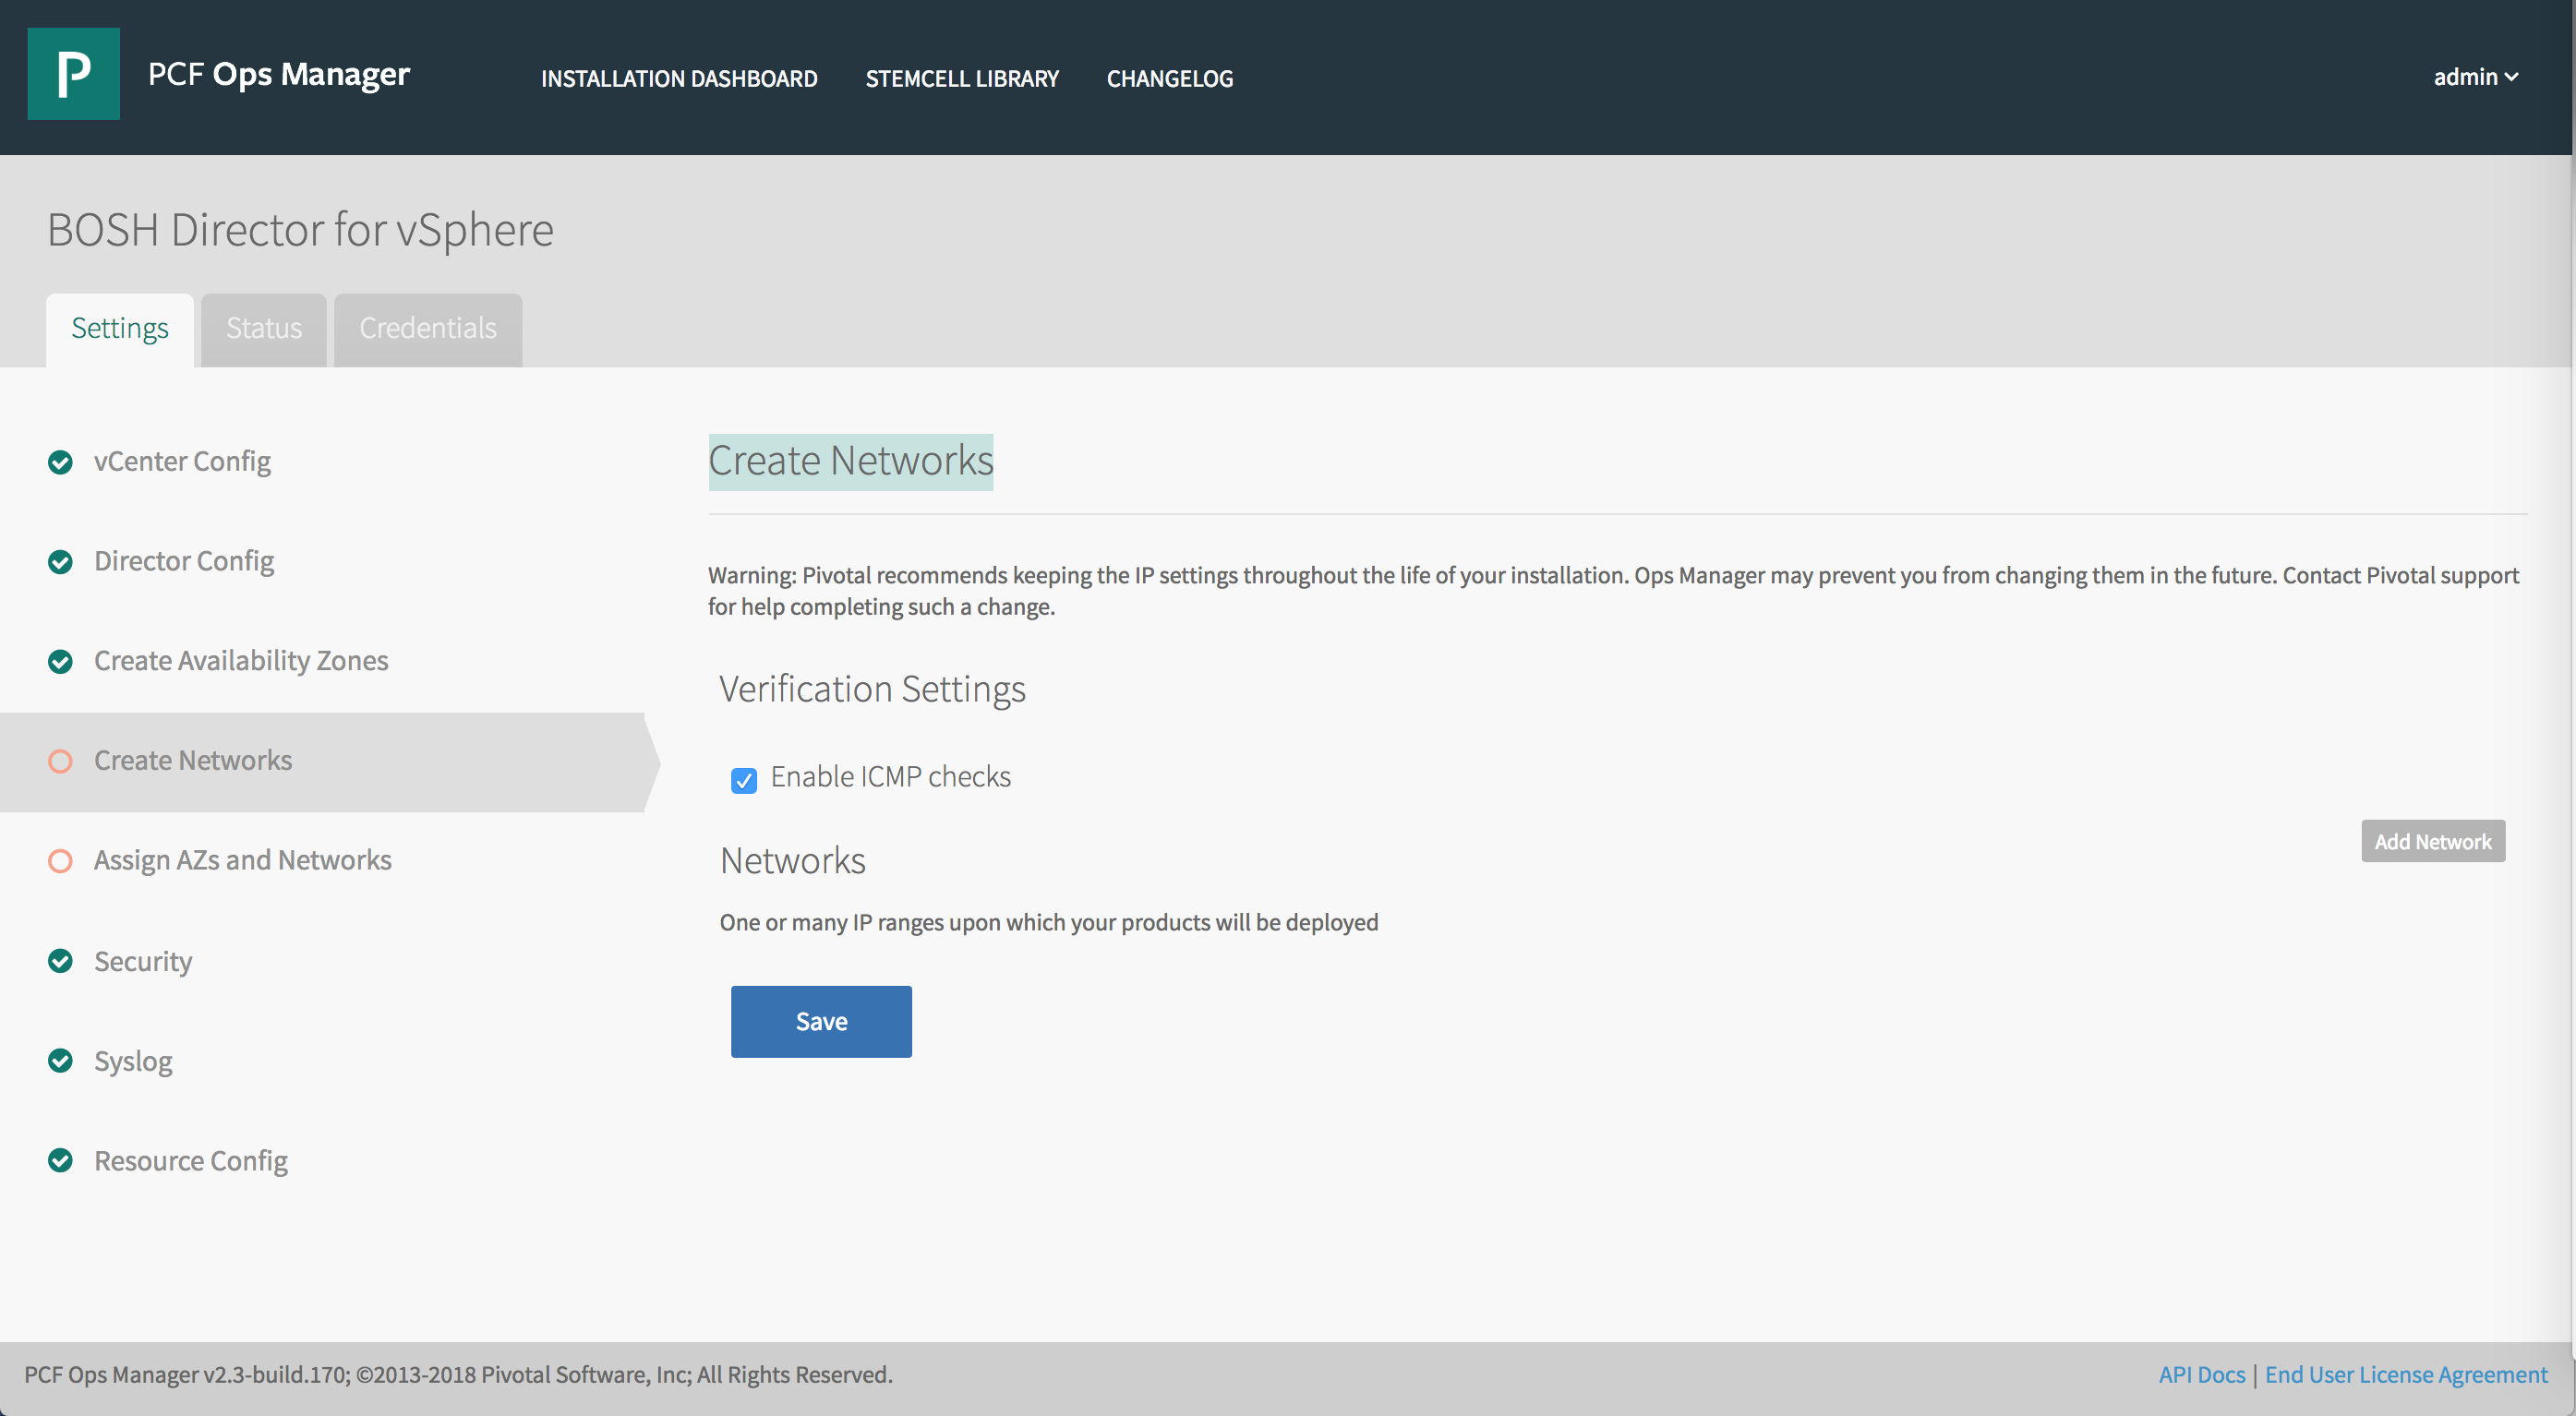
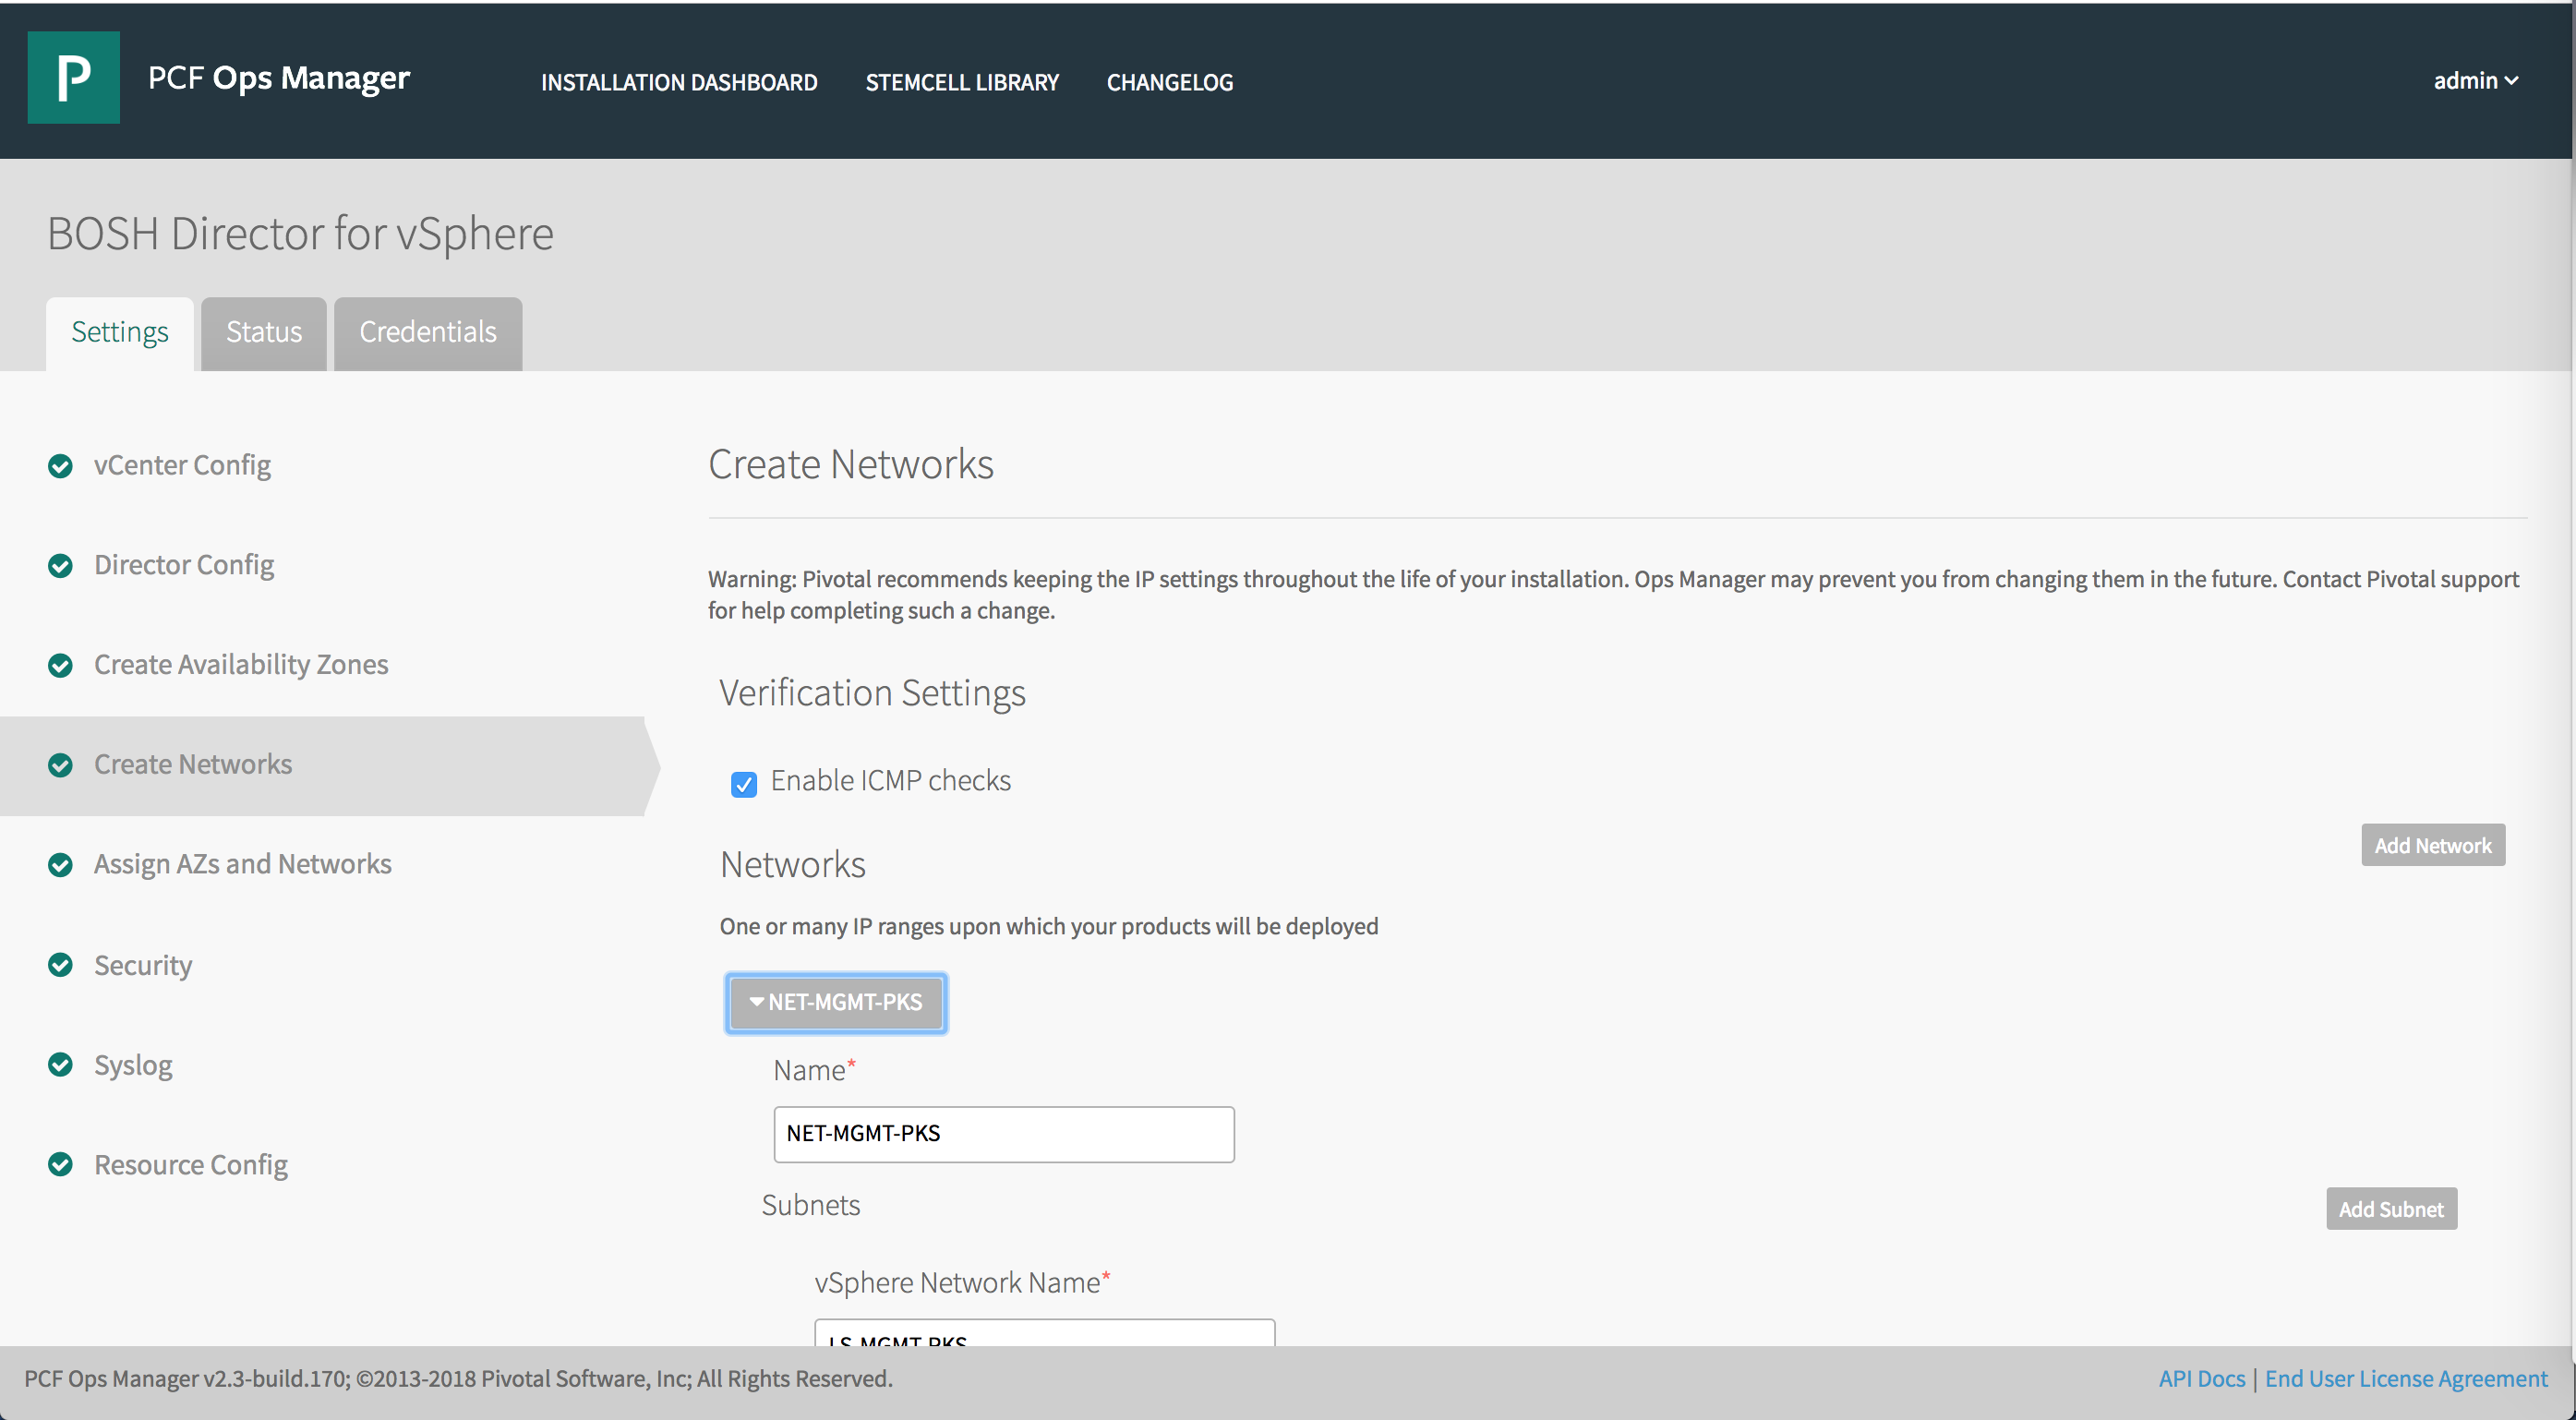
Select Create Networks in BOSH Director.
-
Select Enable ICMP checks to enable ICMP on your networks. Ops Manager uses ICMP checks to confirm that components within your network are reachable.
-
Click Add Network.
-
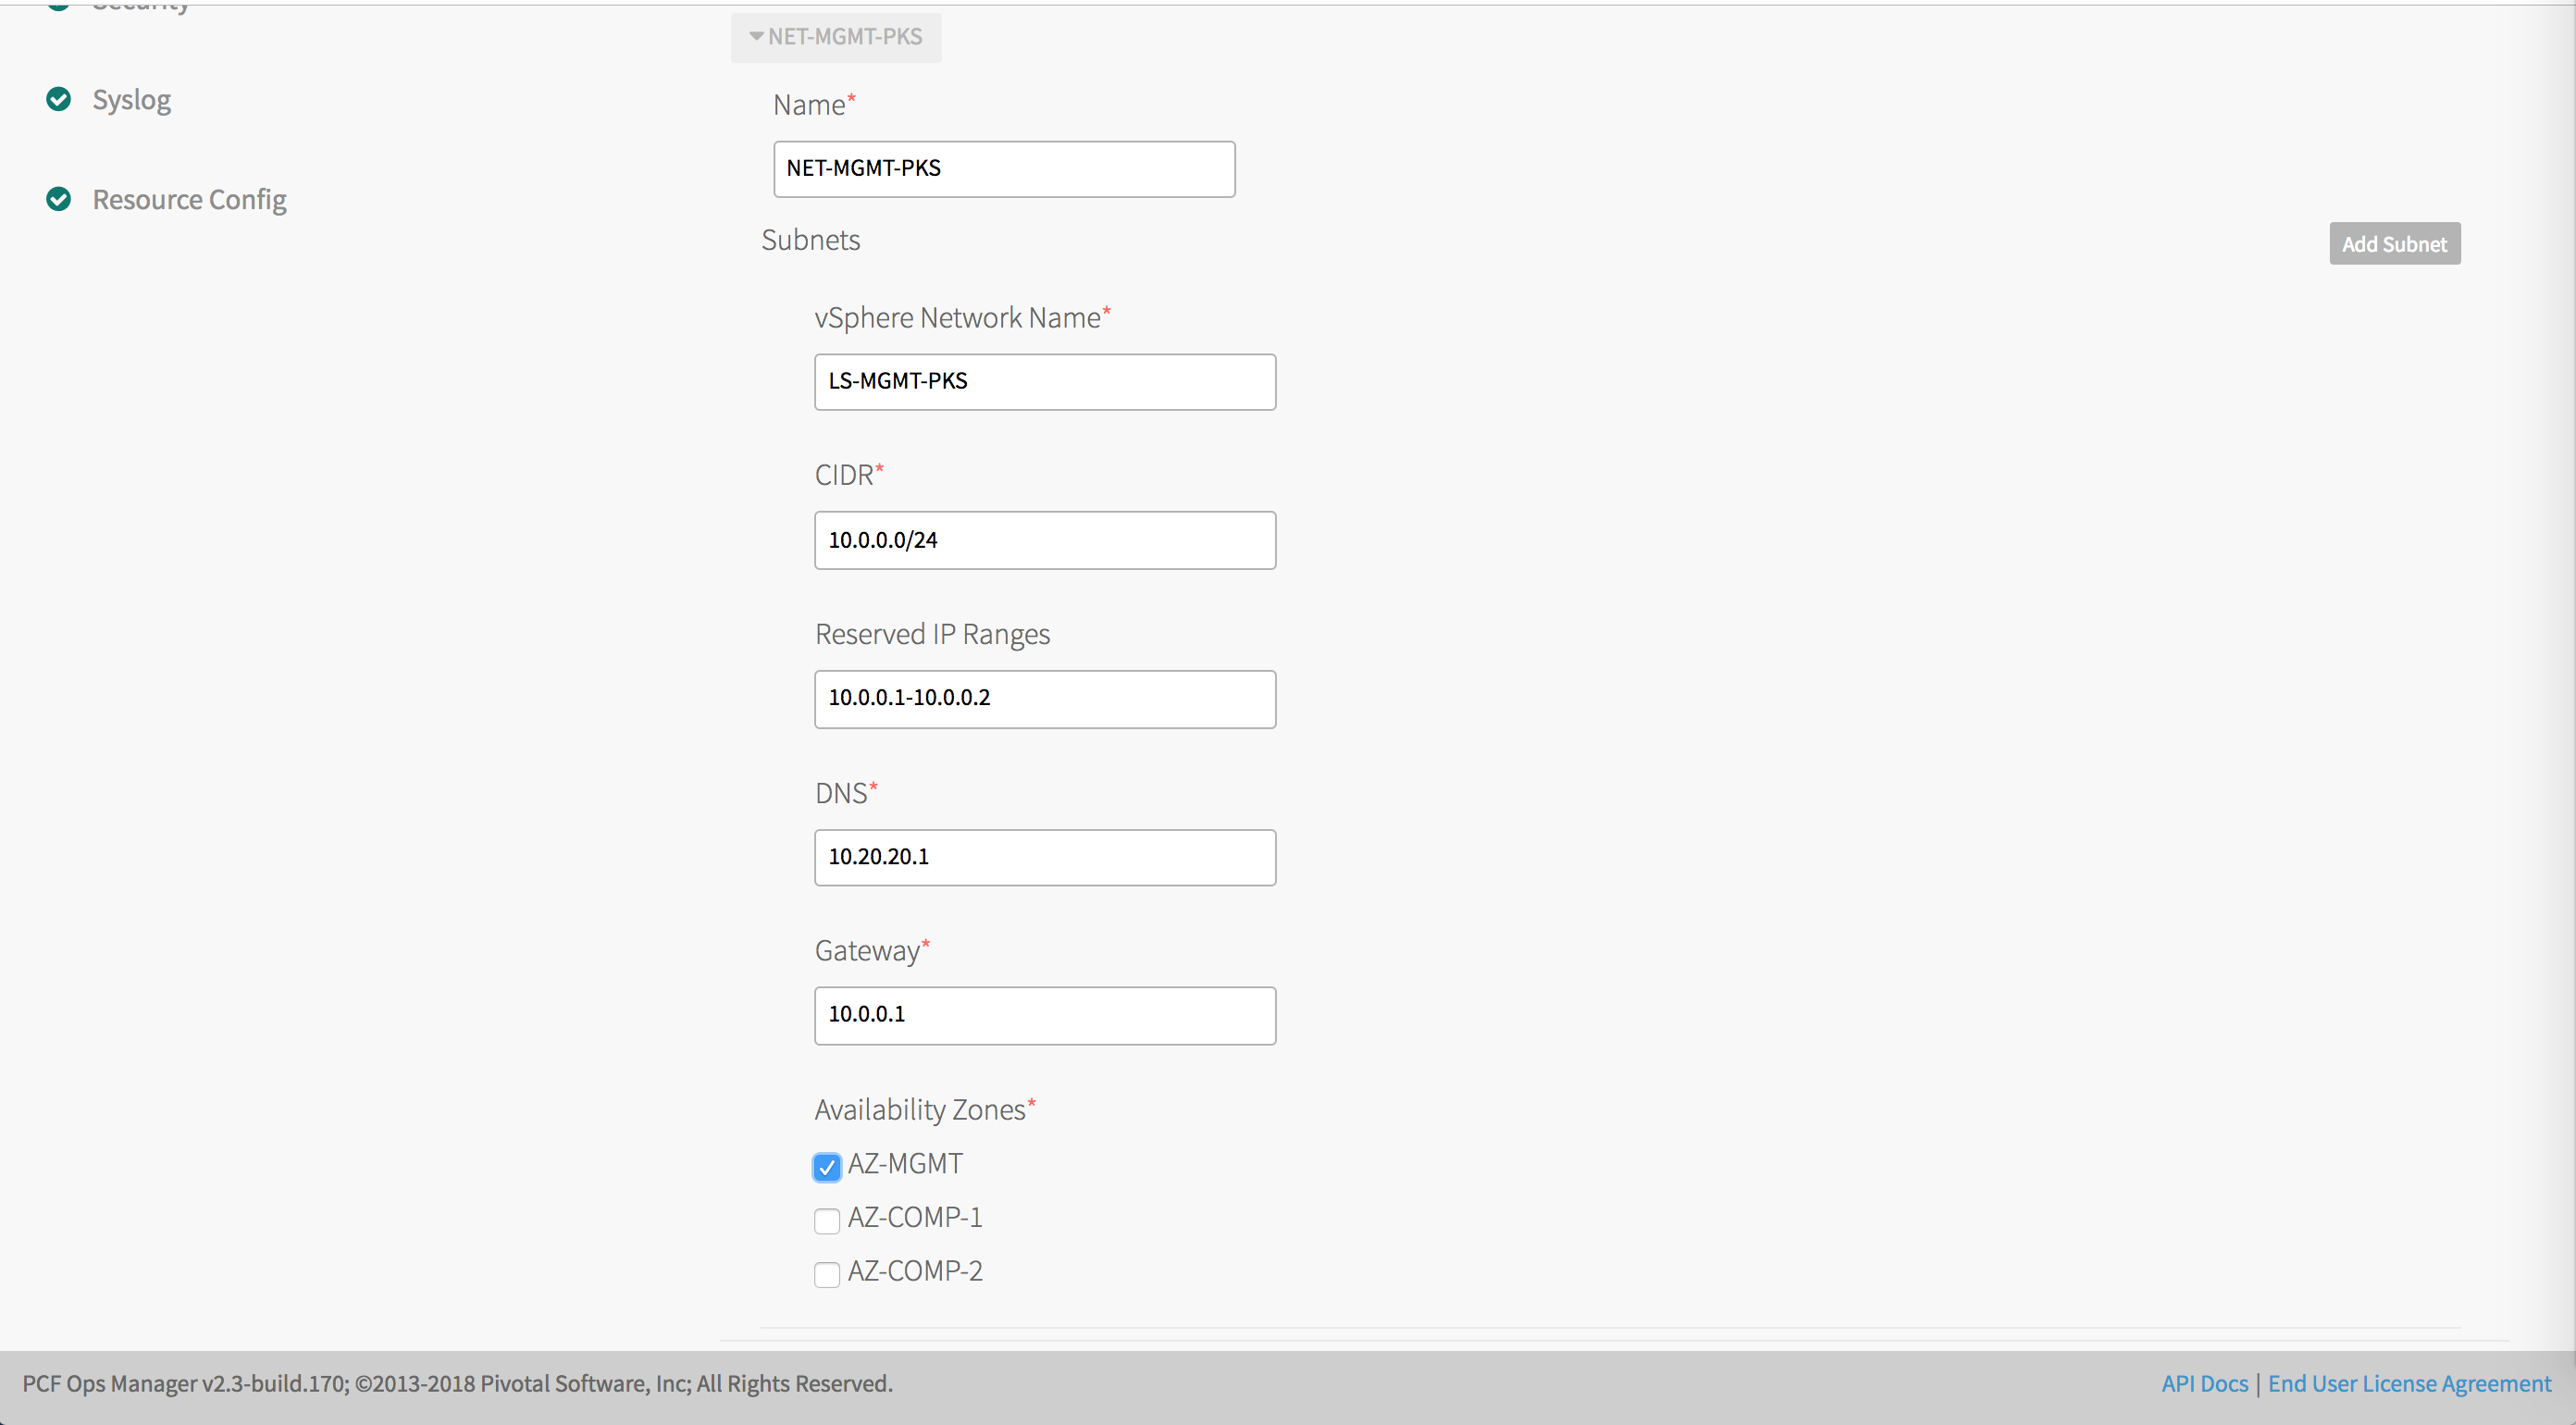
Create the following network:
-
NET-MGMT-TKGI: Network for Ops Manager, BOSH Director, and Tanzu Kubernetes Grid Integrated Edition components. This network maps to the NSX logical switch created for the Tanzu Kubernetes Grid Integrated Edition Management Network. See Create Management Plane in Installing and Configuring NSX-T Data Center v3.0 for TKGI.Note: NSX-T automatically creates the service network to be used by the control plane and worker nodes (VMs) for Kubernetes clusters managed by Tanzu Kubernetes Grid Integrated Edition. Do not manually create this network.
Use the following values as a guide when you define the network in BOSH. Replace the IP addresses with ranges you defined for the Create Management Plane in Installing and Configuring NSX-T Data Center v3.0 for TKGI. Reserve any IP addresses from the subnet that are already in use, such as the IP for Ops Manager and subnet gateway.
Infrastructure
NetworkField Configuration Name NET-MGMT-TKGIvSphere Network Name LS-MGMT-TKGICIDR 10.0.0.0/24Reserved IP Ranges 10.0.0.1-10.0.0.2DNS 10.20.20.1Gateway 10.0.0.1 -
-
Select the AZ-MGMT Availability Zone to use with the
NET-MGMT-TKGInetwork.Note: Do not select the COMPUTE network at this point in the configuration. It will be configured at the end of the procedure.
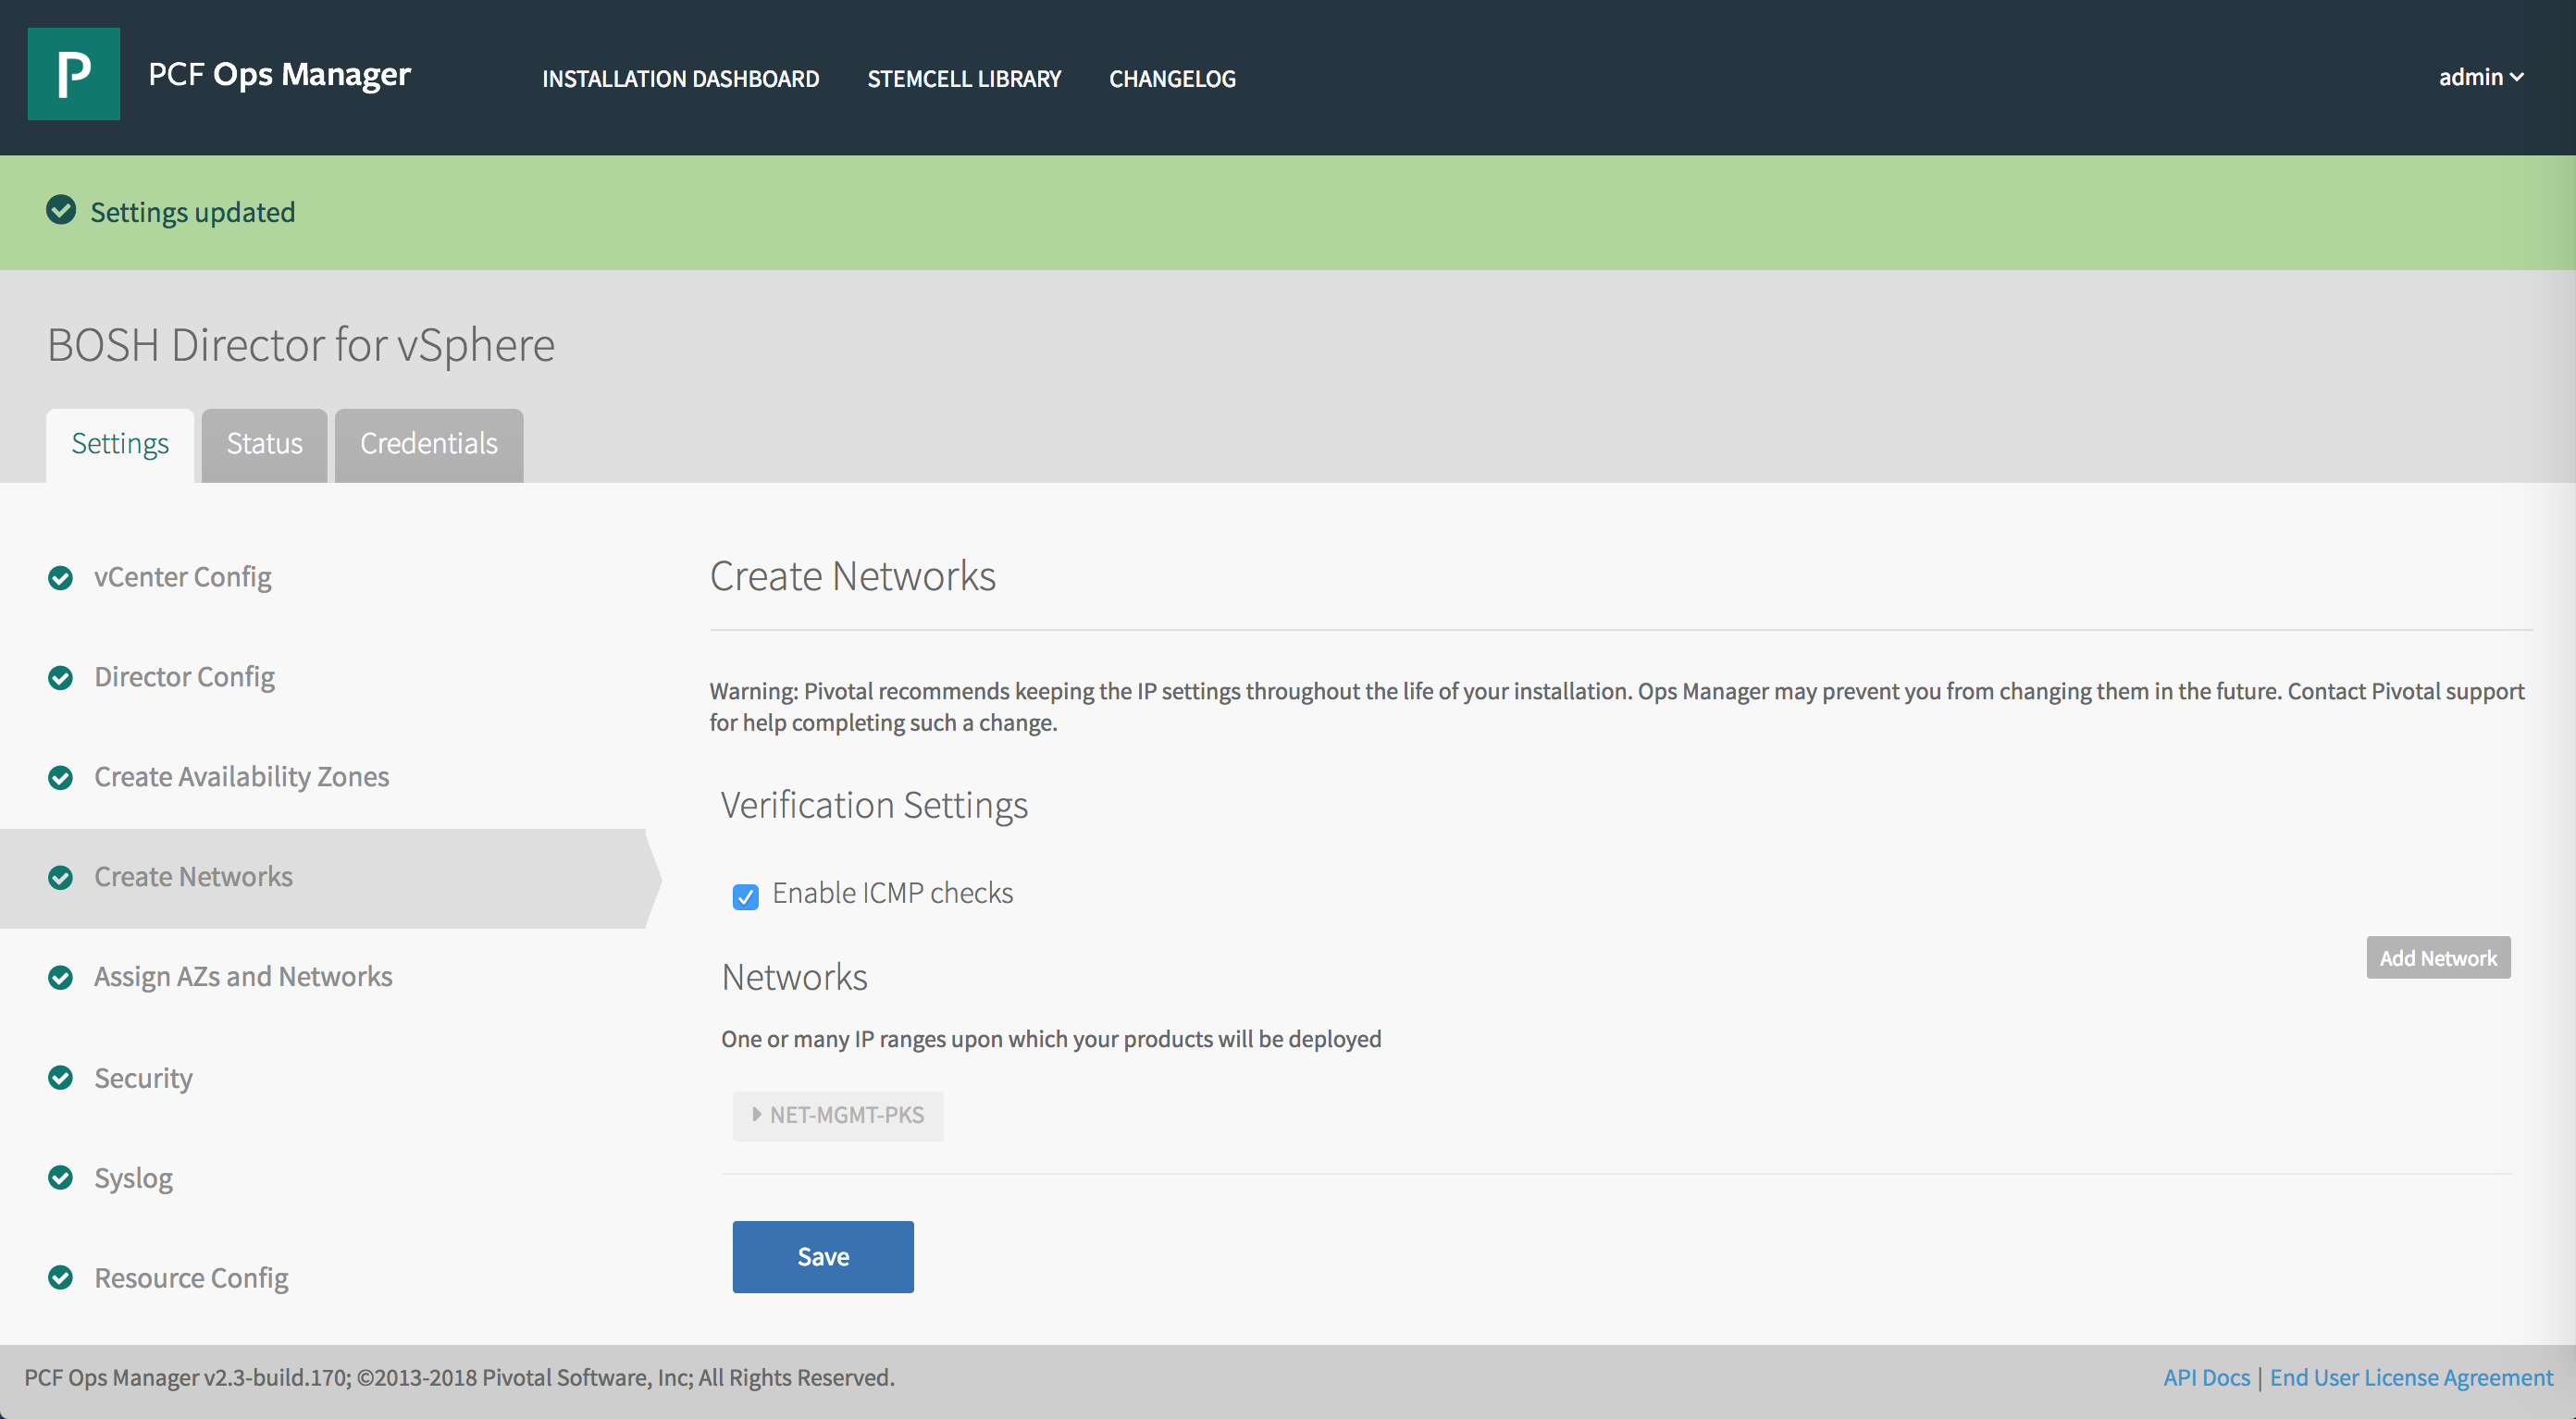
-
Click Save.
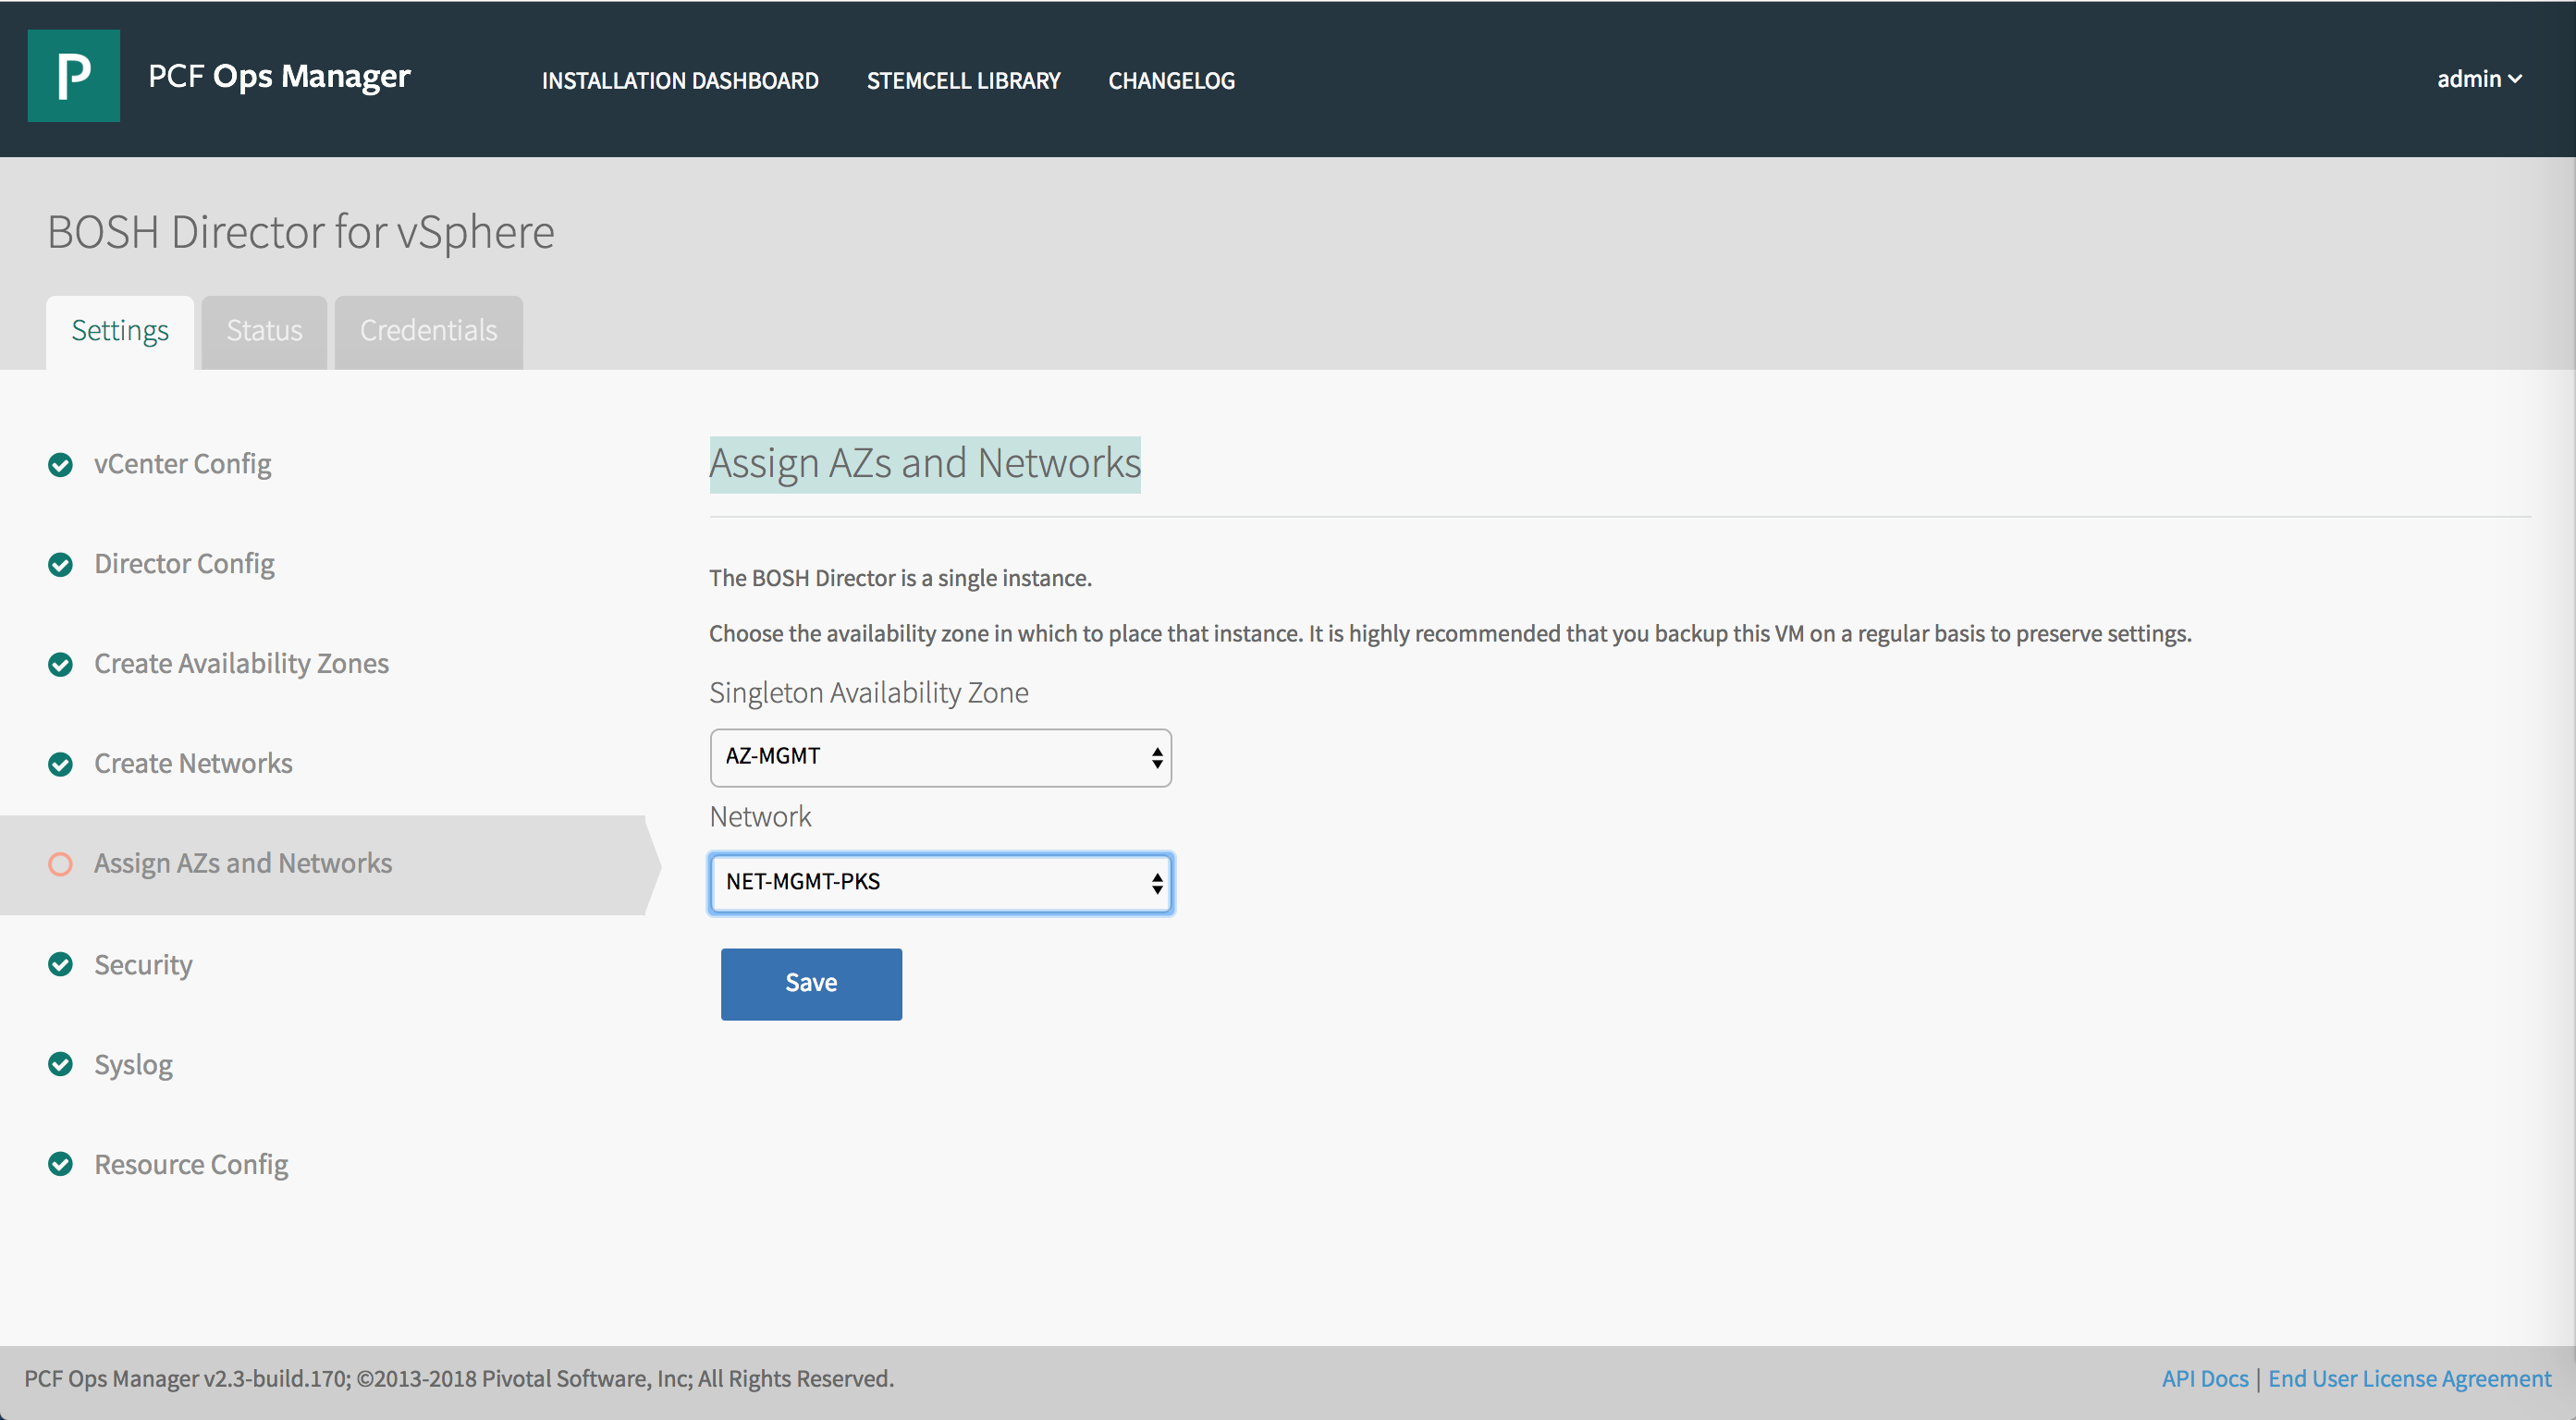
Step 6: Assign AZs and Networks
To configure the AZs and the Network for BOSH Director:
-
Select Assign AZs and Networks in BOSH Director.
-
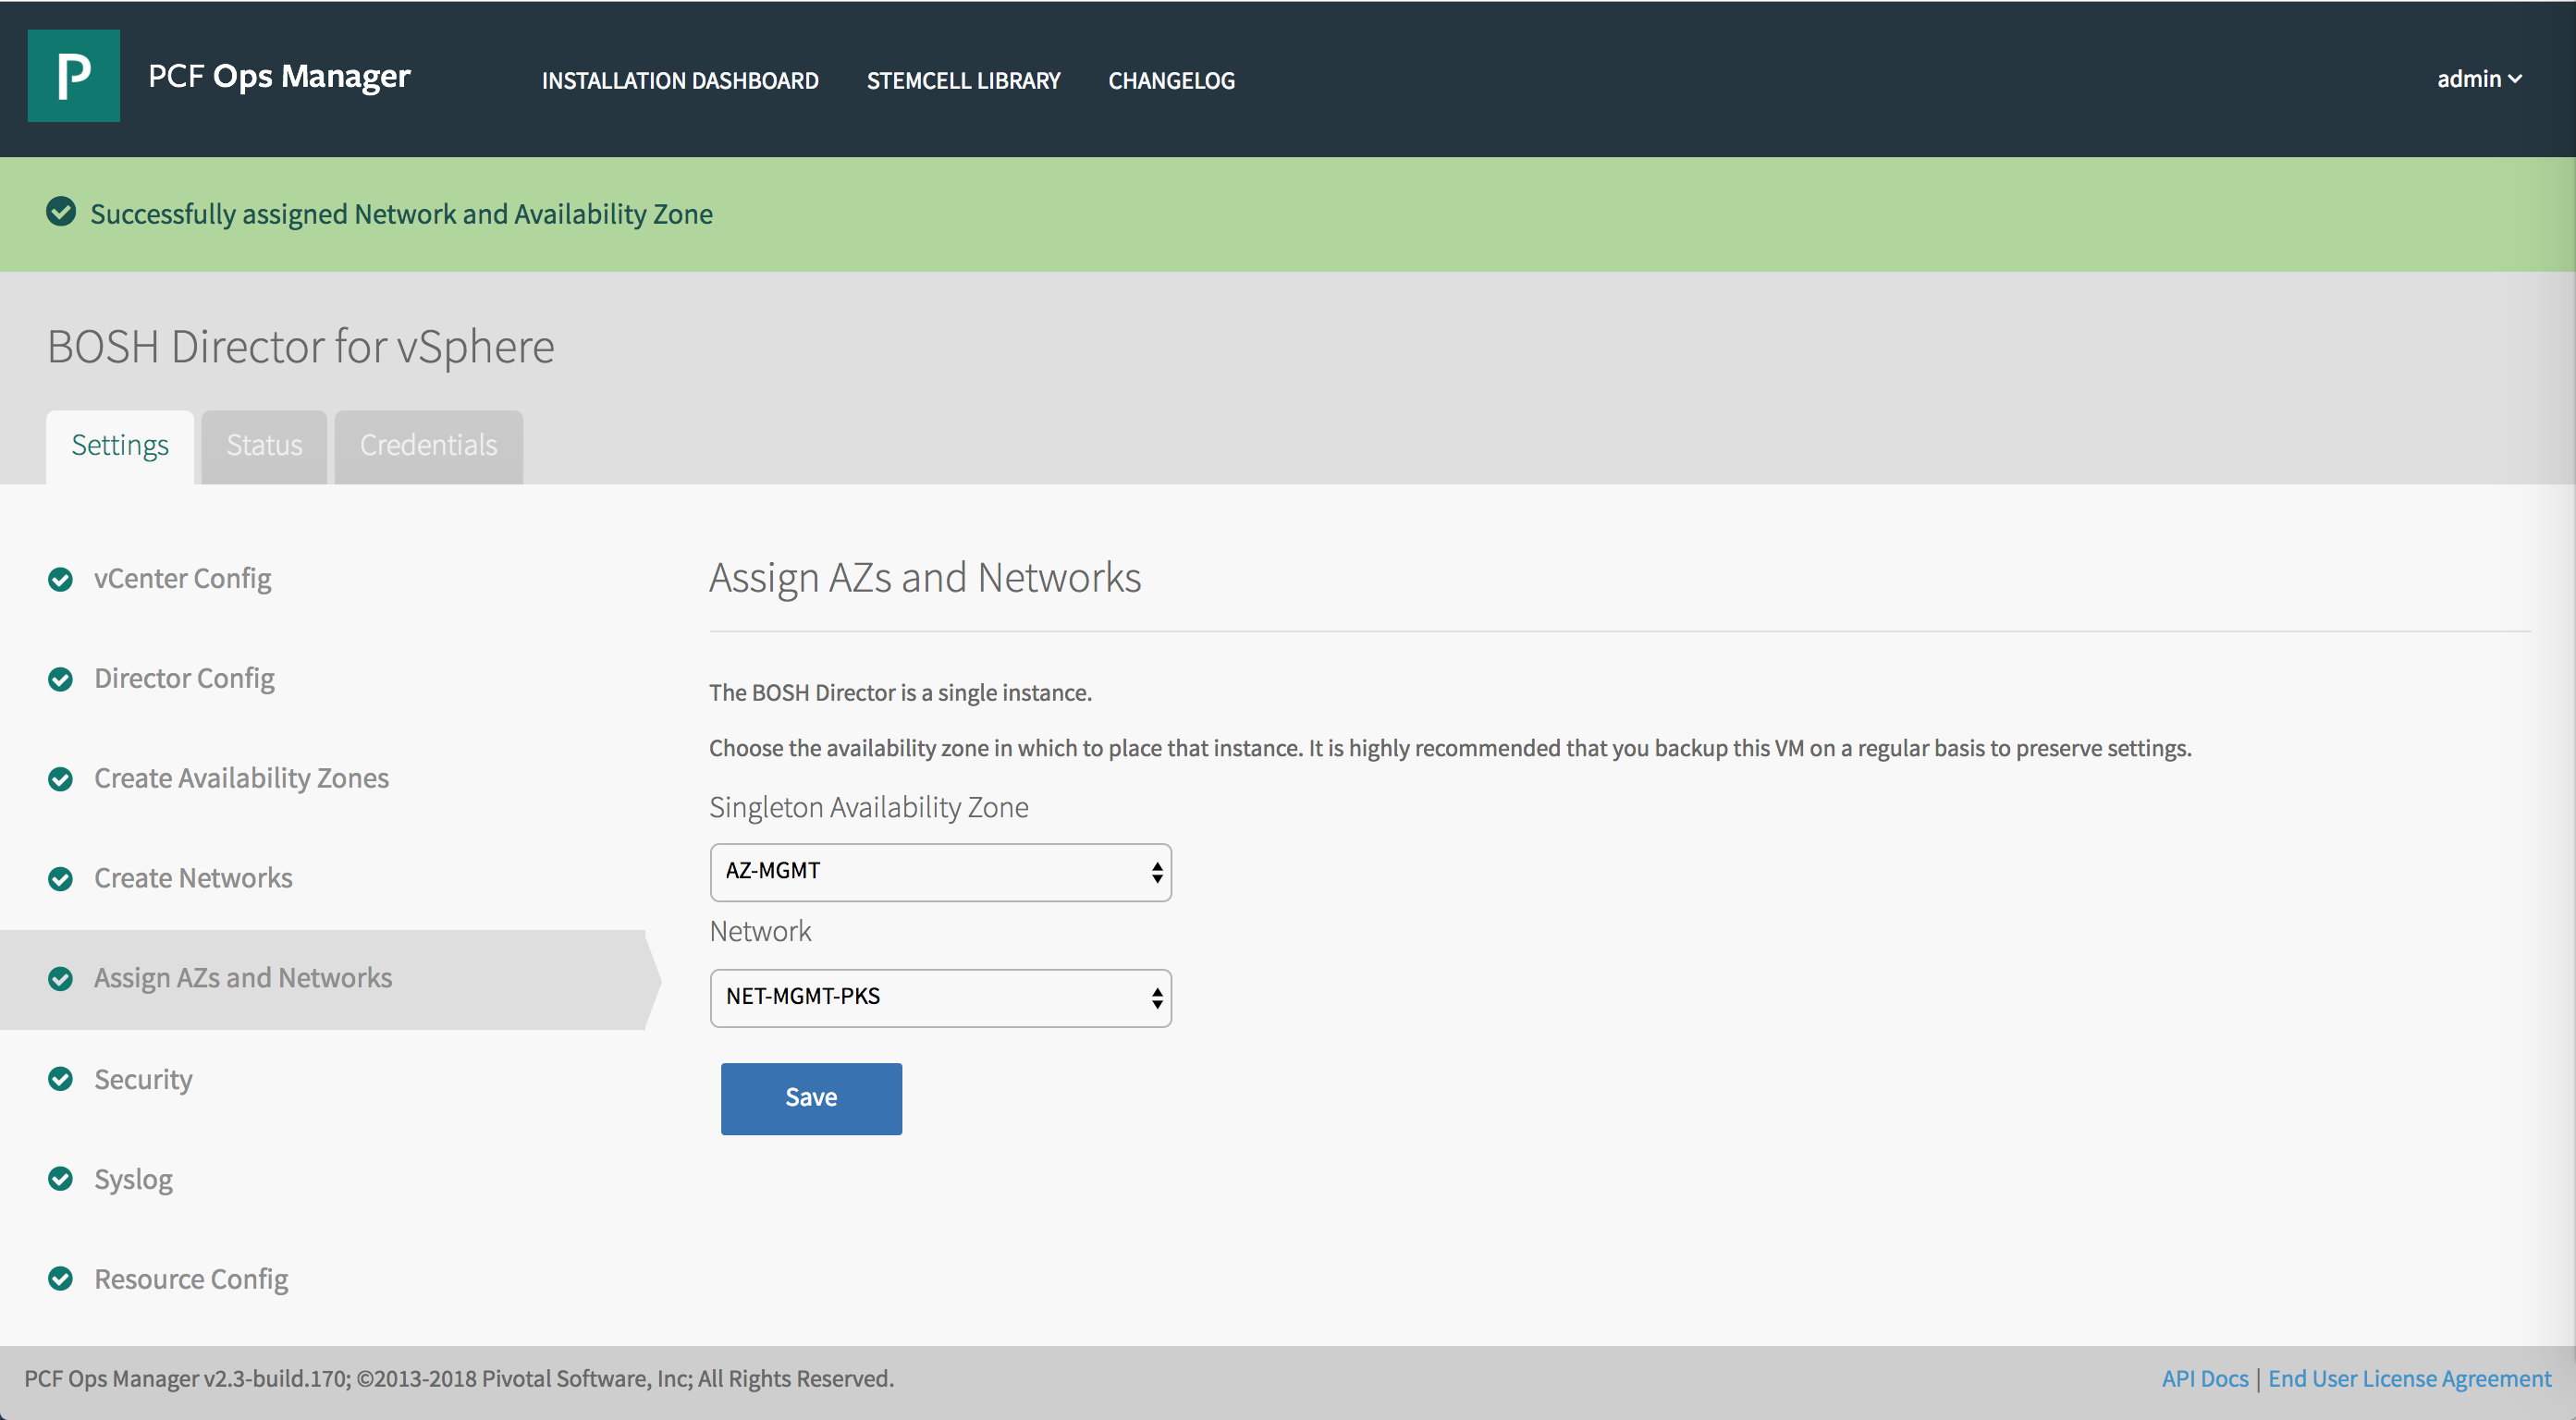
Use the drop-down menu to select a Singleton Availability Zone. The Ops Manager Director installs in this Availability Zone. For Tanzu Kubernetes Grid Integrated Edition, this will be the
AZ-MGMTavailability zone. -
Use the drop-down menu to select a Network for BOSH Director. BOSH Director runs on the Tanzu Kubernetes Grid Integrated Edition Management Plane network. Select the
NST-MGTM-TKGInetwork. -
Click Save.
Step 7: Configure Security
To configure a BOSH Director certificate and password:
-
Select Security in BOSH Director.
-
In Trusted Certificates, enter a custom certificate authority (CA) certificate to insert into your organization’s certificate trust chain. This feature allows all BOSH-deployed components in your deployment to trust a custom root certificate.
If you are using self-signed CAs for the infrastructure components (NSX-T, vCenter), you need to add every CA of every component your deployment might connect to. In other words, the bundle must include all certificates for any component that connects to or from BOSH.
If you are using a private Docker registry, such as VMware Harbor, use this field to enter the certificate for the registry. See Integrating Harbor Registry with Tanzu Kubernetes Grid Integrated Edition for details.
-
Choose Generate passwords or Use default BOSH password. Use the Generate passwords option for increased security.
-
Click Save. To view your saved Director password, click the Credentials tab.
Step 8: Configure BOSH DNS
To configure BOSH Director DNS:
-
Select BOSH DNS Config in BOSH Director.
-
(Optional) In Excluded Recursors, enter a list of prohibited DNS recursor addresses.
-
(Optional) In Recursor Timeout, enter a time limit for contacting the connected DNS recursors. This includes dialing, writing, and reading from the DNS recursor. If any of these actions exceeds the time limit you set, the action fails.
Note: This time limit must include one of the Go parse duration time units. For example, entering
5ssets the timeout limit to five seconds. For more information about supported time units, see func ParseDuration in the Go Programming Language documentation. - (Optional) In Handlers, enter a list of custom domain handlers in JSON format.
- Click Save.
Step 9: Configure Logging
To configure BOSH Director logging:
-
Select Syslog in BOSH Director.
-
(Optional) To send BOSH Director system logs to a remote server, select Yes.
-
In the Address field, enter the IP address or DNS name for the remote server.
-
In the Port field, enter the port number that the remote server listens on.
-
In the Transport Protocol dropdown menu, select TCP or UDP. This selection determines which transport protocol is used to send the logs to the remote server.
-
(Optional) Select the Enable TLS check box to send encrypted logs to remote server with TLS. After you select the check box, perform the following steps:
- Enter either the name or SHA1 fingerprint of the remote peer in Permitted Peer.
- Enter the SSL certificate for the remote server in SSL Certificate.
Note: For an optimal security configuration, enable TLS encryption when you are forwarding logs. Logs can contain sensitive information, such as cloud provider credentials.
- (Optional) Enter an integer in Queue Size. This value specifies the number of log messages held in the buffer. The default value is 100,000.
- (Optional) Select the check box to Forward Debug Logs to an external source. This option is deselected by default. If you select it, you might generate a large amount of log data.
- (Optional) Enter configuration details for rsyslog in the Custom rsyslog Configuration field. This field requires the RainerScript syntax.
- Click Save Syslog Settings.
Step 10: Configure Resources
To configure BOSH Director resources:
-
Select Resource Config in BOSH Director.
-
Adjust any values as necessary for your deployment. Under the Instances, Persistent Disk Type, and VM Type fields, choose Automatic from the drop-down menu to allocate the recommended resources for the job. If the Persistent Disk Type field reads None, the job does not require persistent disk space.
Note: Ops Manager requires a Director VM with at least 8 GB memory.
Note: If you set a field to Automatic and the recommended resource allocation changes in a future version, Ops Manager automatically uses the updated recommended allocation.
-
Click Save.
Step 11: (Optional) Add Custom VM Extensions
Use the Ops Manager API to add custom properties to your VMs such as associated security groups and load balancers.
For more information, see Managing Custom VM Extensions.
Step 12: Deploy BOSH
To deploy BOSH:
-
Go to the Ops Manager Installation Dashboard.
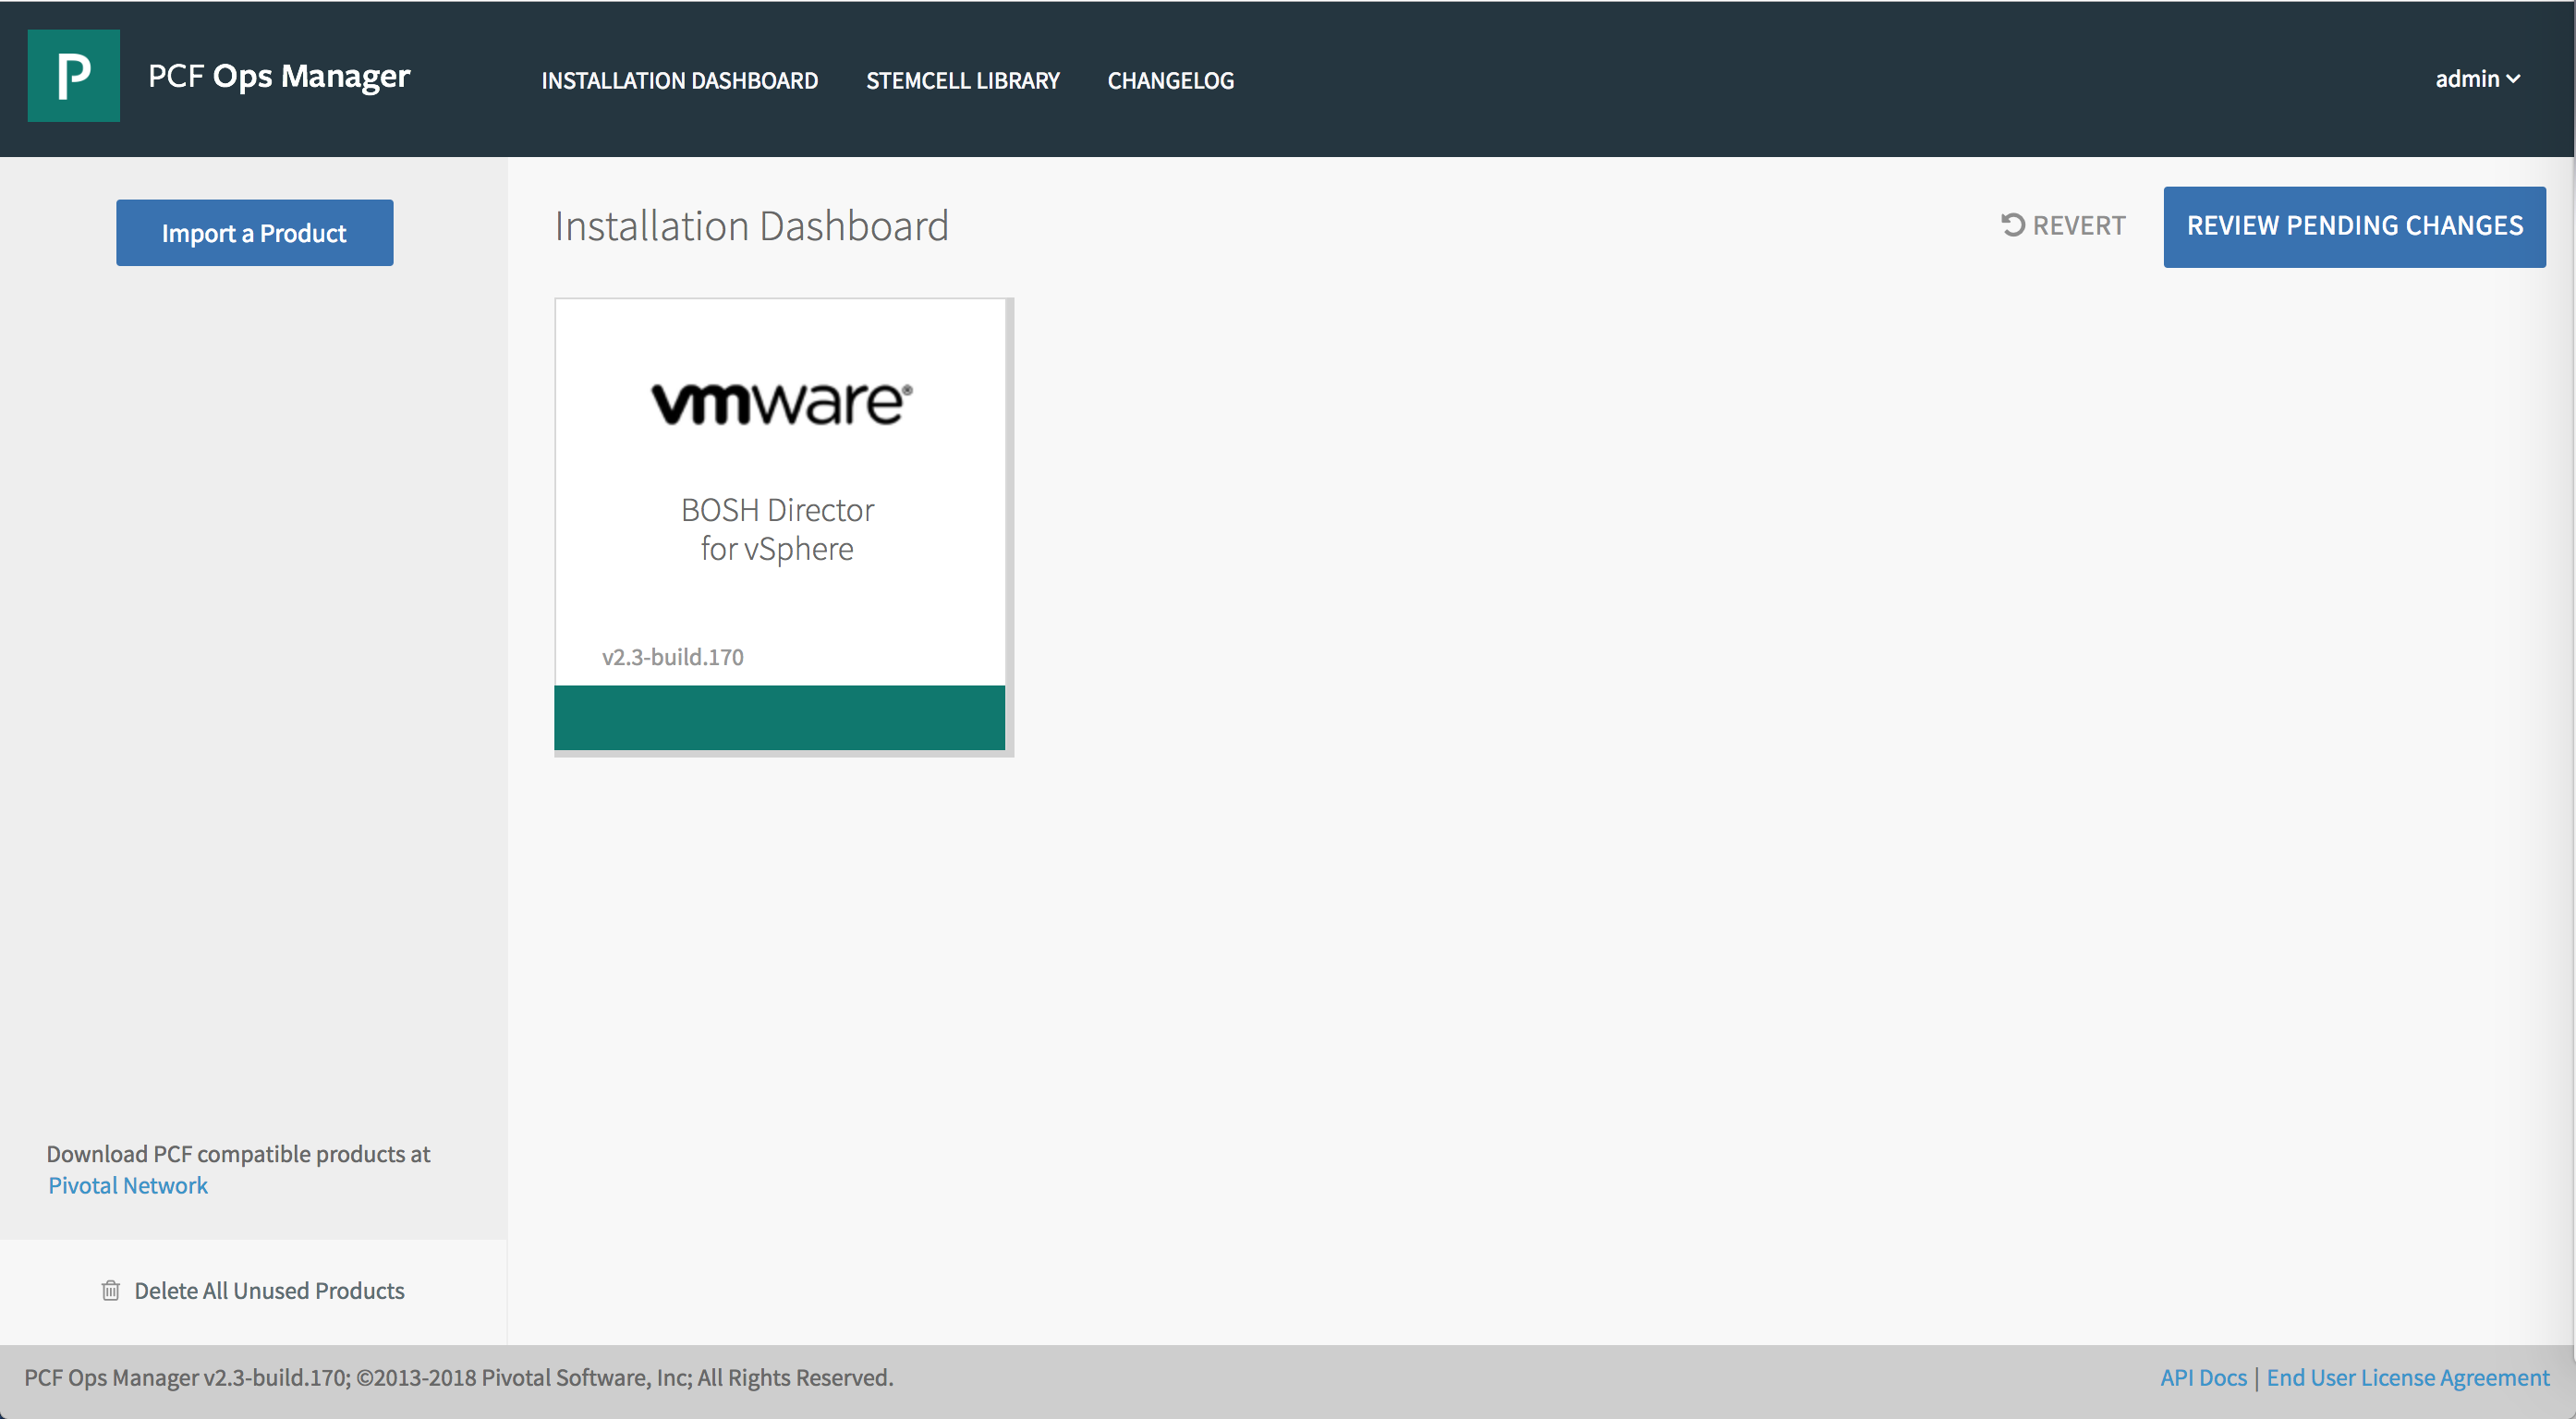
-
Click Review Pending Changes.
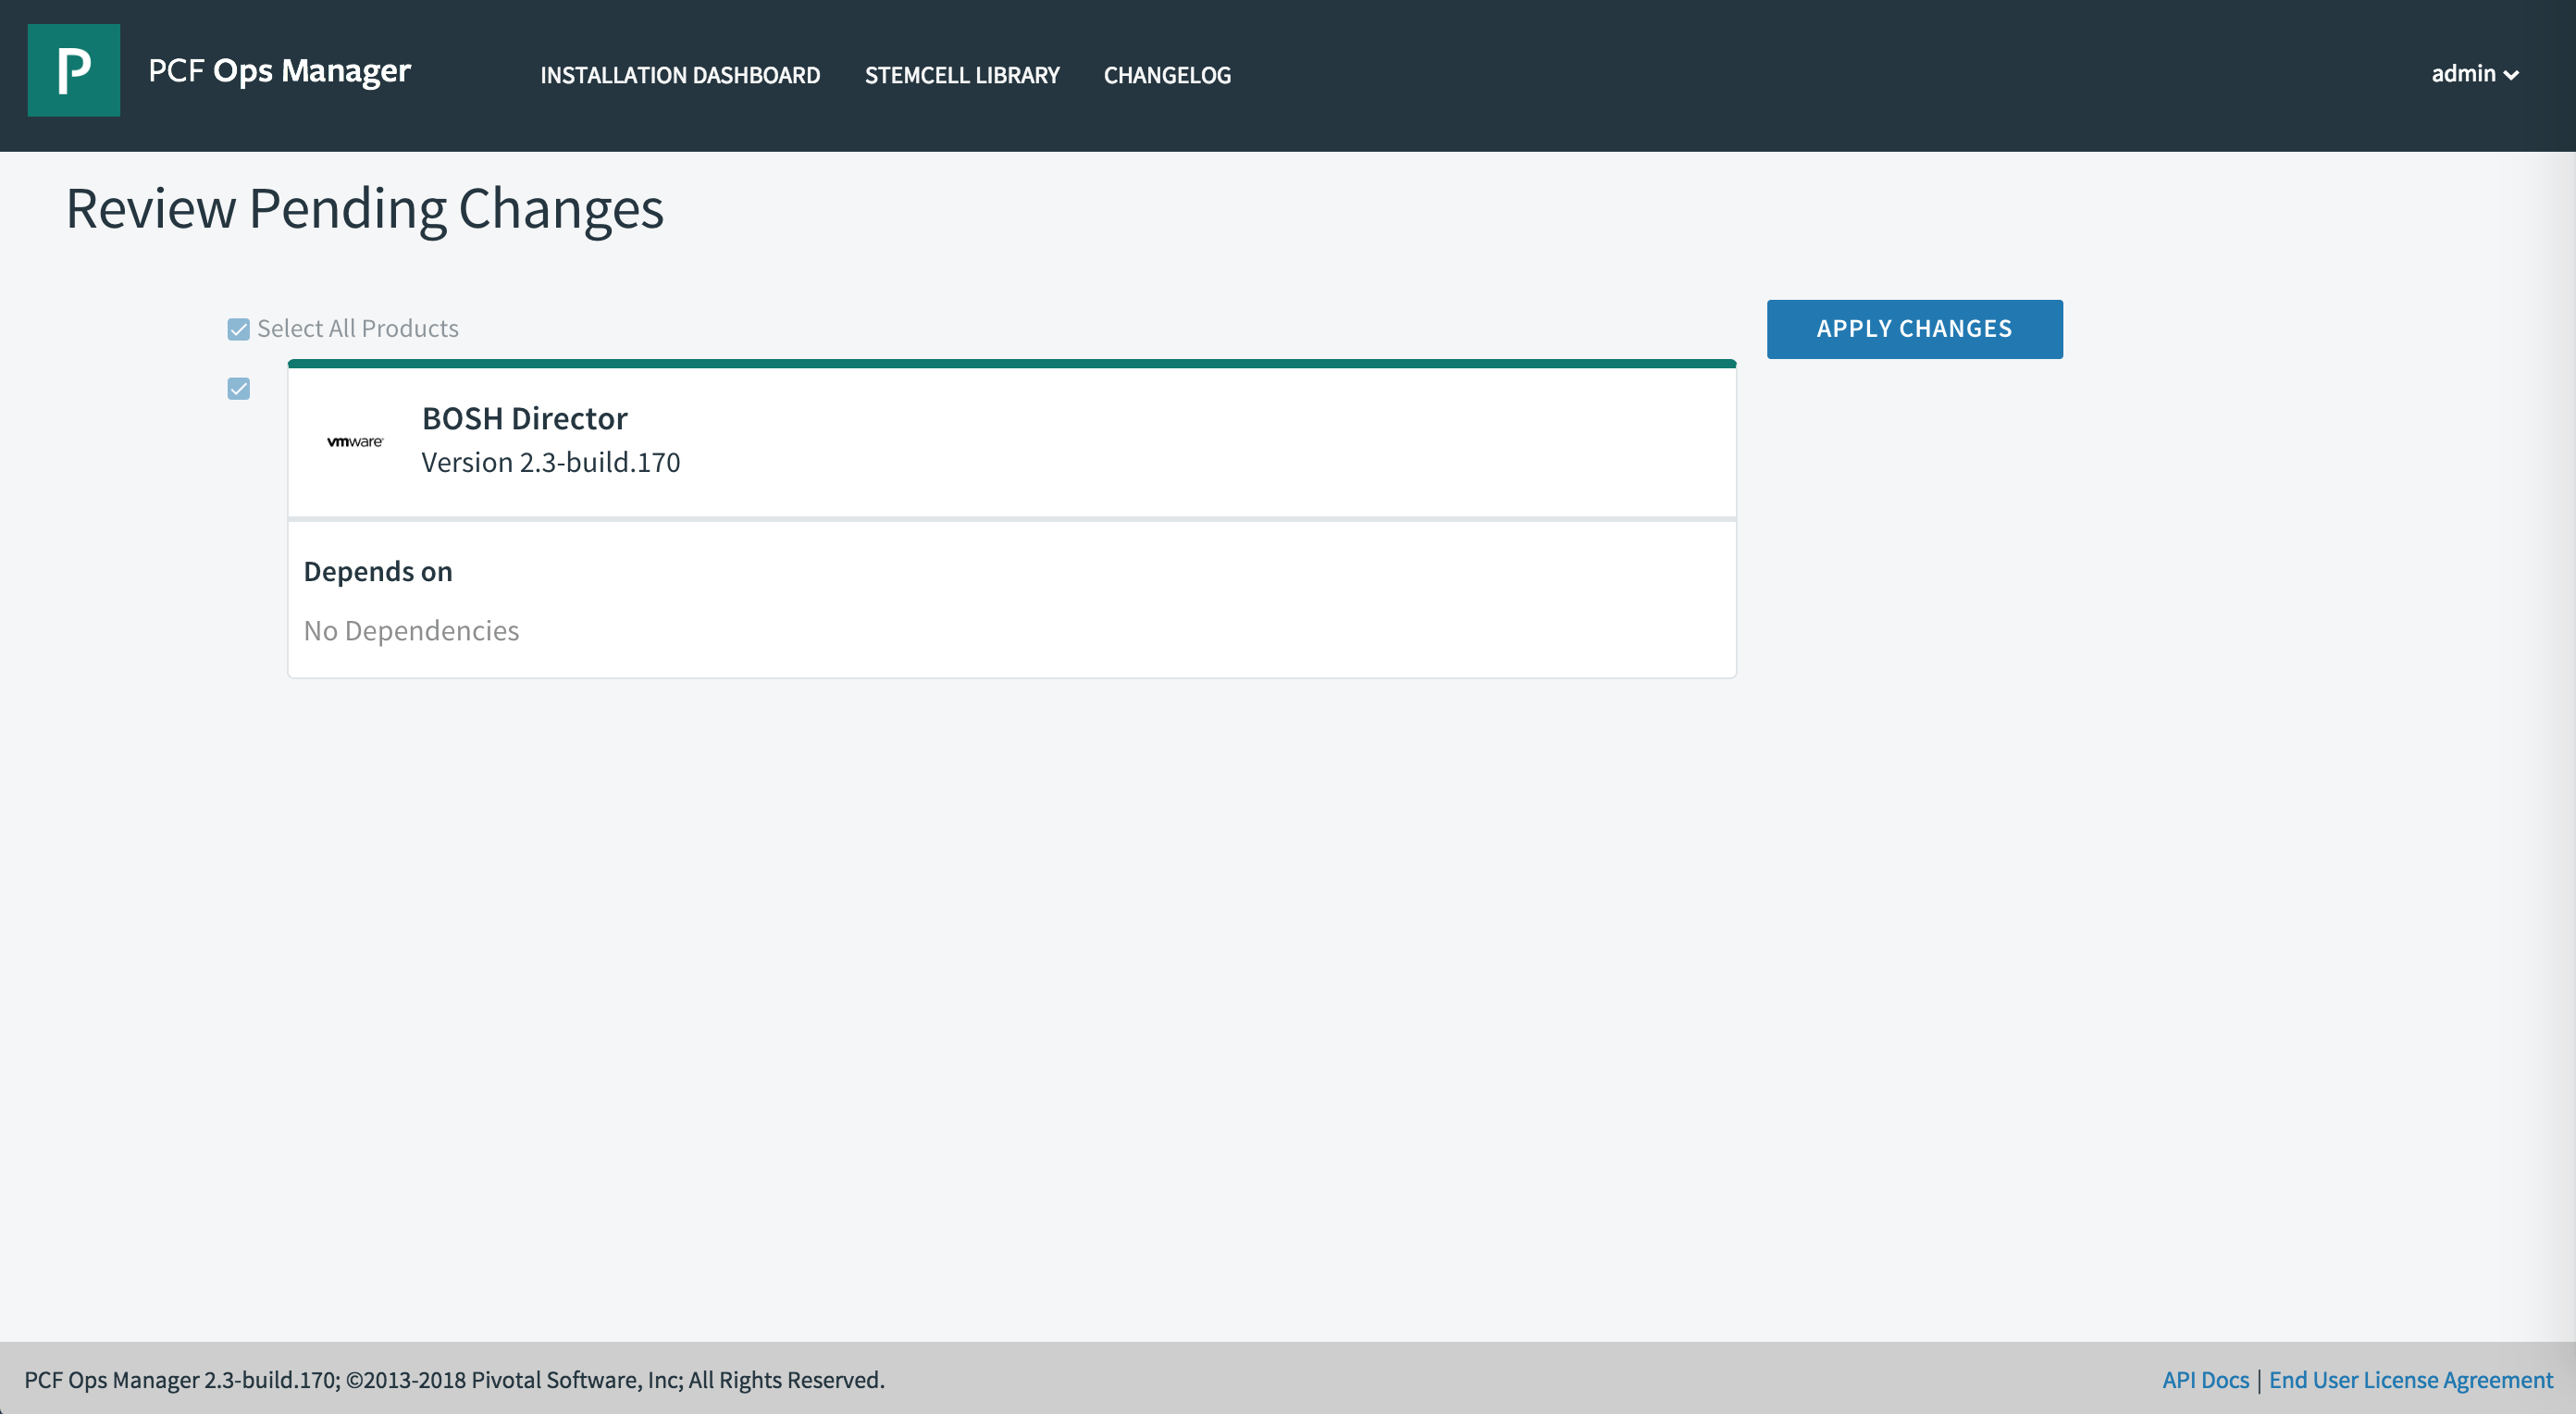
-
Click Apply Changes.
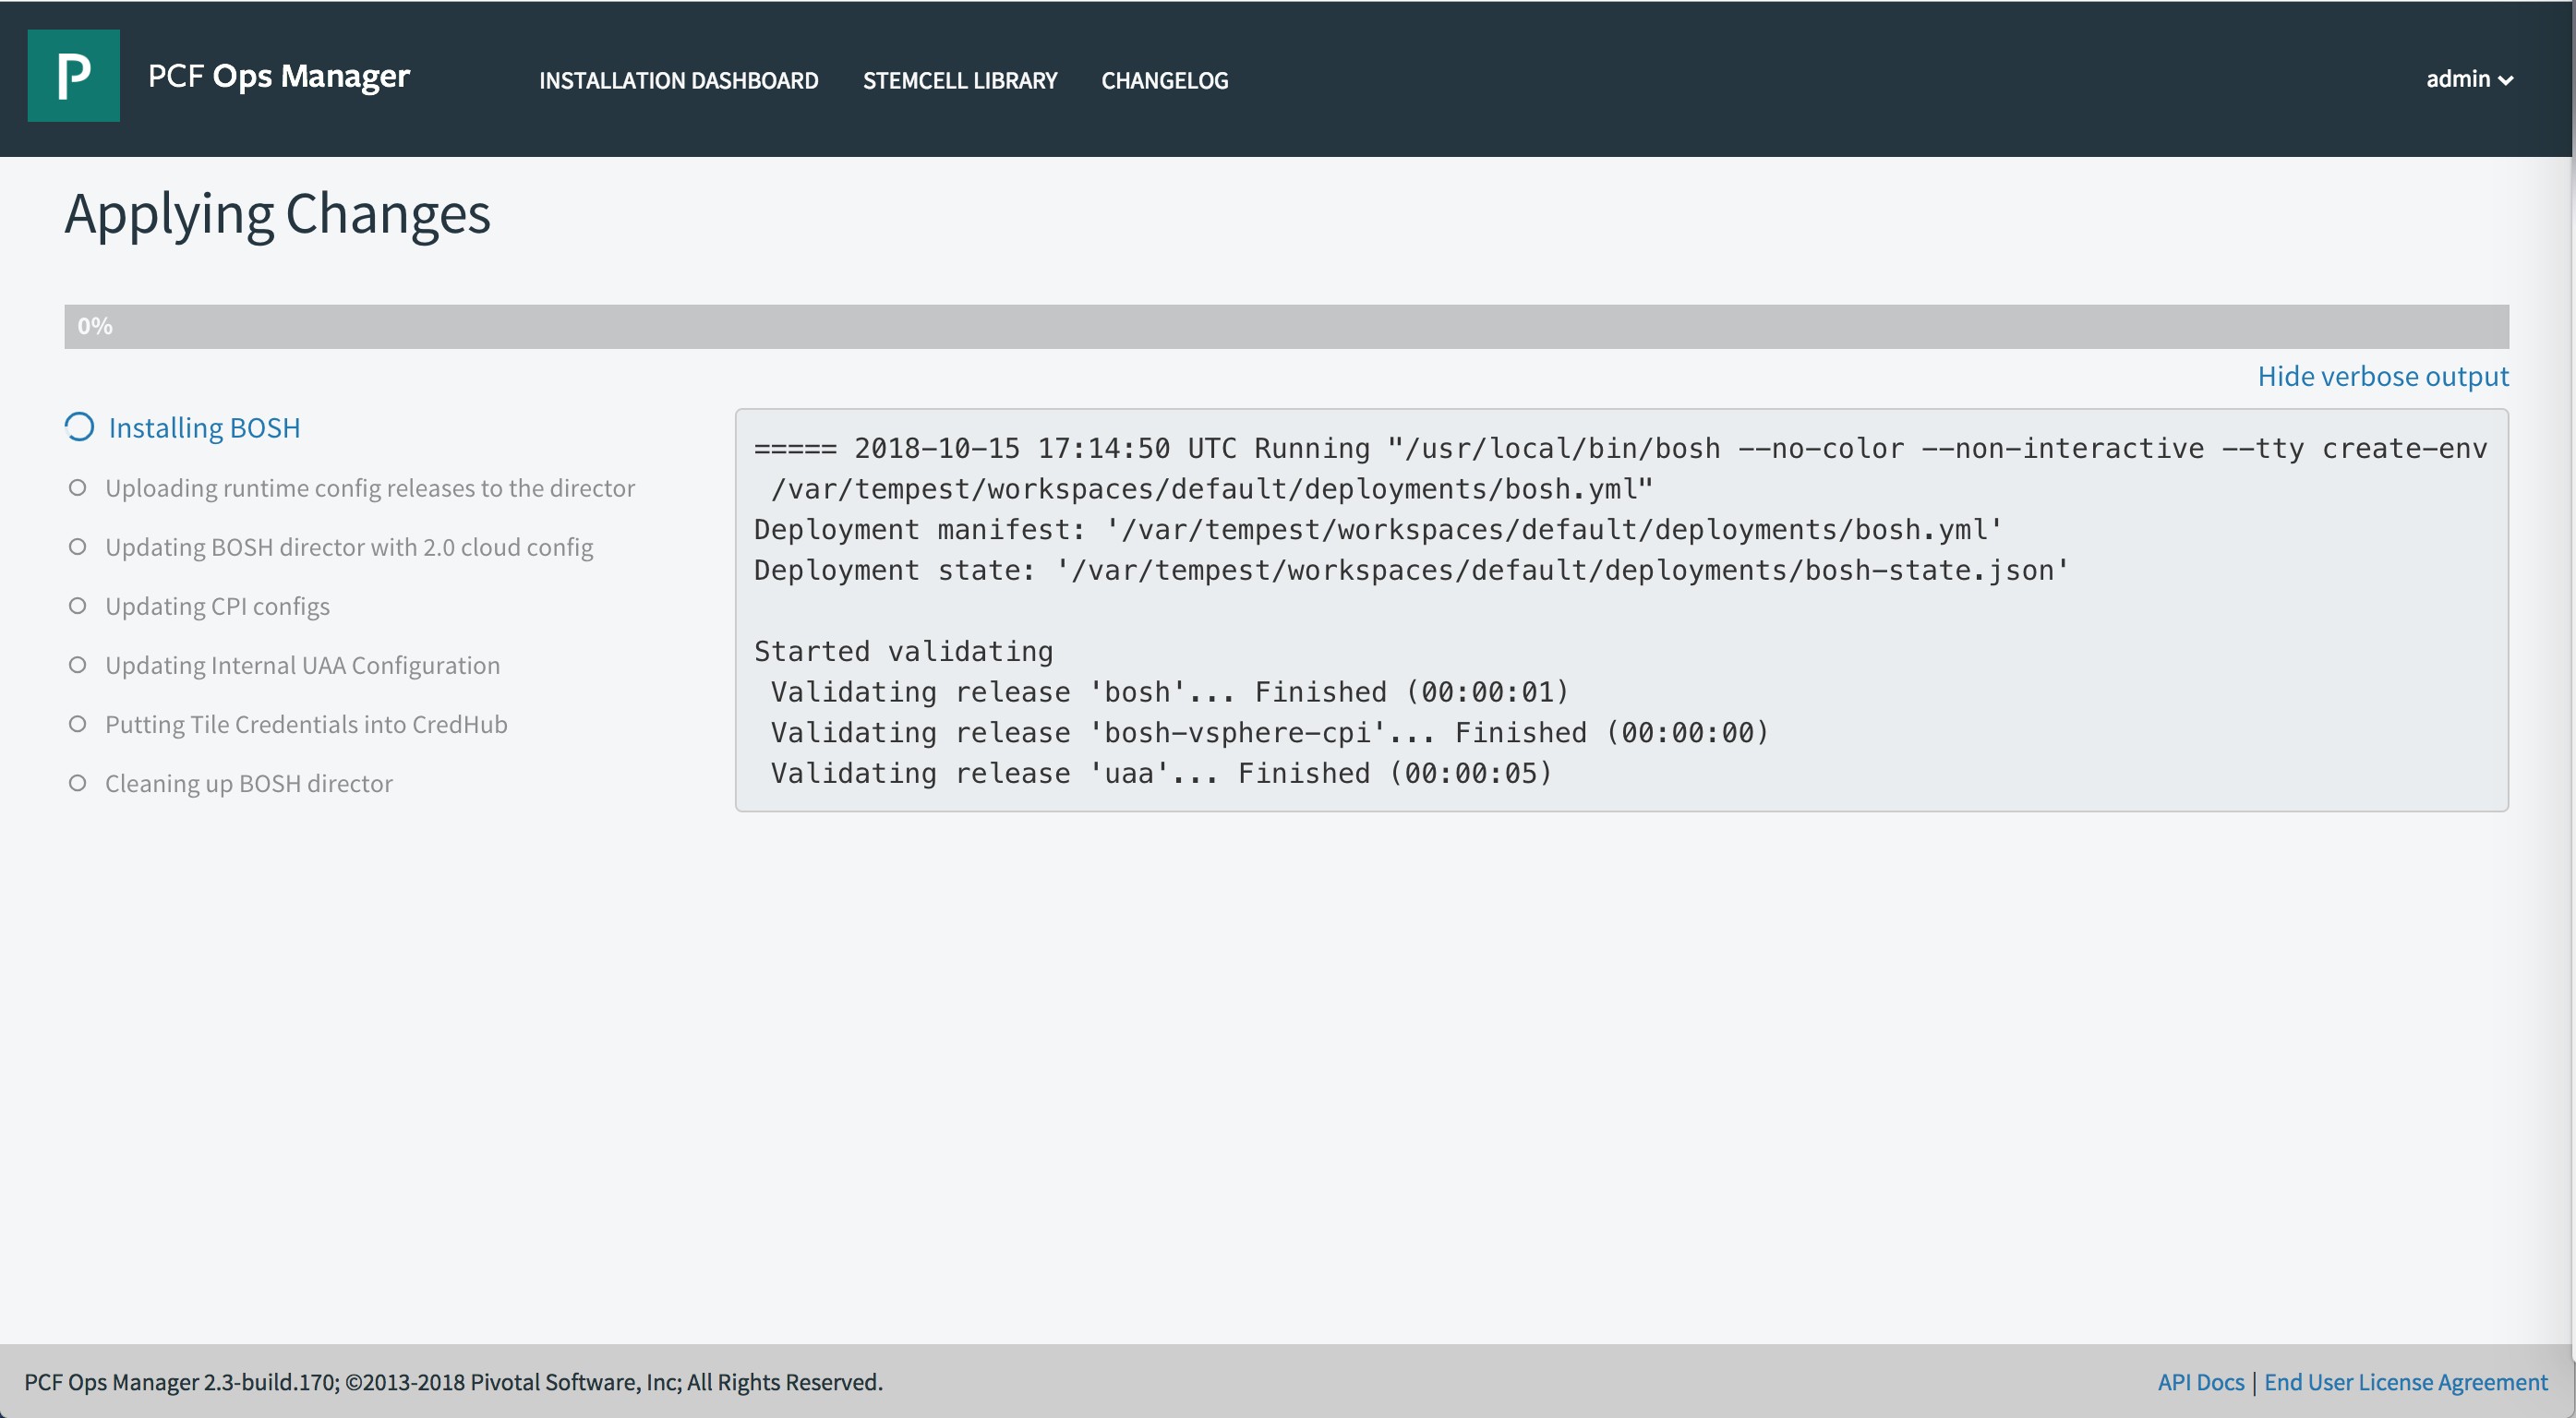
-
Confirm changes applied successfully.
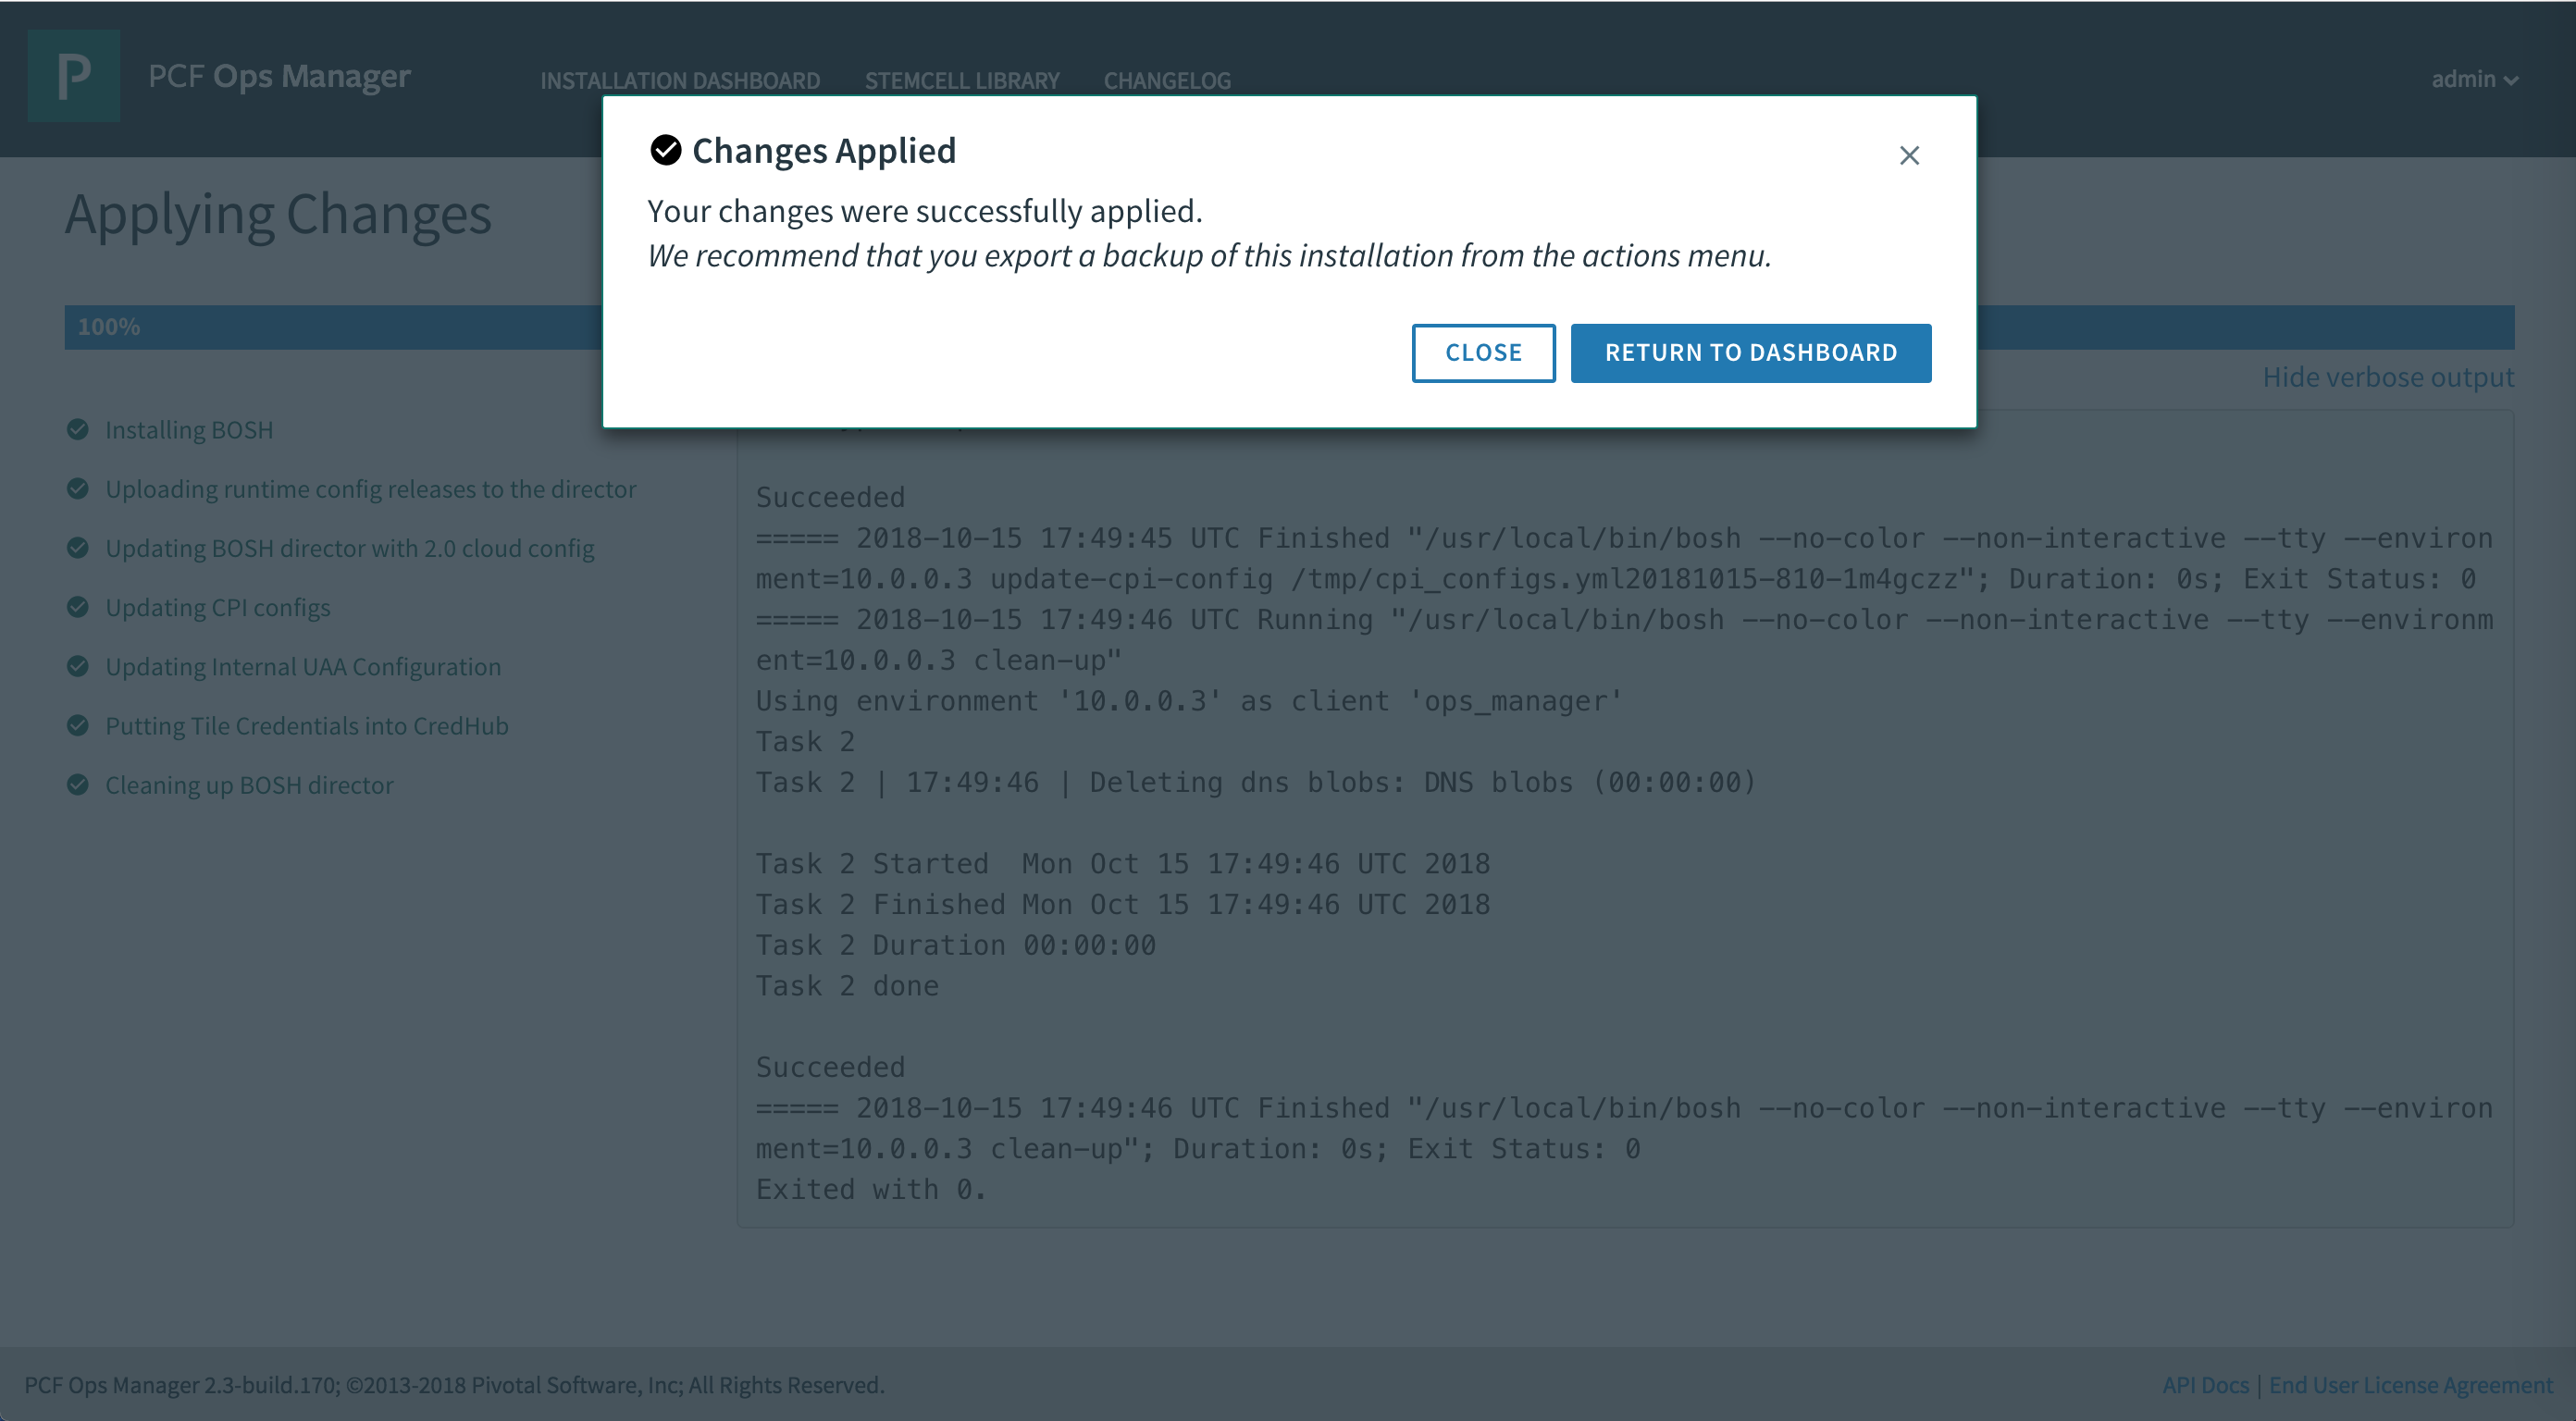
-
Check BOSH VM. Log in to vCenter and check for the
p-boshVM deployment in the Tanzu Kubernetes Grid Integrated Edition Management resource pool.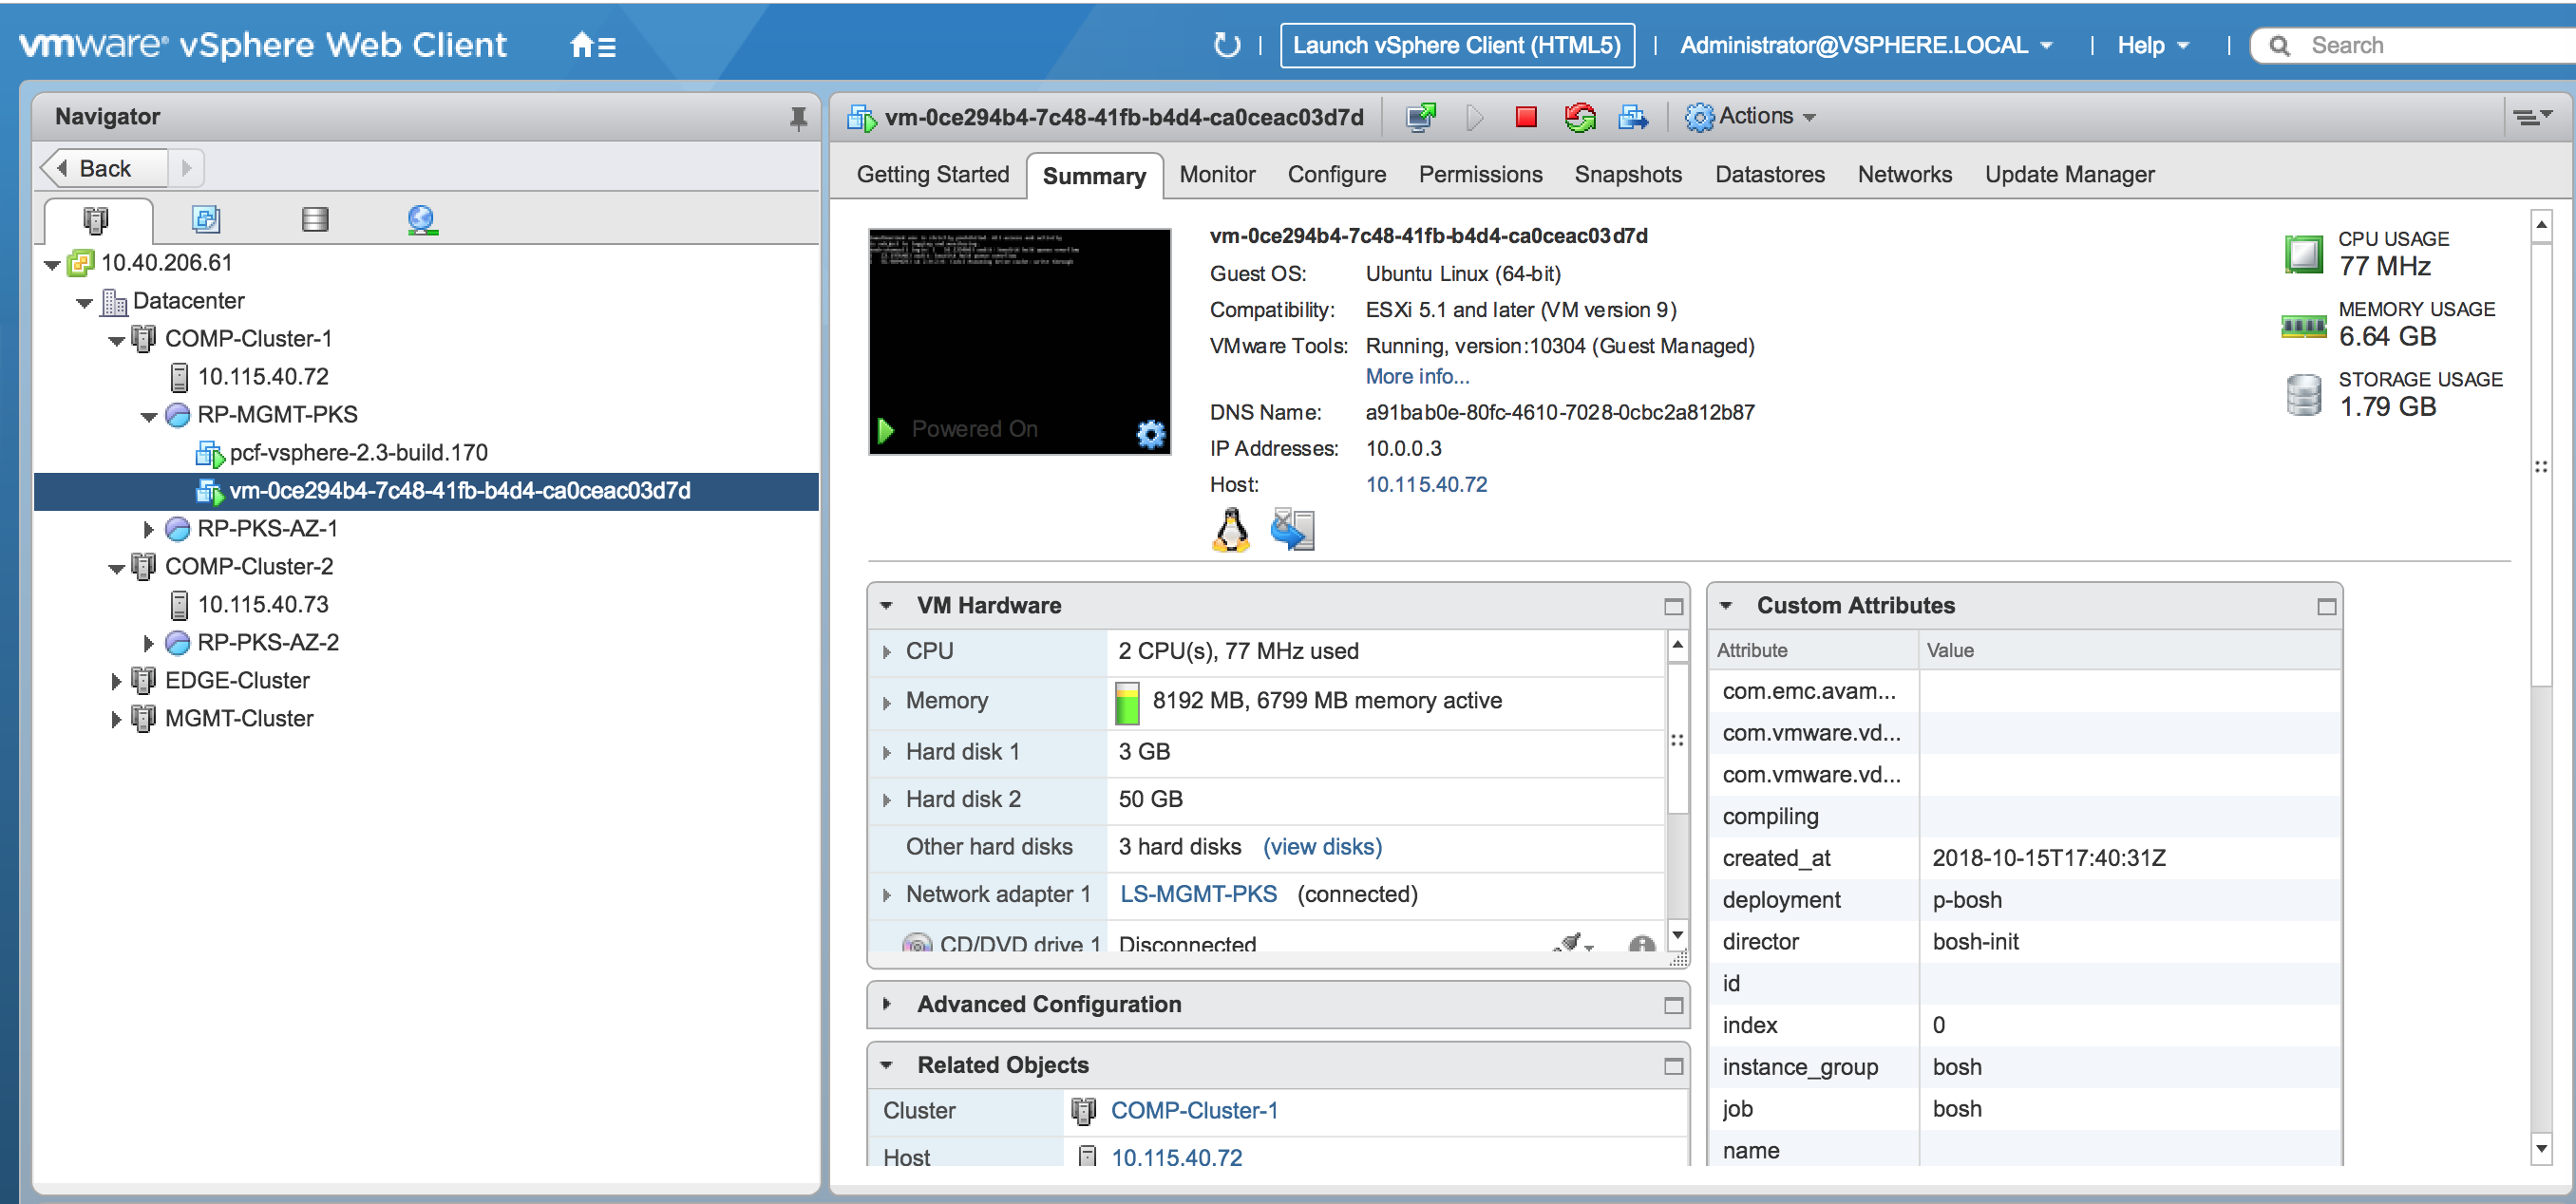
Step 13: Update Network Availability Zones
After successfully deploying BOSH, ensure that both the Management AZ and the Compute AZs appear in the Tanzu Kubernetes Grid Integrated Edition tile Plans.
To ensure that the Management AZ and the Compute AZs are included in the NET-MGMT-TKGI network you defined above:
-
Return to the BOSH tile and click Create Networks.
-
Edit the network (
NET-MGMT-TKGI) and each COMPUTE AZ.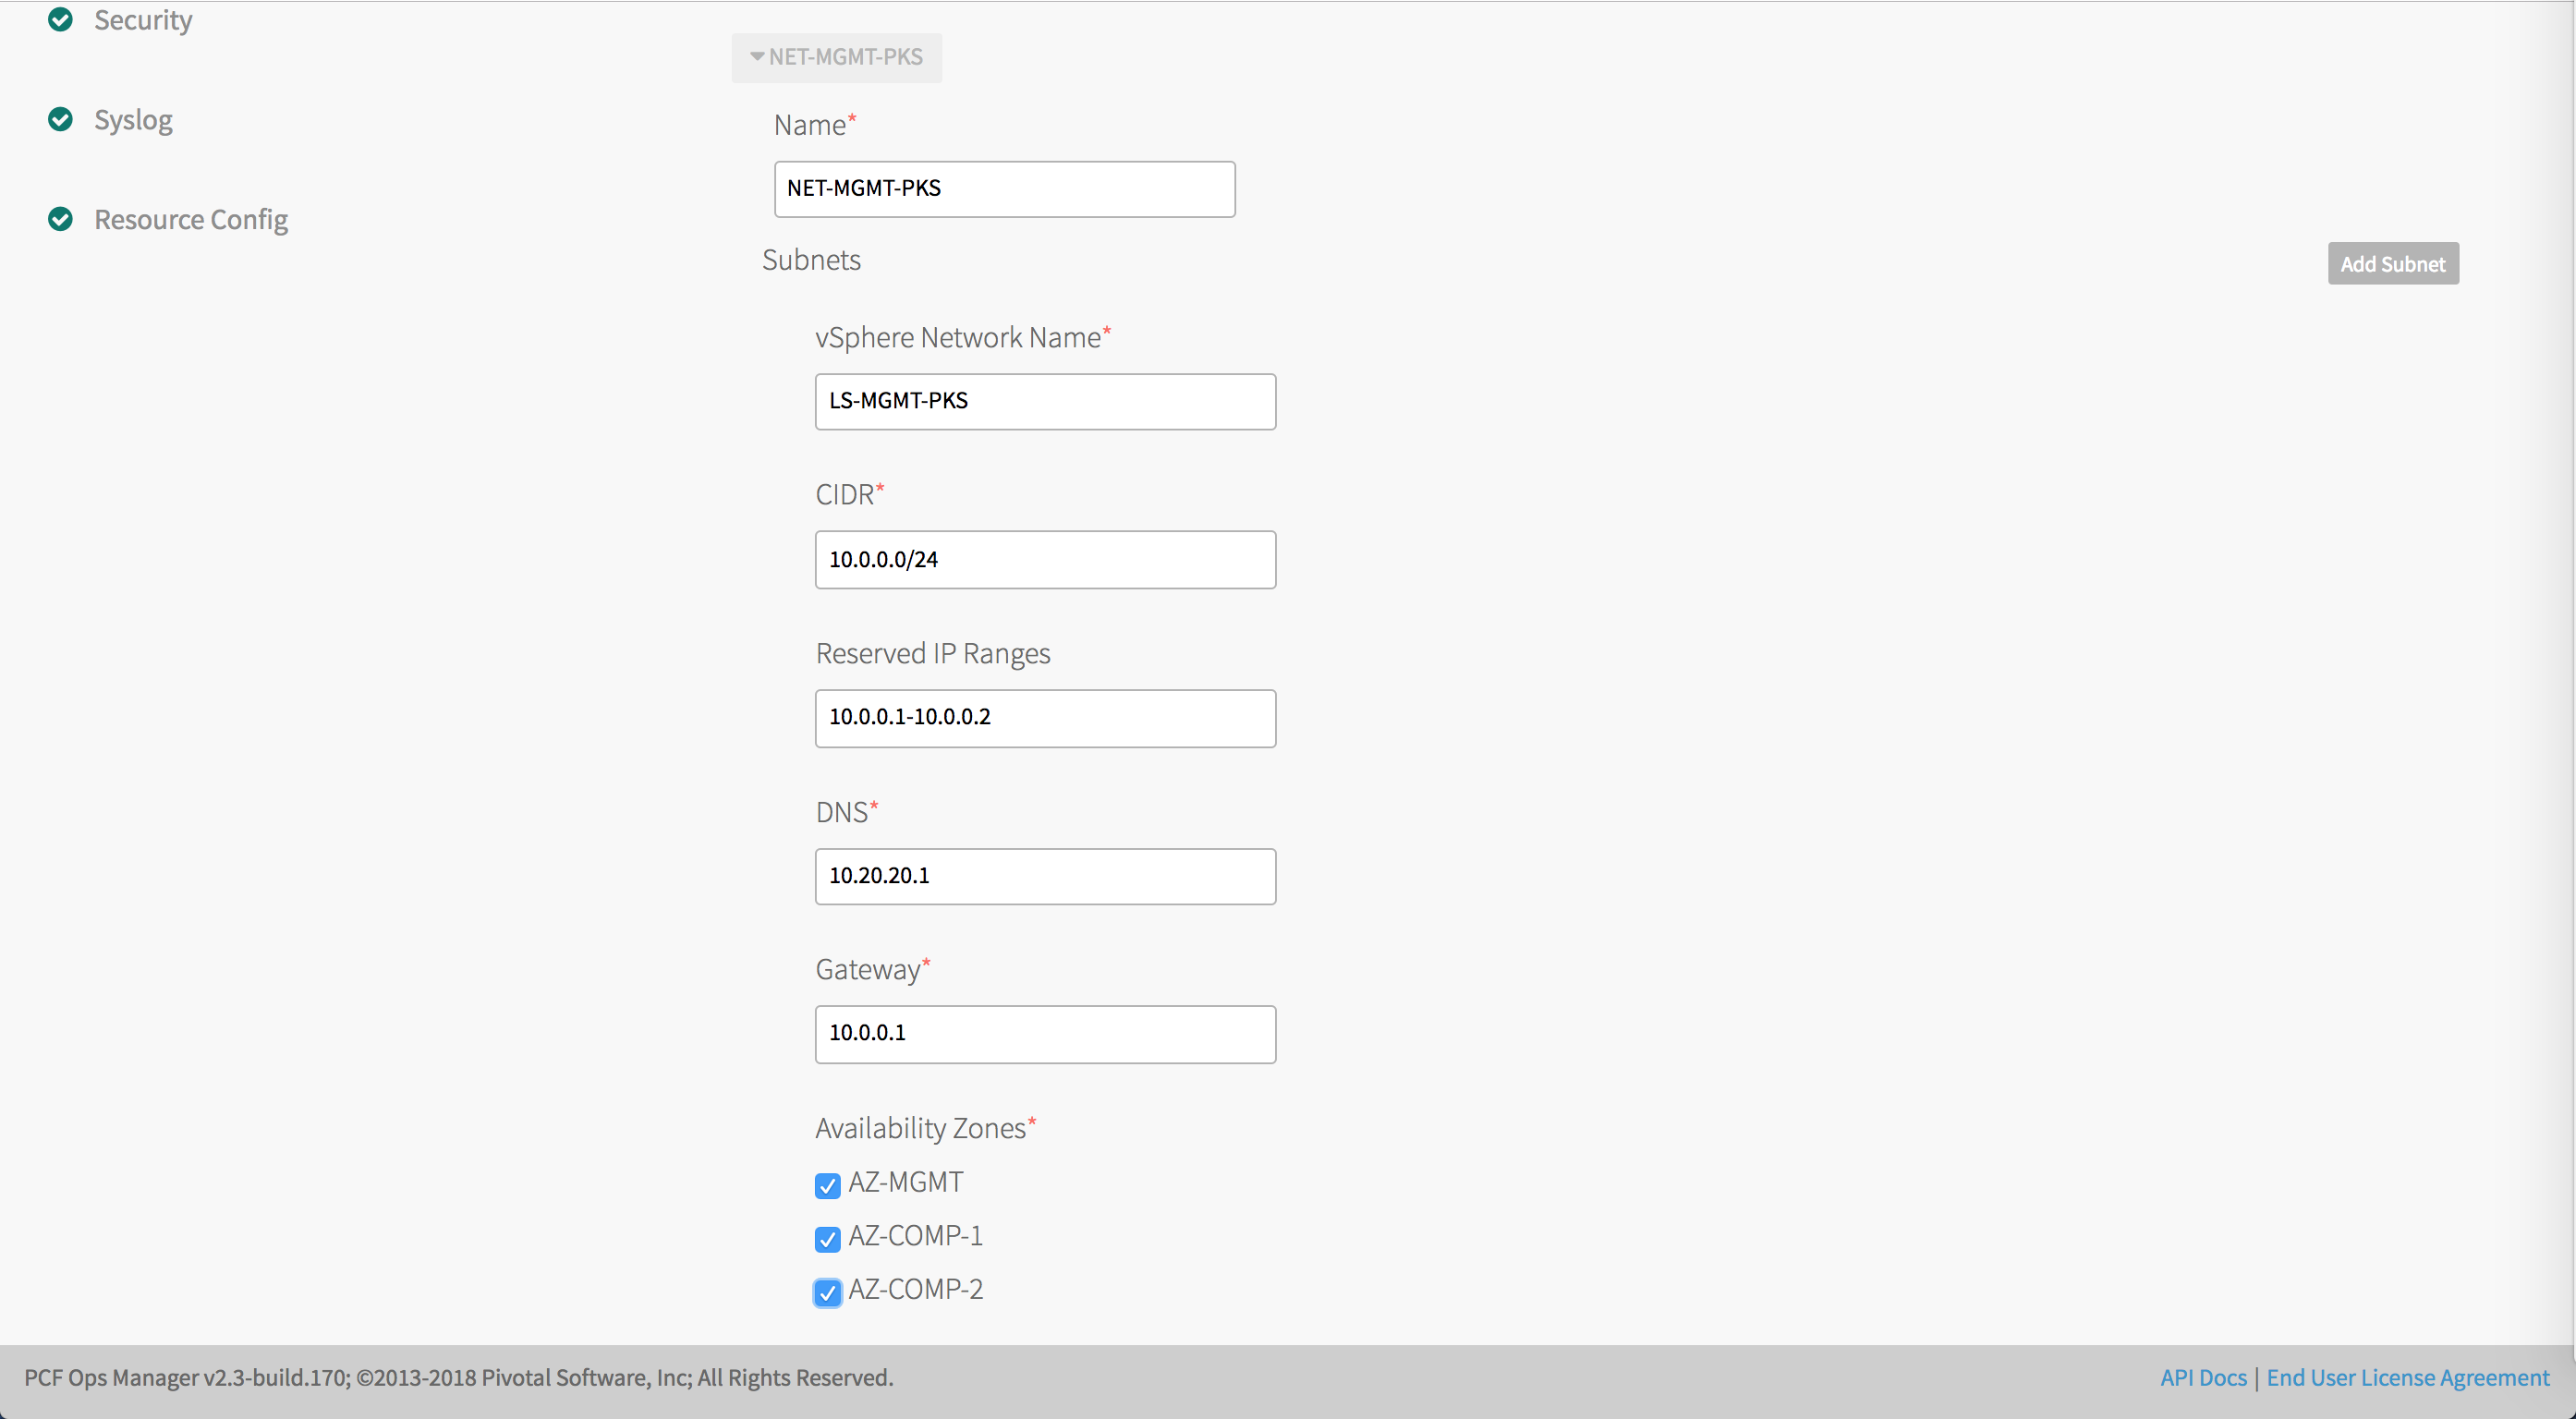
-
Click Save.
-
Review pending changes, and click Apply Changes to redeploy BOSH.
Next Step
