


This topic for operators gives you instructions about how to install, configure, and deploy the VMware Tanzu RabbitMQ for Tanzu Application Service tile to provide a pre-provisioned service.
The RabbitMQ open source product provides additional documentation. For more information about getting started with RabbitMQ and ensuring production readiness, see the Production Checklist in the RabbitMQ documentation.
ImportantPrevious deprecation warnings for the pre-provisioned service are no longer in effect. VMware continues to support the pre-provisioned service.
Role-Based Access in Ops Manager
Ops Manager admins can use Role-Based Access Control (RBAC) to manage which operators can make deployment changes, view credentials, and manage user roles in Ops Manager. Therefore, your role permissions might not allow you to follow every procedure in this operator guide.
For more information about roles in Ops Manager, see Roles in Ops Manager.
Download and Install the Tile
To download and install the tile:
-
Download the product file from Broadcom Support.
-
Navigate to the Ops Manager Installation Dashboard and click Import a Product to upload the product file.
-
Under Import a Product, click + next to the version number of Tanzu RabbitMQ for Tanzu Application Service. This adds the tile to your staging area.
-
Click the newly added Tanzu RabbitMQ for Tanzu Application Service tile. This lets you begin configuring the tile. The installation is complete when you apply the changes from the configuration.
Configure Pre-Provisioned Tanzu RabbitMQ for Tanzu Application Service
The configuration screen below appears when you click the Tanzu RabbitMQ for Tanzu Application Service tile in Ops Manager. An orange circle beside a tab indicates that you must complete a configuration in the tab. A green check mark indicates that the tab is preconfigured and you are able to change its settings. An orange circle indicates that you are required to configure fields on the tab before you can deploy the tile.
Assign AZs and Networks
Follow the steps below to configure the AZs and networks:
- In the Settings screen, click Assign AZs and Networks.
Caution
You cannot change the regions or networks after you have clicked Apply Changes during the Apply Configuration and Complete the Installation procedure below.
-
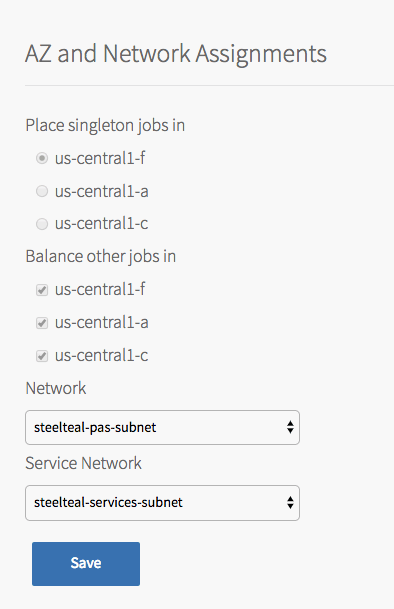
Configure the fields on the Assign AZs and Networks as follows. All fields are required, though some do not apply to the pre-provisioned service.
Required Fields Instructions Place singleton jobs in Select a region. This selection only affects the on-demand service. Balance other jobs in Select additional regions. This selection only affects the pre-provisioned service. Network Select a network for the Tanzu RabbitMQ for Tanzu Application Service Broker.
This should be a separate network from the one you select for Service Network. This network is represented by the Default Network, described in Default Network and Service Network. Typically, you select the network used for VMware Tanzu Application Service for VMs components.Service Network Select a network. This selection only affects the on-demand service. Caution
Changing the Network after you have configured it, or changing the IP address configuration, causes a failed deployment. For more information, refer to Changing Network or IP Addresses Results in a Failed Deployment.
- Click Save.
Pre-Provisioned RabbitMQ
To configure the following sections in the Pre-Provisioned RabbitMQ tab, on the Settings screen, click Pre-Provisioned RabbitMQ and under Deploy Pre-Provisioned service offering, click Yes.
RabbitMQ Admin User Credentials
In the RabbitMQ admin user credentials field of the RabbitMQ pane, enter an admin username and password:
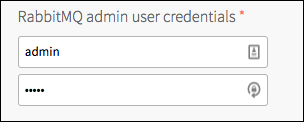
You can use a combination of upper or lowercase alphanumerics and supported special characters: -=_+":;/?.><,~.
NoteYou cannot use a back quote: ` or single quote ’.
This grants you full admin access to the RabbitMQ Management UI.
NoteTo rotate your admin credentials, enter a new username and password, save your options, and redeploy by returning to the Ops Manager Installation Dashboard and clicking Apply Changes.
Plug-ins
Choose which plug-ins you want to enable in this section of the Pre-Provisioned RabbitMQ tab.
You must leave the rabbitmq_management plug-in enabled for this product to work. VMware also strongly recommends enabling the rabbitmq_prometheus plug-in in addition.
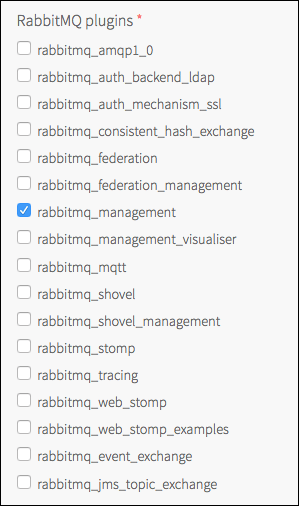
For more information about RabbitMQ plug-ins, see the RabbitMQ Documentation.
(Optional) Provide an Erlang Cookie
-
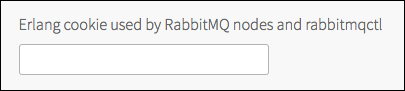
In this section of the Pre-Provisioned RabbitMQ tab, provide an Erlang cookie for the cluster to use. This is useful if you want to connect directly to the RabbitMQ cluster, for example, with
rabbitmqctlor to connect other VMs running Erlang.If you leave this field blank, BOSH CredHub generates a secure Erlang cookie.
Changing the Erlang Cookie Value Known Issue
Changing the Erlang cookie value causes a few minutes of downtime because it requires a full cluster shutdown. VMware recommends that you do not change anything else during this time, because it is possible for the configuration to be applied inconsistently during this process.
The deployment might fail after this process. If so, redeploying fixes the issue.
(Optional) Set an External Load Balancer
To set an external load balancer:
-
In the External Load Balancer DNS name field on the Pre-Provisioned RabbitMQ tab, enter a DNS name or IP address of an external load balancer to be returned in the binding credentials (
VCAP_SERVICES) to app developers.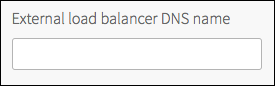
-
To avoid unnecessary VM deployment, in the Resource Config tab set the HAProxy for RabbitMQ instance count to 0.
Enable Custom Policy on New Instances
You can specify a custom RabbitMQ policy in this part of the Pre-Provisioned RabbitMQ tab. For information and instructions, see Setting Default Policies for the Pre-Provisioned RabbitMQ Service.
HAProxy Ports
To add HAProxy ports:
-
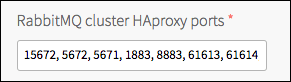
In the RabbitMQ cluster HAproxy ports field on the Pre-Provisioned RabbitMQ tab, enter the ports HAProxy should load balance to the RabbitMQ nodes.
-
Enter a comma-separated list of ports that are proxied to RabbitMQ nodes. You must include port
15672for the Management UI to listen on. If you enable other protocol plug-ins or have a custom configuration that changes the ports that RabbitMQ listens on, you can extend this list. The list defaults to:- 15672 - Management
- 5672 - AMQP
- 5671 - AMQP+SSL
- 1883 - MQTT
- 8883 - MQTT+SSL
- 61613 - STOMP
- 61614 - STOMP+SSL
- 15674 - WebSTOMP
Note
You do not need to expose port
15671because the pre-provisioned offering does not support access to the Management UI over TLS.
If you change the topology of your RabbitMQ cluster, the HAProxy is automatically reconfigured during the deployment.
(Optional) Provide SSL Certificates
To enable apps to connect securely to Tanzu RabbitMQ for Tanzu Application Service, you can provide SSL certificates. You can provide more than one CA certificate.
SSL settings are applied equally across all VMs in the cluster. If you provide a certificate, SSL is simultaneously provided for AMQPS, STOMP, and MQTT. No other plug-ins are automatically configured for use with SSL. For more information about SSL support in RabbitMQ, see the RabbitMQ documentation.
After providing a certificate, apps connected to the cluster over non-SSL AMQP, MQTT, and STOMP continue to function without SSL unless developers specify otherwise. To restrict apps to only connect over secure protocols, see Configure TLS Support below.
To provide SSL certificates:
-
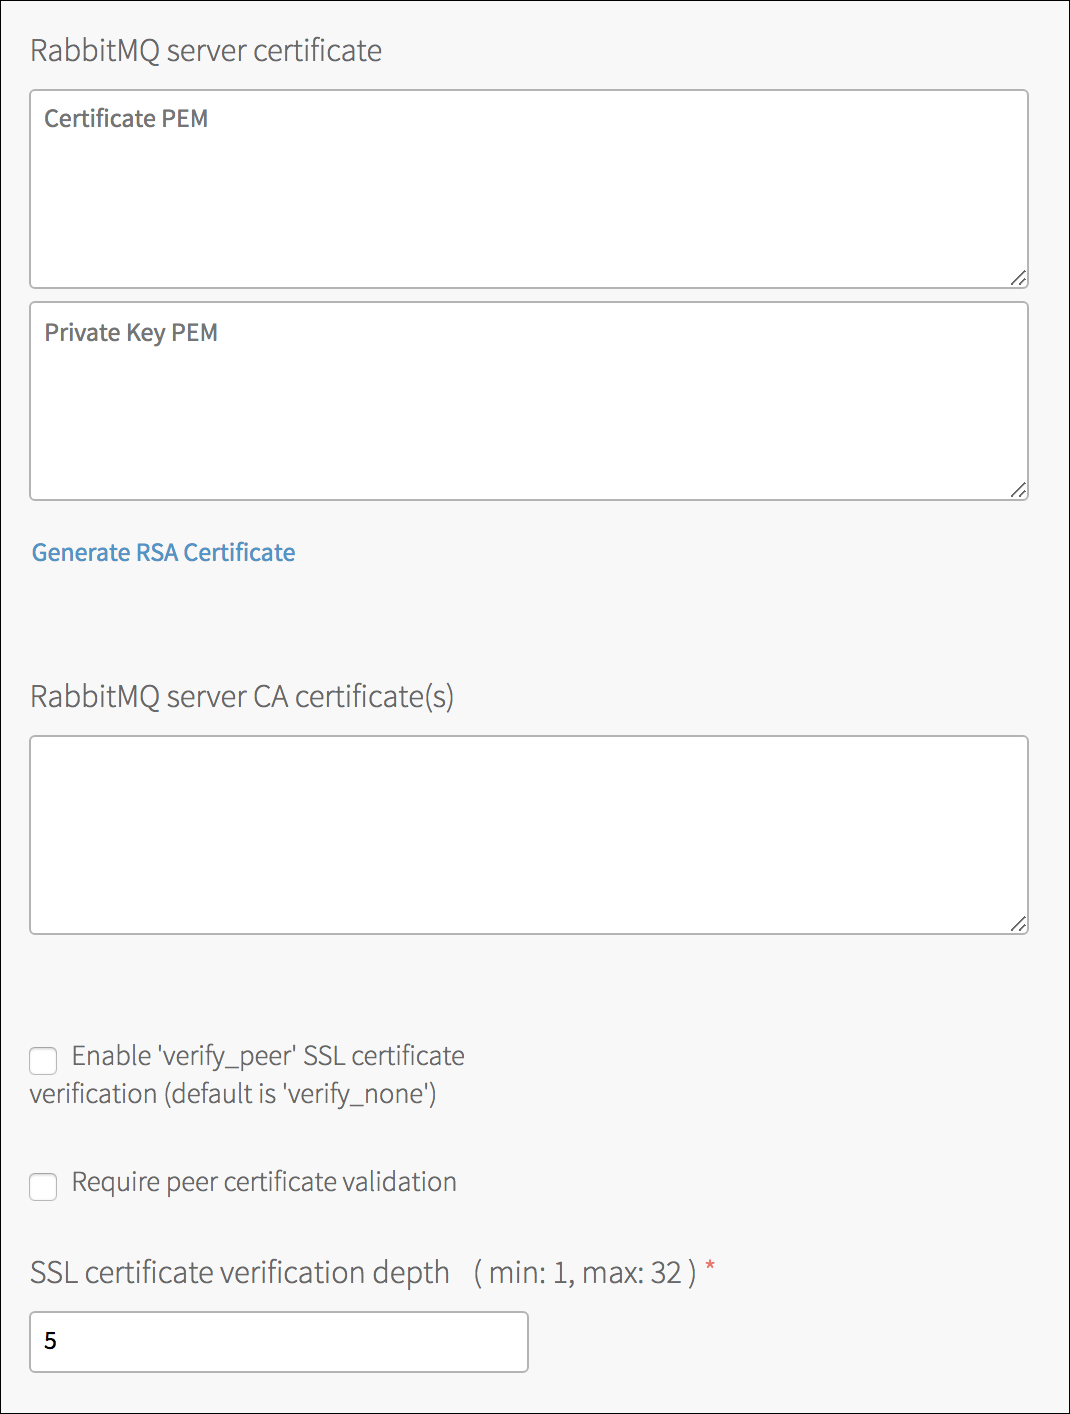
In the RabbitMQ server certificate fields on the Pre-Provisioned RabbitMQ tab, enter SSL certificates and keys for the RabbitMQ cluster to use.
-
To enable support for mTLS, select Enable ‘verify_peer’ SSL certificate verification.
- To enforce mTLS:
- Add
diego-instance-identity-root-ca-*anddiego-instance-identity-intermediate-ca-*to the RabbitMQ server CA certificate(s) field. - Select Require peer certificate validation.
- Add
Configure TLS Support
To configure TLS support:
-
In the Pre-Provisioned RabbitMQ tab, select the TLS versions to support. TLS v1.3 and TLS v1.2 are enabled by default. For more information about TLS versions, see the RabbitMQ documentation.

-
When TLS is enabled, both TLS and non-TLS connections are allowed.
To restrict connections to TLS-only, set the
listeners.tcpproperty to none:[ {rabbit, [ {tcp_listeners, []} ]} ].For how to set properties, see (Optional, Expert only) Override RabbitMQ Server Advanced Configuration below.
Collect Additional RabbitMQ Metrics in Loggregator
NoteIf you only use a Prometheus server to scrape your observed systems, you can skip this section.
If you have the rabbitmq_prometheus plug-in enabled, RabbitMQ collects metrics and sends these to the Loggregator Firehose system for collation. For more information about metrics collected in Tanzu RabbitMQ for Tanzu Application Service, see Monitoring and KPIs for Tanzu RabbitMQ for Tanzu Application Service.
In Tanzu RabbitMQ for Tanzu Application Service v2.0.11 and later, you can also configure your pre-provisioned service instances to collect additional, more detailed metrics for specific vhosts or families of metrics. Collecting additional metrics uses more resources, but you can provide a query parameter that limits the information collected to objects of your choosing. For more information about this query parameter, see rabbitmq-server in GitHub.
Configure Service Instances to Collect Additional Metrics
Prerequisite: The rabbitmq_prometheus plug-in must be enabled.
To configure pre-provisioned service instances to collect additional metrics:
-
Find the query parameter that suits your needs. You only require the query string, which is everything from the
?onwards.-
If you are migrating metrics from Tanzu RabbitMQ for Tanzu Application Service v1.x to v2.0, use the string:
?family=vhost_status&family=exchange_names&family=queue_consumer_count&family=queue_coarse_metricsFor more information, see RabbitMQ Detailed Metrics in Migrating Metrics from Tanzu RabbitMQ for Tanzu Application Service v1.x to v2.0.
- Otherwise, see rabbitmq-server in GitHub.
-
-
In the Pre-Provisioned RabbitMQ tab, enter your query parameter Detailed metrics query for Loggregator text box. For example,
?family=queue_coarse_metrics&family=queue_consumer_count. -
Click Save.
NoteTo stop collecting additional metrics, clear the Detailed metrics query for Loggregator text box, then click Apply Changes in the Ops Manager installation dashboard.
(Optional, Expert only) Override RabbitMQ Server Advanced Configuration
CautionThis feature is for expert users only. Any override configuration set on the RabbitMQ cluster might conflict with other configurations set by the Tanzu RabbitMQ for Tanzu Application Service broker.
You can provide your own configuration to apply to pre-provisioned service instances. For more information, see Expert Mode: Overriding RabbitMQ Server Configuration.
Select the Network Partition Behavior of the RabbitMQ Cluster
In this part of the Pre-Provisioned RabbitMQ tab, you can select one of two behaviors to occur in the event of a network partition.
-
In the Select the network partition behavior of the RabbitMQ cluster field, choose the desired behavior pause_minority or autoheal.
For more information about these options and RabbitMQ clusters and network partitions, see the RabbitMQ documentation.
For production purposes, VMware recommends that customers have at least three RabbitMQ server nodes and two HAProxies spread across low-latency AZs.
Disk Free Alarm Limit
To set the alarm for the amount of free disk space remaining:
- Choose how much disk space RabbitMQ attempts to keep free at any given time in this section of the Pre-Provisioned RabbitMQ tab:

RabbitMQ periodically checks if there is sufficient free disk space. If there is not, RabbitMQ temporarily stops accepting new messages. This gives your apps time to consume existing messages, and therefore free up some disk space. The RabbitMQ tile provides four options for this value:
-
50MB is the minimum value. (Not Recommended)
Selecting 50MB is discouraged because it can cause data loss. For more information, see Dangers of Setting This Value Too Low and When to Use the 50MB Value below.
-
100% Memory ensures that at the time when RabbitMQ checks the available disk, there must be enough space for RabbitMQ to page all memory-based messages out to disk.
-
150% Memory is recommended. This is because it is possible that in between disk-space checks, RabbitMQ might:
- Write persistent messages to disk (using up some disk space).
- Accept more memory-based messages into various queues.
- Page all memory-based messages to disk.
In the above situations, RabbitMQ might require more free disk than it has memory.
- 200% Memory is a conservative value used when the operator wants higher confidence that RabbitMQ never runs out of disk space.
For more information about disk alarms, see the RabbitMQ documentation.
Dangers of Setting This Value Too Low
If the disk of a RabbitMQ node completely fills while RabbitMQ is running, that node crashes. This can lead to data loss, and loss of availability.
RabbitMQ reserves the right to page any and all messages in memory (even transient messages) to disk at any time. You must set your Disk free alarm limit high enough to ensure that RabbitMQ always has at least enough space to do this.
Disadvantages of Setting This Value Too High
If you set your Disk free alarm limit to a value larger than the size of your persistent disk, then RabbitMQ is not able to free up enough disk space to accept new messages. Ensure that you have a large enough disk to persist all the messages you intend to persist while also leaving enough space free to satisfy the Disk free alarm limit that you choose.
When to Use the 50MB Value
VMware discourages using this value in production. However, if you are experimenting with a development environment you might want to use a small disk to keep down costs, even though this increases the risk of RabbitMQ crashing and losing data.
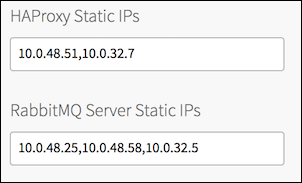
Specify Static IP Addresses
To specify static IP addresses:
-
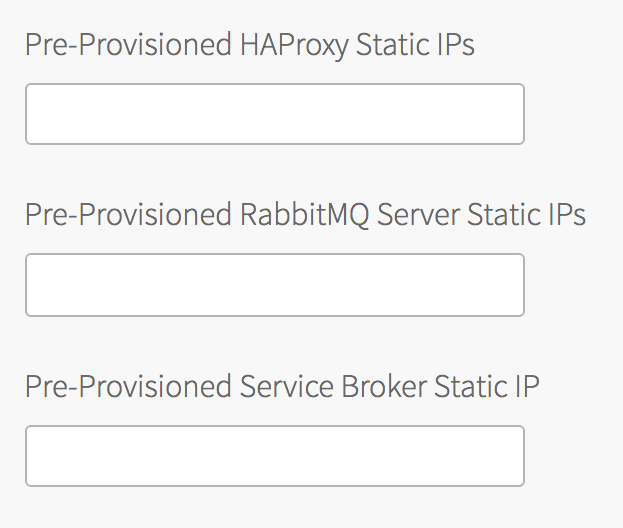
In the Pre-Provisioned RabbitMQ tab, configure the following fields:
- Pre-Provisioned HAProxy Static IPs: Enter a comma-separated list of IP addresses grouped in the order of AZs configured. These IP addresses are assigned to your Pre-Provisioned HAProxy nodes.
- Pre-Provisioned RabbitMQ Server Static IPs: Enter a comma-separated list of IP addresses grouped in the order of AZs configured. These IP addresses are assigned to your Pre-Provisioned RabbitMQ Server nodes.
- Pre-Provisioned Service Broker Static IP: Enter an IP address. This address must be in the network range of the network name specified in the Network dropdown in the Assign AZs and Networks tab and must not be in the Service Network. This IP address is assigned to your Pre-Provisioned Service Broker node.
Note
If any of the above fields are left blank, BOSH allocates an IP address.
- Pre-Provisioned HAProxy Static IPs: Enter a comma-separated list of IP addresses grouped in the order of AZs configured. These IP addresses are assigned to your Pre-Provisioned HAProxy nodes.
-
Click Save.
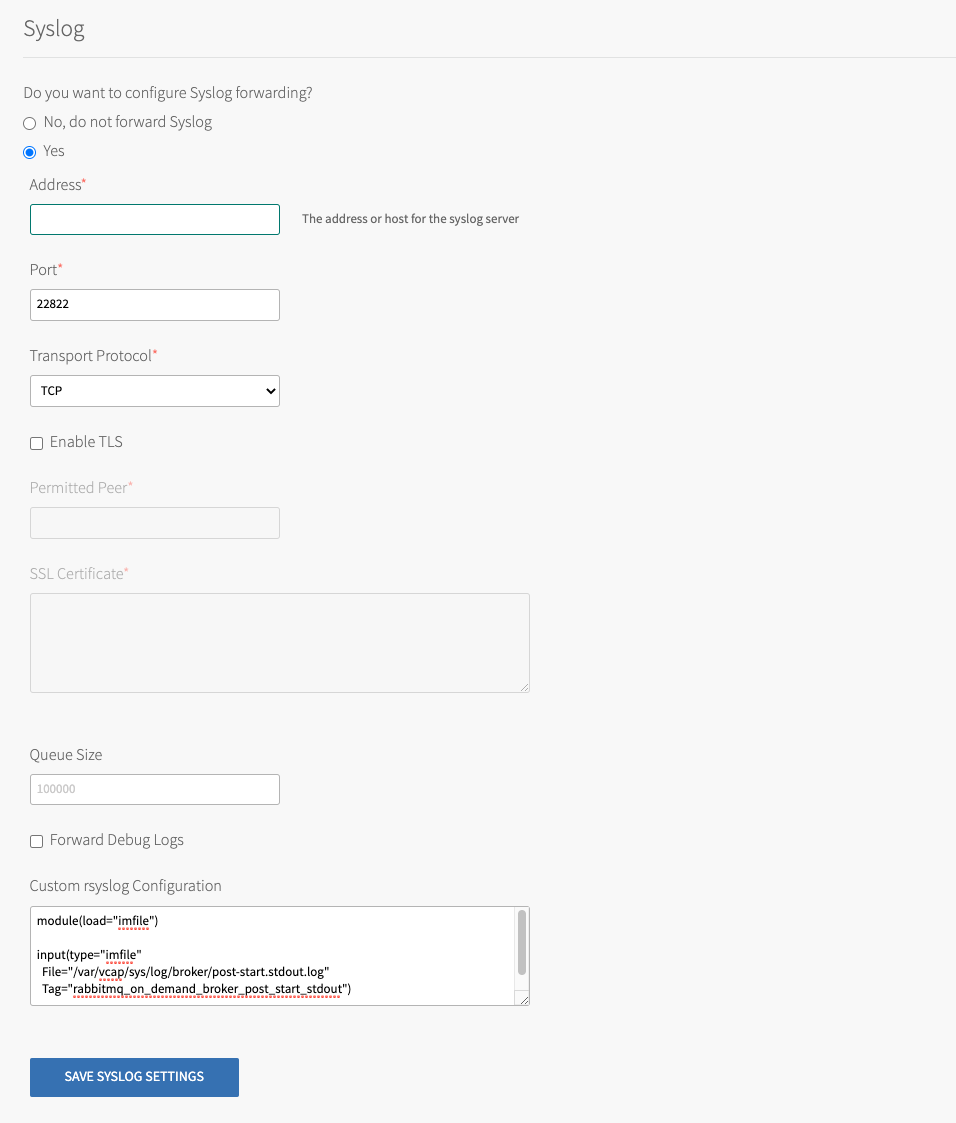
Configure Syslog Forwarding
Syslog forwarding is preconfigured and enabled by default. VMware recommends that you keep the default setting because it is good operational practice. However, you can opt out by selecting No for Do you want to configure syslog? in the Ops Manager Settings tab.
To enable monitoring for Tanzu RabbitMQ for Tanzu Application Service, operators, designate an external syslog endpoint for Tanzu RabbitMQ for Tanzu Application Service component log entries. The endpoint serves as the input to a monitoring platform such as Datadog, Papertrail, or SumoLogic.
To specify the destination for Tanzu RabbitMQ for Tanzu Application Service log entries:
- From the Ops Manager Installation Dashboard, click the Tanzu RabbitMQ for Tanzu Application Service tile.
- In the Tanzu RabbitMQ for Tanzu Application Service tile, click the Settings tab.
-
Click Syslog.
-
Configure the fields on the Syslog pane as follows:
Field Description Syslog Address Enter the IP or DNS address of the syslog server Syslog Port Enter the port of the syslog server Transport Protocol Select the transport protocol of the syslog server. The options are TLS, UDP, or RELP. Enable TLS Enable TLS to the syslog server. Permitted Peer If there are several peer servers that can respond to remote syslog connections, enter a wildcard in the domain, such as *.example.com.SSL Certificate If the server certificate is not signed by a known authority, such as an internal syslog server, enter the CA certificate of the log management service endpoint. Queue Size The number of log entries the buffer holds before dropping messages. A larger buffer size might overload the system. The default is 100000. Forward Debug Logs Some components produce very long debug logs. This option prevents them from being forwarded. These logs are still written to local disk. Custom Rules The custom rsyslog rules are written in RainerScript and are inserted before the rule that forwards logs. For the list of custom rules you can add in this field, see RabbitMQ Syslog Custom Rules. For more information about the program names you can use in the custom rules, see RabbitMQ Program Names. -
Click Save.
- Return to the Ops Manager Installation Dashboard.
- Click Review Pending Changes. For more information about this Ops Manager page, see Reviewing Pending Product Changes.
- Click Apply Changes to redeploy with the changes.
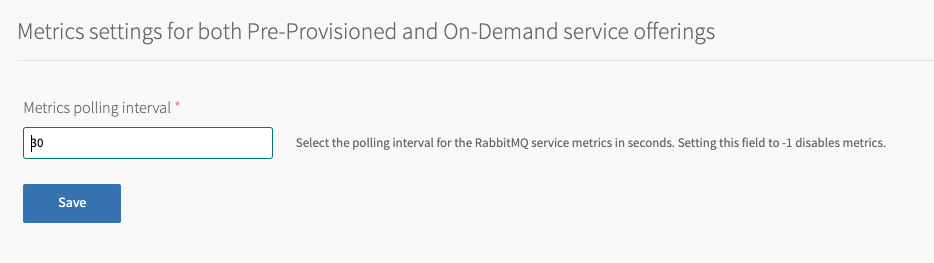
Configure the Metrics Polling Interval
To configure the metrics polling interval:
- From the Ops Manager Installation Dashboard, click the Tanzu RabbitMQ for Tanzu Application Service tile.
- In the Tanzu RabbitMQ for Tanzu Application Service tile, click the Settings tab.
- Click Metrics.
-
Configure the fields on the Metrics pane as follows:
Field Description Metrics polling interval The default setting is 30 seconds for all deployed components. VMware recommends that you do not change this interval. To avoid overwhelming components, do not set this below 10 seconds. Set this to -1to deactivate metrics. Changing this setting affects all deployed instances. -
Click Save.
- Return to the Ops Manager Installation Dashboard.
- Click Review Pending Changes. For more information about this Ops Manager page, see Reviewing Pending Product Changes.
- Click Apply Changes to redeploy with the changes.
Global Settings
Follow the steps below to enable the shareable instances feature. Sharing a service instance between spaces, allows apps in different spaces to share databases, messaging queues, and many other types of services. For more information, see Sharing Service Instances.
-
Click Pre-Provisioned RabbitMQ.
-
Select Enable Service Instance Sharing

-
Click Save.
Dedicated Instance: Single Node Plan
This tab only applies to the on-demand service. However, you must complete the fields on this tab even if you are not using the on-demand service. Therefore, if you are not using the on-demand service:
-
Select or enter any values in the required fields.
-
Select the Acknowledge checkbox.
-
Click Save.
For information about configuring the on-demand service, see Installing and Configuring the On-Demand Service.
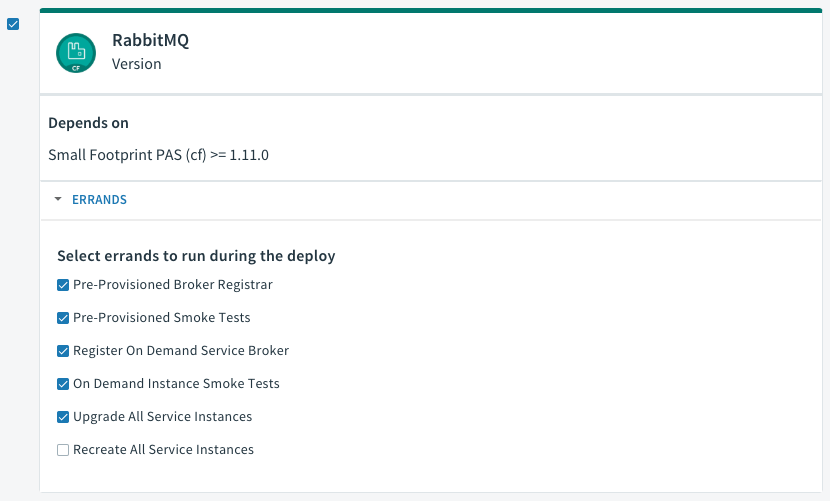
Errands
(Optional) In the Errands tab, choose the defaults for when errands run.
You can think of errands as tasks. For example, when deploying or updating Tanzu RabbitMQ for Tanzu Application Service, Ops Manager can run a series of post-deploy errands. An example is the Smoke Tests errand, which checks the health of the RabbitMQ cluster after a deployment or upgrade. For more information, see Post-Deploy Errands below.
You can toggle errands on and off on the Ops Manager Review Pending Changes page.
This is a one-time action before an update. You can change these defaults by clicking Errands in the Tanzu RabbitMQ for Tanzu Application Service Settings tab as well as the defaults for pre-delete errands.
CautionIn Tanzu RabbitMQ for Tanzu Application Service v1.9.0 and later, post-deploy errands are on by default except the Recreate All Service Instances errand. VMware recommends keeping these defaults, because the smoke tests can encounter unexpected issues, and on-demand instances of Tanzu RabbitMQ for Tanzu Application Service might fall behind if the Upgrade All Service Instances errand is not on by default.
For more information about errand run rules, see Errand Run Rules.
Post-Deploy Errands
| Errand | Description |
|---|---|
| Pre-Provisioned Broker Registrar | Makes the pre-provisioned Tanzu RabbitMQ for Tanzu Application Service service plans available in the Marketplace |
| Pre-Provisioned Smoke Tests | Checks that a pre-provisioned Tanzu RabbitMQ for Tanzu Application Service service instance can be bound to a TAS for VMs app, and that the app can publish and subscribe to a RabbitMQ cluster. See Smoke Tests. |
| Register On Demand Service Broker | Makes the on-demand Tanzu RabbitMQ for Tanzu Application Service service plans available in the Marketplace. If you change the Service Plan Configuration, you must run this errand in order for the changes to be reflected in the Marketplace. |
| On Demand Instance Smoke Tests | Checks that on-demand Tanzu RabbitMQ for Tanzu Application Service service instances can be bound to a TAS for VMs app, and that the app can publish and subscribe to a RabbitMQ cluster. See Smoke Tests. |
| Upgrade All Service Instances | On-Demand instances are updated and redeployed if there are changes to the Dedicated Instance settings or the tile is upgraded. If this errand is set to Off, updates to Dedicated Instance settings are not applied to existing service instances. VMware recommends that this errand is configured to always run. |
| Recreate All Service Instances | This errand re-creates all On-Demand instance VMs managed by the On-Demand broker. It is useful for tasks that require re-creating the service instance VM, such as rotating the Ops Manager root certificate authority (CA) or fully restoring the platform during disaster recovery or migration. This errand is off by default and should be enabled only when you want to re-create a VM. |
Pre-Delete Errands
Pre-delete errands run after an operator chooses to delete a product in the Ops Manager Installation Dashboard, but before Ops Manager finishes deleting the product.
| Errand | Description |
|---|---|
| Deregister and Purge Instances | Removes the pre-provisioned Tanzu RabbitMQ for Tanzu Application Service service from the Marketplace and deletes all associated service instances and bindings. For more information, see Turning Off the Pre-Provisioned Service. |
| Delete All Service Instances | Unbinds and deletes existing dedicated service instances. The duration of this errand depends on the number of deployed on-demand instances. |
| Deregister On-Demand Service Broker | Removes the on-demand Tanzu RabbitMQ for Tanzu Application Service service from the Marketplace |
Stemcell
To verify that you have the correct stemcell, follow the procedure in Importing and Managing Stemcells.
Apply Configuration and Complete the Installation
To apply the configuration and complete the installation:
-
Return to the Ops Manager Installation Dashboard.
-
Click Review Pending Changes. For more information about this Ops Manager page, see Reviewing Pending Product Changes.
-
Click Apply Changes to complete the installation of Tanzu RabbitMQ for Tanzu Application Service.
Other Configuration Topics
Connecting to a Highly Available RabbitMQ Cluster
The Tanzu RabbitMQ for Tanzu Application Service tile allows for a highly available cluster through multiple HAProxy nodes. The hostnames, uris, and hosts properties were added and should be used in preference over the equivalent singular properties. The singular properties are maintained for backwards compatibility and always contain the first value from the equivalent plural property. The singular properties will eventually be deprecated.
For example, with two HAProxy jobs deployed, the following properties are present:
"hostname": "10.0.0.41",

"hostnames": [

    "10.0.0.41",

    "10.0.0.51"]
Port to Protocol Mappings
- 15672 = RabbitMQ Management UI
- 5672 = RabbitMQ
- 5671 = RabbitMQ SSL
- 1883 = MQTT
- 8883 = MQTT SSL
- 61613 = STOMP
- 61614 = STOMP SSL
- 15674 = Web STOMP
- 4567 = RabbitMQ Service Broker
- 3457 - 3459 = CF Loggregator
- 15692 = RabbitMQ Prometheus metrics
Firewall Rules
To enable access to the Tanzu RabbitMQ for Tanzu Application Service tile service, you must ensure your firewall rules allow access to the HAProxy and RabbitMQ Service Broker VMs configured in your deployment. You can obtain the IP addresses for these from the Ops Manager Status page in the Tanzu RabbitMQ for Tanzu Application Service tile. Ensure the following ports are enabled for those VMs:
- 15672
- 5672
- 5671
- 1883
- 8883
- 61613
- 61614
- 15674
- 4567
- 3457 - 3459
To enable Prometheus to collect metrics from pre-provisioned RabbitMQ nodes, you must also permit incoming traffic on port 15692. For information about the RabbitMQ Prometheus plug-in, see the RabbitMQ documentation.
The following is a template for configuring your TAS for VMs firewall rules:
[
{"protocol":"tcp","destination":"<haproxy-node-IP-addresses>","ports":"5671,5672,1883,8883,61613,61614,15672,15674"},
{"protocol":"tcp","destination":"<service-broker-node-IP-addresses>","ports":"4567"}
]
Application Security Groups
To allow this service to have network access, you must create Application Security Groups (ASGs).
NoteThe service is unusable without Application Security Groups.
Application Container Network Connections
Application containers that use instances of the RabbitMQ service require the following outbound network connections:
| Destination | Ports | Protocol | Reason |
|---|---|---|---|
HAProxy IPs |
5672 | tcp | Application containers using AMQP |
HAProxy IPs |
5671 | tcp | Application containers using AMQP over SSL |
HAProxy IPs |
1883 | tcp | Application containers using MQTT |
HAProxy IPs |
8883 | tcp | Application containers using MQTT over SSL |
HAProxy IPs |
61613 | tcp | Application containers using STOMP |
HAProxy IPs |
61614 | tcp | Application containers using STOMP over SSL |
HAProxy IPs |
61613 | tcp | Application containers using Web STOMP |
Create an ASG named rabbitmq-app-containers with the above configuration and bind it to either:
- The appropriate space
-
The
default-runningASG set if you want to provide access to all started apps. Then restart your apps.If you are using an external load balancer, or have more than one IP address for HAProxy, you must also create egress rules for these. For example:
[
{
    "ports": "5671-5672",
    "protocol": "tcp",
    "destination": "10.10.10.10/32"
}
]
Assigned IPs
Tanzu RabbitMQ for Tanzu Application Service does not support changing the IP addresses that were assigned to the Tanzu RabbitMQ for Tanzu Application Service deployments. For example, you cannot change the subnet into which the RabbitMQ cluster was originally provisioned. Doing so causes the deployment to fail. For more information, see Changing Network or IP Addresses Results in a Failed Deployment.
Preserve Dynamically Assigned IP Addresses
You cannot switch from dynamically assigned IP addresses to a different set of static IP addresses. However, you can configure Ops Manager so the current set of dynamically assigned IP addresses always continue to be used. This might be useful when upgrading.
To preserve the current set of dynamically assigned IP addresses:
- Go to the Status page in the Tanzu RabbitMQ for Tanzu Application Service tile.
- Take note of the IP addresses for the RabbitMQ Server and HAProxy for RabbitMQ jobs, in the order nodes appear in the UI.
- Go to the Settings page, and click the Pre-Provisioned RabbitMQ tab.
-
Enter the IP addresses you got from the Status page as a comma-separated list.
-
Click Save.
