Migrate your existing directories to the Workspace ONE Access 20.10 connectors using the Migration Dashboard. The migration process is a staged approach that lets you test your environment with the new connectors before finishing the migration.
The migration process includes the following stages:
- Install 20.10 Connectors
Install the new 20.10 connectors, which contain the Directory Sync, User Auth, and Kerberos Auth services. At a minimum, install the Directory Sync and User Auth service. Install the Kerberos Auth service if you have the Kerberos authentication method configured.
- Migrate to New Connectors
In this stage, you migrate all your directory data using the Migrate Directory wizard. Most of the required information is pre-populated from your environment but you enter some sensitive values such as the directory Bind user password.
Migrating the directories in this stage does not change any of your existing directory, authentication method, or identity provider configurations. You are still using the old connectors. The changes will take effect only after you go to the Preview stage in the next step.
- Preview
In the Preview stage, you preview your environment with the new 20.10 connectors. The new Directory Sync, User Auth, and Kerberos Auth services from the 20.10 connectors perform directory sync and user authentication. All authentication methods except for Kerberos are in outbound mode.
The Preview stage is intended for you to test your environment thoroughly with the new services. Verify that directory sync, user authentication, and application launch are working as expected.
In the Preview stage, you cannot make any changes to your directories, authentication methods, or identity providers, or add new ones.
From the Preview stage, you can roll back to using the old connectors. When you roll back, the directory data that you migrated in the previous stage is still maintained. If you make any changes later to any of your existing directories, authentication methods, or identity providers, ensure that you migrate the directory data again.
- Complete Migration
When you are satisfied with testing your new environment, complete the migration. After you complete the migration, you cannot roll back to using the old connectors.
Prerequisites
- Review requirements in Migrating to VMware Workspace ONE Access 20.10 Connectors.
- Verify that all the connectors in your environment are version 19.03.x. If any connectors are an older version, upgrade them to 19.03.x.
- Prepare one or more Windows servers for the new 20.10 connectors. See Sizing Guidelines in Installing Workspace ONE Access Connector 20.10.
You can install the 20.10 connector either on a new server or on the legacy 19.03.x connector server. However, if Kerberos authentication is configured on your legacy connector, you must use a separate Windows server to install the 20.10 Kerberos Auth service. Do not install the new Kerberos Auth service on the 19.03.x connector server. Workspace ONE Access does not support multiple instances of Kerberos on the same server.
If Kerberos authentication is not configured on your legacy connector and you want to install the new 20.10 connector on the legacy 19.03.x connector server, see Migrating to Latest Connector on a Windows Server Running Workspace ONE Access 19.03.x for additional requirements.
- If you have an on-premises Workspace ONE Access service instance, upgrade it to 20.10 before migrating the connectors.
- If you have the RSA SecurID authentication method configured for any of your directories, clear the Node Secret in the RSA Security console.
Also, if you are installing the User Auth service on a new Windows server, add the Windows server as an Agent in the SecurID server before starting the connector migration.
- If any IDPs are associated with multiple directories, modify the configuration so that each IDP is only associated with one directory.
- Ensure that the directory sync process is not running for any of the directories before starting the migration process.
- If you enabled the People Search feature, ensure that the photo sync process is not running for any of the directories before starting the migration process.
- If you are migrating a 19.03.x connector with no directory associated with it, be aware that when you select the Workspace ONE Access Connector 20.10 option in Step 5, the migration is considered complete and the 19.03.x connector is deleted from the service. If you decide later that you want to use legacy connectors and change your connector selection using the Reset Virtual Apps Usage button, the 19.03.x connector will not be displayed. You will need to reinstall the 19.03.x connector to reactivate it with the service.
Procedure
- Click the Identity & Access Management tab.
The migration page appears.
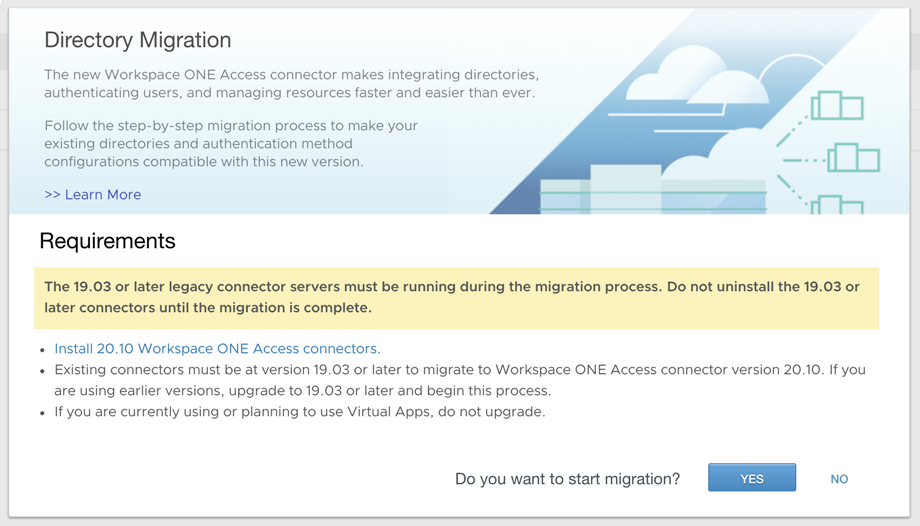
- Review the requirements, then click Yes.
The Directory Migration dashboard appears.
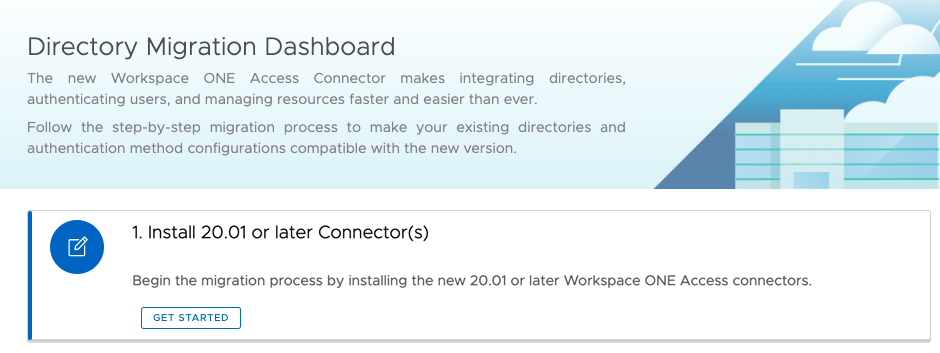
- In the Directory Migration dashboard, click the Get Started link in the Install 20.01 or later Connector(s) section.
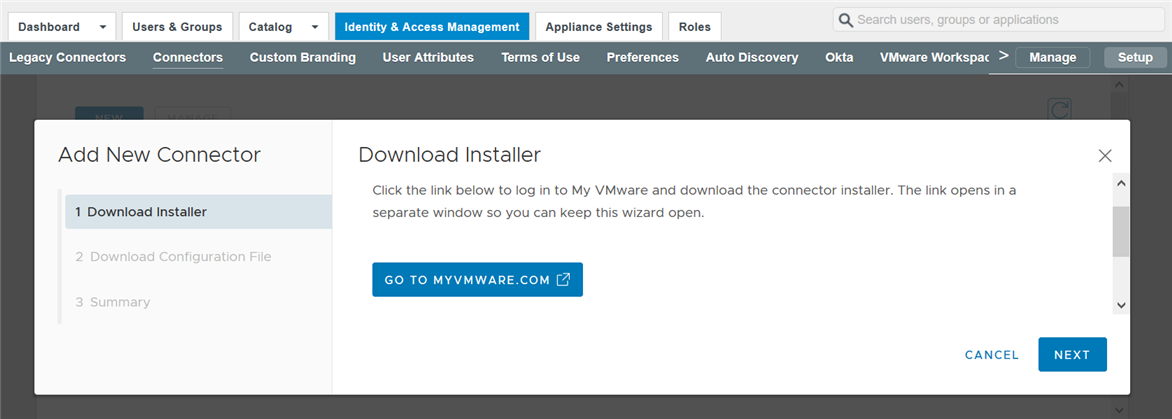
- In the Connectors page, click New.
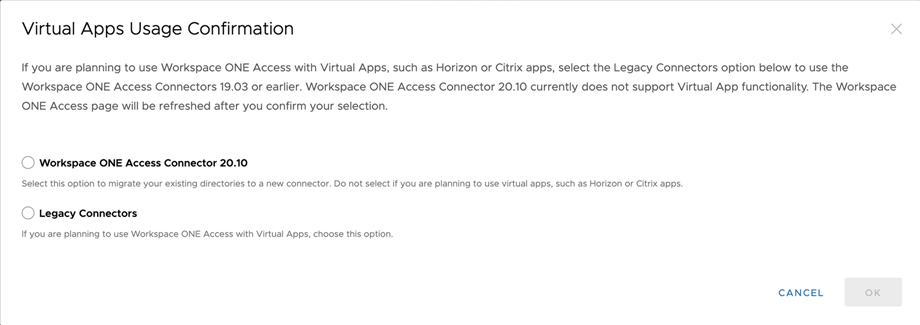
- In the Virtual Apps Usage Confirmation pop-up, select Workspace ONE Access Connector 20.10 if you do not intend to use virtual apps (Horizon, Horizon Cloud, and Citrix integrations).
If you want to use virtual apps, select
Legacy Connectors to exit the migration process. Virtual apps are only supported with legacy connectors.
- Follow the Add New Connector wizard to download the connector installer and the required configuration file, then install the new connector.
Important: When you install the connector, make sure you install the Directory Sync service and the User Auth service. The Kerberos Auth service is required only if you have the Kerberos authentication method configured on any of your legacy connectors.
- When the connector installation is successfully completed, return to the Directory Migration dashboard in the Workspace ONE Access service console.
- In the Migrate to New Connectors section, migrate all your directories, one by one.
The Migrate to New Connectors section lists all the Active Directory and LDAP directories in your tenant. You must migrate all the directories listed before you can complete the migration.
Note: Migrating the directories in this step does not change any of your existing directory, authentication method, or identity provider configuration and will take effect only after you preview the changes in the next step.
- Click the Migrate button next to the directory.
The Migrate Directory wizard appears. The wizard is customized to the directory you are migrating. Additional pages appear for the authentication methods that are configured on the directory.
- On the Directory page, enter the Bind user password for the directory.
The
Directory Sync Host(s) list displays the new 20.10 connector hosts that have the Directory Sync service installed. Select one or more hosts to use to sync the directory.

- (Appears only if Kerberos auth method is configured) On the Kerberos page, specify the information required to migrate the Kerberos authentication method.
- Source Connector: The source connector is preselected. You can select another connector if the preselected connector is not available.
- Kerberos Auth Host(s): The list displays the new 20.10 connector hosts that have the Kerberos Auth service installed. Select one or more hosts to use for Kerberos authentication.

- On the Password page, specify the information required to migrate the Password authentication method.
- Source Connector: The source connector is preselected. You can select another connector if the preselected connector is not available.
- Bind Password: Enter the Bind user password for the directory.
- User Auth Host(s): The list displays the new 20.10 connector hosts that have the User Auth service installed. Select one or more hosts to use for Password authentication.

- (Appears only if RADIUS authentication method is configured) On the RADIUS page, specify the information required to migrate the RADIUS authentication method.
- Source Connector: The source connector is preselected. You can select another connector if the preselected connector is not available.
- Shared secret: The shared secret for the RADIUS server.
- User Auth Host(s): The list displays the new 20.10 connector hosts that have the User Auth service installed. Select one or more hosts to use for RADIUS authentication.

- (Appears only if RSA SecurID authentication method is configured) On the SecurId page, specify the information required to migrate the RSA SecurID authentication method.
- Source Connector: The source connector is preselected. You can select another connector if the preselected connector is not available.
- User Auth Host(s): The list displays the new 20.10 connector hosts that have the User Auth service installed. Select one or more hosts to use for RSA SecurID authentication.

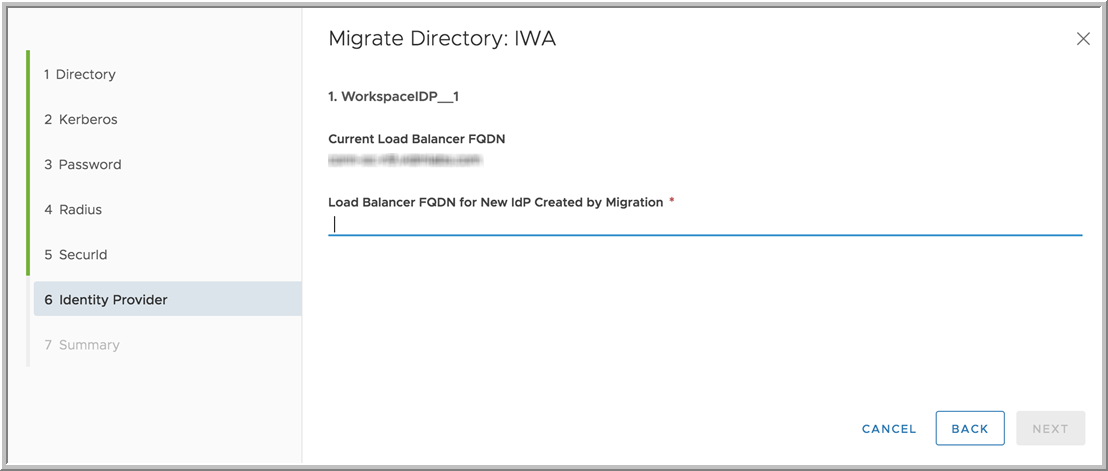
- (Appears only if Kerberos authentication is configured) On the Identity Provider page, enter the connector load balancer's FQDN to use for the new identity provider that will be created for Kerberos authentication during migration.
The current load balancer FQDN is displayed for reference. This is the current
IdP Hostname value in the directory’s identity provider page.
If you have only one 20.10 connector, and no load balancer, enter the connector's FQDN.
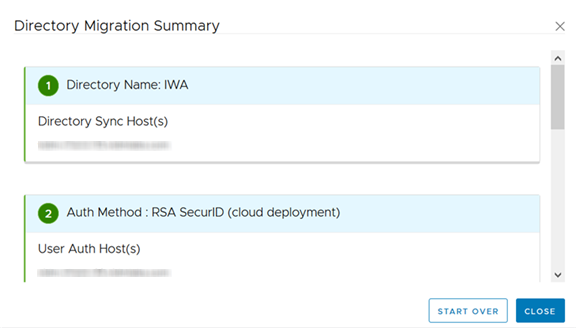
- In the Summary page, verify your selections and click Save.
The directory migration data is saved. You can view the settings by clicking the
Summary button next to the directory in the Directory Migration dashboard.

If you want to make any changes to the information you entered, click
Start Over in the Summary page. This discards the migration data you entered for the directory and lets you migrate the directory again.
- Migrate the rest of the directories.
After all the directories are migrated, the
Complete Migration step is enabled.
- In the Complete Migration section, click Start Preview to start the migration process.

In the Preview stage, the new 20.10 connectors are used. Directory sync is performed by the new Directory Sync service, user authentication is performed by the new User Auth service, and Kerberos authentication is performed by the new Kerberos Auth service. You cannot make any changes to your directories, authentication methods, or identity providers, or create new ones. You can view the converted identity providers in the
Identity Providers tab and the converted authentication methods in the
Enterprise Authentication Methods tabs. All authentication methods except for Kerberos are in outbound mode.
If the People Search feature was enabled in your deployment of the Workspace ONE Access service, you must manually sync the directories without the Safeguard settings. In the Workspace ONE Access console, select the directory in the Identity & Access Management > Directories page and click Sync > Sync without Safeguards.
Important: Test your environment thoroughly in the Preview stage and verify that it is working as expected. Verify that directory sync, user login, and application launch are working.
- If you determine that your environment is not working correctly, or if you want to make any changes to your directories, authentication methods, or identity providers, exit the Preview stage and return to using the old connectors.
Go to the Identity & Access Management > Manage > Directories page, click
Continue Migration, and click
Abort in the
Complete Migration section of the Directory Migration dashboard.

If you make any changes to your directories, authentication methods, or identity providers subsequently, make sure that you migrate the directories again in the
Migrate to New Connectors section.
- After you verify that your environment is working as expected in the Preview stage and you are ready to complete the migration, return to the Directory Migration dashboard by going to the Identity & Access Management > Manage > Directories page and clicking Continue Migration.
Caution: After you complete the migration, you cannot roll back to the old connectors.
Click Complete to complete the migration.
Results
All the directories are migrated to the new 20.10 connectors. The new Directory Sync, User Auth, and Kerberos Auth services now perform directory sync and user authentication.
New identity providers are created for each directory and appear in the Identity Providers tab with the name Migrated IDP for directory. The new identity providers are of type Built-in. For Kerberos authentication, a separate identity provider of type Workspace_IDP is created.
All authentication methods except for Kerberos are converted to outbound methods and are renamed with the (cloud deployment) suffix. For example, the Password authentication method is renamed to Password (cloud deployment). You can view and manage the new authentication methods from the Enterprise Authentication Methods tab.
What to do next
When the migration is completed, you can uninstall the old 19.03.x connectors from the servers on which they are installed.

