


To enable developers to deploy AI/ML workloads on TKG clusters, as a vSphere Administrator you set up the Supervisor environment to support NVIDIA GPU hardware.
Admin Step 1: Review System Requirements
| Requirement | Description |
|---|---|
| vSphere 8 infrastructure |
vCenter Server and ESXi hosts |
| Workload Management license |
vSphere Namespaces and Supervisor |
| TKR Ubuntu OVA | |
| NVIDIA vGPU Host Driver |
Download the VIB from the NGC web site. For more information, see the vGPU Software Driver documentation. |
| NVIDIA License Server for vGPU |
FQDN provided by your organization |
Admin Step 2: Install Supported NVIDIA GPU Device on ESXi Hosts
To deploy AI/ML workloads on TKG, you install one or more supported NVIDIA GPU devices on each ESXi host comprising the vCenter Cluster where Workload Management will be enabled.
To view compatible NVIDIA GPU devices, refer to the VMware Compatibility Guide.
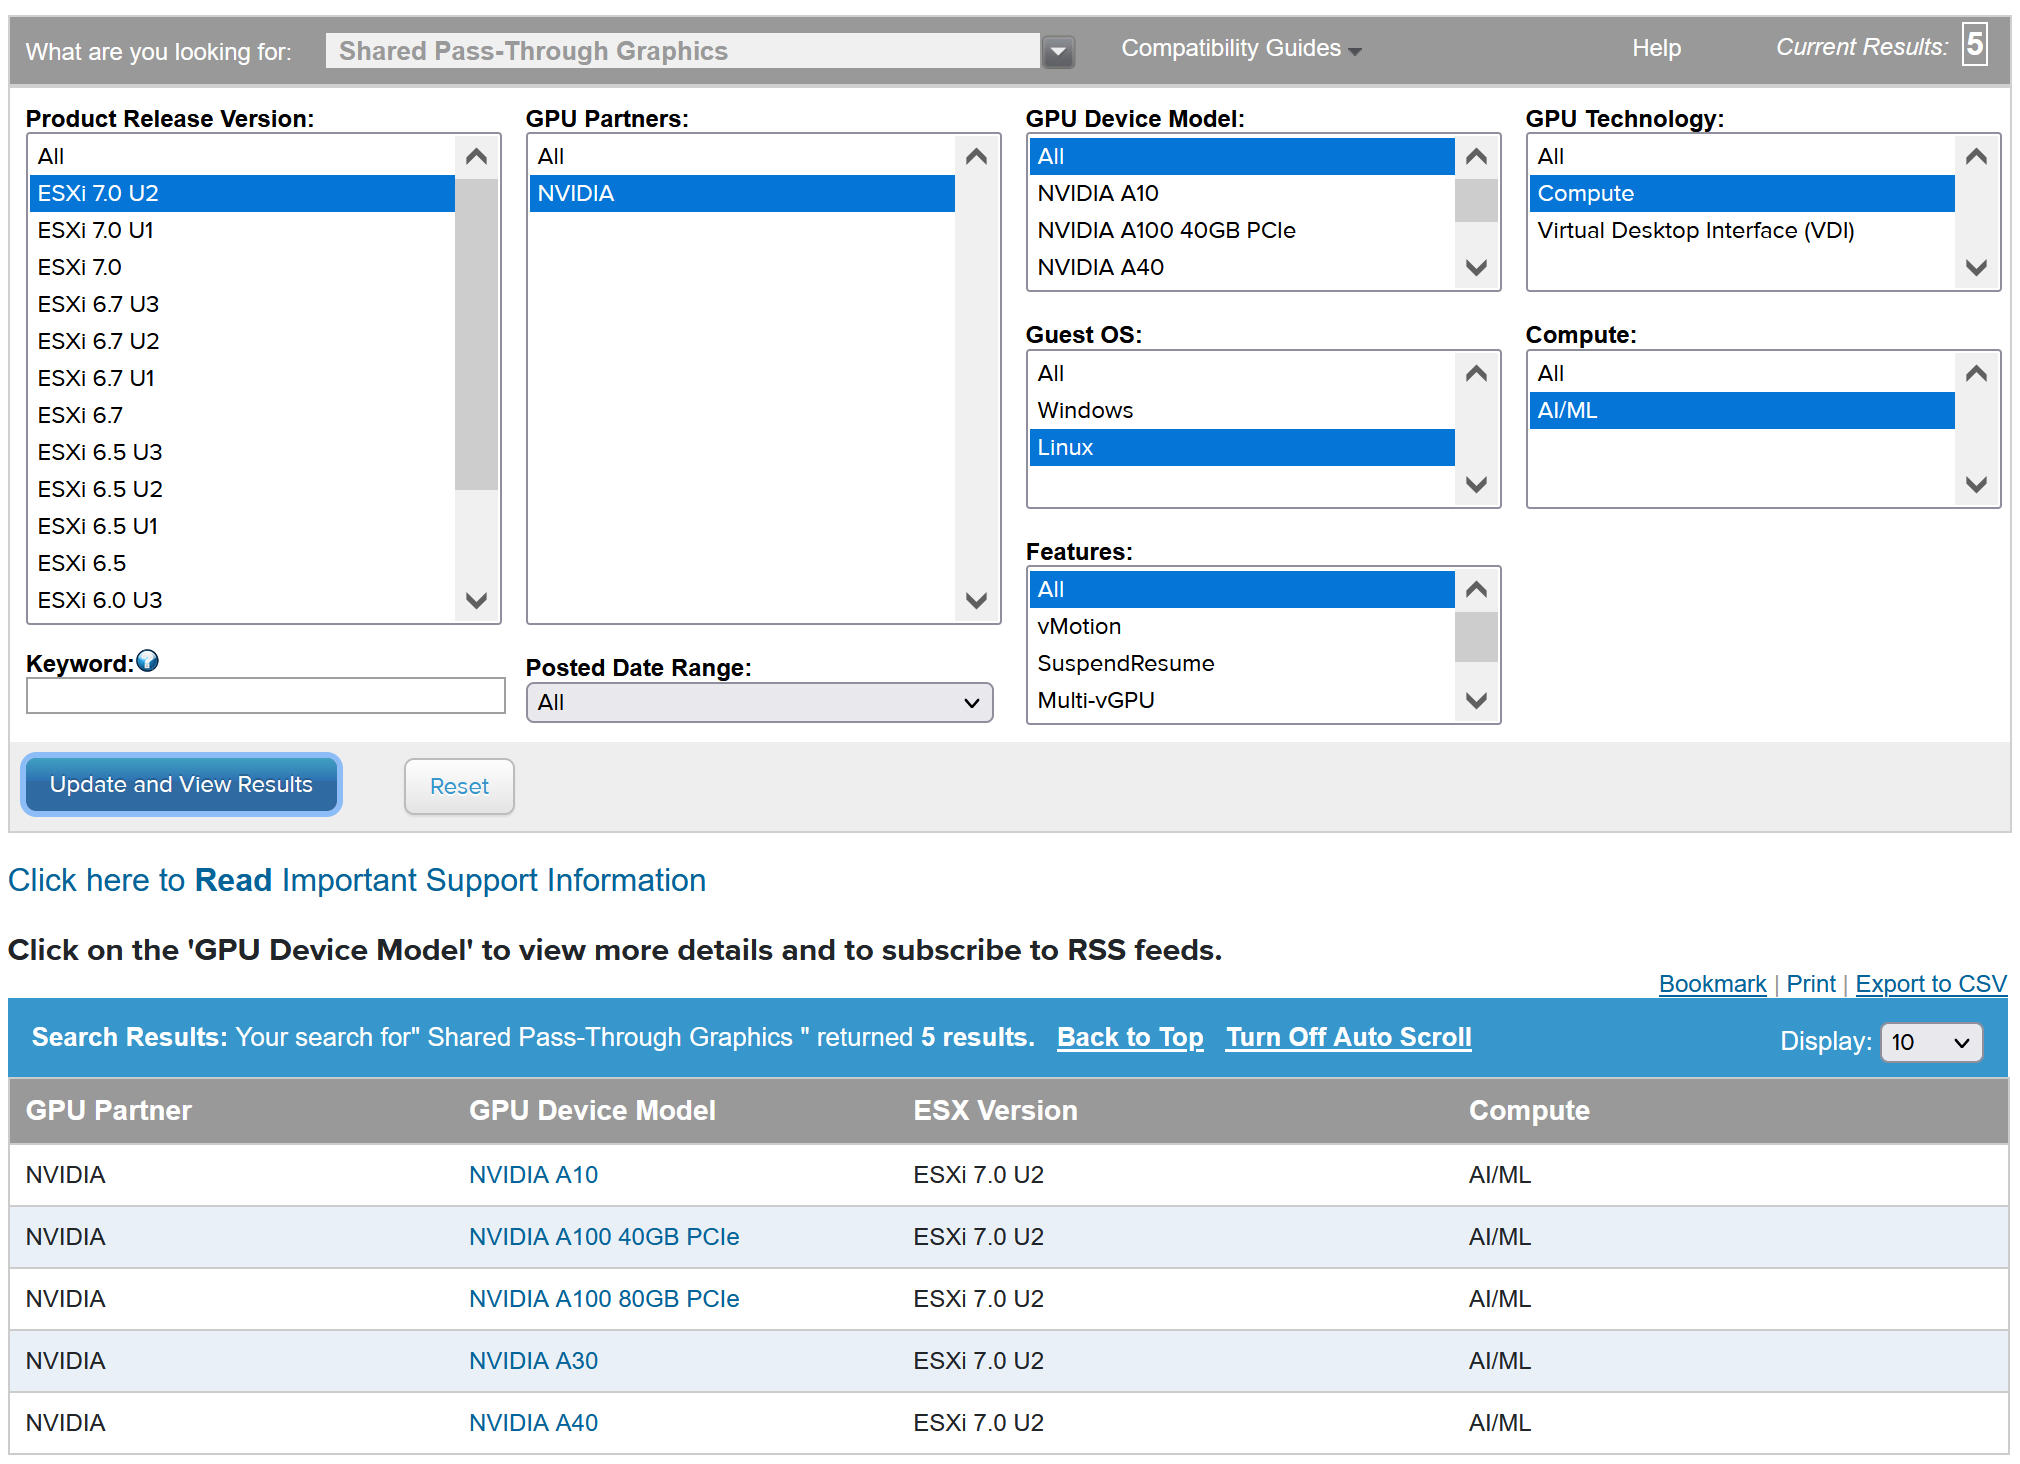
The NVIDA GPU device should support the latest NVIDIA AI Enterprise (NVAIE) vGPU profiles. Refer to the NVIDIA Virtual GPU Software Supported GPUs documentation for guidance.
For example, the following ESXi host has two NVIDIA GPU A100 devices installed on it.

Admin Step 3: Configure Each ESXi Host for vGPU Operations
For each ESXi host comprising the vCenter Cluster where Workload Management is enabled, configure the host for NVIDIA vGPU by enabling Shared Direct and SR-IOV.
Enable Shared Direct on Each ESXi Host
For NVIDIA vGPU functionality to be unlocked, enable Shared Direct mode on each ESXi host comprising the vCenter Cluster where Workload Management is enabled.
- Log on to the vCenter Server using the vSphere Client.
- Select an ESXi host in the vCenter Cluster.
- Select .
- Select the NVIDIA GPU accelerator device.
- Edit the Graphics Device settings.
- Select Shared Direct.
- For Shared passthrough GPU assignment policy, for best performance select Spread VMs across GPUs
- Click OK to save the configuration.
- Note that the settings will take effect after restarting the host.
- Right-click the ESXi host and put it into maintenance mode.
- Reboot the host.
- When the host is running again, take it out of maintenance mode.
- Repeat this process for each ESXi host in the vSphere cluster supporting Workload Management .
Turn On SR-IOV BIOS for NVIDIA GPU A30 and A100 Devices
If you are using the NVIDIA A30 or A100 GPU devices, which are required for Multi-Instance GPU (MIG mode), you must enable SR-IOV on the ESXi host. If SR-IOV is not enabled, TKG cluster node VMs cannot start. If this occurs, you see the following error message in the Recent Tasks pane of the vCenter Server where Workload Management is enabled.
Could not initialize plugin libnvidia-vgx.so for vGPU nvidia_aXXX-xx. Failed to start the virtual machine. Module DevicePowerOn power on failed.
To enable SR-IOV, log in to the ESXi host using the web console. Select . Select the NVIDIA GPU device and click Configure SR-IOV. From here you can turn on SR-IOV. For additional guidance, see Single Root I/O Virtualization (SR-IOV) in the vSphere documentation.
vGPU with Dynamic DirectPath IO (Passthrough Enabled Device)
- Log in to the vCenter Server using the vSphere Client.
- Select the target ESXi host in the vCenter Cluster.
- Select .
- Select the All PCI Devices tab.
- Select the target NVIDIA GPU accelerator device.
- Click Toggle Passthrough.
- Right-click the ESXi host and put it into maintenance mode.
- Reboot the host.
- When the host is running again, take it out of maintenance mode.
Admin Step 4: Install the NVIDIA Host Manager Driver on Each ESXi Host
To run TKG cluster node VMs with NVIDIA vGPU graphics acceleration, you install the NVIDIA host manager driver on each ESXi host comprising the vCenter Cluster where Workload Management will be enabled.
The NVIDIA vGPU host manager driver components are packaged in a vSphere installation bundle (VIB). The NVAIE VIB is provided to you by your organization through its NVIDIA GRID licensing program. VMware does not provide NVAIE VIBs or make them available for download. As part of the NVIDIA licensing program your organization sets up a licensing server. Refer to the NVIDIA Virtual GPU Software Quick Start Guide for more information.
esxcli system maintenanceMode set --enable true
esxcli software vib install -v ftp://server.domain.example.com/nvidia/signed/NVIDIA_bootbank_NVIDIA-VMware_ESXi_7.0_Host_Driver_460.73.02-1OEM.700.0.0.15525992.vib
esxcli system maintenanceMode set --enable false
/etc/init.d/xorg restart
Admin Step 5: Verify ESXi Hosts Are Ready for NVIDIA vGPU Operations
- SSH into the ESXi host, enter shell mode and run the command
nvidia-smi. The NVIDIA System Management Interface is a command line utility provided by the NVIDA vGPU host manager. Running this command returns the GPUs and drivers on the host. - Run the following command to verify that the NVIDIA driver is properly installed:
esxcli software vib list | grep NVIDA. - Verify that host is configured with GPU shared direct and that SR-IOV is turned on (if you are using NVIDIA A30 or A100 devices).
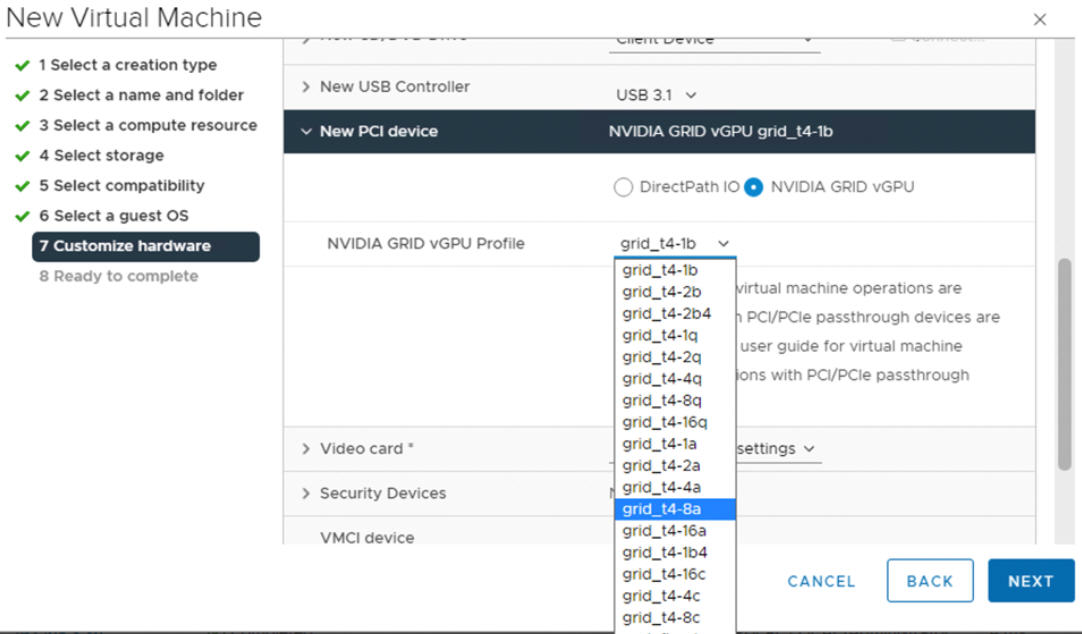
- Using the vSphere Client, on the ESXi host that is configured for GPU, create a new virtual machine with a PCI device included. The NVIDIA vGPU profile should appear and be selectable.
Admin Step 6: Enable Workload Management
Admin Step 7: Create or Update a Content Library with a TKR Ubuntu
NVIDIA vGPU requires the Ubuntu operating system. You cannot use the PhotonOS edition of a TKG release for vGPU clusters.
VMware provides an Ubuntu editions of TKG releases. Starting with vSphere 8, the Ubuntu edition is specified using an annotation in the cluster YAML.
Admin Step 8: Create a Custom VM Class with the vGPU Profile
Create a custom VM Class with a vGPU profile. You will then use this VM class in the cluster specification to create the TKGS cluster nodes. Refer to the following instructions: Create a Custom VM Class for NVIDIA vGPU Devices.
Admin Step 9: Configure the vSphere Namespace
Create a vSphere Namespace for each TKG vGPU cluster you plan to provision. See Create a vSphere Namespace for Hosting TKG Service Clusters.
Configure the vSphere Namespace by adding vSphere SSO users/groups with Edit permissions, and attach a storage policy for persistent volumes. See Configure a vSphere Namespace for TKG Service Clusters.
Associate the TKR content library where the desired Ubuntu image is stored with the vSphere Namespace. See Associate the TKR Content Library with the TKG Service.
- In the Select the vSphere Namespace, select the VM Service tile and click Manage VM Classes.
- Locate the custom VM class you created in the list of classes.
- Select (check) the class and click Add.
Admin Step 10: Verify that Supervisor Is Ready
The last administration task is to verify that Supervisor is provisioned and available for use by the Cluster Operator to provision a TKG cluster for AI/ML workloads.
See Connecting to TKG Service Clusters Using vCenter SSO Authentication.
