Here are instructions for configuring VMware Tanzu Application Service for VMs (TAS for VMs).
Prerequisites
Before you begin this procedure, you must:
-
Ensure that you have successfully completed the steps to prepare your environment for Ops Manager and install and configure the BOSH Director. For more information, see the VMware Tanzu Operations Manager configuration topic for your IaaS.
-
If you plan to install the Ops Manager IPsec add-on, you must do so before installing any other tiles. VMware recommends installing IPsec immediately after Ops Manager and before installing the TAS for VMs Runtime tile. For more information, see Installing IPsec for VMware Tanzu.
Add TAS for VMs to Ops Manager
Before you can configure TAS for VMs, you must add the TAS for VMs tile to your Ops Manager Installation Dashboard.
To add the TAS for VMs tile to your Ops Manager Installation Dashboard:
-
If you have not already downloaded TAS for VMs, log in to VMware Tanzu Network and click VMware Tanzu Application Service for VMs.
-
From the Releases drop-down menu, select the release to install and choose one of the following:
- Click VMware Tanzu Application Service for VMs to download the Pivotal Application Service
.pivotalfile. -
Click Small Footprint TAS for VMs to download the Small Footprint TAS for VMs
.pivotalfile. For more information, see Getting Started with Small Footprint TAS for VMs. -
Go to the Ops Manager Installation Dashboard.
-
Click Import a Product to add your tile to Ops Manager. For more information, see Adding and Deleting Products.
-
Click the VMware Tanzu Application Service for VMs tile in the Installation Dashboard.
Assign AZs and Networks
For Azure environments, this configuration pane is Assign Networks and does not include AZ configuration.
In the Assign AZ and Networks pane, you assign jobs to your Availability Zones (AZs) and networks.
To configure the Assign AZ and Networks pane:
-
Select Assign AZ and Networks.
-
From the Network drop-down menu, select the network where you want to run TAS for VMs.
-
Click Save.
Configure domains
In the Domains pane, you configure a wildcard DNS record for both the apps domain and system domain.
To configure the Domains pane:
-
Select Domains.
-
Enter the name of your system domain in the System domain field. The system domain defines your target when you push apps to TAS for VMs, such as your load balancer or HAProxy. TAS for VMs assigns system components such as UAA and Apps Manager to subdomains under this domain.
-
Enter the name of your apps domain in the Apps domain field. The apps domain is the default domain that apps use for their hostnames. TAS for VMs hosts each app at subdomains under this domain. You can use the Cloud Foundry Command Line Interface (cf CLI) to add or delete subdomains assigned to individual apps.
-
Click Save.
For additional guidance based on your installation method, see the table below:
| Installation Method | Guidance |
|---|---|
| Manual | Enter the domains you created when preparing your environment for Ops Manager. |
| Terraform | Enter the values for sys_domain and apps_domain from the Terraform output. |
<p class="note">
<span class="note__title">Note</span>
VMware recommends that you use the same domain name but different subdomain names for your system and app domains. This allows you to use a single wildcard certificate for the domain while preventing apps from creating routes that overlap with system routes.</p>
Configure Networking
In the Networking pane, you configure security and routing services for your IaaS. To configure the Networking pane:For Gorouter IPs and HAProxy IPs, see the guidance below:
- For AWS, Azure, and GCP, leave these fields blank. You do not need to complete these fields when deploying TAS for VMs on these infrastructures.
- For OpenStack and vSphere, the values you enter in the Gorouter IPs and HAProxy IPs fields depend on whether you are using HAProxy in your deployment. Use the table below to determine how to complete these fields:
Note: If you choose to assign specific IP addresses in either the Gorouter IPs or HAProxy IPs field, ensure that these IP addresses are in the subnet that you configured for TAS for VMs in Ops Manager.
Using HAProxy? Gorouter IPs field HAProxy IPs field No - Choose IP addresses from the subnet you configured in Ops Manager.
- Enter these IP addresses in the Gorouter IPs field. You should specify more than one IP address for high availability. The IP addresses must be within your subnet CIDR block.
- Configure your load balancer to forward requests for the domains that you have configured for your deployment to these IP addresses.
Leave this field blank. Yes Leave this field blank. - Choose IP addresses from the subnet you configured in Ops Manager.
- Enter these IP addresses in the HAProxy IPs field. You should specify more than one IP address for high availability.
- Configure your load balancer to forward requests for the domains you have configured for your deployment to these IP addresses.
For SSH Proxy IPs and TCP router IPs, see the guidance below:
- For AWS, Azure, and GCP, leave these fields blank. You do not need to complete these fields when deploying TAS for VMs on these infrastructures.
- For OpenStack and vSphere:
- (Optional) In SSH Proxy IPs, add the IP address for your Diego Brain, which accepts requests to SSH into app containers on port 2222.
- (Optional) In TCP router IPs, add the IP addresses you want to assign to the TCP routers. You enable this feature at the bottom of this pane.
Note: If you have mutual TLS app identity verification enabled, app containers accept incoming communication only from the Gorouter. This deactivates TCP routing.
Under Certificates and private keys for the Gorouter and HAProxy, you must provide at least one certificate and private key name and certificate key pair for the Gorouter and HAProxy. The Gorouter and HAProxy are enabled to receive TLS communication by default. You can configure multiple certificates for the Gorouter and HAProxy.
Note: When providing custom certificates, enter them in this order:
wildcard,Intermediate,CA. For more information, see Creating a .pem File for SSL Certificate Installations in the DigiCert documentation.- Click Add to add a name for the certificate chain and its private key pair. This certificate is the default used by the Gorouter and HAProxy. You can either provide a certificate signed by a Certificate Authority (CA) or click on the Generate RSA Certificate link to generate a certificate generated by the Ops Manager CA. For the values to use, see Providing a Certificate for Your TLS Termination Point.
Note: If you configured Ops Manager Front End without a certificate, you can use this new certificate to complete Ops Manager configuration. To configure your Ops Manager Front End certificate, see Configure Front End in Preparing to Deploy Ops Manager on GCP.
- If you want to configure multiple certificates for the Gorouter and HAProxy, click Add and fill in the appropriate fields for each additional certificate key pair. For details about generating certificates in Ops Manager for your wildcard system domains, see Providing a Certificate for Your TLS Termination Point.
Note: Ensure that you add any certificates that you generate in this pane to your infrastructure load balancer.
- Click Add to add a name for the certificate chain and its private key pair. This certificate is the default used by the Gorouter and HAProxy. You can either provide a certificate signed by a Certificate Authority (CA) or click on the Generate RSA Certificate link to generate a certificate generated by the Ops Manager CA. For the values to use, see Providing a Certificate for Your TLS Termination Point.
(Optional) When validating requests using mutual TLS to back ends and route services, the Gorouter trusts multiple CAs by default. You can use the following fields to configure which CA certificates Gorouter trusts:
- For backwards compatibility with older versions of Isolation Segment:
- Under Certificate Authorities trusted by the Gorouter for client requests, select Trust certs provided in "Certificate Authorities trusted by the Gorouter for back ends and route services".
- If you want the Gorouter to trust a particular set of CAs only:
- Under Certificate Authorities trusted by the Gorouter for client requests, select Only trust the following Certificate Authorities.
- Enter the CAs in the field that appears. When this option is selected, the Gorouter only trusts the provided CAs for client requests. It does not trust any well-known CAs that are provided with the stemcell.
- For backwards compatibility with older versions of Isolation Segment:
(Optional) When validating client requests using mutual TLS, the Gorouter trusts multiple certificate authorities (CAs) by default. To configure HAProxy to trust the same CAs as the Gorouter, enter your CA certificates under Certificate Authorities trusted by the Gorouter and HAProxy. All CA certificates should be appended together into a single collection of PEM-encoded entries.
(Optional) The Use HTTP/2 protocol check box is selected by default. When this check box is selected, the Gorouter accepts all incoming HTTP/2 requests and sends HTTP/2 requests over app routes that support HTTP/2. To deactivate HTTP/2 ingress and egress for the Gorouter, deselect the Use HTTP/2 protocol check box. For more information about HTTP/2 routing, see Supporting HTTP/2.
Deselecting the Use HTTP/2 protocol check box introduces potential breaking changes for app routes.
Under TLS versions, select the range of TLS versions to use in Gorouter communications. The Gorouter supports TLS v1.2 to TLS v1.3 by default. If you need to accommodate clients that use an older version of TLS, select a lower minimum version. For a list of TLS ciphers supported by the Gorouter, see TLS cipher suite support in Securing traffic into TAS for VMs.
(Optional) Under Load balancing algorithm, select either Round-robin or Least-connection as your load balancing algorithm for the Gorouter. Round-robin is selected by default, and VMware recommends this option for most use cases. Some use cases, such as those where apps have long-lived connections, might benefit from the least-connection algorithm. For more information, see Router balancing algorithm in HTTP Routing.
Configure Logging of client IPs in the Gorouter. The Log client IPs option is set by default. To comply with the General Data Protection Regulation (GDPR), select one of these options To deactivate logging of client IP addresses:
- If your load balancer exposes its own source IP address, select Disable logging of X-Forwarded-For header only.
- If your load balancer exposes the source IP of the originating client, select Disable logging of both source IP and X-Forwarded-For header.
Under TLS termination point, configure how TAS for VMs handles
x-forwarded-client-cert(XFCC) HTTP headers based on where TLS is terminated for the first time in your deployment. The table below indicates which option to choose based on your deployment configuration:
For a description of the behavior of each configuration option, see Forward Client Certificate to Apps in HTTP Routing.Deployment Configuration TLS Option Additional Notes - The load balancer is terminating TLS, and
- The load balancer is configured to put the client certificate from a mutual authentication TLS handshake into the X-Forwarded-Client-Cert HTTP header
Infrastructure load balancer Both HAProxy and the Gorouter forward the XFCC header when included in the request. - The load balancer is configured to pass through the TLS handshake through TCP to the instances of HAProxy, and
- HAProxy instance count is more than
0
HAProxy HAProxy sets the XFCC header with the client certificate received in the TLS handshake. The Gorouter forwards the header. Breaking Change: If you select the The Gorouter does not request client certificates option in the Gorouter behavior for client certificate validation field, the XFCC header cannot be delivered to apps.
- The load balancer is configured to pass through the TLS handshake through TCP to instances of the Gorouter
Gorouter The Gorouter strips the XFCC header if it is included in the request and forwards the client certificate received in the TLS handshake in a new XFCC header.
If you have deployed instances of HAProxy, app traffic bypasses those instances in this configuration. If you have also configured your load balancer to route requests for SSH directly to the Diego Brain, consider reducing HAProxy instances to0.Breaking Change: If you select the The Gorouter does not request client certificates option in the Gorouter behavior for client certificate validation field, the XFCC header cannot be delivered to apps.
To configure HAProxy to handle client certificates, select one of the following options in the HAProxy behavior for client certificate validation field:
- HAProxy does not request client certificates: This option requires mutual authentication, which makes it incompatible with TLS termination point option HAProxy. HAProxy does not request client certificates, so the client does not provide them and no validation occurs. This is the default configuration.
- HAProxy requests but does not require client certificates: The HAProxy requests client certificates in TLS handshakes and validates them when presented, but does not require them. This option is required if you want to enable mutual TLS app identity verification and TLS is terminated for the first time at HAProxy.
Caution: Upon upgrade, TAS for VMs fails to receive requests if your load balancer is configured to present a client certificate in the TLS handshake with HAProxy but HAProxy has not been configured with the certificate authority used to sign it. To mitigate this issue, select HAProxy does not request client certificates or configure the HAProxy with the appropriate CA.
To configure Gorouter behavior for handling client certificates, select one of the following options in the Gorouter behavior for client certificate validation field:
- The Gorouter does not request client certificates: Client certificates are not requested, so the client does not provide them and validation of client certificates does not occur. This option is incompatible with the TLS termination point options HAProxy and Gorouter because these options require mutual authentication.
- The Gorouter requests but does not require client certificates: The Gorouter requests client certificates in TLS handshakes and validates them when presented, but does not require them. This is the default configuration.
- The Gorouter requires client certificates: The Gorouter validates that the client certificate is signed by a Certificate Authority that the Gorouter trusts. If the Gorouter cannot validate the client certificate, the TLS handshake fails.
Requests to the platform fail upon upgrade if your load balancer is configured with client certificates and the Gorouter is not configured with the appropriate CA. To mitigate this issue, select The Gorouter does not request client certificates.
In the TLS cipher suites for the Gorouter field, review the TLS cipher suites for TLS handshakes between the Gorouter and front end clients such as load balancers or HAProxy. The default value for this field is
ECDHE-RSA-AES128-GCM-SHA256:TLS_ECDHE_RSA_WITH_AES_256_GCM_SHA384.
To modify the default configuration, use an ordered, colon-separated list of Golang-supported TLS cipher suites in the OpenSSL format. This field does not apply to TLS v1.3. For TLS v1.3, the Gorouter only uses a set of default ciphers, and this is not configurable.
Verify that the ciphers are supported by any clients or front end components that initiate TLS handshakes with the Gorouter. For a list of TLS ciphers supported by the Gorouter, see TLS Cipher Suite Support in Securing Traffic into TAS for VMs.
Verify that every client participating in TLS handshakes with the Gorouter has at least one cipher suite in common with the Gorouter.Important Specify cipher suites that are supported by the versions configured under Select the range of TLS versions supported by the Gorouter. For example, TLS v1.3 does not support configuring cipher suites. If you select TLSv1.3 only, you cannot configure cipher suites for the Gorouter.
AWS Classic Load Balancers do not support the TAS for VMs default cipher suites. For more information about configuring your AWS load balancers and Gorouter, see TLS Cipher suite support by AWS load balancers in Securing traffic into TAS for VMs.Note: AWS Classic Load Balancers do not support TAS for VMs's default cipher suites. For more information about configuring your AWS load balancers and Gorouter, see TLS Cipher Suite Support by AWS Load Balancers in Securing Traffic into TAS for VMs.
In the TLS cipher suites for HAProxy field, review the TLS cipher suites for TLS handshakes between HAProxy and front end clients such as load balancers and the Gorouter. The default value for this field is:
DHE-RSA-AES128-GCM-SHA256:DHE-RSA-AES256-GCM-SHA384:ECDHE-RSA-AES128-GCM-SHA256:ECDHE-RSA-AES256-GCM-SHA384
To modify the default configuration, use an ordered, colon-separated list of TLS cipher suites in the OpenSSL format. Operators should verify that the ciphers are supported by any clients or front end components that initiate TLS handshakes with HAProxy.
Verify that every client participating in TLS handshakes with HAProxy has at least one cipher suite in common with HAProxy.Note: Specify cipher suites that are supported by the versions configured in the Minimum version of TLS supported by the Gorouter and HAProxy field.
Under HAProxy forwards all requests to the Gorouter over TLS, select Enable or Disable based on your deployment layout.
- To enable communication between HAProxy and the Gorouter:
- Verify that Enable is selected.
- In the Certificate authority for HAProxy back end field, provide the CA that signed the certificate you configured in the Certificates and private keys for the Gorouter and HAProxy field.
Note: If you used the Generate RSA Certificate link to generate a certificate, then the CA to specify is the Ops Manager CA, which you can locate at the
/api/v0/certificate_authoritiesendpoint in the Ops Manager API. - Make sure that the Gorouter and HAProxy have TLS cipher suites in common in the TLS cipher suites for the Gorouter and TLS cipher suites for HAProxy fields.
For more information, see Terminating TLS at the Load Balancer and Gorouter in Securing Traffic into TAS for VMs, Providing a Certificate for Your TLS Termination Point, and Using the Ops Manager API.
- To use non-encrypted communication between HAProxy and the Gorouter:
- Select Disable.
- If you are not using HAProxy, set the number of HAProxy job instances to
0in the Resource Config pane. For more information, see Scale Down and Deactivate Resources.
For more information, see Terminating TLS at the Gorouter Only and Terminating TLS at the Load Balancer Only in Securing Traffic into TAS for VMs.
- To enable communication between HAProxy and the Gorouter:
(Optional) To force browsers to use HTTPS when making requests to HAProxy, select Enable under HAProxy support for HSTS and complete these optional configuration steps:
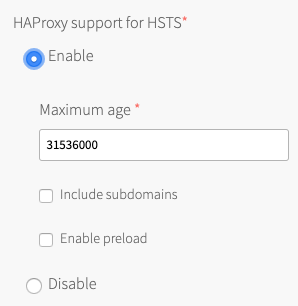
- Enter a Maximum age in seconds for the HSTS request. HAProxy forces HTTPS requests from browsers for the duration of this setting. The maximum age is one year, or 31536000 seconds.
- Enable the Include subdomains check box to force browsers to use HTTPS requests for all component subdomains.
- Select the Enable preload check box to force instances of Google Chrome, Firefox, and Safari that access your HAProxy to refer to their built-in lists of known hosts that require HTTPS, of which HAProxy is one. This ensures that the first contact a browser has with your HAProxy is an HTTPS request, even if the browser has not yet received an HSTS header from HAProxy.
(Optional) If you want the Gorouter to reject any unencrypted traffic, select the Reject HTTP requests check box. When this check box is selected, the Gorouter does not listen on port
80.(Optional) To configure the Gorouter to only generate secure cookies, select the Do not use insecure cookies check box.
(Optional) To deactivate the addition of Zipkin tracing headers on the Gorouter, deselect the Enable Zipkin tracing headers on the Gorouter check box. Zipkin tracing headers are enabled by default. For more information about using Zipkin trace logging headers, see HTTP headers for zipkin tracing in HTTP routing.
(Optional) To activate the addition of W3C tracing headers on the Gorouter, select the Add W3C tracing headers check box. W3C tracing headers are disabled by default. Specify W3C tracing tenant ID name in W3C tenant ID field. If specified, the tracestate identifier will be "tenant-id@gorouter" where "tenant-id" is the value specified. If not specified, the tracestate identifier will be "gorouter." For more information about using W3C trace logging headers, see HTTP headers for W3C tracing in HTTP routing.
(Optional) The Allow the Gorouter to write access logs locally check box is selected by default. VMware recommends deselecting this check box for high-traffic deployments, since logs might not be rotated fast enough and can fill up the disk.
Under Requests to isolation segments, select one of the following options:
- Accept requests for all isolation segments: TAS for VMs Gorouters accept all traffic for apps deployed to an isolation segment created by the Isolation Segment tile. This option is selected by default.
- Accept requests for some isolation segments: TAS for VMs Gorouters to only accept requests for apps within specific isolation segments. If you select this option, you must also enter the names of the isolation segments for which you want TAS for VMs Gorouters to accept requests as a comma-separated list in Isolation segment names.
- Reject requests for all isolation segments: TAS for VMs Gorouters reject requests for apps within all isolation segments.
(Optional) By default, the Gorouter does not accept PROXY requests. To configure the Gorouter to accept PROXY requests, select the Accept PROXY requests check box. When you select this check box, client-side load balancers that stop TLS but do not support HTTP can pass along information from the originating client using the PROXY protocol. Configuring this option might impact Gorouter performance. For more information about configuring the Gorouter to accept PROXY requests, see the About HTTP header forwarding sections in Securing Traffic into TAS for VMs.
In the Route services section, choose either Enable or Disable. Route services are a class of marketplace services that perform filtering or content transformation on app requests and responses. For more information, see Route Services and List Marketplace Services in Managing Service Instances with the cf CLI.
- If you allow route services, you can also configure Bypass security checks for route service lookup. VMware recommends that you do not configure this field, due to potential security concerns. However, you might need to configure it if your load balancer requires mutual TLS from clients. For more information, see Configuring Route Service lookup.
(Optional) If you want to limit the number of app connections to the back end, enter a value in the Maximum connections per back end field. You can use this field to prevent a poorly behaving app from all the connections and impacting other apps. No value or a value of
0sets no limit.
To determine a value to configure in this field, review the highest number of concurrent connections that instances of the most popular apps in your deployment have received. You can determine the number of concurrent connections for an app by reviewing thehttpStartStopevent metrics emitted for each app request. If your deployment uses App Metrics, you can also find this information in your App Metrics deployment. For more information, see the App Metrics documentation.Under Keep-alive connections, select one of the following options:
- Allow: The Gorouter maintains TCP connections after receiving an HTTP response. This option is selected by default.
- Do not allow: The Gorouter closes TCP connections after receiving an HTTP response.
(Optional) To accommodate larger uploads over connections with high latency, increase the number of seconds in the Back end request timeout and idle timeout for the Gorouter field.
(Optional) Use the Front end idle timeout for the Gorouter and HAProxy field to help prevent connections from your load balancer to the Gorouter or HAProxy from being closed prematurely. The value you enter sets the duration, in seconds, that the Gorouter or HAProxy maintains an idle open connection from a load balancer that supports keep-alive connections.
Set the value higher than the back end idle timeout for your load balancer to avoid the race condition where the load balancer sends a request before it discovers that the Gorouter or HAProxy has closed the connection.
See the table below for specific guidance and exceptions to this rule:IaaS Guidance AWS AWS ELB has a default timeout of 60 seconds, so VMware recommends a value greater than 60.Azure By default, Azure load balancer times out at 240 seconds without sending a TCP RST to clients, so VMware recommends a value lower than 240to force the load balancer to send the TCP RST.GCP GCP has a default timeout of 600 seconds. For GCP HTTP load balancers, VMware recommends a value greater than 600. For GCP TCP load balancers, VMware recommends a value less than600to force the load balancer to send a TCP RST.Other Set the timeout value to be greater than that of the load balancer's back end idle timeout. Note: Do not set a front end idle timeout lower than six seconds.
(Optional) Use Gorouter drain timeout to specify the amount of time, in seconds, that the Gorouter continues to serve existing connections before shutting down. After the timeout is reached, all remaining connections are terminated so the Gorouter can restart. Set the value lower than back end request timeout and idle timeout to reduce the drain time during deploys. The default value is
900.(Optional) Increase the value of Load balancer unhealthy threshold to specify the amount of time, in seconds, that the Gorouter continues to accept connections before shutting down. During this period, health checks may report the Gorouter as unhealthy, which causes load balancers to failover to other Gorouters. Set this value to an amount greater than or equal to the maximum time it takes your load balancer to consider a Gorouter instance unhealthy, given repeated failed health checks.
(Optional) Modify the value of Load balancer healthy threshold. This field specifies the amount of time, in seconds, to wait until declaring the Gorouter instance started. This allows an external load balancer time to register the Gorouter instance as healthy.
(Optional) If app developers in your organization want certain HTTP headers on HTTP Requests to appear in their app logs with information from the Gorouter, specify them in the HTTP headers to log field with a comma-separated list. For example, to support app developers that deploy Spring apps to TAS for VMs, you can enter Spring-specific HTTP headers.
(Optional) If app developers in your organization want certain HTTP headers on HTTP Requests to appear in their app logs with information from the Gorouter, specify them in the HTTP headers to log field with a comma-separated list. For example, to support app developers that deploy Spring apps to TAS for VMs, you can enter Spring-specific HTTP headers. The Gorouter always logs the following HTTP request headers: * `Referer` * `User-Agent` * `X-Forwarded-For` * `X-Forwarded-Proto` * `X-Vcap-Request-ID` For **Maximum request header size**, enter the maximum total size (in KB) that all headers in a request to the Gorouter might have combined, including header keys, header values, and all values in the request line. Configuring this field allows TAS for VMs to prevent denial-of-service attacks from requests with large headers. Requests with headers that exceed this limit cause a `431` status code. Enter a value between `1` and `1024`. VMware recommends configuring a limit of `48`. To account for backwards compatibility, you can configure a higher limit, if required. Configuring this field does not limit the size of the request body.
If you expect requests larger than the default maximum of 16.384 KB, enter a new value in bytes for HAProxy request maximum buffer size. You may need to do this, for example, to support apps that embed a large cookie or query string values in headers. Requests larger than the maximum value result in a gateway error.
If your TAS for VMs deployment uses HAProxy and you want it to receive traffic only from specific sources, configure these fields:
- HAProxy protected domains: Enter a comma-separated list of domains to protect from unknown source requests.
- (Optional) HAProxy trusted CIDRs: Enter a space-separated list of CIDRs to limit which IP addresses from the HAProxy protected domains can send traffic to TAS for VMs.
The Loggregator port defaults to 443 if left blank. For AWS environments that are not using an Application Load Balancer, enter
4443.For Container network interface plugin, select one of these options:
- Silk: This option is the default container network interface (CNI) for TAS for VMs.
- External: Select this option if you are deploying the VMware NSX-T Container plug-in for TAS for VMs.
If you select External, follow the procedure in Deploying TAS for VMs with NSX-T Networking in addition to the procedures in this topic.The NSX-T integration only works for new installations of TAS for VMs. If your TAS for VMs tile is already deployed and configured to use Silk as its CNI, you cannot re-configure your deployment to use NSX-T.
If you selected Silk in the previous step, review these fields:
- (Optional) For App network maximum transmission unit, enter an MTU value in bytes. The default value is
1454. Some configurations may require a smaller MTU value. For example, networks that use GRE tunnels may require a smaller MTU.
For Azure environments, VMware; recommends entering1400or lower to prevent Azure from fragmenting the packets. For more information, see TCP/IP performance tuning for Azure VMs. - (Optional) For Overlay subnet, enter an IP range for the overlay network. If you do not set a custom range, Ops Manager uses
10.255.0.0/16. The overlay network IP range you configure must not conflict with any other IP addresses in your network.Editing this property might cause container-to-container (C2C) networking downtime and security implications the next time you redeploy TAS for VMs.
- Enter a UDP port number in the VXLAN tunnel endpoint port box. This is the host port that receives VXLAN packets. If you do not set a custom port, Ops Manager uses 4789.
-
- For Denied logging interval, enter the per-second rate limit for packets blocked by either a container-specific networking policy or by App Security Group (ASG) rules applied across the space, org, or deployment. The default value is
1. For more information, see Policies in container-to-container networking and Restricting app access to internal TAS for VMs Components. - For UDP logging interval, enter the per-second rate limit for UDP packets sent and received. The default value is
100. - To allow logging for app traffic, select the Log traffic for all accepted and denied app packets check box. Selecting this check box increases log volume. For more information, see App traffic logging in Configuring logging in TAS for VMs.
- For Denied logging interval, enter the per-second rate limit for packets blocked by either a container-specific networking policy or by App Security Group (ASG) rules applied across the space, org, or deployment. The default value is
- The Enforce Silk network policy check box is selected by default. To deactivate Silk network policy enforcement between apps, deselect this check box. Deactivating the network policy enforcement allows all apps to send network traffic to all other apps in your TAS for VMs deployment, despite no policy specifically allowing it.
Deactivating the Enforce Silk network policy check box allows all app containers to access any other app container with no restrictions.
- (Optional) For App network maximum transmission unit, enter an MTU value in bytes. The default value is
For DNS search domains, enter the domains for your app containers to use as DNS search domains. Specify multiple DNS search domains as a comma-separated list.
For Database connection timeout, set the connection timeout for clients of the policy server and Silk databases, in seconds. The default value is `120`. You may need to increase this value if your deployment experiences timeout issues related to container-to-container networking.
TCP routing is deactivated by default. You can enable this feature if your DNS sends TCP traffic through a load balancer rather than directly to a TCP router. To enable TCP routing:
- Under TCP routing, select Enable.
Note: If you have mutual TLS app identity verification enabled, app containers accept incoming communication only from the Gorouter. This deactivates TCP routing.
- For TCP routing ports, enter one or more ports to which the load balancer forwards requests. To support multiple TCP routes, VMware recommends allocating multiple ports. Do one of these steps:
- To allocate a single port or range of ports, enter a single port or a range of ports.
Note: If you configured AWS for Ops Manager manually, enter
1024-1123which corresponds to the rules you created forpcf-tcp-elb. - To allocate a list of ports:
- Enter a single port in the TCP routing ports field.
- After deploying TAS for VMs, follow the procedure in Router Groups: Modify TCP port reservations.
- To allocate a single port or range of ports, enter a single port or a range of ports.
- (Optional) For TCP request timeout, modify the default value of 300 seconds. This field determines when the TCP router closes idle connections from clients to apps that use TCP routes. You might want to increase this value to enable developers to push apps that require long-running idle connections with clients.
- Follow these additional instructions based on your IaaS:
IaaS Instructions GCP Specify the name of a GCP TCP load balancer in the LOAD BALANCER field of the TCP Router job in the Resource Config pane. You configure this later on in TAS for VMs. For more information, see Configure Resources. AWS Specify the name of a TCP ELB in the LOAD BALANCER field of the TCP Router job in the Resource Config pane. You configure this later on in TAS for VMs. For more information, see Configure Resources. Azure Specify the name of a Azure load balancer in the LOAD BALANCER field of the TCP Router job in the Resource Config pane. You configure this later on in TAS for VMs. For more information, see Configure Resources. OpenStack and vSphere - Return to the top of the Networking pane.
- In the TCP router IPs field, ensure that you have entered IP addresses that are within your subnet CIDR block. These are the same IP addresses you configured your load balancer with in the Pre-Deployment Steps in Enabling TCP Routing, unless you configured DNS to resolve the TCP domain name directly to an IP you have chosen for the TCP router.
- Under TCP routing, select Enable.
(Optional) For additional security, enter headers that you want the Gorouter to remove from app responses in Remove specified HTTP response headers.
(Optional) In the Sticky session cookies field, enter one or more sticky session cookie names. The default cookie name is
JSESSIONID. Some apps require a different cookie name. For example, Spring WebFlux requiresSESSIONfor the cookie name. Gorouter uses these cookies to support session affinity, or sticky sessions. For more information, see Session Affinity in HTTP Routing.Click Save.
Configure App Containers
In the App Containers pane, you enable microservice frameworks, private Docker registries, and other services that support your apps at the container level.
To configure the App Containers pane:
-
Select App Containers.
-
The Enable custom buildpacks check box governs the ability to pass a custom buildpack URL to the
-boption of thecf pushcommand. By default, this ability is enabled, letting developers use custom buildpacks when deploying apps. Deactivate this option by deselecting the check box. For more information about custom buildpacks, see Buildpacks. -
The Allow SSH access to app containers check box controls SSH access to app instances. Select the check box to permit SSH access across your deployment, and deselect it to prevent all SSH access. For more information about SSH access permissions at the space and app scope, see App SSH overview.
If you are using a load balancer instead of HAProxy, ensure that it has port 2222 open to enable SSH traffic.
You can give SSH access to an app only if an admin assigns you a Space Developer role in the space where the app runs. For more information, see Manage App Space Roles in Managing User Roles with Apps Manager.
-
To enable SSH access for new apps by default in spaces that allow SSH, select the Enable SSH when an app is created check box. If you deselect this check box, developers can still enable SSH after pushing their apps by running
cf enable-ssh APP-NAME. -
Choose how the Gorouter verifies app identity to enable encryption and prevent misrouting under Gorouter app identity verification:
This feature does not work if the Disable SSL certificate verification for this environment check box is enabled in the Networking pane.
- The Gorouter uses TLS to verify app identity: Enables the Gorouter to verify app identity using TLS. This is the default option.
- The Gorouter and apps use mutual TLS to verify each other’s identity: Enables your apps and the Gorouter to verify each other’s identity using mutual TLS (mTLS). This option deactivates TCP routing because app containers accept incoming communication only from the Gorouter.
For more information, see Preventing Misrouting in HTTP Routing.
For more information, see Preventing misrouting in HTTP Routing.
-
Select your preference for Docker images disk cleanup scheduling on Diego Cell VMs. If you choose Clean up disk space once usage fills disk, enter a value in MB for Reserved disk space for other jobs. This is the amount of space the garbage collection algorithm should keep free for other jobs. For more information about the configuration options and how to configure a reserved amount, see Configuring Diego Cell disk cleanup scheduling.
-
The Enable containerd delegation check box governs whether or not Garden delegates container create and destroy operations to the containerd tool. By default, this option is enabled and Garden uses containerd. Deactivate this option by deselecting the check box. For more information about the containerd tool, see containerd.
-
Enter a number in the Max-in-flight container starts field. This number configures the maximum number of started instances across the Diego Cells in your deployment. Entering
0sets no limit. For more information, see Set a Maximum Number of Started Containers in Configuring TAS for VMs for Upgrades. -
For Maximum in-flight container starts, enter the maximum number of started instances you want to allow across all Diego Cells in your deployment. Entering
0sets no limit. The default value is200. For more information, see Set a maximum number of started containers in Configuring TAS for VMs for Upgrades. -
Under NFSv3 volume services, select Allow or Do not allow. Deploying NFS volume services allows app developers to bind existing NFS volumes to their apps for shared file access. For more information, see Enabling Volume Services.
Important In a new installation of TAS for VMs, he NFSv3 volume services check box is selected by default. When you upgrade from an earlier version of TAS for VMs, the NFSv3 volume services check box is automatically configured the same way it was configured in the earlier version.
-
(Optional) To configure LDAP for NFSv3 volume services:
- For LDAP service account user, enter the username of the service account in LDAP that will manage volume services.
- For LDAP service account password, enter the password for the service account.
- For LDAP server host, enter the hostname or IP address of the LDAP server.
- For LDAP server port, enter the LDAP server port number. If you do not specify a port number, Ops Manager uses 389.
- For LDAP user search base, enter the location in the LDAP directory tree from which any LDAP user search begins. The typical LDAP search base matches your domain name.
For example, a domain namedcloud.example.comtypically uses the following LDAP user search base:ou=Users,dc=example,dc=com. - For LDAP server CA certificate, you can optionally enter a certificate if your LDAP server supports TLS and you want to enable TLS connections from the NFS driver to your LDAP server. Paste in the root certificate from your CA certificate or your self-signed certificate.
UAA can only parse one certificate entered into this field. If you enter multiple certificates, UAA only uses the first one you entered and ignores the rest. You only need to include one root certificate or self-signed certificate.
-
(Optional) To enable SMB volume services, select the Enable SMB volume services check box. Enabling SMB volume services allows developers to bind existing SMB shares to their apps. For more information, see Enabling Volume Services.
If you enable SMB volume services, you must set the SMB Broker Errand to On in the Errands pane.
-
(Optional) Modify the Default health check timeout. The value configured for this field is the amount of time allowed between starting up an app and the first healthy response from the app. If the health check does not receive a healthy response within the configured timeout, then the app is declared unhealthy. The default timeout is
60seconds and the maximum configurable timeout is600seconds.If you decrease the default health check timeout value below its current value, existing apps with startup times greater than the new value may fail to start up.
-
(Optional) To modify the amount of time that health checks wait to receive a healthy response from an app before the app is declared unhealthy, enter the number of seconds you want the timeout period to last in Default health check timeout. If the health check does not receive a healthy response from a newly-started app within the configured timeout period, then the app is declared unhealthy. The default value is
60. The maximum value you can configure is600.If you decrease the default health check timeout below its current value, existing apps with startup times greater than the new value might fail to start up.
-
Click Save.
Configure App Developer Controls
In the App Developer Controls pane, you configure restrictions and default settings for your apps.
To configure the App Developer Controls pane:
-
Select App Developer Controls.
-
Enter the Maximum file upload size in MB. This is the maximum size of an app upload, including the buildpack.
-
Enter the Maximum package size in MB. This is the maximum total size of an app’s files.
-
Enter the Default app memory in MB. This is the default amount of memory allocated to a newly-pushed app if no value is specified with
cf push. -
Enter the Default app memory quota per org in MB. This is the default memory limit for all apps in an org. The specified limit only applies to the first installation of TAS for VMs. After the initial installation, operators can use the cf CLI to change the default value.
-
For Maximum disk quota per app in MB, enter in MB the maximum amount of disk allowed per app. If you allow developers to push large apps, TAS for VMs might have trouble placing them on Diego Cells. Additionally, in the event of a system upgrade or an outage that causes a rolling deploy, larger apps might not successfully redeploy if there is insufficient disk capacity. Monitor your deployment to ensure that your Diego Cells have sufficient disk to run your apps.
-
Enter the Default disk quota per app in MB. This is the amount of disk allocated by default to a newly-pushed app if no value is specified with
cf push. -
Enter the Default service instance quota per org. The specified limit only applies to the first installation of TAS for VMs. After the initial installation, operators can use the cf CLI to change the default value.
-
Enter the Staging timeout in seconds. When you stage an app droplet with the Cloud Controller, the server times out after the number of seconds you specify in this field.
-
For Internal domains, enter one or more domains that apps use for internal DNS service discovery. If you specify a domain using
cf push -d, other TAS for VMs apps can reach the pushed app atAPP-NAME.INTERNAL-DOMAIN. This value defaults toapps.internal. -
Enable the Allow space developers to manage network policies check box to permit developers to manage their own network policies for their apps.
-
Click Save.
Configure App Security Groups
Setting appropriate ASGs is critical for a secure deployment. To acknowledge that you are responsible for setting the appropriate ASGs after the TAS for VMs deployment completes:
- Select App Security Groups.
- In the Type “X” to acknowledge this requirement field, enter
X. - Click Save.
For more information about ASGs, see App Security Groups. For more information about setting ASGs, see Restricting App Access to Internal TAS for VMs Components.
Configure Authentication and Enterprise SSO
In the Authentication and Enterprise SSO pane, you configure your user store access.
To configure the Authentication and Enterprise SSO pane:
-
Select Authentication and Enterprise SSO.
-
To authenticate user sign-ons, your deployment can use one of three types of user database: the UAA server’s internal user store, an external SAML identity provider, or an external LDAP server. To configure the user database that your deployment uses to authenticate users, select one of the following options under User authentication mechanism:
- To use the internal UAA instance, select Internal user store and follow the procedure in Configuring UAA password policy to configure your password policy.
- To connect to an external identity provider through SAML, select SAML identity provider and follow the procedure in Configure TAS for VMs to use a SAML identity provider in Configuring Authentication and Enterprise SSO for TAS for VMs.
- To connect to an external LDAP server, select LDAP server and follow the procedure in Configure LDAP as an identity provider for TAS for VMs in Configuring Authentication and Enterprise SSO for TAS for VMs.
- To use an external OIDC identity provider, select OIDC identity provider and follow the procedure in Configure TAS for VMs to Use an OIDC identity provider.
-
Click Save.
Configure UAA
In the UAA pane, you configure the User Account and Authentication server.
To configure the UAA pane:
-
Select UAA.
-
Under UAA database location, select one of these options:
- Tanzu Application Service database: Use the same database server that other TAS for VMs components use. This system database is configured in the Databases pane, and it can be either internal or external.
- Other external database: Use a separate, dedicated database server for UAA.
Caution: Protect whichever database you use in your deployment with a password.
Note: For GCP installations, VMware recommends using an external database on Google Cloud SQL.
-
(Optional) If you selected Other external database, complete these fields as follows. Each field includes additional guidance for specific IaaSes and installation methods.
- For Hostname, enter the hostname of the database server.
- AWS Terraform: Enter the value of
rds_addressin your Terraform output. - GCP Terraform: Enter the value of
sql_db_ipfrom your Terraform output.
- AWS Terraform: Enter the value of
- For TCP port, enter the port of the database server.
- AWS Terraform: Enter the value of
rds_portin the Terraform output. - GCP and GCP Terraform: Enter
3306.
- AWS Terraform: Enter the value of
- For Username, specify a unique username that can access this specific database on the database server.
- AWS Terraform: Enter the value of
rds_usernamefrom your Terraform output. - GCP Terraform: Enter the value of
tas_sql_usernamefrom your Terraform output.
- AWS Terraform: Enter the value of
- For Password, specify a password for the provided username.
- AWS Terraform: Enter the value of
rds_passwordfrom your Terraform output. - GCP Terraform: Enter the value of
tas_sql_passwordfrom your Terraform output.
- AWS Terraform: Enter the value of
- For CA certificate, enter a certificate to use for encrypting traffic to and from the database.
Note: The CA certificate field only works if your external database hostname matches a name specified in the certificate. This is not true with GCP CloudSQL.
- For Hostname, enter the hostname of the database server.
-
(Optional) Under JWT issuer URI, enter the URI that UAA uses as the issuer when generating tokens.
-
Under SAML service provider credentials, enter a certificate and private key to be used by UAA as a SAML service provider for signing outgoing SAML authentication requests. You can provide an existing certificate and private key from your trusted Certificate Authority or generate a certificate. The domain
*.login.SYSTEM-DOMAINmust be associated with the certificate, whereSYSTEM-DOMAINis the System domain you configured in the Domains pane.Note: The Ops Manager Single Sign-On Service and Ops Manager Spring Cloud Services tiles require the
*.login.SYSTEM-DOMAIN. -
If the private key specified under SAML service provider credentials is password-protected, enter the password under SAML service provider key password.
-
(Optional) To override the default value, enter a custom SAML Entity ID in the SAML Entity ID override field. By default, the SAML Entity ID is
http://login.SYSTEM-DOMAIN, whereSYSTEM-DOMAINis the System domain you configured in the Domains pane. -
For Signature algorithm, choose an algorithm from the dropdown to use for signed requests and assertions. The default value is SHA256.
-
(Optional) In the Apps Manager access token lifetime, Cloud Foundry CLI access token lifetime, and Cloud Foundry CLI refresh token lifetime fields, change the lifetimes of tokens granted for Apps Manager and cf CLI login access and refresh. Most deployments use the defaults.
-
(Optional) In the Global login session maximum timeout and Global login session idle timeout fields, change the maximum number of seconds before a global login times out. These fields apply to:
- Default zone sessions: Sessions in Apps Manager, Ops Manager Metrics, and other web UIs that use the UAA default zones.
- Identity zone sessions: Sessions in apps that use a UAA identity zone, such as a Ops Manager Single Sign-On service plan.
-
(Optional) Customize the text prompts used for username and password from the cf CLI and Apps Manager login popup by entering values for Username label and Password label.
-
(Optional) The Proxy IPs regular expression field contains a pipe-separated set of regular expressions that UAA considers to be reverse proxy IP addresses. UAA respects the
x-forwarded-forandx-forwarded-protoheaders coming from IP addresses that match these regular expressions. To configure UAA to respond properly to Gorouter or HAProxy requests coming from a public IP address, append a regular expression or regular expressions to match the public IP address. -
(Optional) Deactivate the Client basic auth compatibility mode check box to require URL encoding for UAA client basic authentication credentials. By default, the check box is enabled and URL encoding is not required. This represents the default behavior of UAA prior to UAA v74.0.0. URL encoding is defined by RFC6749. For more information, see RFC6749.
Note: To require URL encoding for certain UAA clients without deactivating compatibility mode, use the `X-CF-ENCODED-CREDENTIALS=true` HTTP header.
Caution: If you deactivate the Client basic auth compatibility mode check box, URL encoding is required for all UAA client apps in your deployment. To avoid breaking changes, ensure that all client apps support URL encoding before you deactivate the check box.
-
(Optional) If you are using Single Sign-On for VMware Tanzu Application Service and you want to honor the CORS policy for custom identity zones, clear the Enforce system zone CORS policy across all identity zones checkbox. This check box is enabled by default. If you use Single Sign-On, UAA creates custom identity zones. If you leave this checkbox selected, UAA ignores the CORS policy for custom identity zones and applies the system default identity zone CORS policy to all zones.
Caution: If you clear the Enforce system zone CORS policy across all identity zones check box, apps that are integrated with Single Sign-On might experience downtime because the default CORS policy of the custom identity zones is more restrictive. To prevent downtime, you must explicitly set the CORS policy of the custom identity zones according to the needs of your apps. For more information, see the Managing Service Plan Configurations in the Single Sign-On documentation.
-
Click Save.
Configure CredHub
In the CredHub pane, you configure the CredHub server.
To configure the CredHub pane:
-
Select CredHub.
-
Under CredHub database location, select the location of your CredHub database. TAS for VMs includes this CredHub database for services to store their service instance credentials.
- Tanzu Application Service database: If you select this option, CredHub uses the same database as other TAS for VMs components, whether the database is internal or external. You configure this database in the Databases pane.
-
Other external database: If you select this option, configure these fields:
- Hostname: Enter the IP address of your database server.
- TCP port: Enter the port of your database server, such as
3306. - Username: Enter a unique username that can access your CredHub database on the database server.
- Password: Enter the password for the provided username.
- Database CA certificate: This certificate is used when encrypting traffic to and from the database. For certificate rotation, you may enter multiple CA certificates in this field.
- Disable hostname verification: Activate this check box to deactivate hostname verification for TLS connections to the targeted database server. You cannot deactivate hostname verification for TLS connections to Postgres databases. You must select this option if you are configuring an external database on GCP or Azure.
Note If you deploy TAS for VMs on AWS using Terraform, you can locate these values in your Terraform output:- Hostname:
rds_address - TCP port:
rds_port - Username:
rds_username - Password:
rds_password
-
(Optional) Under KMS plugin providers, specify one or more Key Management Service (KMS) providers:
- Instance name: Enter the name of the KMS provider.
- Endpoint: Enter the Unix socket address for the KMS plugin.
- Primary: Enable the Primary check box to indicate the primary KMS provider for your environment. You must mark one provider as primary. Do not mark more than one provider as primary.
-
Under Internal encryption provider keys, specify one or more keys to use for encrypting and decrypting the values stored in the CredHub database.
- If you plan to use internal encryption, configure these fields:
- Name: Enter any key name.
- Key: Enter a randomly generated value that is at least 20 characters long. This key is used for encrypting all data.
- Primary: This check box marks the key you specified above as the primary encryption key. You must mark one key as primary. Do not mark more than one key as primary.
- If you plan to use a hardware security module (HSM) as your encryption provider, configure these fields:
- Name: Enter a key name that already exists on your HSM or a new key name. For each new key name, CredHub generates a key in HSM provider partition that you configure below.
- Key: Enter a placeholder value under Key. CredHub does not use this key for encryption. However, you cannot leave the Key field blank.
- Primary: This check box is used for marking the key you specified above as the primary encryption key. You must mark one key as primary. Do not mark more than one key as primary.
NoteFor information about using additional keys for key rotation, see Rotating Runtime CredHub Encryption Keys.
- If you plan to use internal encryption, configure these fields:
-
(Optional) To configure CredHub to use an HSM, configure these fields:
- HSM provider partition: Enter the name of the HSM provider partition.
- HSM provider partition password: Enter a password to use to access the HSM provider partition.
- HSM provider client certificate: Enter the client certificate for the HSM. For more information, see Create and Register HSM Clients in Preparing CredHub HSMs for Configuration.
- Under HSM provider encryption keys, specify one or more keys to use for encrypting and decrypting the values stored in the HSM provider. For each key, configure these fields:
- Name: Enter the name of the encryption key.
- Primary: This check box is used for marking the key you specified above as the primary encryption key. You must mark one key as primary. Do not mark more than one key as primary.
- In the HSM provider servers section, click Add to add an HSM server. You can add multiple HSM servers. For each HSM server, configure these fields:
- Host address: Enter the hostname or IP address of the HSM server.
- Port: Enter the port of the HSM server. If you do not know your port address, enter
1792. - Partition serial number: Enter the serial number of the HSM partition.
- HSM certificate: Enter the certificate for the HSM server. The HSM presents this certificate to CredHub to establish a two-way TLS connection.
-
If your deployment uses any Ops Manager services that support storing service instance credentials in CredHub and you want to enable this feature, enable the Secure service instance credentials check box. For more information about using CredHub for securing service instance credentials, see Securing Service Instance Credentials with Runtime CredHub.
-
Click Save.
-
Go to the Resource Config pane.
-
Under the Job column of the CredHub row, ensure that the number of instances is set to
2. This is the minimum instance count required for high availability. -
To configure CredHub so it recognizes a proxy, complete the following fields:
- List of proxy servers: Enter a comma-separated list of router IP addresses for the first group of HTTP/TCP backends.
- http proxy: Enter the
http_proxyfor all http requests across VMs. - https proxy: Enter the
https_proxyfor all http requests across VMs - no proxy: Enter a comma-separated list of either domains, IP addresses or DNS suffixes.
-
Click Save.
Configure Databases
In the Databases pane, you can configure TAS for VMs to use an internal MySQL database provided with Ops Manager, or you can configure an external database provider for the databases required by TAS for VMs.
Caution If you are performing an upgrade, do not modify your existing internal database configuration, or you might lose data. You must migrate your existing data before changing the configuration. For additional upgrade information, see Upgrading Ops Manager.
Internal Database Configuration
For GCP installations, VMware recommends selecting External and using Google Cloud SQL. Only use internal MySQL for non-production or test installations on GCP.
To configure internal databases for your deployment:
-
Under System databases location, select Internal databases - MySQL - Percona XtraDB Cluster.
-
Click Save.
To configure high availability for your internal MySQL databases, see Configure Internal MySQL.
External System Database Configuration
To configure external databases for your deployment:
-
Ensure that you have a database instance with the following databases created. The steps vary depending on your database type. For an example procedure, see Creating Databases for TAS for VMs.
accountapp_usage_serviceautoscaleccdbcredhubdiegolocketnetworkpolicyservernfsvolumenotificationsroutingsilkuaa
-
In the TAS for VMs tile, select Databases.
-
Under System databases location, select External databases.
Note: If you configure external databases, you cannot configure an internal database in the UAA pane.
-
For Hostname, enter the hostname of the database server. If you are installing TAS for VMs using Terraform, this value corresponds to the following variable:
- AWS Terraform:
rds_address - GCP Terraform:
sql_db_ip
- AWS Terraform:
-
The Enable hostname validation check box is selected by default. When Enable hostname validation is selected and you enable TLS for your external databases, TAS for VMs verifies the hostname of the external database for communication between TAS for VMs and the external database.
Caution: If your deployment uses a GCP or Azure external database for TAS for VMs that is TLS-enabled, you must deselect the Enable hostname validation check box. For more information, see Deactivate Hostname Validation for External Databases on GCP and Azure in Upgrade Preparation Checklist for Ops Manager v2.10.
Note: The Enable hostname validation check box does not affect communication between TAS for VMs components and external CredHub databases. To activate or deactivate hostname validation for the CredHub external database, see Configure CredHub.
-
For TCP port, enter the port of the database server.
- If you are using GCP CloudSQL, enter
3306. - If you are installing TAS for VMs on AWS using Terraform, enter the value for
rds_port.
- If you are using GCP CloudSQL, enter
-
Each component that requires a relational database has two corresponding fields: one for the database username and one for the database password. For each set of fields, specify a unique username that can access this specific database on the database server and a password for the provided username. If you are installing TAS for VMs using Terraform, these values correspond to the following variables:
- AWS Terraform:
rds_usernameandrds_password - GCP Terraform:
pas_sql_usernameandpas_sql_password
Ensure that the networkpolicyserver database user has the
ALL PRIVILEGESpermission.If you are configuring an external database on GCP or Azure and want to use this database for CredHub, ignore the CredHub database username and CredHub database password fields. Enter the credentials in the CredHub configuration pane instead.
- AWS Terraform:
-
(Optional) To enable TLS for your external databases, paste your CA certificate in the Database CA certificate field.
TLS is not currently supported for databases that do not include a matching hostname in their server certificate, such as Azure and GCP, unless you deactivate hostname verification in TAS for VMs. You can deactivate hostname verification for external GCP and Azure databases by deselecting the Enable hostname validation check box described above and selecting the Disable hostname verification check box in the CredHub pane. For more information, see Connection Options for External Applications in the GCP documentation. To configure the Disable hostname verification check box, see Configure CredHub.
-
Click Save.
(Optional) Configure Internal MySQL
In the Internal MySQL pane, you configure the internal MySQL clusters for TAS for VMs. Only configure this section if you selected Internal databases - MySQL - Percona XtraDB Cluster in the Databases pane.
To configure the Internal MySQL pane:
-
Select Internal MySQL.
-
In the Replication canary time period field, specify how frequently the canary checks for replication failure. Leave the default of 30 seconds or modify the value based on the needs of your deployment. Lower numbers cause the canary to run more frequently, which means that the canary reacts more quickly to replication failure but adds load to the database.
-
In the Replication canary read delay field, specify how long the canary waits, in seconds, before verifying that data is replicating across each MySQL node. Leave the default of 20 seconds or modify the value based on the needs of your deployment. Clusters under heavy load can experience a small replication lag as write-sets are committed across the nodes.
-
In the Email address field, enter the email address where the MySQL service sends alerts when the cluster experiences a replication issue or when a node is not allowed to auto-rejoin the cluster.
-
The Allow command history check box is enabled by default. To prohibit the creation of command line history files on the MySQL nodes, deselect this check box.
-
To allow admin and read-only admin users to connect from any remote host, select the Allow remote admin access check box. When this check box is deselected, admins must
bosh sshinto each MySQL VM to connect as the MySQL super user.Network configuration and ASG restrictions might still limit a client's ability to establish a connection with the databases.
-
In the Cluster probe timeout field, enter the maximum amount of time, in seconds, that a new node searches for existing cluster nodes. If left blank, the default value is 10 seconds.
-
In the Maximum connections field, enter the maximum number of connections allowed to the database. The default value is
3500. -
To log audit events for internal MySQL, select Enable under Server activity logging.
- In the Event types field, you can enter the events you want the MySQL service to log. By default, this field includes
connectandquery, which tracks who connects to the system and what queries are processed. For more information about which events the Percona MySQL server can log, see Audit Log Plugin in the Percona documentation.
Note: Internal MySQL audit logs are not forwarded to the syslog server because they can contain personally identifying information (PII) and secrets.
You can use thedownload-logsscript to retrieve the logs, which each MySQL cluster node VM stores in/var/vcap/store/mysql\_audit\_logs/. For more information, see Script to download MySQL logs for TAS for VMs or Tile HA Clusters in the VMware Tanzu Knowledge Base. - In the Event types field, you can enter the events you want the MySQL service to log. By default, this field includes
-
In the Load balancer healthy threshold field, enter the amount of time, in seconds, to wait until reporting that the MySQL Proxy instance has started. This allows an external load balancer time to register the instance as healthy. The default value is 0 seconds.
-
In the Load balancer unhealthy threshold field, enter the amount of time, in seconds, that the MySQL Proxy continues to accept connections before shutting down. During this period, the health check reports the MySQL Proxy instance as unhealthy to cause load balancers to fail over to other proxies. You must enter a value greater than or equal to the maximum time it takes your load balancer to consider a proxy instance unhealthy, given repeated failed health checks. The default value is 30 seconds.
-
To enable MySQL Proxy to listen on port 3336, select the Enable inactive MySQL port check box. When you run MySQL in high availability mode, this feature allows you to connect to a MySQL node that is not currently serving traffic so that you can run auditing and reporting queries without affecting performance.
-
Click Save.
For more information about how to monitor the node health of your MySQL Proxy instances, see Using the MySQL Proxy.
Configure File Storage
Important Some blobstores, for example, Oracle Cloud Infrastructure Object Storage, do not support S3 Signature v4 Streaming. To use blobstores without S3 Signature v4 Streaming support with VMware Tanzu Application Service for VMs, deselect the Signature v4 streaming check box.
For more information, see [AWS-S3 Signature v4 Streaming](https://docs.aws.amazon.com/AmazonS3/latest/API/sigv4-streaming.html).In File Storage, you determine where you want to place the file storage for your Cloud Controller.
To configure the File Storage pane:
-
Select File Storage.
-
To set the maximum number of recent valid packages that your app can store, not including the package for the current droplet, enter a value in the Maximum valid packages per app field. VMware recommends leaving the default value of
2. However, you can lower the value if you have strict storage requirements and want to use less disk space. -
To set the maximum number of recent valid droplets that your app can store, not including the package for the current droplet, enter a value in the Maximum staged droplets per app field. VMware recommends leaving the default value of
2. However, you can lower the value if you have strict storage requirements and want to use less disk space. -
Under File storage backup level, select what you want to back up from your blobstores:
- Complete file storage backup includes the entire blobstore. This includes droplets, packages, and buildpacks.
- Exclude droplets from file storage backup excludes droplets from your backup. If you choose this option, you must re-stage all apps during a restore.
- Exclude droplets and packages from file storage backup excludes droplets and packages from your backup. If you choose this option, you must re-push all apps during a restore.
For more information about the advantages and disadvantages of excluding droplets and packages, see File storage backup level.
-
To configure Cloud Controller filesystem, see Configuring file storage for TAS for VMs.
(Optional) Configure System Logging
In the System Logging pane, you can configure system logging in TAS for VMs to forward log messages from TAS for VMs component VMs to an external service. VMware recommends forwarding logs to an external service for use in troubleshooting. If you do not fill these fields, platform logs are not forwarded but remain available on the component VMs and for download through Ops Manager.
This procedure explains how to configure system logging for TAS for VMs component VMs. To forward logs from Ops Manager tiles to an external service, you must also configure system logging in each tile. For more information about configuring system logging, see the documentation for the given tiles.
To configure the System Logging pane:
-
Select System Logging.
-
For Address, enter the hostname or IP address of the syslog server.
-
For Port, enter the port of the syslog server. The default port for a syslog server is 514.
The host must be reachable from the TAS for VMs network and accept UDP or TCP connections. Ensure the syslog server listens on external interfaces.
-
For Transport protocol, select a transport protocol for log forwarding.
-
For Encrypt syslog using TLS?, select Yes to use TLS encryption when forwarding logs to a remote server.
- For Permitted peer, enter either the name or SHA1 fingerprint of the remote peer.
- For Destination certificate, enter the TLS CA certificate for the remote server.
-
Select the Enable Cloud Controller security event logging check box to include security events in the log stream. This feature logs all API requests, including the endpoint, user, source IP address, and request result, in the Common Event Format (CEF).
-
Enable the Use TCP for file forwarding local transport check box to transmit logs over TCP. This prevents log truncation, but may cause performance issues.
-
The Do not forward debug logs check box is enabled by default. To forward
DEBUGsyslog messages to an external service, deactivate the check box.Some TAS for VMs components generate a high volume of
DEBUGsyslog messages. Enabling the Do not forward debug logs check box prevents TAS for VMs components from forwarding theDEBUGsyslog messages to external services. However, TAS for VMs still writes the messages to the local disk. -
For Custom rsyslog configuration, enter a custom syslog rule. For more information about adding custom syslog rules, see Customizing platform log forwarding.
-
Configure how TAS for VMs emits app logs and app metrics for ingestion in your deployment. The options include:
- Use existing Firehose integrations for app metric and app log ingestion.
- Preserve existing Firehose integrations for app metrics, but use an alternate method for app log ingestion.
- Deactivate all Firehose integrations and use alternate methods for both app log and app metric ingestion.
The following table provides the configuration procedures for each option. For more information about each field, see the Field Descriptions table.
Option: Configuration Procedure: Use existing Firehose app log and metrics integrations - Select Enable V1 Firehose.
- Select Enable V2 Firehose.
- Deselect Disable logs in Firehose.
- (Optional) Configure Aggregate log and metric drain destinations.
Preserve existing Firehose integrations for app metrics, but use an alternate method for app log ingestion Caution: Do not use this option if your deployment depends on partner log integrations.- Select Enable V1 Firehose.
- Select Enable V2 Firehose.
- Select Enable Log Cache Syslog Ingestion.
- Select Disable logs in Firehose.
- Configure Aggregate log and metric drain destinations.
Deactivate all Firehose integrations and use alternate methods for both app log and app metric ingestion Caution: Do not use this option if your deployment depends on any of these:- Service tile metrics
- Healthwatch or App Metrics
- Partner log or metric integrations
- Deselect Enable V1 Firehose.
- Deselect Enable V2 Firehose.
- Select Enable Log Cache syslog ingestion.
- Deselect Disable logs in Firehose.
- Configure Aggregate log and metric drain destinations.
- Deactivate the Smoke Test errand. Otherwise, the TAS for VMs deployment fails. To deactivate errands, see Configure Errands.
Field Descriptions:
The following table provides more details on field values:Field Name Description Enable V1 Firehose Enabled by default. When enabled, app logs and app metrics flow to the Loggregator V1 Firehose. Enable V2 Firehose Enabled by default. When enabled, app logs and app metrics flow to the Loggregator V2 Firehose. If you deselect the check box To deactivate the V2 Firehose, you must also deactivate the V1 Firehose. Enable Log Cache syslog ingestion Enabled by default. When enabled, syslog agents send app logs and app metrics to Log Cache and Log Cache ingests app logs and app metrics using syslog. Default loggregator drain metadata Enabled by default. When enabled, TAS for VMs sends all metadata in app and aggregate syslog drains. Deactivating this option can reduce logging to external databases by up to 50 percent. Disable logs in Firehose Deselected by default. Prevents the Firehose from emitting app logs but still allows the Firehose to emit app metrics. Deactivating logs in Firehose helps reduce the load on TAS for VMs by allowing you to scale down Doppler and Traffic Controller VMs. Aggregate log and metric drain destinations Aggregate drains forward all app logs on your foundation to the endpoints that you provide in this field. Enter a comma-separated list of syslog endpoints for aggregate log drains. Specify the endpoints in the format: syslog://HOSTNAME:PORT. To use TLS for sending logs, specifysyslog-tls://HOSTNAME:PORTorhttps://HOSTNAME:PORT.
In TAS for VMs v2.10, aggregate drains no longer forward metrics by default. You can choose to forward app metrics and TAS for VMs component VM metrics by adding?include-metrics-deprecated=trueto the endpoints. For example,syslog://myhost:514?include-metrics-deprecated=true.Breaking Change: If you are upgrading from TAS for VMs v2.9 and want the aggregate drain to continue forwarding app and component VM metrics, you must add
?include-metrics-deprecated=trueto the endpoint. For more information, see Aggregate Syslog Drains Contain Logs Only in the TAS for VMs Breaking Changes. -
For mTLS Log Cache, select one of the following options:
- No Client Authentication: Log Cache Syslog Server does not authenticate clients.
- Mutual TLS Authentication: Log Cache Syslog Server communicates with clients over mTLS.
-
(Optional) For System metrics scrape interval, the default value is
1m, which configures TAS for VMs to send BOSH system metrics to your logging endpoint once per minute. To configure TAS for VMs to send metrics more or less frequently, modify the value in this field. For example, enter2mto send metrics every two minutes, or10sto send metrics every ten seconds. VMware recommends configuring a minimum interval of five seconds, or5s. -
(Optional) For OpenTelemetry Collector Metric Exporters (beta), the default value is empty, which disables the beta OpenTelemetry Aggregate Metric Egress support. To configure TAS for VMs to send metrics over the OpenTelemetry protocol, enter valid OpenTelemetry Collector Exporter YAML configuration in this field. Refer to the OpenTelemetry Collector documentation for examples of how to configure exporters. Currently TAS for VMs provides support for a limited number of OpenTelemetry Collector Exporters, including the OTLP exporter. Note that this feature is in beta and may still change in significant ways.
If configuring a metric exporter that listens on a port, take care to ensure that the port is not claimed by a TAS for VMs component on any of the VMs in your deployment.
-
Click Save.
To configure Ops Manager for system logging, see Settings page in Using the Ops Manager interface.
(Optional) Configure Custom Branding and Apps Manager
In the Custom Branding pane, you can customize the appearance of the TAS for VMs login portal and Apps Manager. In the Apps Manager pane, you can configure the functionality of Apps Manager, as well as how it displays the pages for your apps in the Marketplace.
To configure the Custom Branding and Apps Manager panes:
-
Select Custom Branding.
-
Configure the fields in the Custom Branding pane. For more information about the Custom Branding configuration settings, see Custom-branding apps Manager.
-
Click Save.
-
Select Apps Manager.
-
Select the Enable invitations check box to enable invitations in Apps Manager. Space Managers can invite new users for a given space, Org Managers can invite new users for a given org, and Admins can invite new users across all orgs and spaces. For more information, see Invite New Users in Managing User Roles with Apps Manager.
-
Enable the Display Marketplace service plan prices check box to display the prices for your services plans in the Marketplace.
-
Under Configure how developers access documentation, tools and pluggins when unable to connect to the internet, select the Enable access to offline tools check box to allow users to download documentation and cf CLI packages in air-gapped environments. When this option is enabled, the cf CLI installer is included in the Apps Manager BOSH release and updates each time you apply changes in Tanzu Operations Manager.
-
Under Choose which CF CLI packages to include, select either CF CLI V7 or CF CLI V8.
-
Enter the Supported currencies as JSON to appear in the Marketplace. Use the format
{ "CURRENCY-CODE": "SYMBOL" }. This defaults to{ "usd": "$", "eur": "€" }. -
Enter a Product name and Marketplace name to configure page names.
-
Enter a Marketplace URL to point the Marketplace link in Apps Manager to your own marketplace.
-
In Secondary navigation links, enter link text and URLs to configure secondary navigation links in the Apps Manager and Marketplace pages. You can configure up to 10 links in the Apps Manager secondary navigation.
-
(Optional) In Apps Manager buildpack, enter the name of the buildpack you want to use to deploy the Apps Manager app. This buildpack must be for static content. If you do not specify a buildpack, TAS for VMs uses the detection process to determine a single buildpack to use. For more information about the detection process, see Buildpack Detection in How Buildpacks Work.
-
(Optional) For Apps Manager buildpack, enter the name of the buildpack you want to use to deploy the Apps Manager app. The buildpack you specify must be for static content. The default buildpack is
staticfile_buildpack. If you do not specify a buildpack, TAS for VMs uses the detection process to determine a single buildpack to use. For more information about the detection process, see Buildpack detection in How Buildpacks Work. -
(Optional) For Search Server buildpack, enter the name of the buildpack you want to use to deploy the Search Server app. The buildpack you specify must be a node-based buildpack. The default buildpack is
nodejs_buildpack. If you do not specify a buildpack, TAS for VMs uses the detection process to determine a single buildpack to use. For more information about the detection process, see Buildpack detection in How Buildpacks Work. -
(Optional) For Invitations buildpack, enter the name of the buildpack you want to use to deploy the Invitations app. The buildpack you specify must be a node-based buildpack. The default buildpack is
nodejs_buildpack. If you do not specify a buildpack, TAS for VMs uses the detection process to determine a single buildpack to use. For more information about the detection process, see Buildpack detection in How Buildpacks Work. -
The Search Server memory usage field sets the memory limit with which to deploy the Search Server app. Use this field to increase the memory limit if the app fails to start with an
out of memoryerror. Enter the value in MB. To use the default value of 256 MB, leave this field blank. -
The Invitations memory usage field sets the memory limit with which to deploy the Invitations app. Use this field to increase the memory limit if the app fails to start with an
out of memoryerror. Enter the value in MB. To use the default value of 256 MB, leave this field blank. -
The Apps Manager polling interval field provides a temporary fix if Apps Manager usage degrades Cloud Controller response times. In this case, you can use this field to reduce the load on the Cloud Controller and ensure Apps Manager remains available while you troubleshoot the Cloud Controller. VMware recommends that you do not keep this field modified as a long-term fix because it can degrade Apps Manager performance. Optionally, you can:
- Increase the polling interval above the default of 30 seconds. Enter the value in seconds.
If you enter a value between
0and30, the field is automatically set to30. - Deactivate polling by entering
0. This stops Apps Manager from refreshing data automatically, but users can update displayed data by reloading Apps Manager manually.
- Increase the polling interval above the default of 30 seconds. Enter the value in seconds.
-
The App details polling interval field provides an additional way to reduce the load on the Cloud Controller when the Apps Manager polling interval field is not sufficient. This field controls the rate at which Apps Manager polls for data when a user views the Overview page of an app. VMware recommends that you do not keep this field modified as a long-term fix because it can degrade Apps Manager performance. Optionally, you can:
- Increase the polling interval above the default of 10 seconds. Enter the value in seconds.
Note: If you enter a value between
0and30, the field is automatically set to10. - Deactivate polling by entering
0. This stops Apps Manager from refreshing data automatically, but users can update displayed data by reloading Apps Manager manually.
- Increase the polling interval above the default of 10 seconds. Enter the value in seconds.
-
To enable multi-foundation support for Apps Manager, enter a JSON object containing all the foundations you want Apps Manager to manage in Multi-foundation configuration (beta). Enabling multi-foundation support allows you to manage orgs, spaces, apps, and service instances from multiple TAS for VMs foundations from a single Apps Manager interface. For more information, see Configuring Multi-Foundation Support in Apps Manager.
-
To configure multi-foundation support for Apps Manager, enter a JSON object containing all the foundations you want Apps Manager to manage in Multi-foundation configuration (beta). Configuring multi-foundation support allows you to manage orgs, spaces, apps, and service instances from multiple TAS for VMs foundations from a single Apps Manager interface. For more information, see Configuring multi-foundation support in apps Manager.
-
For Redirect URIs, enter a comma-separated list of the URI for each additional foundation you configured in Multi-foundation configuration (beta).
-
Click Save.
(Optional) Configure Email Notifications
In the Email Notifications pane, you can enable end-user self-registration. TAS for VMs uses SMTP to send invitations and confirmations to Apps Manager users. If you do not need this service, leave this pane blank and deactivate the Notifications and Notifications UI errands in the Errands pane.
To configure the Email Notifications pane:
-
Select Email Notifications.
-
For From email, enter the email address from which email notifications are sent.
-
For SMTP server address, enter the SMTP address of the server that sends emails.
-
For SMTP server port, enter the port of the SMTP server that sends email notifications.
Note: For GCP, you must use port 2525. Ports 25 and 587 are not allowed on GCP Compute Engine.
-
For SMTP server credentials, enter the username and password for the SMTP server that sends email notifications.
-
Enable the SMTP enable automatic STARTTLS check box if you want your SMTP server to automatically create a secure TLS connection when sending emails.
-
After you verify your authentication requirements with your email administrator, select None, Plain, or CRAMMD5 from the SMTP authentication mechanism drop-down menu. If you have no SMTP authentication requirements, select None.
-
If you selected CRAMMD5 as your authentication mechanism, enter a secret in the SMTP CRAMMD5 secret field.
-
Click Save.
Important If you do not configure the SMTP settings in the Email Notifications pane, an administrator for Apps Manager must create orgs and users through the cf CLI. For more information, see Creating and managing users with the cf CLI.
(Optional) Configure App Autoscaler
In the App Autoscaler pane, you configure the App Autoscaler service. To use App Autoscaler, you must create an instance of the service and bind it to an app. To create an instance of App Autoscaler and bind it to an app, see Set up App Autoscaler in Scaling an App Using App Autoscaler.
To configure the App Autoscaler pane:
-
Select App Autoscaler.
-
For Autoscaler instance count, enter the number of instances of the App Autoscaler service you want to deploy. The default value is
3. For high availability, set this number to3or higher. Larger environments might require more instances than the default number. We recommend one App Autoscaler instance for every 10 apps using App Autoscaler. -
For App Autoscaler API instance count, enter the number of instances of the App Autoscaler API you want to deploy. The default value is
1. Larger environments might require more instances than the default number. -
For Metric collection interval, enter how many seconds of data collection you want App Autoscaler to evaluate when making scaling decisions. The minimum interval is 60 seconds, and the maximum interval is 3600 seconds. The default value is
120. Increase this number if the metrics you use in your scaling rules are emitted less frequently than the existing metric collection interval. -
For Scaling interval, enter in seconds how frequently App Autoscaler evaluates an app for scaling. The minimum interval is 15 seconds, and the maximum interval is 120 seconds. The default value is
35. -
To enable verbose logging for App Autoscaler, select the Enable verbose logging checkbox. Verbose logging is deactivated by default. Activate this checkbox to see more detailed logs. Verbose logs show specific reasons why App Autoscaler scaled the app, including information about minimum and maximum instance limits, App Autoscaler’s status. For more information about App Autoscaler logs, see App Autoscaler Events and Notifications in Scaling an App Using App Autoscaler.
-
If you do not want the Autoscaler API to reuse HTTP connections, select the Disallow API connection pooling check box. This might be necessary if your front end idle timeout for the Gorouter is set to a low value, such as
1. For more information, see Configuring front end idle timeout for Gorouter. -
To allow App Autoscaler to email event notifications to space developers, select the Send email notifications check box. For more information about managing email notifications, see Manage App Autoscaler notifications in Scaling an App Using App Autoscaler.
-
Click Save.
Configure Cloud Controller
In the Cloud Controller pane, you configure the Cloud Controller.
To configure the Cloud Controller pane:
-
Click Cloud Controller.
-
Enter your Cloud Controller database encryption key if all of the following are true:
- You deployed TAS for VMs previously.
- You then stopped TAS for VMs or it ended.
- You are redeploying TAS for VMs with a backup of your Cloud Controller database.
For more information, see Backing up and restoring Ops Manager.
-
Cloud Foundry API rate limiting prevents API consumers from overwhelming the platform API servers. Limits are imposed on a per-user or per-client basis and reset on an hourly interval.
To deactivate Cloud Foundry API rate limiting, select Disable under Cloud Foundry API rate limiting. To enable Cloud Foundry API rate limiting:- Under Cloud Foundry API rate limiting, select Enable.
- For General limit, enter the number of requests a user or client is allowed to make over an hour-long interval for all endpoints that do not have a custom limit. The default value is
2000. - For Unauthenticated limit, enter the number of requests an unauthenticated client is allowed to make over an hour-long interval. The default value is
100.
-
(Optional) Enter in seconds your Database connection validation timeout. By default, the setting is
3600seconds or 60 minutes. You can enter-1to cause Cloud Controller to make an additional query to the database whenever connections are checked out from the pool. Choosing-1has performance implications. -
(Optional) Enter in seconds your Database read timeout. By default, the setting is
3600seconds or 60 minutes. -
(Optional) Enter in days the Age of audit events pruned from Cloud Controller database.
-
(Optional) Enter in days the Age of completed tasks pruned from Cloud Controller database.
-
(Optional) Rotate the Cloud Controller database (CCDB) encryption key using the Encryption key ledger field. For more information, see Rotating the Cloud Controller Database Encryption Key.
-
(Optional) For Age of completed tasks pruned from Cloud Controller database, enter in days the age at which completed tasks are to be pruned from the Cloud Controller database. The default value is
31. -
(Optional) Rotate the Cloud Controller database (CCDB) encryption key using the Encryption key ledger field. For more information, see Rotating the Cloud Controller database encryption key.
-
For Available Stacks, configure the set of stacks you want to make available to app developers on the platform:
-
Select the stacks to expose to developers.
cflinuxfs4is the latest stack, based on Ubuntu Jammy Jellfish (22.04), and is recommended.cflinuxfs3, an older stack based on Ubuntu Bionic Beaver (18.04), remains supported as well. Lastly,tanzu-jammyrefers to the Tanzu Jammy Full stack. This stack uses the same operating system as cflinuxfs4, but is based on the Paketo stacks and is compatible with Cloud Native Buildpacks. Operators have the following four configuration options:cflinuxfs4onlycflinuxfs3andcflinuxfs4cflinuxfs4andtanzu-jammycflinuxfs3,cflinuxfs4, andtanzu-jammy
-
Select a Default stack. This stack is used whenver an app is pushed with no stack specified. The available options are
cflinuxfs3andcflinuxfs4.tanzu-jammyis not supported as a defualt stack. If you select a stack list that does not includecflinuxfs3, thencflinuxfs4is used as the default stack.
-
-
Click Save.
Configure Smoke Tests
In the Smoke Tests pane, you configure the org and space where smoke tests are run. In the org and space you configure in the Smoke Tests pane, the Smoke Tests errand pushes an app to a Ops Manager org to run basic functionality tests against the TAS for VMs tile after an installation or update. In the Errands pane, you can choose whether or not to run the Smoke Tests errand.
To configure the Smoke Tests pane:
-
Select Smoke Tests.
-
In the Smoke tests location, select one of the following options to configure where TAS for VMs pushes an app to run smoke tests:
- If you have a shared apps domain, select A temporary space within the system org. This creates a temporary space within the
systemorg for running smoke tests and deletes the space afterwards. - If you do not have a shared apps domain:
- Select A specified domain, org, and space.
- For Domain, enter the domain that TAS for VMs uses when pushing an app to run smoke tests.
- For Org, enter the org that TAS for VMs uses when pushing an app to run smoke tests.
- For Space, enter the space that TAS for VMs uses when pushing an app to run smoke tests.
- If you have a shared apps domain, select A temporary space within the system org. This creates a temporary space within the
-
Click Save.
(Optional) Configure Advanced Features
The Advanced Features pane includes new capabilities that might have certain constraints. Although these features are fully supported, VMware recommends caution when using them in production environments.
Do not deploy Diego Cells
If you intend to deploy Diego Cells only through one or more isolation segment deployments, use this option to remove all Diego Cells from the TAS for VMs deployment. You might wish to do this to completely separate updates to Diego Cells from updates to the rest of the TAS for VMs deployment.
Important At least one isolation segment must deploy non-isolated Diego cell VMs so that the TAS for VMs installation has the shared Diego cells that are necessary to host system components that run as apps. Do not deploy app-based system components or run smoke-test errands until the non-isolated Diego cells in these isolation segment deployments are present.
Diego Cell Memory and Disk Overcommit
If your apps do not use the full allocation of disk space and memory set in the Resource Config tab, you might want use this feature. These fields control the amount to overcommit disk and memory resources to each Diego Cell VM.
For example, you might want to use the overcommit if your apps use a small amount of disk and memory capacity compared to the amounts set in the Resource Config settings for Diego Cell.
Note: Due to the risk of app failure and the deployment-specific nature of disk and memory use, VMware has no recommendation for how much, if any, memory or disk space to overcommit.
To enable overcommit:
-
Select Advanced Features.
-
Enter in MB the total desired amount of Diego Cell memory in the Diego Cell memory capacity field. See the Diego Cell row in the Resource Config tab for the current Diego Cell memory capacity settings that this field overrides.
-
Enter in MB the total desired amount of Diego Cell disk capacity in the Diego Cell disk capacity field. See the Diego Cell row in the Resource Config tab for the current Diego Cell disk capacity settings that this field overrides.
-
Click Save.
Note: Entries made to each of these two fields set the total amount of resources allocated, not the overage.
App Graceful Shutdown Period
If your apps require a longer period of time to finish in-flight jobs and gracefully shut down, you can increase the graceful shutdown period. By default, this graceful shutdown period is set to 10 seconds.
When TAS for VMs requests a shutdown of an app, the processes in the container have a period of time to gracefully shut down before the processes are forcefully terminated. For more information, see Shutdown in App Container Lifecycle.
If you significantly increase the value of the graceful shutdown period, platform upgrades and updates might become slower. This is because each Diego Cell uses the graceful shutdown period when it is cleaning up evacuated app instances and waits for each app to gracefully shut down.
VMware recommends using isolation segments to separate apps that have different shutdown requirements to ensure Diego Cell update times are reliable. For more information, see Installing Isolation Segment.
Note: You must ensure that App graceful shutdown period has the same value in all environments that have deployed apps. This is to avoid unexpected behavior.
To increase the app graceful shutdown period:
-
Select Advanced Features.
-
Enter an integer in the App graceful shutdown period field. This value is the period of time in seconds the platform should wait for an app instance to exit after it is signaled to gracefully shut down. The default and minimum value is
10. -
Click Save.
Non-RFC-1918 Private Network Allow List
Some private networks require extra configuration so that internal file storage (WebDAV) can communicate with other TAS for VMs processes.
The Non-RFC-1918 private network allow list field is provided for deployments that use a non-RFC 1918 private network. This is typically a private network other than 10.0.0.0/8, 172.16.0.0/12, or 192.168.0.0/16.
Most TAS for VMs deployments do not require any modifications to this field.
To add your private network to the allow list:
-
Select Advanced Features.
-
Append a new
allowrule to the existing contents of the Non-RFC-1918 private network allow list field. Include the wordallow, the network CIDR range to allow, and a semi-colon (;) at the end. For example:allow 172.99.0.0/24; -
Click Save.
CF CLI Connection Timeout
The CF CLI connection timeout field allows you to override the default five-second timeout of the Cloud Foundry Command Line Interface (cf CLI) used within your TAS for VMs deployment. This timeout affects the cf CLI command used to push TAS for VMs errand apps such as Notifications, Autoscaler, and Apps Manager.
Set the value of this field to a higher value, in seconds, if you are experiencing domain name resolution timeouts when pushing errands in TAS for VMs.
To modify the value of the CF CLI connection timeout:
-
Select Advanced Features.
-
Enter a value, in seconds, to the CF CLI connection timeout field.
-
Click Save.
(Optional) Enable TLS for Internal System Database
You can allow TLS communication for clients of the internal system database. This feature is in beta, and the Allow TLS for internal MySQL database (beta) check box is deselected by default. For more information about the internal system database, see Managing internal databases.
To enable TLS for clients of the internal system database:
-
Select Advanced Features.
-
Select the Enable TLS for internal system database (beta) checkbox.
-
Click Save.
Database Connection Limits
You can configure the maximum number of concurrent database connections that Diego and container networking components can have.
To configure the maximum number of concurrent database connections:
-
Select Advanced Features.
-
Enter a value in each field beginning with Maximum number of open connections… for a given component. The placeholder values for each field are the default values.
-
Click Save.
When there are not enough connections available, such as during a time of heavy load, components may experience degraded performance and sometimes failure. To resolve or prevent this, you can increase and fine-tune database connection limits for the component.
Decreasing the value of this field for a component might affect the amount of time it takes for it to respond to requests.
(Optional) Rolling App Deployments
You can disallow rolling app deployments. For more information, see Rolling app deployments.
To deactivate rolling app deployments:
-
Select Advanced Features.
-
Select the Disable rolling app deployments checkbox.
-
Click Save.
Maximum Number of Envelopes Stored in Log Cache Per Source
By default, Log Cache keeps 100,000 envelopes per source. An envelope wraps an event and adds metadata. For sources that produce more than 100,000 envelopes, this default may not provide a long enough duration for you to specify a time period for a historical query.
To set the maximum number of envelopes stored per source above the default:
-
Select Advanced Features.
-
Enter the Maximum number of envelopes stored in Log Cache per source.
-
Click Save.
Usage Service Data Retention Period
By default, Usage Service deletes granular data after 365 days.
To configure this retention period:
-
Select Advanced Features.
-
Enter the number of days of granular data you want to retain in the Usage service cutoff age field.
-
Click Save.
To avoid performance or data migration issues, VMware recommends that you do not retain data for longer than 365 days. Configuring this field does not affect monthly summary records.
For more information, see Usage Data Retention in Reporting App, Task, and Service Instance Usage.
(Optional) Configure Metric Registrar
The Metric Registrar is bundled with TAS for VMs, and you configure it in the TAS for VMs tile. You do not install and configure Metric Registrar as a separate product tile.
In the Metric Registrar pane, you configure the Metric Registrar. The Metric Registrar allows TAS for VMs to convert structured logs into metrics. It also scrapes metrics endpoints and forwards the metrics to Loggregator.
If you configure the Metric Registrar, VMware recommends that you also run the Metric Registrar smoke test errand. For more information, see Configure smoke tests.
Deactivate the Metric Registrar
By default, the Metric Registrar is deployed.
To deactivate the Metric Registrar:
-
Select Metric Registrar.
-
Clear the Enable Metric Registrar check box.
-
Click Save.
Edit default scraping interval
The scraping interval defines how often the Metric Registrar polls custom metric endpoints. The default is 35 seconds.
To edit the Metric Registrar scraping interval:
-
Select Metric Registrar.
-
Edit the Endpoint scraping interval field.
-
Click Save.
Add blocked tags
To prevent the Metric Registrar from consuming the value of a metric or event tag, you can add the tag to the Blocked tags field. For example, if you tag your metrics with a customer_id, you may want to add customer_id to the list of blocked tags.
By default, the following tags are blocked to prevent interference with other products like App Metrics that use and rely on such tags.
deploymentjobindexid
To prevent the Metric Registrar from consuming the value of a metric or event tag:
-
Select Metric Registrar.
-
Add the desired tags to the Blocked tags field in a comma-separated list.
-
Click Save.
Edit app instance metrics limit per scraping interval
The App instance metrics limit per scraping interval field defines how many metrics are emitted per app instance per interval. If the number of metrics an app instance generates within a scraping interval exceeds the configured limit, no metrics are emitted. Each individual Prometheus value is counted as one metric, including multiple values within the same metric family. By default, there is no limit.
To configure a metrics limit per scraping interval for app instances:
-
Select Metric Registrar.
-
Edit the App instance metrics limit per scraping interval field.
-
Click Save.
Configure Errands
Errands are scripts that Ops Manager runs automatically when it installs or uninstalls a product, such as a new version of TAS for VMs. There are two types of errands: post-deploy errands run after the product is installed, and pre-delete errands run before the product in uninstalled.
By default, Ops Manager always runs all errands.
In the Errands pane, you can change these run rules. For each errand, you can select On to run it always or Off to never run it.
For more information about how Ops Manager manages errands, see Managing Errands in Ops Manager.
Note: Several errands, such as App Autoscaler and Notifications, deploy apps that provide services for your deployment. When one of these apps is running, selecting Off for the corresponding errand on a subsequent installation does not stop the app.
-
Smoke Test Errand verifies that your deployment can:
- Push, scale, and delete apps
- Create and delete orgs and spaces
Caution: If both the V2 and V1 Firehoses are deactivated, then deactivate the Smoke Test Errand. Otherwise, the deploy fails.
-
Usage Service Errand deploys the Usage Service app, which Apps Manager depends on.
-
Offline Docs Errand deploys an offline documentation app that can be used in air-gapped environments.
-
The Apps Manager Errand deploys Apps Manager, a dashboard for managing apps, services, orgs, users, and spaces. Until you deploy Apps Manager, you must perform these functions through the cf CLI. After you first deploy Apps Manager, VMware recommends setting this errand to Off for subsequent TAS for VMs deployments. For more information about Apps Manager, see Getting started with apps Manager.
-
The Notifications Errand deploys an API for sending email notifications to your TAS for VMs platform users.
Important The Notifications app requires you to configure a user name and password for your SMTP server, even if you select
Nonefrom the SMTP authentication mechanism drop-down menu in the Email Notifications pane of the TAS for VMs tile. To configure a user name and password for your SMTP server, see Configure email notifications. -
Notifications UI Errand deploys a dashboard for users to manage notification subscriptions.
-
App Autoscaler Errand pushes the App Autoscaler app, which enables you to configure your apps to automatically scale in response to changes in their usage load. For more information, see Scaling an App Using App Autoscaler.
-
App Autoscaler Smoke Test Errand runs smoke tests against App Autoscaler.
-
NFS Broker Errand pushes the NFS Broker app, which supports NFS Volume Services for TAS for VMs. For more information, see Enable NFS Volume Services in Enabling Volume Services.
-
The Metric Registrar Smoke Test Errand verifies that the Metric Registrar can access custom metrics that an app emits and convert them into Loggregator metrics.
Note: The Metric Registrar Smoke Test errand runs only if the Metric Registrar is deployed. For more information about configuring the Metric Registrar, see Metric Registrar and Custom App Metrics.
-
The SMB Broker Application Errand pushes the SMB Broker app, which supports SMB volume services for TAS for VMs. For more information, see Enable SMB volume services in Enabling Volume Services.
-
Rotate CC Database Key translates sensitive data in the Cloud Controller database to the currently specified Primary key. You specify this key in the Encryption key ledger field of the Cloud Controller pane.
Configure Resources
In the Resource Config pane, you must associate load balancers with the VMs in your deployment to enable traffic. For more information, see Configure Load Balancing for TAS for VMs.
(Optional) Scale Down and Deactivate Resources
Note: The Resource Config pane has fewer VMs if you are installing Small Footprint TAS for VMs. For more information, see Getting Started with Small Footprint TAS for VMs.
Note: Small Footprint TAS for VMs does not default to a highly available configuration. It defaults to the minimum configuration. To make Small Footprint TAS for VMs highly available, scale the Compute, Router, and Database VMs to 3 instances and scale the Control VM to 2 instances.
TAS for VMs defaults to a highly available resource configuration. However, you might need to follow additional procedures to make your deployment highly available. For more information, see High availability in TAS for VMs and Scaling TAS for VMs.
If you do not want a highly available resource configuration, you must scale down your instances manually by navigating to the Resource Config section and using the drop-down menus under Instances for each job.
By default, TAS for VMs also uses an internal filestore and internal databases. If you configure TAS for VMs to use external resources, you can deactivate the corresponding system provided resources in Ops Manager to reduce costs and administrative overhead.
To deactivate specific VMs in Ops Manager:
-
Select Resource Config.
-
If you configured TAS for VMs to use an external S3-compatible filestore, enter
0in Instances in the File Storage field. -
If you selected External when configuring the UAA, System, and CredHub databases, edit these fields:
- MySQL Proxy: Enter
0in Instances. - MySQL Server: Enter
0in Instances. - MySQL Monitor: Enter
0in Instances.
- MySQL Proxy: Enter
-
If you deactivated TCP routing, enter
0Instances in the TCP Router field. -
If you are not using HAProxy, enter
0Instances in the HAProxy field. -
Click Save.
Download Stemcell
This step is only required if your Ops Manager deployment does not already have the stemcell version that TAS for VMs requires. For more information about importing stemcells, see Importing and managing Stemcells.
To download the stemcell version TAS for VMs requires:
-
Go to the Stemcell product page on VMware Tanzu Network. You may have to log in.
-
Download the appropriate stemcell version targeted for your IaaS.
-
Go to the Ops Manager Installation Dashboard.
-
Click Import Stemcell to import the downloaded stemcell
.tgzfile. -
When prompted, enable the Ops Manager product check box to stage your stemcell.
-
When you are prompted, stage your stemcell by selecting the Ops Manager product check box.
-
Click Apply Stemcell to Products.
Complete the TAS for VMs Installation
To complete your installation of TAS for VMs:
-
Click the Installation Dashboard link to return to the Ops Manager Installation Dashboard.
-
Click Review Pending Changes, then Apply Changes. The install process generally requires a minimum of 90 minutes to complete. The following image shows the Changes Applied window that displays when the installation process successfully completes.