


Before registering an Antrea Kubernetes cluster to NSX, you must complete several prerequisite tasks, as described in this documentation.
You can register multiple Antrea Kubernetes clusters to a single NSX deployment.
If the VMware Container Networking™ with Antrea™ version in your Kubernetes cluster is 1.8.0 or later, do tasks 1 though 6 and task 9. You can skip tasks 7 and 8 in this documentation.
If the VMware Container Networking™ with Antrea™ version in your Kubernetes cluster is 1.7.0 or earlier, do tasks 1 through 5 and tasks 7 though 9. Task 6 is not applicable.
Task 1: Ensure that Required Ports are Opened for Antrea-NSX Interworking Adapter
Antrea-NSX Interworking Adapter runs as a pod in an Antrea Kubernetes cluster, and this pod uses the host networking mode. The pod can be scheduled to run on any Kubernetes node. Therefore, you must ensure that the K8s nodes can reach the NSX IP addresses on the ports that are mentioned on the VMware Ports and Protocols portal at https://ports.esp.vmware.com/home/NSX.
At this link, enter Antrea Interworking Pod in the Search text box.
Task 2: Deploy Antrea Kubernetes Clusters
Persona: Kubernetes platform administrator
A Kubernetes cluster with Antrea network plug-in must be up and ready.
- Tanzu management clusters are deployed and the clusters are in running state.
- Tanzu Kubernetes clusters are deployed and the clusters are in running state.
- Tanzu command line interface (CLI) is installed.
For a detailed information about these tasks, see the Tanzu Kubernetes Grid documentation at https://docs.vmware.com/en/VMware-Tanzu-Kubernetes-Grid/index.html.
When you deploy a management cluster, networking with Antrea is automatically enabled in the management cluster.
Task 3: Add Appropriate Licenses in NSX
Persona: NSX administrator
Ensure that your NSX environment has one of these licenses:
- NSX Data Center Advanced
- NSX Data Center Enterprise Plus
- Antrea Enterprise Standalone
Task 4: Determine the Antrea Version From the Kubernetes Cluster
Persona: Kubernetes platform administrator
Before downloading the Antrea-NSX interworking file (antrea-interworking-version.zip), which is the next prerequisite in this topic, you must determine the Antrea open source version from your Kubernetes cluster.
For example, see the following table.
This table is not a comprehensive list of all the VMware Container Networking versions and Antrea-NSX Interworking versions. For the complete list, see the VMware Container Networking™ with Antrea™ release notes at https://docs.vmware.com/en/VMware-Container-Networking-with-Antrea/index.html.
| VMware Container Networking Version | Based on Antrea OSS Version | Compatible With Antrea-NSX Interworking Version |
|---|---|---|
| v1.5.0 See: v1.5.0 Release Notes |
v1.7.1 |
v0.7.* |
| v1.4.0 See: v1.4.0 Release Notes |
v1.5.2 |
v0.5.* |
| v1.3.1 |
v1.2.3 |
v0.2.* |
- Find out the Antrea Controller pod name. Kubernetes generates this name with a random string, so, you can get the name from the K8s cluster.
For example:
                $ kubectl get pod -n kube-system -l component=antrea-controller
NAME                                 READY   STATUS    RESTARTS   AGE
antrea-controller-6b8cb7cd59-wcjvd   1/1     Running   0          13d
In this command output, the Antrea Controller pod name is antrea-controller-6b8cb7cd59-wcjvd.
- Retrieve the Antrea open source version by running the following command:$ kubectl exec -it antrea-controller-6b8cb7cd59-wcjvd -n kube-system -- antctl version antctlVersion: v1.7.1-cacafc0 controllerVersion: v1.7.1-cacafc0
In this command output, v1.7.1 is the Antrea open source version that you wanted to determine.
Task 5: Download the Antrea-NSX Interworking Zip File
Persona: Kubernetes platform administrator
- Open the My Downloads page on the Broadcom Support portal.
- From the top-right corner, click
 , and then select VMware Cloud Foundation.
The My Downloads page displays only those SKUs that you are entitled to download.
- Click VMware Antrea, and then click VMware Antrea Enterprise.
- Click the VMware Container Networking with Antrea version that is relevant to you. The Primary Downloads tab opens.
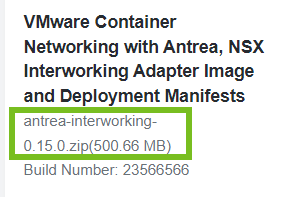
- Search for the VMware Container Networking with Antrea, NSX Interworking Adapter Image and Deployment Manifests file name on this tab page.
- Verify that the version of the antrea-interworking-version.zip file that is mentioned below the file name is compatible with the Antrea open source software version, which you determined earlier.
For example:
- Select the I agree to Broadcom Terms and Conditions check box.
- Click the download icon.
| File Name | Description |
|---|---|
| interworking.yaml | YAML deployment manifest file to register an Antrea Kubernetes cluster to NSX. |
| bootstrap-config.yaml | YAML file where you can specify the following details for registration: Antrea Kubernetes cluster name, NSX Manager IP addresses, TLS certificate of the Kubernetes cluster, and the private key of the Kubernetes cluster. |
| bin/antreansxctl | Antrea-NSX command-line utility. This utility is available in the antrea-interworking.zip file of VMware Container Networking version 1.7.0 or later. |
| deregisterjob.yaml | YAML manifest file to deregister an Antrea Kubernetes cluster from NSX. |
| ns-label-webhook.yaml | Webhook definitions for automatically adding labels to newly created Kubernetes namespaces. This YAML file is used only when Kubernetes version is ≤ 1.20. |
| interworking-version.tar | Archive file for the container images of Management Plane Adapter and Central Control Plane Adapter. |
Task 6: Run the antreansxctl bootstrap Command
Persona: NSX administrator
- Creating a self-signed certificate
- Creating a Principal Identity (PI) user
- Creating the bootstrap configuration (bootstrap-config.yaml)
Note: The bootstrap-config.yaml template that is embedded in the antreansxctl command-line utility is compatible with the current interworking release. The command-line utility does not rely on the bootstrap-config.yaml file from the antrea-interworking.zip file to run.
To run the antreansxctl bootstrap command, use the antreansxctl command-line utility. You can find this utility in the antrea-interworking.zip file that you downloaded earlier.
The antreansxctl utility is a Linux-only executable. So, you require a Linux machine to run this utility.
To learn about the usage of the antreansxctl bootstrap command and its various configuration options, see the antreansxctl Command-Line documentation in the VMware Container Networking with Antrea Installation Guide.
Task 7: Create a Self-Signed Security Certificate
Persona: NSX administrator
A self-signed security certificate is required to create a principal identity user account in NSX, which is explained later in this topic.
Using OpenSSL commands, create a self-signed security certificate for each Antrea Kubernetes cluster that you want register to NSX.
For example, assume that you want to create a self-signed OpenSSL certificate of length 2048 bits for an Antrea Kubernetes cluster called cluster-sales. The following OpenSSL commands generate a private key file, a certificate signing request file, and a self-signed certificate file for this cluster.
                openssl genrsa -out cluster-sales-private.key 2048
openssl req -new -key cluster-sales-private.key -out cluster-sales.csr -subj "/C=US/ST=CA/L=Palo Alto/O=VMware/OU=Antrea Cluster/CN=cluster-sales"
openssl x509 -req -days 3650 -sha256 -in cluster-sales.csr -signkey cluster-sales-private.key -out cluster-sales.crt
Task 8: Create a Principal Identity User
Persona: NSX administrator
The Management Plane Adapter and Central Control Plane Adapter use the principal identity (PI) user account to authenticate with an NSX Manager and identify themselves as the principal identity. The PI user owns the inventory resources that are reported by the adapters. NSX prevents other users from accidentally overwriting the inventory resources.
Each Antrea Kubernetes cluster requires a different PI user. The cluster name must be unique in NSX. The certificate common name and the PI user name must be the same as the cluster name. NSX does not support sharing certificate and PI user between clusters.
Create a principal identity user in NSX with the self-signed certificate that you created in the previous step. Assign this principal identity user an Enterprise Admin role.
- In the NSX Manager UI, click the System tab.
- Under Settings, navigate to .
- Click .
- Enter a name for the principal identity user. For example, enter cluster-sales.
Important: Ensure that you specify the same name for the NSX principal identity user, certificate CN, and the clusterName argument in the bootstrap-config.yaml file.
For more information about the bootstrap configuration file, see Edit the Bootstrap Configuration File.
- Select the role as Enterprise Admin.
- In the Node Id text box, enter a name for the Antrea Kubernetes cluster. This name must be unique across all Kubernetes clusters that you are registering to NSX. For example, enter cluster-sales.
- In the Certificate PEM text area, paste the complete self-signed certificate, which you created earlier. Ensure that the -----BEGIN CERTIFICATE---- and ------END CERTIFICATE----- lines are also pasted in this text box.
- Click Save.
- From the left navigation pane, under Settings, click Certificates. Verify that the self-signed certificate of the Antrea Kubernetes cluster is shown.
Task 9: Import the Container Images to Container Registry
Persona: Kubernetes platform administrator
There are two approaches for doing this prerequisite task.
- Approach 1 (Recommended): Pull images from VMware Harbor Registry
-
VMware has hosted the container images on VMware Harbor Registry.
Image locations are as follows:- projects.registry.vmware.com/antreainterworking/interworking-debian:version
- projects.registry.vmware.com/antreainterworking/interworking-ubuntu:version
- projects.registry.vmware.com/antreainterworking/interworking-photon:version
For version information, see the VMware Container Networking with Antrea release notes at https://docs.vmware.com/en/VMware-Container-Networking-with-Antrea/index.html.
Open the interworking.yaml and deregisterjob.yaml files in any text editor of your choice, and replace all image URLs with any one of these image locations.
The advantage of this approach is that when you submit the .yaml files to the Kubernetes API server for registering the cluster, Kubernetes can pull the container images automatically from VMware Harbor Registry.
- Approach 2: Manually copy images to Kubernetes worker nodes and control plane nodes
-
If your Kubernetes infrastructure has no Internet connectivity, or connectivity is too slow, use this manual approach.
Extract the container images from the interworking-version.tar file and copy them to the Kubernetes worker nodes and control plane node of each Antrea Kubernetes cluster that you want to register to NSX.
For example, at the Tanzu CLI, run the following command for each Kubernetes worker node IP and control plane node IP to copy the .tar and .yaml files:scp -o StrictHostKeyChecking=no interworking* capv@{node-ip}:/home/capvImport the images to the local Kubernetes registry, which is managed by the container runtime engine. Alternatively, if your organization has a private container registry, you can import the container images to the private container registry.
For example, at the Tanzu CLI, run the following command for each Kubernetes worker node IP and control plane node IP to import the container images to the local Kubernetes registry:
ssh capv@{node-ip} sudo ctr -n=k8s.io i import interworking-{version-id}.tarFor this approach to work in a vSphere with Tanzu environment that has NAT configured, you must run the SCP and SSH commands on a jump host VM to connect to the Tanzu Kubernetes cluster nodes. To learn more about creating a Linux jump host VM, and setting up SSH connections to the cluster nodes, see the vSphere with Tanzu documentation at https://docs.vmware.com/en/VMware-vSphere/index.html.
